


Likes
Comments
Share


@Fronti89
Follow
Start Woche 6
Tag 35 ein wenig Entlaubt .
Hinten Rechts ist mein Sorgenkind ...Sie hatte von Anfang an nur ein Keimblatt und war dementsprechend auch die Kleinste . Nach dem ich sie höher gestellt habe hatt Sie etwas nachgezogen , momentan ist Sie ungefähr 10cm kleiner als die anderen und dies war wohl der Grund der leichten überdüngung ! Aber alles wieder im Griff 😉😎


Likes
26
Share


@pifflestikkz
Follow
Day 29
29/07/24 Monday
Nice feeding today with De-chlorinated tap water pH 6.
Gave her 300 ml and she had a small run off.
Getting chunky in the stem now 💪💚
Day 31
31/07/24 Wednesday
De-chlorinated water pH 6 today with Plagron pk13-14 5ml to 5L
Plagron power buds 5ml to 5L
Used 300ml of the 5L solution.
I will be using these on water days from now on as they are advised to be used every irrigation.
We'll see how they perform 💪💚
Day 32
01/08/24 Thursday
Another feed today using de-chlorinated tap water pH 6, there now taking 300ml every evening.
Day 35
04/08/24 Sunday
END OF WEEK 😁
De-chlorinated tap water pH 6 today with Plagron products. 300ml each.
Had a issue with leaf invaders this week, I have treated and am checking every 48 hrs so far seems ok and not progressive.
All plants look great, very healthy, one of the Overdose is way behind and due to space maybe culled at flower I'll see how she gets on.


Likes
7
Share


@russrahl
Follow
Alien tech is coming along nicely, she is scrog’d with 3 other Ayahuasca Purple and seems to be doing beautifully. She didn’t stretch as much as the Ayahuasca, but I was able to keep the Ayahuasca lower by spreading it more then the Alien Technology. Screen is not perfectly even, but there all within the sweet spot for my 1000w HPS so things should start ramping up soon! Not much else to say this week, just been checking the ph levels and adding 8 gals or so of water/nutrients every 2-3 days to the main reservoir feeding all 4 plants. So far they are good with the same nutrients so that is good! Lol cheers 💨
Likes
14
Share


@SkunkyDog
Follow
Hallo zusammen 🤙.
So das war es für sie wir sehen uns in 3 Wochen mit dem Erntebericht 🤙.
Sie erhalten 25 Prozent Rabatt in unserem Shop
Mindestbestellwert beträgt 75 Euro
https://greenbuzzliquids.com/en/shop/
Code: GD42025

Likes
2
Share


Likes
7
Share


@Leofongrow
Follow
29/10/2018 Girls looking awesome, I named them Piggy sisters.
31/10/2018 Ripen nutes bath (5mlL Ripen, 1mlL greenfuse bloom, 1drop4.5L SuperVit)
02/11/2018 Poored girls with solution (5mlL Delta Nueve, 2mlL Ripen, 2drop6L SuperVit)

Likes
7
Share


@WeedleyScott
Follow
Woche 6 lasse ich die Pflanzen etwas hoch wachsen und hoffe, dass sie am Ende der Woche etwas an Höhe gewonnen haben. Eventuell entlaube ich am Anfang von Woche 7 nochmal etwas, damit die Blütephase ohne viel Laub starten kann. Bisher gieße ich aber einfach 1L pro Pflanze alle 2 Tage und lasse sie weitestgehend in Ruhe.

Likes
4
Share

@klebrigeknolle
Follow
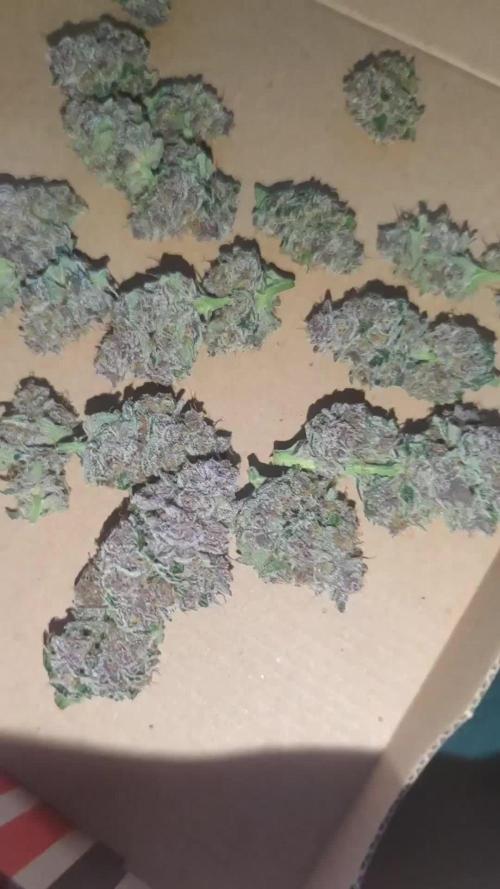
I had to harvest both sbc.. they produced seeds caused by too high EC in the Coco. The EC of the GP was even higher but she seems to handle it better and performs normal.
A EC of 1.8 in the Coco was too high for the sbc. EC of the GP was 2.4.
I flushed the GP, it was now possible since the sbc wasnt there anymore and therefor was no danger of getting the stacked pizza boxes wet which would let the sbc sink down like in mud.
GP will be harvested in two weeks and right after that i will start a new diary with 3x sbc. I then can flush probably and will not run into this problem again.
Likes
18
Share


@Rinna
Follow
Still doing fine, not much to say yet. Will be receiving the Amsterdam Genetics Logo shape to bend her around. Should be fun, it's gonna be risky, but I'm prepared to fail 💪

Likes
30
Share


@BC_Green
Follow
It has been another amazing week of the plants growing. I have been watching as the Fruity Freak leaves become progressively more fern-like, and ornamental as a result!
Based on my Banizzle grows, I knew I needed to understand plant nutrients in a more meaningful way if I wanted these plants to thrive. So, I decided to get a soil test (see Ref. 1 below on how to perform a test) to understand what nutrients my plants needed. The report I received advised that I needed to add 200 lbs/acre of nitrogen, 150 lbs/acre of phosphorus, and 190 lbs/acre of potassium (see picture labeled Pic.1 (FYI you can't see these images unless you login to growdiaries)).
I then researched what to do with my results (Ref. 2 helped), and I figured out that my nutrient needs of 200-150-190 fall close to a 2-1-2 ratio. I then looked at different types of organic fertilizers (see Ref. 3 and Ref. 4) and considered that I already had a 3-10-5 fertilizer (Vermibloom) on hand. I discovered Dr Earth’s Alfalfa Meal is 2-1-2 and includes beneficial bacteria and mycorrhizae (to promote healthy plant growth and disease resistance). However, I knew I would be low on nitrogen if I only used those two fertilizers. Therefore, I decided to buy some blood meal (12-0-0). I also liked that blood meal is more fast acting while the other two are more moderate.
I hunted around for a solid fertilizer calculator and found an amazing tool from the University of Georgia Extension (Ref. 5). I entered all three fertilizers into the calculator, and it kicked out the exact amount of each fertilizer I needed to apply to 1 square foot (see Pic. 2). As I am using 10-gallon fabric pots (that can hold 1.5 cubic feet, but I put stone on the bottom and there’s space left at the top) I decided to use the one square foot application rate as I can always add more later, but I can’t take it away.
Not only did I want to understand the nutrients I needed, but I also wanted to understand the structure of the soil (as it was not included in my test results). North Dakota State University has a nice page that discusses this (Ref. 6), and I performed a soil ribbon test (see Video 1) based on this information. I determined my soil to be medium textured (which is great), but I have seen occasional water pooling on the surface, suggesting that it may be more of a medium-fine. This means adding peat moss, coco coir, or other amendments might improve drainage (and plant hydration) and allow for roots to grow more easily. In the long run, I plan to use compost to enhance the soil structure and nutrients.
I filled the bottom of my 10-gallon fabric pots with a ½” of pea stone to allow for drainage (Pic. 3). I then partially filled two 5-gallon buckets with topsoil from near where I will plant (but not in an area the roots will reach). I used a digital scale to measure the amount of fertilizers recommended by the calculator (Pic. 4, 5, and 6) and added it to one of the 5-gallon buckets (see Pic. 7). I mixed the fertilizers into the soil as evenly as possible (Pic. 8 and 9). I then poured a two-inch layer of non-fertilized soil, then peat moss, and then fertilized soil (in a roughly 2:1:1 ratio) and blended them together. I repeated this until the pot was full (getting additional soil as needed), and then I repeated the process for the other three pots.
I set the filled fabric pots in my garage (Pic. 10) for two days to allow any upset bugs to flee into my garage instead of my house. I then moved the pots (wrapping them in a contractor garbage bag to prevent making a mess) into the room with the grow light. I placed a board on top of the fabric pots to insulate the plants (in their smaller pots) from the cold soil (Pic. 11). Once the soil in the fabric pots reaches room temperature, I will transplant.
(Ref. 1) This video shows the method I used to take a soil sample. I didn’t have a field to test, so I took four samples from the area where I will eventually plant outdoors and blended them together. I then mailed my soil sample off to the lab, and about a week later, I received an email with a PDF of my results (included with my pictures this week).
https://www.youtube.com/watch?v=N9AwxmFxBwg&t=8s
(Ref. 2) This video from the University of Minnesota Extension (many universities have agriculture extensions that can assist you with soil testing and growing information for your area) discusses what to do with your soil testing results:
https://youtu.be/HYrkcfE62Pg
(Ref. 3) This is a nice article that discusses organic fertilizer solutions:
https://www.grow-it-organically.com/npk-fertilizer.html
(Ref. 4) This article lists the NPK values of many organic fertilizer solutions:
https://www.epicgardening.com/organic-fertilizers/
(Ref. 5) Many websites tout a fertilizer calculator…but this one is hands down the best I have found. If you scroll down to the bottom, you can enter any fertilizer type you want (and the cost, if you want). It will give you the exact blend of multiple fertilizers to solve your nutrient deficiencies (I included a snapshot of the solution I used in my pictures).
https://aesl.ces.uga.edu/soil/fertcalc/
(Ref. 6) This is an excellent article that discusses how to evaluate your soil:
https://www.ndsu.edu/agriculture/extension/publications/evaluating-preparing-and-amending-lawn-and-garden-soil
Likes
2
Share


@KeemBboomin
Follow
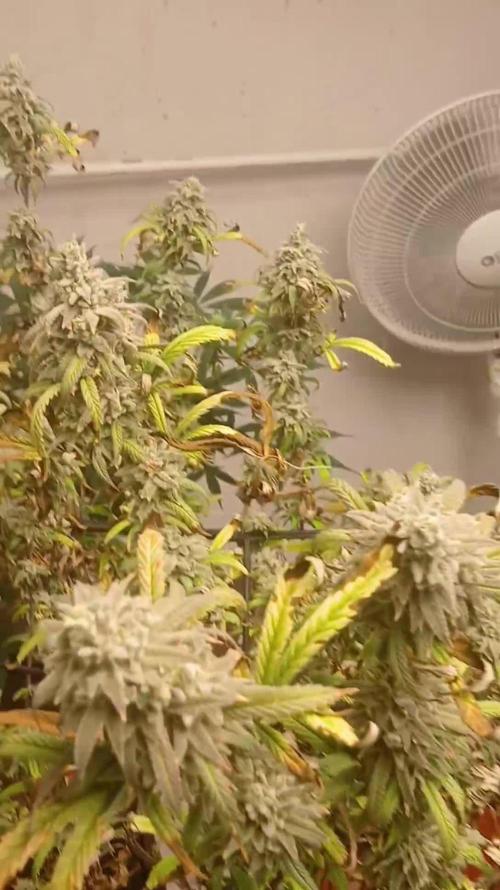
Everything is not as accurate as I would like to say, but I wanted you guys to see what I can do


Likes
5
Share


@Deltatigrou0169
Follow
Bonjour les amis,
Je viens tout juste de faire mes photos et vidéos, ça va faire 1 semaines que j'ai commencé à leur mettre de l'engrais (pro organic) mais apparemment mes fifilles ne le supporte pas elles commencent à me faire des taches (marron jaune). Du coup je les est mis en rinçage et après je leur mettrais du purin d'orties fait maison. J'espère vraiment qu'elles vont se remettre d'à plomb, je serai vraiment triste 😥 si je les perds.
Je vous dit à plus tard les amis,
Bonne journée à tous 🙂👍👍👍


Likes
8
Share





Likes
9
Share


@GoldenWeedGrower
Follow
D01 - 25/09 -> New Home for my fellows clones coming from one of biggest plant I ever saw: a Royal Queen Seeds Skunk XL
D02 - 26/09 -> I think she has a little zinc deficency, so i dropped down to ph to 5.5
D03 - 27/09 -> Topped one girl to see what happens. If everything goes well, I'm going to topping all of them. Increased EC until 1.3
D04 - 28/09 -> Topping of other buds
D05 - 29/09 -> Rest for the girls. Increased EC until 1.5
D06 - 30/09 -> SCROG Net Setup and a little of defolation. Tomorrow I'm going to cut all the branches below the red line (see picture). I want to make a main lining alongside the SCROG Net with 2-3 branches and cut off all the branches below except for the girl on the left that is too short yet.
D07 - 01/10 -> I Cut off the branches of only one girl, waiting to see her reaction to the stress before to do the same to other girls. Increased EC until 1.8.

Likes
17
Share


@AlpineGoat
Follow
Quest'anno si comincia col botto! Come buon proposito dell'anno nuovo mi sono deciso a metter mano ad un vecchio cassone che c'è in casa mia (prima era una base per un acquario). Ora sarà tut'altro >:D
Dopo aver fatto una bella ricerca e raccolta di semi, averli testati e messi alla prova, mi sono finalmente convinto a fare questa benedetta veg box.
L'altro box era un 80x80x160, perfetto per la fioritura. Questo invece è un 60x100x80, un box più slim del mio e sdraiato, riesco a dividere lo spazio per tenere madre e cloni contemporaneamente :)
Per il momento sto ospitando alcune piante di un amico, piante che dovevano avere dimora in un comodo 120x120 ma che ora sono tutte stipate come sardine a casa mia per le prossime settimane. Mi sto prendendo cura di loro: mi assicuro che germoglino per bene (vedi la girl scout cookies e la runtz in serra), trapianto quando necessario, e mi occupo delle mie bambine personali, la banana sherbet e la critical 707. Piccola curiosità: quando mi ha portato le piantine, stavano tutte a 1 settimana di vita, alcune appena germinate, e ho notato che la bruce banner 3 ha prodotto un gemello! Due germogli da un seme! Sono riuscito a dividerli con successo e mi terrò il gemellino sfortunato per cercare di riportarlo in forze.
Al momento ci sono 10 piante in totale: 5 automatiche (tutte del mio amico) e 5(+1) femminizzate (3 mie ,2 del mio amico e 1 in fase di germinazione).
Vorrei provare a fare un clone di Monster Skittlez, visto che ha delle foglie particolarmente strane e arricciate (in inglese si dice "webbed" se non sbaglio)... indagherò!
Saluti a tutti dal caprone
Alpine Goat

Likes
2
Share


@Almo420
Follow
Really stoked with the outcome of this grow, I was aiming for a good 60g, so i outdid myself some bit.
On to the next one!

Likes
51
Share


@Crasta_Garden
Follow
I HAVE THE LEDD😁😁 in this week i start using some fertilizer from Canna, they r growing so good
hope someone have some advice to give me
Likes
5
Share


@eldruida_lamota
Follow
Que pasa familia, vamos con la septima semana de floración de estas GG4 Sherbet Fast Flowering, de FastBuds.
Agradezco a Agrobeta todos los kits obtenidos de ellos 🙏.
Ya veis que llevan buen ritmo ya tiene un color espectacular.
Vamos al lío, El ph se controla en 6.2 , la temperatura la tenemos entre 21/24 grados y la humedad ronda el 50%, 7 litros de sustrato. Iremos viendo cómo avanzan.
Agrobeta:
https://www.agrobeta.com/agrobetatiendaonline/36-abonos-canamo
Hasta aquí todo, Buenos humos 💨💨💨