
Likes
Comments
Share

@803FireGrower
Follow
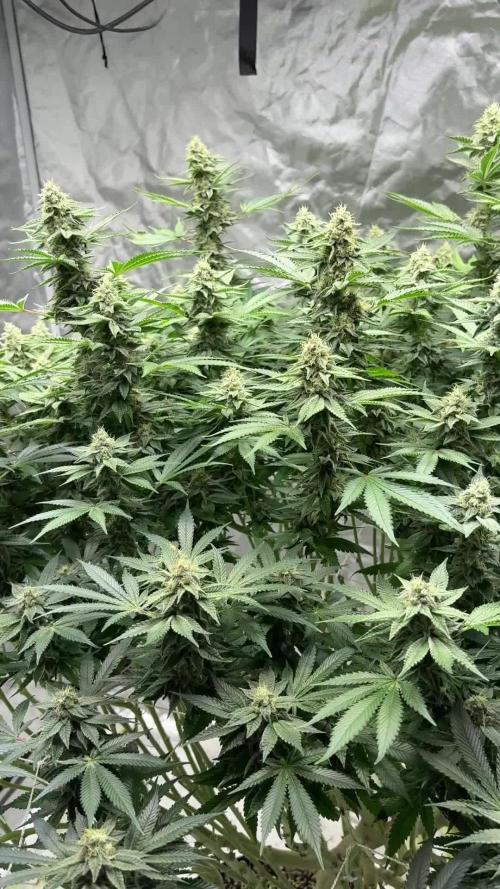
All steady except for some minor tucking and defoliation. Cut nitrogen altogether this week and depending how she responds will continue without but if they need a lil kick I’ll go to .25 tsp per gallon but seeing how I’m in the home stretch I may just go for a good flush

Likes
50
Share


@SuggaShane
Follow
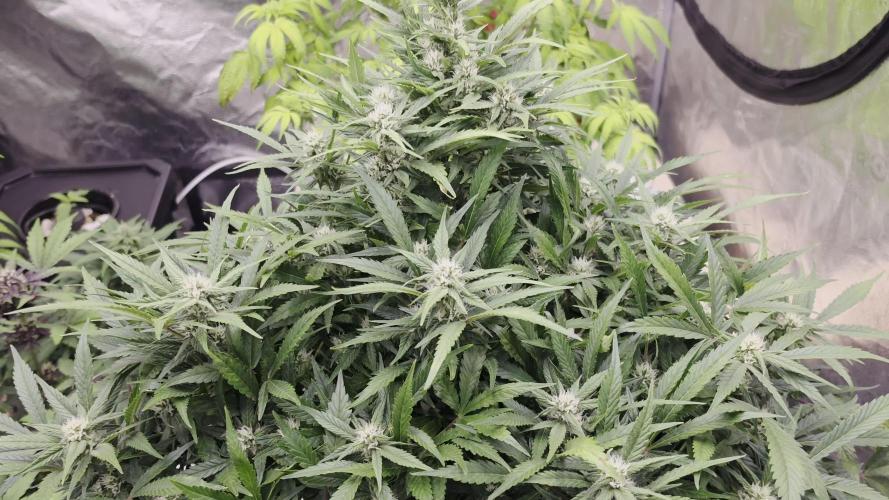
It’s time for the flush to begin. This lady has been a pleasure to grow. Although I ran into a few bumps but it happens. Not much I can do about it. It’s life. Thanks for stopping by. 🙏🏼🙌🏽


Likes
11
Share


@DixTheReal
Follow
Ho regolato il dimmer della lampada al 100% e distanza 30cm perché si sono allungate troppo i primi giorni. Continuo ad annaffiare solo con acqua ogni giorno con l’aiuto di uno spruzzino

Likes
10
Share


@JeyGanesha
Follow
Questa panty punch inizia a ingrossare i fiorellini.bene bene...
Ancora non si sentono profumi ma la prossima settimana esploderà di buoni odori in tutto il box😜💪👍

Likes
7
Share


@Dargaville_Dukes
Follow
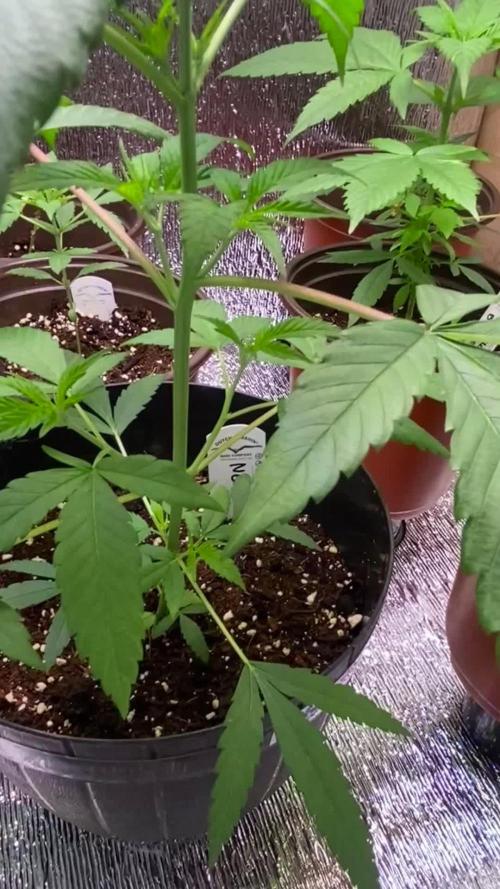
All seems to be going well. I'm watering twice a week with 80ml per plant. Using mainly plain water with a little Fish Mix. If growth is strong this week, I'll look potting into 5 gallon pots next week. I've begun some small training with my fingers to keep the stalks malleable and see what shape I want. Once they're in their final pots I'll start training with clips.


Likes
58
Share


@Poleeg1986
Follow
Very good buds as for me) I am really waiting for dry weight. The smell is very very nice, like black currant and a little diesel... It has been 7 days from the beginning of flowers drying. So I have 73 grams dry buds. I think it's not better results but quality of buds is perfect👌 They are very crystal and strong but very lite for smoke and unbelievable color of flower and stem: 1:I have been tasted her and ofcourse she has mostly indica effect as it was expected from the beginning)) and I'd recommend use this in the evening because you will be rest and sleep more strong than usually😉 It's not strongest indica effect I have ever tasted but it has very good quality doubtless... But you should see this buds and flower in reality : 1: Unforgettable impression!😉 I put them into the fridge on 1 month. It will make them more impressive and stronger... 000
Likes
1
Share

@FarithAriasFajardo
Follow
Esta semana realizamos mantenimiento en el esquejé de Cherry gelato y continuamos con la aicacion de roots, hasta ahira el crecimiento ha sido bastante continuo y compacto, dejaré un par de dias más y haré poda apical en las principales y trataré de sacar algunos esquejes!


Likes
5
Share

@BudBrewerz
Follow
This lady seems to be doing really great, she's growing on some thick nuggs that start to smell super fruity, im really curious about how she will turn out.
Stopped with nutrients yesterday
Think she will be ready in a week or two
Likes
16
Share


@Bendedknee
Follow
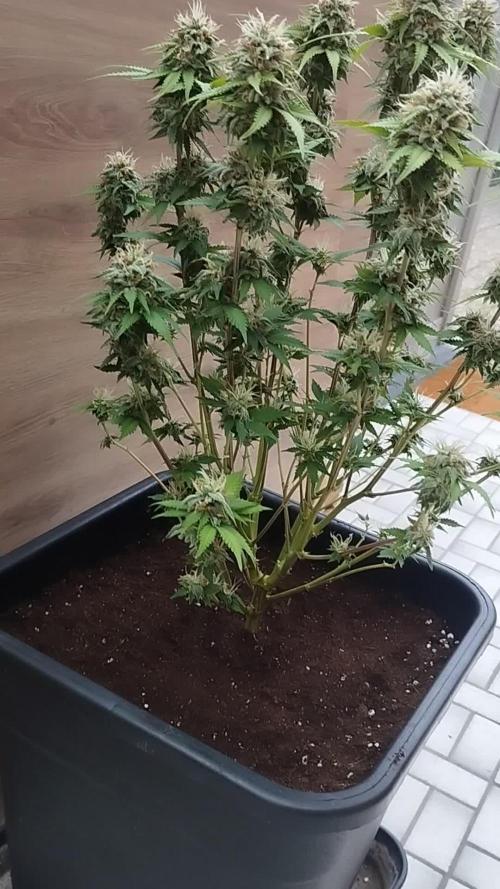
Most of my flowing plants are cut and hung, cpl taking their times getting nice and ripened just a few more days then everything comes down Making room for my autos


Likes
78
Share


@ClubRiot
Follow
Week 11 ,
pH Perfect Connoisseur Bloom Part A ( 1 ml/L )
pH Perfect Connoisseur Bloom Part B ( 1 ml/L )
CarboLoad Liquid ( 2 ml/L )
Sensi Cal-Mag Xtra ( 2 ml/L )
Sensizym ( 2 ml/L )
Bio-Heaven ( 2 ml/L )
Overdrive ( 2 ml/L)
Nirvana (2 ml/L)
Processing
Likes
26
Share


@eldruida_lamota
Follow
Esa familiaa, estoy impresionado porque estas skunk están muy compactas, es una cepa increíble, y no la fume todavía, solo hay que verlas no solo lo prietas que van, si no lo tricomas as que están .
Hay que felicitar a Zambezaseeds ya que esta variedad es muy estable y sencilla de llevar.
Ph controlado, quitamos productos y lavamos raíces, pronto solo agua.
Ph controlado, temperatura por debajo de 29 y humedad por debajo del 40%, deseando que estén listas para ver la producción, esss flores pesarán, hasta la semana que viene fumetillas.

Likes
4
Share


@IndigoMist8
Follow
Plants were still neglected due to health. Starting to feel better and was finally able to get out and feed/water plants. These girls are doing great all things considering. Although they are not as big as my earlier harvests, I am surprised that they doing as well as they are with weeks of neglect. Now it's just a matter of finishing in time.


Likes
25
Share


@Luna91
Follow
Hey There!
Nothing much to say,GOD I can’t wait to taste them!!!! Smell of pineapple is all over my room!! Look at the Digital Microscope!! I know I have at least two more weeks to go!! But simply cant wait🤣 this is my first grow! I studied a lot to make these autoflowers sth worth my time!
Likes
36
Share


@nonick123
Follow
Día 51 (22/07) Las plantas han reaccionado bien al 2º topping! 💥 Algunas de ellas ya empiezan a formar los nuevos brotes justo debajo del nudo cortado!
Hoy NO necesitan riego, tras regar ayer con 1 Litro de Té Vegetativo de Lurpe! 💨😁
Día 52 (23/07) Las plantas empiezan a formar rapidamente nuevas ramas tras el topping! 😍
A pesar del alto calor (35 - 38 ºC), gracias al sombreado y el mulch se mantienen frescas y con la tierra humeda, ¡perfecto para los microorganismos del living soil!
Riego: Solo es necesario regar a OnionOG #1 con 1 Litro de H20 pH 6,5
Día 53 (24/07) Riego: Solo es necesario regar a OnionOG #1 con 1 Litro de H20 pH 6,5. Esta planta se muestra muy sedienta comparada con el resto!
Día 54 (25/07) Los nuevas ramas se lanzan al cielo! 💥
Me encanta ver como los nuevos brotes de un color verde palido (casi radiactivo) nacen entre el intenso verde oscuro de las hojas de abanico ya formadas
Hace un dia nublado y con 29 ºC de maxima. No es necesario regar!
Día 55 (26/07) Riego con 500 ml H2O pH 6,5
Día 56 (27/07) Retiro los ajustes de LST a la mayoria de las plantas, para que crezcan libres ahora que se acerca el stretch
No es necesario regar
Día 57 (28/07) Riego con 1 Litro H2O pH 6,5 con 25 ml/L de Humus de Lombriz Liquido
Aplicación foliar Kelp hidrolizado de Lurpe Solutions a 0,25 ml/l
💦Nutrients by Lurpe Solutions - www.lurpenaturalsolutions.com
🌱Substrate PRO-MIX HP BACILLUS + MYCORRHIZAE - www.pthorticulture.com/en/products/pro-mix-hp-biostimulant-plus-mycorrhizae

Likes
6
Share


@MasterKush714
Follow
Hey gang update on the new girls!!!!
So they are definite differences in the girls genetics I can tell just by this growth so far,
The Tricross is a bit thinner on the fan leaves and a bit more lanky or taller. Whereas the
Muchacha F5 is shorter and has wider fan leaves, so this will Most Def be a interesting grow,
I'm excited to see if i can make this a much better grow then the last run. I will be using the
FOOP nutrient line i picked up to see how the girls fare with is, but i wont start that until maybe
week 5 or 6 depending on how the progress is at that point, thanks guys! will keep y:all posted!!!!

Likes
35
Share


@SmokingTiki
Follow
Trichomes started to get cloudy and some of them have already turned amber. I hope to harvest next week but for now they are still too many clear trichomes.
All the plants are now watered with clear water until the harvest. Some leaves almost turned yellow directly after the nutrient stop, especially on the OG Kush.
The Honey Melon Haze is now mostly standing up thanks to the strings that support it. Hopefully the harvest is coming soon!

