


Likes
Comments
Share

@DevilsBud
Follow
Start of week 2
There growing like clock work taking the first nutrients like a champ and now we have improved there invoirment they going to take off.
Finally have put up the new setup from spider farmer together and I am very pleased with a modern version more control and can watch from distance what's going on .
More info and picture Tru the week
Had some issues with some deficiency but it resolved it self everything looking Green again

Likes
5
Share

@Jardineiro_Br
Follow
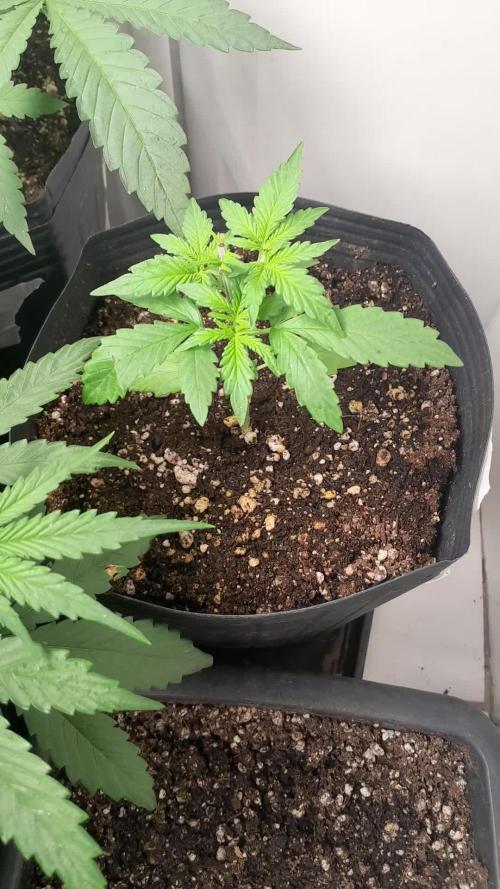
Coloquei as duas plantas no fundo da sala , a luz parece está sendo suficiente, estao com um bom desenvolvimento e as cores das folhas sugerem que está tudo bem.
Likes
117
Share


@PEAKYPLANTERS
Follow
wou wou wou .... do you see all that beautiful meat over those rigid stems ???
I would give him a nice bite over mmmm there is a great smell in a pot!
being together with you is always a joy,
Brothers and sisters farmers

Likes
27
Share


@adam_pawloski87
Follow
Let’s go day 43!!!! Week went real well , girls started preflower so sometime this week I will be switching up the nutrients for flowering! We are stable and looking super healthy! Can’t wait to see what these ladies do this week! Hope you all enjoy !

Likes
3
Share


@IzzyIncredible
Follow
I'm always open to feedback!
seeing as how I've never made it this far, I am pleased with where I am so far.
I see plenty of bud sites.. still a long way to go
Processing
Likes
8
Share


@eldruida_lamota
Follow
Esa familia, de vuelta vamos a actualizar esta tercera semana de floración de estas candy caramelo de Zambezaseeds.
Son fast flowering, así que veremos que tal se rápidas son en su floración, hasta ahora se están comportando muy bien, tienen 0 bloqueos alimenticios, esta vez no se nos va de la mano con el producto 😂.
En resumen color verde, vigorosas, bastante estables hasta ahora, sigo regulando ph , humedad y temperatura.
Gracias al led ts-600 que me a facilitado marshydro es posible cultivar en interior 365 días al año .
Www.mars-hydro.com
web: http://bit.ly/2uJAjgy
ts600: http://bit.ly/3cnv0Ev
code: an420
Macetas de 7L en sustrato all mix de plagron, hasta ahora esto es todo un saludo y buenos humos gente 💨💨💨

Likes
10
Share


@GoldenWeedGrower
Follow
📅 D71 - 24/10
📜 New res, maybe the last one before the flush. I keep the EC on 1,4 and pH on 5,8
✍️ 1,4 EC
♒ 5,8 pH
🌊 10 L
📏 110 cm
📅 D72 - 25/10
📜 As pH is falling and EC raises, I added 1 L. of fresh RO water. Now EC is about 1,6 and pH of 5,9. Also, I start to make some pictures of trichomes that for now is blank and milky. I think Lucy needs a couple or three other weeks.
✍️ 1,6 EC
♒ 5,9 pH
🌊 10 L
📏 110 cm
📅 D73 - 26/10
📜 I made a nice video, take a look please :). Added 2 L of water EC = 0,8 and pH = 6,1.
✍️ 1,5 EC
♒ 6 pH
🌊 9 L
📏 110 cm
📅 D74 - 27/10
📜 Added 1 L of pure RO water
✍️ 1,5 EC
♒ 5,9 pH
🌊 10 L
📏 110 cm
📅 D75 - 28/10
📜 I'm unsure what I should do among these options: make a water cleanup with florakleen then new res with ripen until the end and a new
flush or wait until the end and nmake a flush in the lst two days. Any suggestion will be welcome.
✍️ 1,5 EC
♒ 6 pH
🌊 9 L
📏 110 cm
📅 D76 - 29/10
📜 I decided to make a clean with Flash Kleen this week and then Ripen for about another week until the final flush. I hope this is the right decision.
✍️ 1,5 EC
♒ 5,9 pH
🌊 9 L
📏 110 cm
📅 D77 - 30/10
📜 Changed the res with 10 liters of water withj only ripen. Last week, I will harvest at the end of next week
✍️ 1,5 EC
♒ 6 pH
🌊 10 L
📏 110 cm


Likes
17
Share


@Elpicor
Follow
Sakura season has begun, I hope everything goes fine.
Strawberry Pie is going to have a tough time this week, let's hope it survives, meanwhile there are signs of heat shock and sunlight, it's developing 3 point leaves and strange ramifications but maybe I'm wrong.
D38
Defoliation, I hope I haven't overdone the pruning
D41
First week of flowering, I think it couldn't have gone better, it's growing visibly, let's hope it's like this until the end, maybe shortening the timing, we'll see. on the contrary strawberry pie has stopped growing, I have to thank that she survived, who knows what will come out of her, I wish her a sweeter climate...
D42
Defoliation is limited for what I did last night, I literally deforested, I did it because the humidity was sky high and the vegetation was too thick covering so many peaks,,, the fascinating thing is that they recovered within the night, if I may say that 6 hours of darkness relax the plants just as if they were on vacation.
Likes
28
Share


@DreamIT
Follow
Sponsored by:
🌲DUTCH PASSION SEEDS🌲-💡VIPARSPECTRA💡-💐GREEN BUZZ NUTRIENTS💐-🛠️WEDRYER🛠️
25/7 Despite the very high temperatures and the death of some seeds, I resume germination starting from the ongoing contest, by Dutch passion seeds, which I thank for the sponsorship. So off with the sowing!
28/7 it has appeared in the night and is already ready to become huge😁
2/8 I will combine the two weeks of germination into one. As you can see in the video it is going well, tomorrow I put it in the 0.5 jar. yeah
3/8 I have to postpone the transfer
7/8 decanting carried out in soil biobizz light mix. no nutrients for now🤘
8/8 update with photos
__________________________________________
Personal advertising (contains affiliate links)
__________________________________________
🦄 Dutch Passion was the second European cannabis seed company, founded in Amsterdam in 1987. Their mission is to provide the recreational and medical home grower with the highest quality cannabis seeds available. Anonymous shipments !! ( no affiliate link)
✅https://bit.ly/DutchPassionSeeds
__________________________________________
Did you know that Green Buzz Nutrients fertilizers are 100% vegan? A complete line of products ready to give the best to each of your plants! Visit the site and see my journals to see how they work 🦄
🤯 And with the code "dreamit" you will immediately receive a 15% discount on your purchases
✅https: //bit.ly/GreenBuzzLiquidsPro
__________________________________________
👀 Are you looking for a good lamp to start with? 👀
🌞Viparspectra has something more than the others, take a look at their site.
⏩ Use "GDVIP" for an extra discount or "DREAMIT3" for an extra 5 %% discount
👀 Search for it on Amazon
✅Amazon USA: https://amzn.to/30xSTVq
✅Amazon Canada: https://amzn.to/38udUVe
✅Viparspectra UE: bit.ly/ViparspectraUE
✅Viparspectra USA: bit.ly/ViparspectraUS
__________________________________________
🌈 Tired of blowing on your weed hoping it dries quickly? Check out the Wedryer website! You will find a well-made accessory that will help your weed dry in just 8-10 days without the annoying risk of finding mold or other annoyances! (no affiliate links)
✅https: //bit.ly/Wedryer_
__________________________________________
📷🥇Follow the best photos on Instagram 🥇📷
https://www.instagram.com/dreamit420/
Backup
https://www.instagram.com/dreamit4200/
🔻🔻Leave a comment with your opinion if you pass by here🔻🔻
🤟🦄💚 Thank you and good growth 💚🦄🤟

Likes
35
Share


@The_Bearded_Grower
Follow
Day 29 and she is doing well im expecting her to start to fatten up in the next week. im thinking 2 more weeks at least till flush. also my defoliation is very light at this point

Likes
7
Share

@Skynets_Growing
Follow
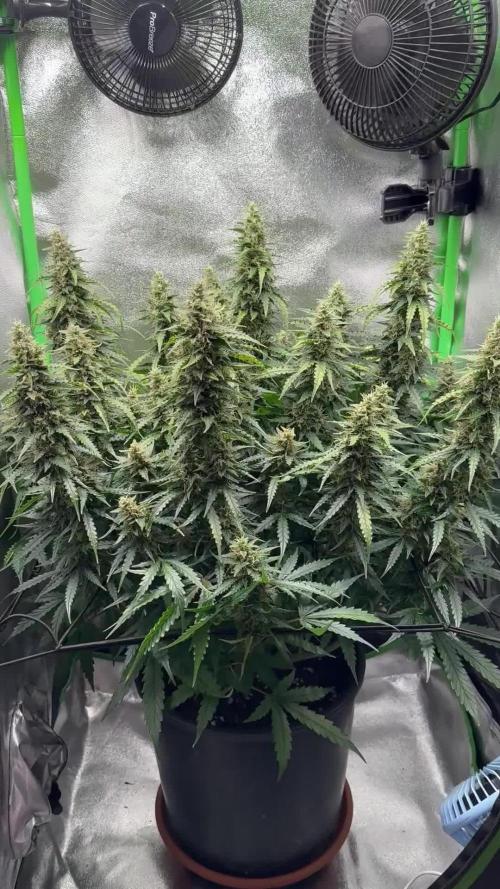
Tamara her week 11 is full with looking in many Little Parts of Tamara. Every „corner“ I have my eyes on I am more and more impressed of her Beautyness… really. I have never thought about that, that a plant can take me so much. I am looking for week 12 what she will do with me ^^. I am sure, I will love the next week.


Likes
3
Share


@valiotoro
Follow
Easy trim✂️
The buds are solid like a diamond 💎💍
The smell : citrus pine & rosemary🍋🌲absolutely divine super fresh it’s a one way to the Mediterranean Sea☀️✈️
Likes
8
Share


@WeeDay420
Follow
Good joob thank you seeeeeee youuuuuuuuu next week wait check like i love smoking weed everyday 😃😍🤪😋😜

Likes
4
Share


@Budette_Botanics
Follow
She seems to responding well to the net, and defoliating. I have taken quite a few leaves from both this week. Hopefully it won’t stress her out too much, it was much needed. The leaves were shading nodes, and crowding each other. We will see how the week progresses. She has been very petite throughout, but this last week I have notice she is starting to have a growth spurt. I wasn’t convinced it would happen with this one, but she’s on it! She had a rough start, so how ever it goes I’m curious to see how she ends. No deficiencies to note (touch wood) she has been quite resilient in that sense, where as her neighbour s/b has been battling potassium deficiency. Fed the same, but they really are worlds apart.
Thank you for taking an interest 💚 Happy growing everyone 💚🌱
Likes
Comments
Share


@bigsmoke42069
Follow
3/27/25
Watering with RO water and FinalPart to wash out salts.
About 2 days from now is chop time.
Watering 4 times a day for 45-50sec each watering.
Light at 90% intensity.
Dehumidifier running 24/7 set to 45% RH, tent RH is ranging from 45-55%.
Buds swelled up good.
The different phenos are very visible, (A) is front left, (B) x2 to the right in front and back, (C) bis left back.
(B) is definitely finishing faster than the rest, I'll try to harvest them sooner when they are done.
The ladies looking beutiful.


