


Likes
Comments
Share

@DmbTexasRanger
Follow
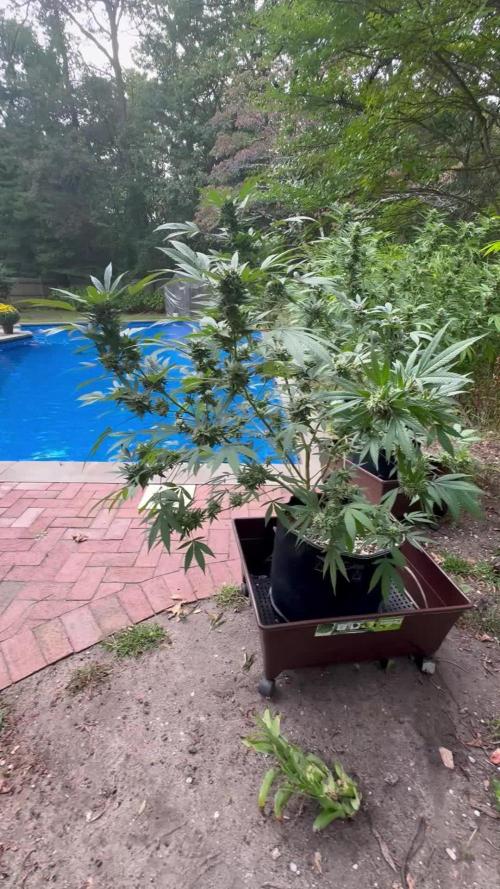
Doesn’t smell great doesn’t look great. Outdoors better than indoors



Likes
10
Share


@SwissKush
Follow
Day 43
Alles gut! she is huge, exploded!
Day 44
2000ml of full preflowering blend, 850ppm
Day 45
Alles gut!
Day 46
2000ml of full preflowering blend, 850ppm, 200watts light
Day 47
Drinking alot, alles gut, removed Trump plant, will be installing the ScrOG net
Day 48
2000ml of full flowering blend, 1000ppm
alles gut!
Day 49
extreme explosion! The Gorilla is enormous!
really liking that 1000ppm flowering blend, it also gets same alpine stream water as Sour Jealousy

Likes
Comments
Share


@marvin_Kush
Follow
Diese Woche hat sie einen richtigen Schub gehabt.
Weiterhin Greenhouse BioGrow 1g über die erde und 1ml flüssig Wurzel/Pflanzen Booster

Likes
9
Share


@TiRobotProds
Follow
Impeccable sa pousse bien, division en 8 branche. Génétique parfaite répond très bien à la doublure principale a bientôt pour plus d'informations sur cette souche de Ganfa Famer Seed.

Likes
4
Share


@OHighOBoyz
Follow
Plant decided it wanted to switch to flower so I guess week 4 is officially flower for her. there’s a smell beginning to linger as well hard to describe but very delightful.

Likes
38
Share


@kohlrabi
Follow
I almost despaired of getting my seeds to germinate after I moved house. Unfortunately, I seem to have stored them incorrectly during the move, so almost all of my auto seeds refused to germinate. But this single Mimosa Cake Auto from Fastbuds did manage it in only 2 days, and I'm very happy to be able to grow three plants at once after all. What a struggle!
Because I was given a pretty olla (a clay pot that you bury in the ground), I'm going to try it out this time. Fertiliser cannot be added this way, but it should prevent the soil from drying out.
In this grow, I used my usual nutrients from Greenbuzz-Nutrients, which I received as a sponsorship over a year ago. Time to use them up!
As a substrate, I used the peat-free Lightmix from T.A. again. It is cheaper than alternatives with peat and better for the environment, so I recommend everyone to give it a try.
Likes
7
Share


@Naujas
Follow
66 days!!!! and it's harvest day already, the girl ripened beautiful flowers while I was on vacation :) my house smells very delicious sweet aroma, the unexpectedly early summer +30, and +33° in the suitcase accelerated her growth and she really suffered from stress because of it, 106 grams of wet harvest on the scales, I'm waiting to taste it :) good luck to everyone :)

Likes
27
Share


@Reaper
Follow
Day 28: start of week 5 i start to see a cal mag defency on the critical
(see the leaf picture)
I got no calmag as im very low on cash right now. hope she will do great without it
ill put more pictures as the week progresses, the critical finishes at day 50 so theres only 3 weeks left
The coockies are now on day 21
Update:
Day 31 (see final video on this week)
The calmag problem is very visible on one of the critical (bottom left) no too bad, the girl scout cookies had a nice stretch and the leaves gained a lot of size everything Goes well the coockies drink a lot now. See you at week 5


Processing
Likes
27
Share


@Hawkbo
Follow
Day late on the update, pics/vids were taken on time tho just been a crazy week of harvests and trimming and keeping up with these. I linked up with Rain Science Grow Bags on Instagram and got them to offer all my followers and friends a discount of 10% off entire order from their site with the code ' bangdang ' so if anyone is in the market for a pot upgrade use that code. I got them in the mail 3 days after I ordered. Reason I went with Rain Science is because they offer identical air flow for rapid growth as the radicle bags, just using a different material and a tighter knit so water doesnt flood out the sides during feeds and when you pick these up when the coco is dry, it wont fly all over the tent like with the radicles. They're the optimal bag for autoflowers especially. I figured out why the one stayed so short compared to the others, the base of the stem did a 360 so it's like a loop then it grew vertical.
Likes
39
Share


@GrowWiththeBro
Follow
Fed on Day 39
Up’d the nutes a bit. Added some Superthrive.
Also added (2)3 gallon strains I have from another grow and additional lighting 250w in the tent.
Day 44: Watered with PH’d 6.1 water and a couple pinches of epsom salt.
Both of their ppm’s were a bit high on the R/O around 1700.
I assume this is from the feeding earlier in the week. (I need to start taking better notes) I brought it down considerably to around 900 ppm with a couple gallons of mild flushes.
**Personal note**
I read alot and I mean ALOT of forums and questions from here as I grow. I’m using a combination of techniques I feel are beneficial and learning do’s and do nots as I go. That being said Please feel free to comment, advice is ALWAYS welcomed!
Grow on.


Likes
65
Share


@Dedon
Follow
Hi everyone !
Everything is OK, buds are frostier each day.
They look more dense and tastier than my first try, i really want to taste them to compare the dfference between this grow and the previous one.
Today i bought a new tent, ballast and lamp, so i'll start the next grow tomorrow 😋 i don't need to wait for plant to be dry before start a new grow now o/
Thanks for your support and see you next week !

Likes
6
Share


@HandsomeTerpz
Follow
The Blueberry is just delicious! It smells like fresh berries, and the plant stems are extremely sticky. The trichomes are growing amazingly well! I hope the buds will turn out big and strong. So far, I'm really impressed, and for the next run, I'll go with feminized plants.


Likes
20
Share


@All_our_small_plants
Follow
Bewässerung: 5000 ml jeden 3 Tag in der Zwölften Woche
pH-Wert: 6,2
EC-Wert: 1,4 mS/cm
Temperatur: 22ºC
Luftfeuchtigkeit: 50%
Schädlingsbekämpfung: im Moment haben wir keine Anzeichen das es was zu bekämpfen gibt, sobald die ersten Anzeichen da sind werden wir handeln :)
Düngemittel: Sie bekommen ab jetzt Brenneseljauche da sie im Outdoor Bereich ist.
Besonderheiten: Sie wurde nach draußen umgepflanzt.
-Tag 78 Heute haben wir ihr nochmals ne Ordentliche Dosis Jauche verpasst, sie ist nun ca 1.5 m hoch und der Geruch wird auch immer intensiver.😍 Diese Sorte ist einfach unglaublich, wenn es so weiter geht hat sie in ein paar Tagen die 1,7 oder 1,8 meter erreicht. für eine auto ist das sehr nice.
-Tag 81 Heute war es wieder ein sehr Heißer Tag und wir haben sie wieder mit 5 Liter Wasser gegossen. sie ist nun 1,6 Meter hoch und wird noch immer weiter wachsen.
-Tag 84 sie ist sehr durstig und hat wieder Wasser bekommen.

Likes
7
Share


@IslandTerps
Follow
Strain: Fast Buds – Mixed Photoperiod Pack #1
Grow Type: Indoor
Pot Size: 3 Gallon
Medium: Peat Moss & Perlite
Nutrient Line: Athena (Bloom)
Week 7 Update
I’m honestly amazed at how well I trained this plant, the 6-manifold came out perfect. She’s doing excellent, showing vigorous growth and a strong, balanced structure.
Everything about her looks healthy, from the canopy to the bud sites starting to fill in. She’s taking her nutrients really well with no signs of deficiencies or stress.
I’m excited to see how she looks later in flower once those buds start packing on.
Feeding
1.9 L Athena Bloom nutrient mix (steady from this point).
Indoor Climate Conditions
Temperature: 24–27°C
Humidity: 45–55%
VPD: ~1.3–1.8 kPa
See y’all next week! And don’t forget to use my discount code ISLANDT for 15% off your next order at Fast Buds!
Likes
7
Share

@Gewaltmann
Follow
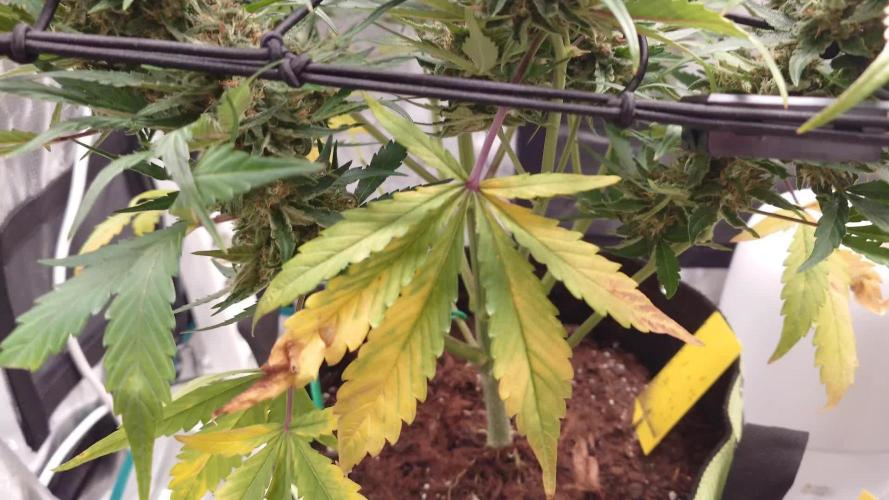
Der Herbst wird langsam eingeläutet. Man merkt deutlich dass es langsam Zeit wird regelmäßig die trichome zu monitoren.
Ich schätze mal ein bis zwei Wochen noch dann haben wir hier genau den perfekten Zeitpunkt. Ansonsten lasse ich das Video für sich sprechen.
Und wer noch mehr von der Guava Runtz sehen will - Guava Runtz auf YouTube suchen 😘
Likes
Comments
Share

Likes
30
Share


@BC_Green
Follow
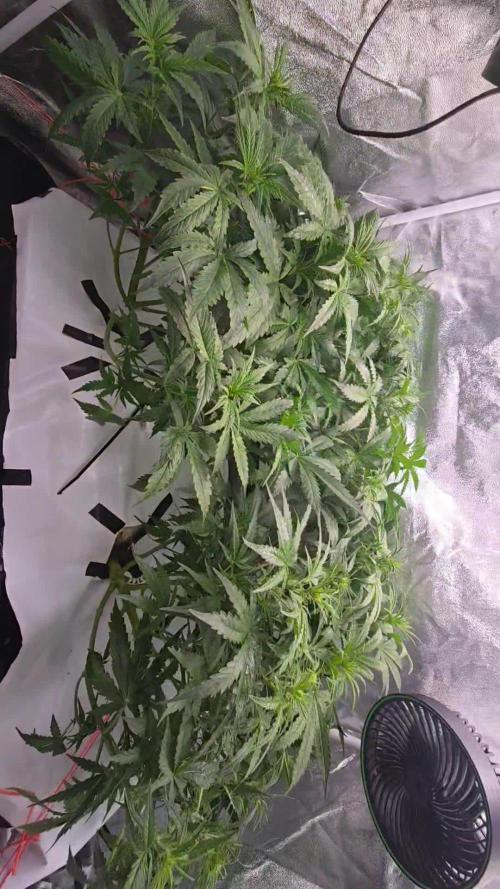
It has been another amazing week of the plants growing. I have been watching as the Fruity Freak leaves become progressively more fern-like, and ornamental as a result!
Based on my Banizzle grows, I knew I needed to understand plant nutrients in a more meaningful way if I wanted these plants to thrive. So, I decided to get a soil test (see Ref. 1 below on how to perform a test) to understand what nutrients my plants needed. The report I received advised that I needed to add 200 lbs/acre of nitrogen, 150 lbs/acre of phosphorus, and 190 lbs/acre of potassium (see picture labeled Pic.1 (FYI you can't see these images unless you login to growdiaries)).
I then researched what to do with my results (Ref. 2 helped), and I figured out that my nutrient needs of 200-150-190 fall close to a 2-1-2 ratio. I then looked at different types of organic fertilizers (see Ref. 3 and Ref. 4) and considered that I already had a 3-10-5 fertilizer (Vermibloom) on hand. I discovered Dr Earth’s Alfalfa Meal is 2-1-2 and includes beneficial bacteria and mycorrhizae (to promote healthy plant growth and disease resistance). However, I knew I would be low on nitrogen if I only used those two fertilizers. Therefore, I decided to buy some blood meal (12-0-0). I also liked that blood meal is more fast acting while the other two are more moderate.
I hunted around for a solid fertilizer calculator and found an amazing tool from the University of Georgia Extension (Ref. 5). I entered all three fertilizers into the calculator, and it kicked out the exact amount of each fertilizer I needed to apply to 1 square foot (see Pic. 2). As I am using 10-gallon fabric pots (that can hold 1.5 cubic feet, but I put stone on the bottom and there’s space left at the top) I decided to use the one square foot application rate as I can always add more later, but I can’t take it away.
Not only did I want to understand the nutrients I needed, but I also wanted to understand the structure of the soil (as it was not included in my test results). North Dakota State University has a nice page that discusses this (Ref. 6), and I performed a soil ribbon test (see Video 1) based on this information. I determined my soil to be medium textured (which is great), but I have seen occasional water pooling on the surface, suggesting that it may be more of a medium-fine. This means adding peat moss, coco coir, or other amendments might improve drainage (and plant hydration) and allow for roots to grow more easily. In the long run, I plan to use compost to enhance the soil structure and nutrients.
I filled the bottom of my 10-gallon fabric pots with a ½” of pea stone to allow for drainage (Pic. 3). I then partially filled two 5-gallon buckets with topsoil from near where I will plant (but not in an area the roots will reach). I used a digital scale to measure the amount of fertilizers recommended by the calculator (Pic. 4, 5, and 6) and added it to one of the 5-gallon buckets (see Pic. 7). I mixed the fertilizers into the soil as evenly as possible (Pic. 8 and 9). I then poured a two-inch layer of non-fertilized soil, then peat moss, and then fertilized soil (in a roughly 2:1:1 ratio) and blended them together. I repeated this until the pot was full (getting additional soil as needed), and then I repeated the process for the other three pots.
I set the filled fabric pots in my garage (Pic. 10) for two days to allow any upset bugs to flee into my garage instead of my house. I then moved the pots (wrapping them in a contractor garbage bag to prevent making a mess) into the room with the grow light. I placed a board on top of the fabric pots to insulate the plants (in their smaller pots) from the cold soil (Pic. 11). Once the soil in the fabric pots reaches room temperature, I will transplant.
(Ref. 1) This video shows the method I used to take a soil sample. I didn’t have a field to test, so I took four samples from the area where I will eventually plant outdoors and blended them together. I then mailed my soil sample off to the lab, and about a week later, I received an email with a PDF of my results (included with my pictures this week).
https://www.youtube.com/watch?v=N9AwxmFxBwg&t=8s
(Ref. 2) This video from the University of Minnesota Extension (many universities have agriculture extensions that can assist you with soil testing and growing information for your area) discusses what to do with your soil testing results:
https://youtu.be/HYrkcfE62Pg
(Ref. 3) This is a nice article that discusses organic fertilizer solutions:
https://www.grow-it-organically.com/npk-fertilizer.html
(Ref. 4) This article lists the NPK values of many organic fertilizer solutions:
https://www.epicgardening.com/organic-fertilizers/
(Ref. 5) Many websites tout a fertilizer calculator…but this one is hands down the best I have found. If you scroll down to the bottom, you can enter any fertilizer type you want (and the cost, if you want). It will give you the exact blend of multiple fertilizers to solve your nutrient deficiencies (I included a snapshot of the solution I used in my pictures).
https://aesl.ces.uga.edu/soil/fertcalc/
(Ref. 6) This is an excellent article that discusses how to evaluate your soil:
https://www.ndsu.edu/agriculture/extension/publications/evaluating-preparing-and-amending-lawn-and-garden-soil
Likes
112
Share


@PEAKYPLANTERS
Follow
Hello, all grower brothers and sisters!
After a long wait, we are finally ready to show you all the finish of this harvest!
I shared a lot of content for you and I hope you enjoy it..
The growth of these plants has all in all been quite simple .... in comparison .... what they have been able to give me back .... is something extremely RARE
Between one phenotype and another they each took on a different color....but all extremely potent! Tight, solid buds that overflow with resin 😬😋 Just how I like them!!
my work combined with the scrog technique paid off and these fantastic lights meant that even the lower buds got the light they deserved ,But all this would not have been possible if I hadn't had good nutrients with me to enrich the soil at the right point! All without ever checking the EC of the ground 😉
Stay updated
