


Likes
Comments
Share


@Cheeba_Inu
Follow
Entering the second week of growing for the Orange Diesel, I am finally relaxing a bit. It was so close to death with it's germination issue, but the "seed surgery" saved it and it seems to be recovering. It's a bit small compared to the Blue Dream'Matic growing under the same conditions, but it's leaves are healthy and it's putting out new growth. It's going to get it's nutrients dialed up just a little, and the lights are being lowered slowly, to dial in it's optimal grow conditions. Unless she explodes with growth I am going to avoid any topping later in the grow and focus instead on some gentle LST (if needed).
I am including a timelapse that mainly covers my Blue Dream'Matic, but shows some of the growth of the 🍊 in the foreground. In future weeks I hope to get more of both the plants centered in the video.
Thanks for reading, and happy growing! 🌱👍

Likes
11
Share


@Joni2017
Follow
Hello everybody 👋🏻 today full moon 🌕. I put the seed in a tupper on top of the router where it gives a good temperature😊. I will put the led at half power (400W) during vegetation and at full power (800W) in flowering.
Blue Cheese Auto
Blue Cheese Auto from Barney's Farm is a variety classified as indica / autoflowering, it will take longer to make more than the other cars in the catalog but it will surprise us when we finish its cultivation for its incredible quality.
In an interior it is a large producer and not only a central truncheon, but it will have multiple satellites surrounding it with bright and compact buds. Putting 4 plants per focus we will extract the maximum potential, which we will have to tutor so that they do not double the weight; get ready to see 500g dry when doing a manual job.
In outdoor crops it is ideal for hot climates, where we will get the best harvests when there is the strongest summer sun. The size that usually reaches is good, up to the meter; production is also reflected in the high compaction of this genetics, up to 50-80g dry for each car. It has average resistance to the attacks of pests and fungi so it is better to perform biological preventive treatments during the first 20 days.
Type: Feminised
Photoperiod: Autoflowering
Cultivation INTERIOR / EXTERIOR
Genetics Blue Cheese x Ruderalis
Indoor Productivity (g) 500 gr / m²
Productivity Average (g) 500
Autoflowering Harvest Time from Seed (days) 70 - 75
Height (cm) 80 / 100cm
Height in Interior (cm) 100cm
% Indica 80%
% Sativa 20%
Indica / Sativa Mostly Indica
Medical No
Mold Resistance (5 = Maximum) 4
Resistance to Botrytis (5 = Maximum) 5
Resistance to the cold (5 = Maximum) 5
Oidium Resistance (5 = Maximum) 4
Resistance to Red Spider (5 = Maximum) 4
Warm weather
% Stable Stability
Difficulty of Growth (5 = Difficult) 1
Bio Tabs
Now fertilizing your plants will be much easier; we only have to add the Bio Tabs and the other components that are included directly in the pot when we plant, and the rest of the crop will only add water to our pots.
In the middle of the crop you have to apply an irrigation with Orgratrex and Bactrex to reinforce the biological activity and that's it. We will have plants as always, the most productive and tasty, totally organic and without having to worry about excess nutrients or fertilize them.
Dosage and how to use the Starter Pack of Bio Tabs step by step:
Fill our pots to about 3/4 and add 3g of Mycotrex for each pot, no matter the size. More or less are 3 tablespoons of coffee rasas.
Then we add another 25g of Startrex (which comes to be 2 tablespoons) every 5L of soil, so if we have 10L of pot then 50g and so progressively.
We stir well to mix with our substrate and just fill the pot of earth.
Then we make the hole to transplant our plant to the final pot, and in that hole you have to throw another 2g of MycoTrex into the hole itself and we can now transplant our plants.
Then we have to add your Bio Tabs tablets, every 5L of earth a tablet on the substrate, if we have 10L then two tablets ... You have to bury them closer to the edge of the pot than in the center. They are buried about 5 cm deep in the substrate and we will have our plants fertilized for weeks.
We make a mixture with the last component that remains when we plant, Bactrex. Add 1g to a liter of water and give the first watering with that mixture.
From now on, you only have to water with water until the 5th week.
At the 5th week, we will have to contribute a new help to our plants, we will add 20ml of Orgatrex and 1g of Bactrex in 500ml of water and stir well. Water only with that half a liter a plant and only once.
Add water until the end of the crop, that's that easy.😋👏🏻👏🏻
Biobizz light mix
With Light Mix of BioBizz we will be 100% sure of having bought one of the best lands available for your seeds. Saving on the ground is one of the worst mistakes we can make, since we are starting a job that the final result is to seek the highest quality and production. To think that is where the plant will have to live all its days of life so it will have to be of the best possible quality.
With Light Mix you will have an excellent substrate, as each land has a different formula and composition, we will find out who will best resist this substrate, according to the climatic conditions where we are going to plant. It is characterized by its high proportion of water / oxygen retention, this soil pulls more towards water retention so it will be perfect for all those who live in warmer areas avoiding having to water the pots so often, it retains a lot of humidity. We will have to be careful with the first days of our plants so as not to soil the land too much, otherwise the roots will not shoot as they should and you could even drown your plants, this advice is worth all the autoflowering genetics that are more sensitive to root problems and excess irrigation.
This sack of earth comes very light of nutrients, so this substrate should provide practically nutrients in all phases of the crop from the second week.
Composition:
Peat moss
Perlite
Ec: 1.2
Ph: 6.2

Likes
10
Share


@BRM_OutDoor
Follow
Se levanto de pana , si alguien me puede dar consejos de como regar mejor , se agradece ajshsj
Pd: El video es un tomate pera con lst

Likes
121
Share


@NuggetPawn
Follow
So she was chopped (wet trimmed) yesterday (F74) and is now hanging up to dry at 55% RH and temps between 15 and 18ºc.
I made fresh frozen dry ice hash today using a 160 micron bubble bag, a flat surface, 8kg of dry ice and a couple 5 gal buckets. I already have the weights for that, which far exceeded my expectations. Those figures I will post once she is dried and in 1 quart screw top glass jars.
People suppose dry ice hash is inferior quality vs bubble hash. I am not experienced enough to comment on that but must say it is extremely easy to make hash with dry ice, it took 40 mins to process 995g of trim which included sugar leaves, some stems and popcorn buds. I then pressed it into 3.5g briquettes for storage using a pollen press. As you can see from videos, this stuff is all blonde - and after already trying some today with some friends, it knocked our boots off!
Will be back in 5-7 days with harvest figures, smoke analysis and other details!
Happy growing all!
P.s I ticked defoliation this week - the only week I intentionally cut any leaves off for the entire grow 😉


Likes
3
Share


@Wiggsix
Follow
Jue12.MAYO
Grandes avances desde la poda apical aplicada días anteriores. La verdad que contento con la evolución que trae esta lechuga 😍
Se realizo el cambio de solución hoy.. entran en el balde 7.5 Litros
Dom15.mayo
Todo sigue bien, pensando si hacerle nuevas podas apicales...
Mar17mayo
Poda apical a las apicales anteriores
Likes
13
Share

@Borberad
Follow
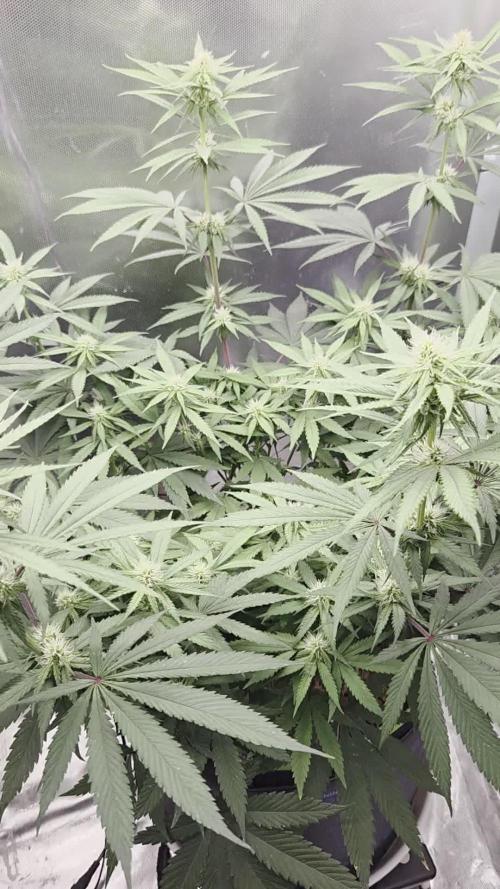
Woche 9
Das Training wurde gut überstanden, sie wächst gesund und kräftig. So langsam muss aber mal wieder Luft durchs Blattwerk pusten, daher wird diese Woche Schrittweise das unterste Drittel entlaubt, sowie Blüten und Triebe entfernt.

Likes
30
Share


@SqwshKush
Follow
Major morphological changes being observed still. Stretch & bud thickening occurring.
Sept 18 - looking good. Hairy hairy buds!
Sept 19 - all watered with nutes 2ml/L all. 1.5L each.
Sept 20 - looking great, sticky colas when handling, smelling noticeably when opening the tent now & Lina’s hairs starting to brown off. Subtle purple colours are popping on some cola’s - notably BM & TB. Scrog’d them. Need to find out how to make it square and less bowed in..I’m guessing poles or bungee cord?
21 Sept - doing well.
22 Sept - all watered, 2L each w/ bud burst @ 3ml/L and in total 1/2 cup of molasses for 10L.
23 - all good
24 - looking great!

Likes
Comments
Share


@ElPracticante
Follow
Ha sido la primera semana 12 12 .. les hice una defoliacion hace una semana pero estaban tan densas que han necesitado otra tipo lolipop o como se diga jaja.. el lts hace que se enreden mucho pero el modo espiral de momento va bien


Likes
2
Share


@Green_Peace
Follow
The plants are growing at a good rate now and drinking a litre each per day. I feed them by hand and each plant gets 2litres every other day.
Didn't do anything else this week other than install the trellis on the last day.
This plant is on the laft in the timelapse video.

Processing
Likes
3
Share


@scooter112
Follow
End of week 9 and I'm seeing just a few amber trichomes and most of hairs have turned brown so she'll most likely get chopped during week 10.

Likes
20
Share

@GermanGrow182
Follow
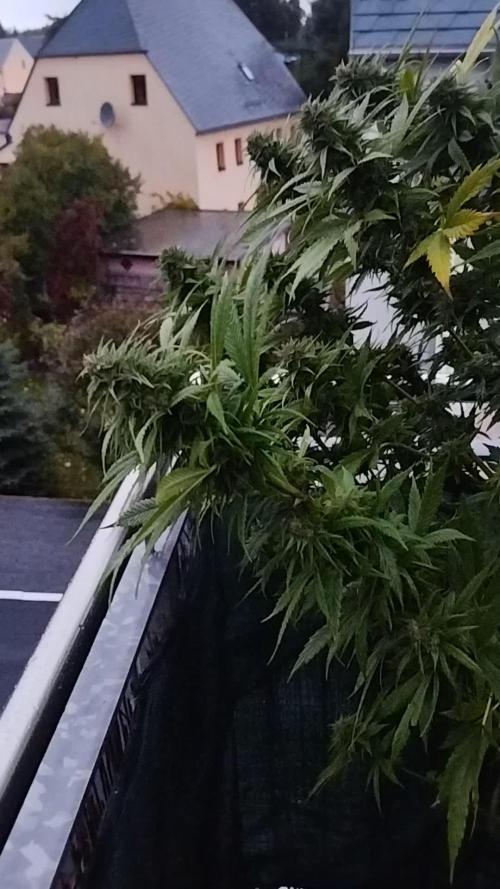
Die kleine Larry hat nur eine halbe Woche 20 gehabt und wurde Samstag geerntet. Der Schimmel kam dann doch. AK ist bisher verschont geblieben. Sie hat später begonnen,zu blühen und hat bisher nicht so große buds entwickelt. Aber ich lass sie noch stehen.in der Hoffnung, sie baut noch ein bisschen Masse in ihrer wahrscheinlich letzten Woche.
Es geht dem Ende entgegen.
Bis nächste Woche ✌️
Processing
Likes
4
Share


@Ferenc
Follow
Week 10: 20/4 light schedule, 150 mp water per plant 2x, no fertilization anymore. Day 65: Next week Tueasday/beggining week 11/ we need to harvest because they will come from the council to check the house😂 Well, the previous one finished in 69 days, but I think they won't be properly ready by next week. I tried it and made me high anyways. I would give at least 2 weeks more to be done. Tomorrow I will check the trichomes with magnifying glass. They are beautiful stinky girls. Flowers are getting thicker and pistils are getting brownish. Day 66: I checked the trichomes with magnifying glass and it will be ready by next Tuesday. 7 days left with this day. They are beautiful just check in the video (Day 66).
Day 67: It is crazy the last 3 days was so hot here in London. Today was 38 degrees!!!!!! Poor plants even with ventilation it goes up to 30-31 degrees. Well, it is alright because direct ventilation goes on so they won't be cooked. 😓😛 Day 70: It is the last day when they receive water and they just get once and half of the daily intake. 2 days before harvest I will not water them. Harvest day is on Tuesday 30th of July when they are 72 days old. I have checked the trichomes all good they are matured nicely cloudy so now it is very strong. They are very stinky girls 😋 Day 71: No more water for them..... Tomorrow is harvest day!!!!!😋

Likes
21
Share


@Freddd
Follow
The Jedi came down at 11 weeks. The other blackberry came down at 8.5 weeks, for a total production of 2.5zips plus 7.5 zips. I've had to estimate the Jedi at the moment, there was 1050 gm wet weight of trimmed bud on minimal stem. I would expect the dry weight to be 21% of that but I will update the numbers next week.
She is a spacious plant and very branchy but you can continually trim branches as you defoliate throughout the grow, she responds well to both. Floats like a butterfly and hits like a steam train. It's been over two weeks since the Blackberry was harvested and she's all gone now, never even got a chance to dry properly. Basically she kept me going while waiting for this Jedi, who I already knew was going to be soaking with resin. I was hoping for 8 zips total with 4 for each plant but I ended up only getting 2.5 on the blackberry but I got an easy 7.5 of mostly grade a bud so a total of 10 zip for both plants in the same pot. They were expected to mature together but the black berry was a week or so early, so as you can see in the root shots her roots had died and made the Jedi roots rot as well but this shows you the resiiance of the Shallow Water Culture as I do it because of added redundancy, I could not even tell there was a root problem didn't after the Jedi at all but it's good to be away of, I'm back to single pots for a while now.

Likes
1
Share


@FarithAriasFajardo
Follow
El registro corresponden a los dias 28, 30 de abril y 2,3,4 de mayo Despues de realizar corte apical y algo de lst junto defoliación leve. Hasta ahora las plantas van muy bien, creciendo muy bonitas y con fuerza. Tratando de llevar todo de la mejor manera ya pude ajustar algo el set donde tengo mis planta y cada vez más contento con estos resultados! Ya hoy la white widow ibl cumple 30 dias desde germinada y la zinfandel 23.


Likes
107
Share


@Afterglow
Follow
Начинаю растить новый сорт моим собственным методом. Я его называю корона, хотя больше подходит название Multiple Symmetric Lollipopping. Это что-то среднее между Main Lining, Low Stress Training и SoG. Суть заключается в том, что мы делаем Topping выше 4-го этажа и затем все 8 основных веток разводим по сторонам. Четыре нижние ветки по диагонали, четыре верхние крест-накрест. В итоге получается эдакий равномерный круг веток, растущих на одной высоте, так как мы легко можем контролировать высоту каждой ветки. Принципиально можно и 10 и 12 веток делать, но мне хватает 8. Желательно иметь широкий горшок, чтобы было куда разводить ветки. Надеюсь когда-нибудь появится новый метод MSL с моим авторством.
Итак, взял две семечки, а победитель по росту переедет в большой горшок.
Гроубокс у меня самодельный. Две лампы HLG 100, но по факту обе работают по 50ватт. Встроено два фильтра и два канальных вентилятора. Один работает постоянно, второй включается автоматически при превышении верхнего порога температуры. Дверки на защелках, проклеены уплотнителем чтобы не пробивался свет и запах. Внутррение габариты от лампы ШДВ - 67х48х68 сантиметров. Помещается два куста, но я предпочитаю растить только 1.
Как проращиваю семена?
1. Они всегда хранятся в холодильнике. При попадании в теплую и влажную среду семена получают сигнал к росту и быстрее всего прорастают, буквально за 14-16 часов.
2. Берем нужные семена и кладем в теплую воду (18-22 градуса Цельсия) на 3-4 часа. Это нужно, чтобы скорлупа размягчилась, а семечко согрелось и получила достаточно влаги.
3. Слегка маникюрными щипчиками расщепляем скорлупу. Делается специально, чтобы как можно раньше корешок начал получать воздух. Чем быстрее раскрывается скорлупа, тем быстрее начинает прорастать корень и уменьшается риск загнивания.
4. Садим в таблетку или сразу в готовый субстрат. Обычно я сажу сразу в готовый субстрат, но в этот раз решил попробовать в торфяной таблетке, чтобы выбрать победителя по активности роста.
Как я готовлю кокосовый субстрат?
1. Я никогда не использую старый субстрат. Во-первых, я применяю микоризу и множество других грибков и бактерий, которые для маленьких ростков будут слишком концентрированными и могут навредить. Во-вторых, в старом кокосе очень много старых корней, которые обязательно будут гнить. С одной стороны это хорошо, но по факту это приводит к загниванию субстрата и образованию плесени.
2. Беру половину брикета, развожу в воде, промываю в проточной воде (попеременно горячей и холодной) пока не вымоется вся морская соль и затем размешиваю с вермикулитом и перлитом.
3. Заливаю полученный субстрат на 15-20 минут удобрением Cal-Mag (1000 PPM), чтобы субстрат набрал катионов кальция и магния, иначе первую неделю полива кокос будет забирать эти вещества из полива, а растение будет голодать. Если измерить PPM воды после внесения Cal-Mag и через 20 минут, то увидите, что PPM упадет до 600-700 единиц. Это кокос вобрал в себя соли.
4. Заливаю удобрением, в случае трех-компонентного Grow-Micro-Bloom в соотношении 3-2-1, PPM 1000. Также оставляю на 15-20 минут. Нужно это затем, чтобы кокос теперь равномерно вобрал в себя другие катионы (железо, цинк, медь, калий, ну и азотистые соединения, как то мочевина и аммоний). То есть мы целенаправленно вымываем излишки кальция и магния.
5. Затем, уже поливаем нашим удобрением с PPM 600-700 чтобы чуток снизить концентрацию.
6. В этот готовый буферизированный субстрат потом и попадет пророщенное семечко.
Как я поливаю?
В течение первых трех недель я поливаю через день. И не важно, высох субстрат или не высох. Кокосовый субстрат это позволяет. Далее приходится поливать каждый день, потому что развитая корневая система осушивает весь субстрат за сутки под чистую. Никогда не поливаю чистой водой - это только нарушает PH внутри субстрата и приводит к стрессу растения. Если нужно промыть субстрат, то готовится несколько поливов с нужным удобрением. Вспомните про то как после промывки падает PPM. Вот тоже самое происходит и при поливе чистой водой: питательные элементы вымываются с кокоса и когда вы начинаете "кормить" растение, оно голодает, потому что кокос все отбирает, чтобы делиться "потом", когда "насытится".
PH на веге всегда около 5.6-5.8, на цветении 5.8-6.1. PPM стараюсь держать на уровне 700. На цветении 1200-1400. Если вы дочитали до этого момента и увидели страшную цифру в 700 PPM, то на самом деле ничего страшного в этом нет. Если вы возьмете обычную землю, разведете водой и померяете PPM, то он там будет куда более высокие показатели. На самом деле растение способно жить даже при PPM в 5000 единиц. Поливать растение с PPM 300 - это слишком бедная смесь. Как правило, все руководства ориентируются на земляной грунт, а производители страхуются и дают заниженные нормы, чтобы покупатели случайно не сожгли свои растения. Но если если у вас есть PH и TDS измерительные приборы, то вы смело можете щедро кормить свое растение, а оно вам ответит буйным ростом и плотными шишками.
Всегда руководствуюсь золотым правилом проверки дренажа:
PPM растет PH падает: у растения несварение и что-то оно не может усвоить.
PPM падает PH растет: растение голодает, либо нарушен ионно-катионный баланс.
PPM стоит PH растет: все идет хорошо.
В каждом случае нужно понимать что было сделано ранее и корректировать действия.
Итак:
19.01.2021, в 12:00 замочил семечки в воде
19.01.2021, в 16:00 расколол аккуратно семечки и посадил в торфяную таблетку
19.01.2021, в 23:00 уже одна семка начала вылезать из торфа, хотя утапливал. И это всего лишь прошло 7 часов. Чувствую кандидат на пересадку уже показал себя.
20.01.2021, в 16:00 эта же семечка уже отрастила корешок и полностью показалась из торфа.
21.01.2021, в 10:00 выскочило из торфа и готова расправить листики. Вторая семечка пока сохраняет молчание.
21.01.2021, в 17:00 росток вот вот начнет разрывать скорлупку чтобы выпустить первые семядоли. Перенес в гроубокс под лампу.
23.01.2021, в 10:00 умер... так и не увидев свет. А вот её младшая сестра неожиданно вылеза из торфа и вытянулась за ночь на 2 сантиметра, пока были отключены лампы. Пришлось ей вручную снимать скорлупу.
23.01.2021, в 15:00 младшая сестра уже показала хвостик корня с другой стороны торфяной таблетки. Завтра надо будет пересаживать уже в нормальный горшок
24.02.2021, в 14:00 девочка переехала в новый дом. Первые листики стали размером с семядолями. Поздравления принимаются, мы проросли.

Likes
15
Share


@RDWCGrowing
Follow
6/29/2024 - Flower Week 12 Day 1- Water Change Day!!!! Should be the last week.. Can't wait... Will check the Trichomes tomorrow and see where we are at.
I added 36 gallons and the accompanying Nutes
I added 36 Gallons of Water
I added the following Nutes:
CalMag= 1.25Mil/Gal= 45Mil
FloraMicro = 2.3Mil/Gal= 83Mil
FloraGro= 1.3Mil/Gal= 47Mil
FLoraBloom= 4.0Mil/Gal= 144Mil
Liquid KoolBLoom= 2.5mil/Gal = 90Mil
TPS SIgnal= 2mil/Gal = 72mil
ORCA = .5Mil/Gal= 18Mil
EPSOM- 1 pinch
6/30/2024 - Flower Week 12 Day 2- Nothing to do but take some pics.... One more day take some pics of the Trichomes..
7/1/2024 - Flower Week 12 Day 3- Still Nothing to do but take some pics and check the Trichomes.. she is almost there..
7/2/2024 - Flower Week 12 Day 4- Still Nothing to do but take some pics, the buds are so heavy now the stems are falling down all over the place.
7/3/2024 - Flower Week 12 Day 5- Took some extensive Trichome pics today, I really had to see if she will be ready for cut on Saturday and I think she will be. Get brown tips for the most part throughout the bud a few spots more milky than i typically like but I think overall she is ready this weekend.. That will leave me 9 days to dry and weigh and get submitted for final pics.. Lots to do in the next 12 days.
7/4/2024 - Flower Week 12 Day 6- Happy 4th of July.. :-)
Did nothing but take some pics today... :-) 1 more day and TIMBER!!!
7/5/2024- Harvest Day, harvested on Week 12 Day 7..... from the big plant... 2.2lbs wet into the cannatrol for dry 5.6 lbs into the tent to hang dry.. Since this is a competition going to wait to post the close out for weights and all that until after judging, See you all in a few weeks with the close out report..
Likes
4
Share


@Autower
Follow
This was the untopped gorilla cookies not positive that topping made much difference this time but then again who knows still 480g wet weight is good for me has a very pine and cookies smell very sticky can’t wait to try all these fat bud strains will update dry weights I due time thanks for viewing and onto the next

Likes
29
Share


@DOOBS_N_BREWS
Follow
Day 71- Starting week 7 of flowering with these 2 GDPS nearing the end! I have 2 different phenos but they both formed really dense sticky buds so kudos to MSNL for that. GDP A is a snowy gdp with slight purps but GDP B really shows the purple pheno well and the leave progression is really pretty cool. I will continue to go light on waterings and sledgehammer it 2 more times this week. 💪
Day 73- Another big flush for these girls. Its crazy to see both these plants side by side. I did the same training on each one and changed no feedings up but one obviously was very open and grew HUGE while the other grew very tight and compact but still very vigorously in its own special way ;)

Processing
Likes
28
Share


@JBOrganix
Follow
1 - (03/14) Starting my new seeds, my other order for the Barney's never came in the mail. Must be "lost"... Decided to go get something semi locally. Picked up 2 strains and got the free Early Miss as well. Germination has started as of 03/13, paper towel transfer at 03/14 (approximately 16 hours later). Tent is sanitized and the new LED I'll be running is almost here. (Decided to wait on the full spectrum) Following guidelines as per Crop Kings recommendation for germination. We'll see in the next 48 how well they have developed under the paper towel. This plant will be grown alongside the Early Miss and quite possibly the GSC from Sun West Genetics as well. The GSC and EM will have separate diaries, so be sure to check those out as well! This grown will be done in the Indo 4*2*5 tent. Thank you to everyone that chimed in on my last failed grows, I look forward to some success after the excellent suggestions I received from everybody. Super excited! Happy growing!
2 - 03/16 - Looks like a good start to the germination. 48 hours after they were dumped from the glasses. Waiting for those t roots to get a bit bigger yet.
3 - 03/17 - 72 Hours later, forgot to get in the tent and remoisten the paper towels last night, just got up at 4am and they were pretty dry. Tap root looks to have lost some moisture, I'm just hoping I didn't already fuck them up this time. Shouldn't have drank so much on my 30th. Happy Saint Patrick's day to y'all! Hopefully they suck up some water and bounce back by midday. Going to put them in jiffys or rock cubes tomorrow.
4 - 03/18 - Planted in their first pots.
Due to the nature of my last grow, I've decided to start the other 2 girls in a jiffy. Placed the jiffy into a smaller pot (approx. .25g?) That is filled with my Mo Koko, gia green organics 4-4-4 all purpose, 40% worm castings and a higher 60-70% perlite ratio. I plan on testing the runoff from the pots and the Early Miss is in a felt pot, so I figured it would be a great idea to accommodate for the additional moisture those felt ones hang onto. Probably going to uproot the EM tonight and transfer it to a jiffy as well then get it into a plastic pot. (Edit - decided against it) I'm going to run two 3 gallon pot sizes for both of my autos and eventually upsize to a 5 gallon for the GSC PP. Going to get some nicer domes today. Getting pumped. Almost through the germination process and onto Day 1 of Veg. 😎
Video update later today!
5 - 03/19 - All the girls are popping up out of the soil and should shed the seedling casings within 24hrs. Off to a much better start! The EM somehow came out, big surprise to see it. Not as pronounced as the other girls, but nonetheless. Stoked. Ended my day by them officially being in Veg Day 1.
6 - 03/20 - Well yesterday was officially day 1 of week 1 in Veg and as of this morning all 3 girls look great. Definitely feeling more confident this time through.
7 - 03/23 - Made some adjustments to the diary, measured the girls and corrected my Veg days. Moving forward, I'll do week to week updates on the girls and daily pictures of growth progress.
8 - 03/26 - Day 7 for all the girls. CC is definitely on the weakest link list. The EM has shocked me entirely. GSC is progressing as I figured she should. Today I am finally going to scoop my new light. So stoked 🙌 Girls get to go into week 2 with a heavy adjustment on their total wattage. I'll update later this evening with a photo update and video of the new light and the girls. Thanks for following, don't forget to hit the like! Cheers 🌱
End of the week, new lights in the tent. Running a bit hot right now so I have some work cut out for me. On to the next week.
