


Likes
Comments
Share


@Kynareth
Follow
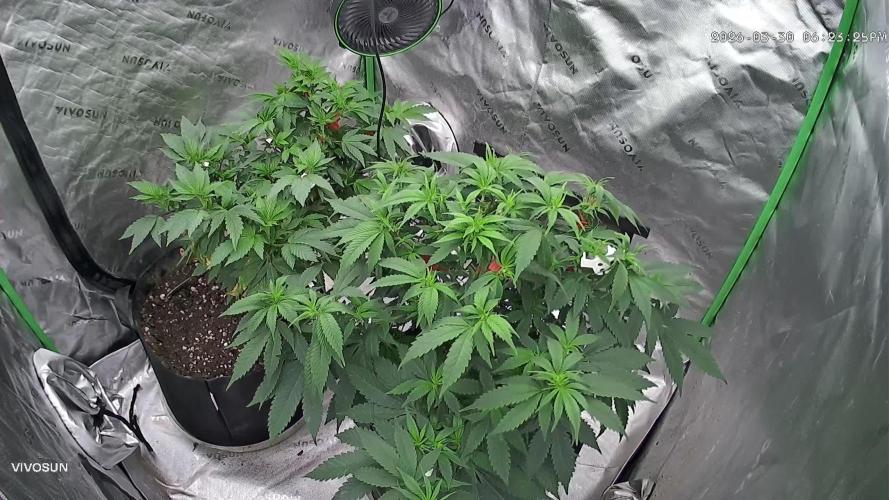
Como se puede ver en el timelapse de la semana anterior la planta va dejando atrás esos problemas de crecimiento de hojas y cada vez va más rápida ayudada principalmente por ese gran par de hojas del segundo nudo. He realizado una poda apical justo después del cuarto nudo como se puede ver en las imagenes. APlicaré LST cuando esas dos ramas principales estén claramente visibles, lo que calculoque será en un par de días y posteriormente colocaré la maya de scrog (calculo que esto será sobre la cuarta semana de crecimiento), dependiendo como vea la malla entonces pasaré a ciclo de floración o dejaré otra semana de crecimiento, pero máximo 5 semanas de vegetativo. La fertilización la mantengo sin cambios, aun queda bastante solución nutritiva en el depósito, la cual mantiene el ph a cerca de 6 (6.07) y la ec al estabilizarse ha subido un poco 1,7 que sigue siendo un buen valor.

Likes
22
Share

@MrBulldops
Follow
✂️✂️✂️Update (5/27/26)✂️✂️✂️✂️ day 61 of flower- she’s chopped and sitting in the herbs now… will upload the timelaps a little later today… I filled about 2 and a half trays on my herbs now so I’m guessing I’ll be getting about 60-75 grams from the one plant.. my WiFi will be out for a few days so need to wait on the timelaps so I can download it off my camera.. will upload as soon as I get it

Likes
44
Share


@rudiak
Follow
Well another epic this week. The girls are looking very tasty indeed now! I have now harvested one plant on day 57. It was a tad early for her but she started looking pretty bad for some reason. Potentially started the flush on her a little early or could have been root rot. Either way the plant was chopped to ensure buds were saved. She weighed a cracking 550g wet, and dry was about 100g. This was the girl that was completely untouched, no defoliation etc complete virgin ;).
Unfortunately the RH was high I ordered a dehumidifier but they sent me a faulty one and by time had a new one was too late some mould was starting to occur on the girls in a few places. I was over cautious and slung around 25g of buds that were near the mould just to ensure it didn’t spread to the rest of the plant. I also sped the drying up and placed in brown paper bags for last 2 days to suck the remaining moisture off after a full trim and inspection. The girls took a total of 5 days to dry and are now curing. They were a bit “hay” like in smell and taste but this was probably because of all the problems listed above. She is starting to smell much better after a couple of days of curing though so my faith is restored that the remainder of the buds may be quite good still!
The last 3 girls have been going lovely, and starting to bring in some purple colours to the sugar leaves which are quite nice, all the trichomes are nice and cloudy and just starting to go amber. I will be harvesting on day 66 as this will allow me a good period of time to trim them fully into reasonable size buds and dry in my hanging net in the tent to ensure no mould problems again.
For the last 3 days I have been flushing with 30L of water to ensure they are completely free of nutrients as again think this maybe another factor on the not so nice smelling/tasting buds from the first girl. I will give 2 days to fully dry the soil out bone dry before I cut them down. Happy I took her down early as it’s allowed me to ensure I have 3 good plants left and the remainder of the grow/dry/cure should go smoothly as know what I am doing now.

Likes
16
Share


@ChronicFinest
Follow
Wow what a strong weed. The yellowing stopped immediately after repotting and she wasn't stunted at all. I give her 3 liter water every other day. The temps are higher in this season I hope that will not be too much of an effect on yield.
Humidity is OK so mold should stay out too.


Likes
20
Share


@NONSENSE
Follow
Week N-3.
The Cookies plant is doing well. grows normally. Easy Boost Organic Nutrition works perfect.
I added GHE Diamond nectar and GHE Roots this week.
You can see, that I started to train plants using LST and FIM.
I water the plant every day;
Plants are not stressed and continue to grow normally.
On the next week I plan to do:
1. Put on the air filter, as you can smell a wonderful smell right now. unfortunately not wonderful for everyone. :)
2. Place the grid for SCROG.
The plant has a lot of branches, which is very pleasing. So the SCROG- MUST have. |:)
Likes
18
Share


@DogDoctorOfficial
Follow
Hey fellow green thumbs! 🌿💚 It’s harvest time for our Auto Fat Pete’s Cookies from Super Sativa Seed Club! After an exciting journey, we’re thrilled to share the details of this unique plant’s final stage. Let’s dive into the harvest report!
🌟 Harvest Details:
Day 75: Harvest Day
• Harvest Date: Day 75
• Harvest Method: Our Auto Fat Pete’s Cookies was harvested yesterday. While the flowers turned out less dense than expected, the amazing smell has us super curious about the final product. 🌿🌸
• Preparation: Before hanging, we meticulously cleaned the plant, removing all leaves without trichomes to ensure a smooth drying process and to enhance the quality of the final product. 🌿✂️
Current Drying Process:
• Method: The entire plant is now hanging upside down to dry. This method helps maintain moisture levels within the buds, allowing for a slower and more even drying process. 🌿🔄
• Environment:
• Temperature: 18-22°C (65-72°F)
• Humidity: 50-60%
Maintaining these conditions is crucial for achieving a perfect dry and preserving the plant’s aromatic and flavorful profile. 🌡️💧
🌟 Plant and Bud Characteristics:
Auto Fat Pete’s Cookies:
• Bud Structure: The buds are not as dense as we’d hoped, but they are still sticky and resinous, showcasing a beautiful array of green hues with hints of purple and orange pistils.
• Aroma: The aroma is incredibly strong and delightful, filling the grow room with a sweet, cookie-like scent that hints at the strain’s name. 🌿🍪
• Trichomes: A generous layer of trichomes covers the buds, promising a flavorful and aromatic final product. 🌿✨
🌟 Care Tips:
• Drying Process: Patience is key. Allowing the plant to dry slowly will enhance the final quality, preserving both flavor and potency. Ensure good airflow around the hanging plant to prevent mold and mildew. 🌬️💧
• Trimming: Once the drying process is complete (typically 10-14 days), it will be time to trim the buds. This is where we’ll shape the final product and get it ready for curing. ✂️🌿
• Curing: After trimming, curing the buds in jars for at least 2-4 weeks will further enhance the flavor and smoothness. This final step is essential for achieving the best possible smoking experience. 🍁
🌟 Genetics Spotlight:
Auto Fat Pete’s Cookies:
• Characteristics: Known for its sweet and cookie-like aroma, this strain has shown remarkable aromatic qualities throughout the grow. Despite the less dense flowers, the strong scent and generous trichome coverage promise a high-quality final product.
• Harvest Expectations: Sweet, aromatic buds with a rich flavor profile. The slower drying process will ensure the best possible preservation of cannabinoids and terpenes.
🌍🌿 Fun Fact:
Did you know? 🌿✨ The aroma of a cannabis plant can be a strong indicator of its final flavor profile. Strains like Auto Fat Pete’s Cookies, with their unique and strong scents, often translate these aromas into delicious, flavorful buds.
For a detailed grow guide and to see this strain in action, head over to my YouTube channel! 🎥✨ I share tips, tricks, and in-depth reviews to help you get the best results from your grow. This week’s harvest has been particularly intriguing, and I’ll be explaining the reasons behind the less dense flowers in detail.
👉 Join me on YouTube Link in my profile 👈
🌟 Conclusion:
Harvesting Auto Fat Pete’s Cookies at Day 75 has been an interesting and rewarding experience. While the buds are not as dense as we hoped, the strong aroma and generous trichome coverage give us high hopes for the final product. With the plant now drying, we’re eagerly awaiting the final outcome.
Stay tuned for updates on the drying, trimming, and curing process, and get ready for a sweet and aromatic harvest!
Happy growing, and see you next time! 🌿💚✨
#SuperSativaSeedClub #HarvestReport #FatPetesCookies #PlantMagic #GardeningJoy #NatureLovers #PlantPower #InspireGrow #YouTubeJourney
Germination method 🌱 @thecannakan
Genetics @supersativaseedclub_official
Nutrition
@aptusholland 🌿
@aptus_world 🌎
@aptus_es 🌍
@aptusbrasil 🌱
@aptus_thailand 🌿
@aptus_portugal 🌳
@aptususa_official 🍀
@aptusplanttechnz 🌺
@aptusplanttechaus 🍃
Ambient controls🎮
@trolmaster.eu @trolmaster.eu.support @trolmaster.support @trolmaster.agro
Soil @promix_growers_eur @promix_cannabis
LED - @lumatekeu
Watering- @autopot_usa @autopot_global
Love and attention- @dogdoctorofficial
As always thank you all for stopping by, for the love and for it all , this journey of mine wold just not be the same without you guys, the love and support is very much appreciated and i fell honored and so joyful with you all in my life 🙏
With true love comes happiness 💚🙏 Always believe in your self and always do things expecting nothing and with an open heart , be a giver and the universe will give back to you in ways you could not even imagine so 💚
More info and complete updates from all my adventures can be found ⬆️link in the profile description ⬆️
Friendly reminder all you see here is pure research and for educational purposes only
💚Growers Love To you All 💚
Discount Codes :
@thecannakan DOGDOCTOR 15% off
@theneutralizer PORKIT7-DOGDOCTROSO 17% off
@kannabiaglobal DOGDOCTOR 30% off
@seedsmangenetics DOGDOCTOR 10%off
@terpyz.mutant.genetics DOCTOR 15% off

Likes
2
Share


@Marshydrots1000
Follow
Comeing on great see a couple seeds lower down but no more balls no where. So happy days !

Likes
28
Share


Likes
28
Share


@Esoteric_growing
Follow
Did a final defoliation on today day 21, not quite as full canopy compared to normal but wanted this chamber freed up for some new genetics so the plants had only a weeks veg.
Likes
8
Share


@GrowPassionItalyChris
Follow
È stata una settimana bellissima e calda. Tutte le varietà sono vicine alla fase finale della fioritura e ognuna ha il suo forte aroma particolare. Tutte quasi piene di infiorescenze dure e molto appiccicose ormai stanno completando il loro processo di fioritura in maniera impeccabile. Come sempre queste varietà dutchfem seeds autofiorenti sono una soddisfazione! Alcune sono di tipo XXL mentre altre di taglia media ma sono tutte piene di infiorescenze e continuano a riempirsi quindi verrà applicata una raccolta graduale tra una settimana o due al massimo. Sparito ogni insetto nelle piante a causa della resina appiccicosa. Sono felice un abbraccio a tutti.


Likes
12
Share


@H2Smith
Follow
📅 16.04-21 (Flower Day 50 since 12/12)
📜 Addition of 175ml total care. Trhichome analysis: everything is transparent.
⚗️ 2.06
💦 5.99
🌊 55L
📏
📅 17.04-21 ( Flower Day 51 since 12/12)
📜 Set PH 6.10. Removed 40l. Addition of 35l in the tank at 4 p.m. Addition of 45l at 7pm. 10% of the leaves turn black
⚗️ 1.93
💦 6.14
🌊 75L
📏
📅 18.04-21 (Flower Day 52 since 12/12)
📜 10l emptying of the system.
⚗️ 1.9
💦 6.10
🌊 55L
📏
📅 19.04-21 (Flower Day 53 since 12/12)
📜 10l emptying of the system. 30% of the leaves turn black
⚗️ 1.86
💦 6.14
🌊 70L
📏 cm
📅 20.04-21 (Flower Day 54 since 12/12)
📜 10l emptying of the system. 40% of the leaves turn black
⚗️ 1.85
💦 6.10
🌊 60L
📏 cm
📅 21.04-21 (Flower Day 55 since 12/12)
📜 theoretical start end of flo - analysis of trichomes: wait and see flushing within 1 - 2 days. Set ph a 6.2
⚗️ 1.85
💦 6.15
🌊 50L
📏 cm
📅 22.04-21 (Flower Day 56 since 12/12)
📜 👌 i fill 50 liter at 23h20
⚗️ 1.83
💦 6.20
🌊 50L
📏 cm
_____________________________________________________
📅 Day - 📜 Note - ⚗️ EC -💦 PH -🌊 Water -📏 Height
Equipment:
Idrolab 12 bucks
Chiller teco Hy500
weather controler with Co2 : PRO-LEAF BECC-B2
Bavagreen 720w
Bavagreen 720w
Bavagreen 240w
Bavagreen 240w
Nutrients and PH controller: PRO-LEAF PHEC-B2
Nutrients: Green House feeding - powder feeding hybrids | Powder feeding boost
Extractor: primaklima PK250-1 PK250-L1 x2
System and roots care: Idrolab Total care

Likes
10
Share


@StonedFarm
Follow
10/5/24 - Purple Punch 👊 & Green Crack 💚
Girls got a top feed of 7.3 pH, and runoffs are strong 6.4. PPMs are a little lower last dunk on the GC, so we are going to bump up her feed a little, and reduce the feed on the Purple Punch.


Likes
2
Share

@DogDoctorOfficial
Follow
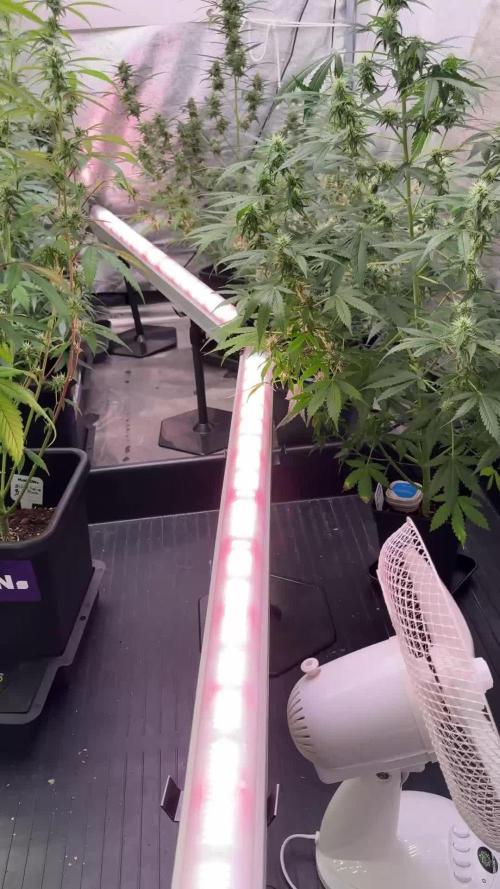
🌸 Week 9 – Opening the Door for the Flowers
Blueberry Muffin has always had an interesting personality in this tent.
She's not the tallest plant.
She's not the largest plant.
But she's been quietly building herself into a compact flowering machine.
And that's exactly why I decided that a little selective defoliation was appropriate this week.
We're not trying to strip her.
We're not trying to make her naked.
We're simply opening some space.
A few leaves here.
A little overlap there.
Removing foliage that is no longer helping the structure we're trying to maintain.
The goal is simple:
More breathing room.
Better light movement.
Better airflow.
Less unnecessary congestion.
And when you have twelve different plants sharing the same room, sometimes opening one plant slightly also helps the environment around her.
That's the beauty of working with the whole garden rather than looking at each plant in isolation.
✂️ Defoliation – It's About Purpose, Not Punishment
I've talked about this before, but this week is a perfect opportunity to repeat it.
Defoliation isn't about removing leaves because leaves are somehow "bad."
They're not.
Healthy leaves are incredibly valuable.
They're photosynthetic organs.
They're producing the energy the plant uses to grow and develop.
So when I remove a leaf, I want to have a reason.
Maybe it's heavily overlapping another leaf.
Maybe it's sitting inside an increasingly congested section of the canopy.
Maybe it's shading a developing flower while contributing relatively little to the structure.
Maybe removing it creates a much better pathway for air.
And sometimes...
it's simply part of cleaning the plant.
That's the approach we're taking with Blueberry Muffin.
Selective. Intentional. Moderate.
We're not trying to win a defoliation competition.
We're trying to create a healthier, more manageable flowering plant.
💨 Airflow Becomes More Important as Flowers Develop
This is where the timing becomes particularly interesting.
As the plant gets deeper into flower, the canopy naturally becomes more complicated.
Flowers get larger.
Leaves overlap.
Branches carry more biomass.
And spaces that were wide open earlier in the grow can gradually become pockets of dense vegetation.
That's not automatically a problem.
But it's something worth managing.
One of the reasons I wanted to open Blueberry Muffin a little more this week was simply to maintain air movement through the plant.
Good airflow doesn't mean blasting the flowers with a hurricane.
It means avoiding stagnant pockets of humid air trapped inside dense vegetation.
And as we move further into flowering, that's increasingly important.
Because nobody wants to discover a problem after flowers have already become dense.
Prevention is much easier than trying to fix a problem later.
💧 Helping the Room Breathe
There's another interesting side effect to opening the canopy.
The plants are collectively producing and moving a lot of moisture through transpiration.
When twelve plants are sharing a relatively enclosed environment, the canopy itself becomes a major part of the room's microclimate.
Opening congested areas gives moving air more pathways through the plants.
That can help reduce pockets of trapped humidity around the foliage.
And when the canopy breathes better, the whole room benefits.
Again, this isn't about expecting defoliation to magically control room humidity.
The ventilation system is still doing the heavy lifting.
But good canopy management can make the environment easier to manage.
And that's exactly what we're looking for.
💡 Every Photon Has Somewhere to Go
Blueberry Muffin is also at an interesting size.
She's approximately 75 cm tall.
That's not a huge plant.
And because she's relatively compact, I want to make sure the available light isn't unnecessarily intercepted by layers of foliage sitting on top of other foliage.
Yes, she has support from the under-canopy and inner-canopy lighting strategy.
And that's fantastic.
But additional lighting doesn't mean we should deliberately create unnecessary barriers between the light and the flowers.
If we can open a section naturally and allow more photons to travel through the canopy, why not?
We're not trying to expose every square centimetre of the plant.
We're simply making the canopy a little more efficient.
Sometimes the best lighting upgrade is simply...
removing something that doesn't need to be in the way.
🌸 The Flowers Are Taking Over Now
And this is where the photographs become particularly exciting.
The flowers are becoming increasingly obvious throughout the plant.
The white pistils are still doing a lot of the visual talking, but the individual flowering sites are gaining structure and substance.
She's moving away from that early-flower appearance where everything is basically a collection of little pistil-covered points.
Now we're beginning to see the plant building actual floral mass.
The branches are carrying their flowers with confidence.
The canopy has become more compact.
And the whole plant feels like she's entering another chapter.
This is the stage where I stop being interested in how much she's going to stretch...
and become much more interested in how much she's going to stack.
? The Blueberry Muffin Personality
One thing I really appreciate about this phenotype is how different she looks when compared with some of the other genetics in the tent.
She's not trying to dominate.
She isn't the tallest.
She doesn't have the most dramatic structure.
But she's developing her own little architecture.
And that's what this entire 8×8 Adventure is about.
Twelve genetics.
One room.
One general environment.
And twelve completely different answers.
Blueberry Muffin's answer seems to be:
"Give me some time."
And now she's starting to show us why.
💚 Nutrition – Staying the Course
There's no reason to reinvent the feeding programme this week.
We're keeping nutrition essentially unchanged.
Current feeding remains:
Terra Bloom — 2.2 ml/L
Pure Zym — 1 ml/L
Power Buds — 1 ml/L
Sugar Royal — 1 ml/L
pH Plus / Lemon Kick — as required
The plant continues receiving the same flowering nutrition rather than reacting to every small visual change with another adjustment.
That's important.
We made a structural intervention this week.
We don't need to simultaneously start changing everything else.
One change at a time makes the plant much easier to read.
🌡️ The Room Has Changed
And this week we do have a small but interesting environmental change.
The daytime temperature remains around:
29°C
But the night temperature is now approximately:
26°C
Last week we were around 25.6°C, so the difference isn't dramatic, but the overall night temperature is slightly warmer.
That means our day/night temperature differential is now smaller.
We're also sitting around:
RH: 60%
Solution temperature: 25°C
Root-zone/substrate temperature: 25°C
CO₂: ~693 ppm
Light schedule: 12/12
Watering: ~1.3 L per plant / 24h
Container: 15 L
And I actually like observing these little changes.
The room doesn't have to remain frozen in time.
What matters is understanding what changed and watching how the plants respond.
At this stage, with flowers getting denser, keeping the canopy open and maintaining good air movement becomes even more valuable.
🌙 Day vs Night – The Difference Matters
One of the things I enjoy about documenting these numbers is that they tell us more than a single temperature reading.
We're running approximately:
29°C during the day → 26°C at night.
That's only about a 3°C difference.
Earlier in the run, the difference was a little larger.
As the room changes, so does the relationship between temperature, humidity, transpiration and plant development.
And this is why I don't like looking at temperature or humidity as isolated numbers.
The plant doesn't experience "29°C."
It experiences:
temperature + humidity + light + airflow + root-zone conditions + CO₂ + time of day.
Everything interacts.
And right now, I'm happy with what the room is showing us.
We're watching it.
We're measuring it.
And we're adjusting when necessary rather than reacting to every little fluctuation.
🔬 One More Reason I Like This Defoliation
There's something else happening here that I think is easy to overlook.
Cleaning the plant isn't only about what remains.
It's also about what we can see afterward.
Once some of the unnecessary foliage is removed, I can see the flowering structure much more clearly.
I can see which branches are developing strongly.
I can see where flowers are stacking.
I can see where the canopy remains dense.
And I can see what might need attention later.
In other words...
defoliation also improves observation.
And for this project, observation is half the fun.
🔮 Looking Ahead
From here, I want to keep things relatively simple.
No unnecessary training.
No dramatic interventions.
No chasing numbers just because they're numbers.
We'll continue watching the flowers develop, monitoring the canopy and paying attention to how she responds to the cleanup.
The next stage should increasingly be about:
🌸 flower stacking
🌸 calyx development
🌸 increasing resin production
🌸 increasing flower density
🌸 maintaining airflow
🌸 keeping the environment stable
The framework is already there.
Now we're entering the part of the journey where patience becomes more important than intervention.
We've done our job.
Now...
let Blueberry Muffin do hers.
💭 Final Thoughts – Making Space for What's Coming
I think this week is a really good example of how I like to grow.
We didn't defoliate because someone told us:
"Week 9 means defoliation."
We did it because the plant changed.
She's becoming more compact.
She's developing more flowers.
The canopy is getting denser.
She isn't a particularly tall plant, so making the available photons work efficiently matters.
And with twelve plants sharing the same room, keeping air moving through the garden matters too.
So we opened her up.
Not dramatically.
Not aggressively.
Just enough.
And now she looks cleaner, more open and easier to read.
That's what I wanted.
Not a naked plant.
A better-organised plant.
And honestly...
she looks fantastic.
Blueberry Muffin may not have started this journey as the plant that immediately grabbed everyone's attention.
But she's slowly becoming one of those phenotypes where you look back at the earlier photographs and think:
"Oh... now I see what she was doing."
She's been building toward this.
And now she's starting to show it.
?🌸🔥
🙏 Thank You
A huge thank you once again to Zamnesia for giving us the opportunity to explore these genetics, Plagron for supporting the garden throughout the journey, Future of Grow for providing the light that powers this experiment, Lumiflora for bringing additional light into the inner and lower canopy, TrolMaster for helping maintain environmental stability, and of course everyone following this 8×8 Adventure on GrowDiaries.
Every week gives us another little lesson.
Sometimes it's about nutrition.
Sometimes it's about environment.
Sometimes it's about genetics.
And sometimes...
it's simply about knowing when to take a few leaves away and give the plant a little more room to breathe.
Blueberry Muffin is entering another chapter now.
The canopy is open.
The flowers are developing.
The room is stable.
And there's still plenty of story left to write.
Until next week...
Growers Love and happy growing! 🌱💚?


Likes
17
Share


@CzAlmighty
Follow
Thank you soo much Humboltd seeds. I love your qualitty. Another my favorite indica strain. 🍀 i love this strain ❤️


Likes
12
Share


@420DeepGrow
Follow
📆 Semana 4 de floración – Permanent Jealousy Auto XL
La Permanent Jealousy Auto XL entra en su cuarta semana de floración con muy buena pinta. Los cogollos han engordado notablemente respecto a la semana anterior, y empiezan a llenarse de pistilos que ya apuntan hacia todas direcciones. Se nota que está en plena faena.
El desarrollo de resina se ha disparado y las hojas cercanas a los cogollos empiezan a brillar con tricomas. El olor también ha subido de nivel: una mezcla intensa entre lo dulce, lo químico y lo funky, que promete bastante.
La planta se mantiene estable, con buen consumo de agua y nutrientes. No hay signos de estrés, ni por temperatura, ni por alimentación. Todo bajo control, y el ritmo de floración se está cumpliendo como toca para una XL automática bien criada.
A este paso, se viene una buena cosecha.
¡Seguimos creciendo fuerte 💪!
Processing
Likes
55
Share


@Max1973
Follow
Day 29 - Things going along nicely .... i trimmed down some of the bigger bottom leaves, i didn't have enough soil to fill the pots, and the plants are short, bushy, weird little things, that filled out the inside of the pots..... they are only 15cm tall, but the leaves are 10+ cm .... really weird little plants.... haha....
i decided to trim the fk out of one of the ones in the double pot, and practiced topping on her.... i'll cut her down maybe trimmer her of the pot, and focus on just the 2........ they seem to be still growing upwards, so i'm not in a hurry to put em into flower mode......... on the main one i noticed some neut deficiencies ... so i upped the neuts.... should be ok, i put a good heavy neut and it stopped the spots etc..... i think some bug or something got in the double pot and is livin in there, but he doesn't eat much, haha....... the main stalks are as big as my thumb and under each canopy is all the branches..... it's really strange, to go in under all the growth and see it all .... they look kinda small, but the entire under canopy of leaves is all full .... i'm moving the huge sized leaves out and pulling each branch up over them as they grow..... this is 21 THC and 19 CBD, so it's all the good stuff for medicine ... the smell is getting abit noticable and i'm hoping the exhaust fan arrives from china soon.... just got positive ventilation into a carbon fil. ... and daily air out........ i think i had the led lights too low..... so i'll raise em abit more and see if i can get em to stretch ....
Day 30 -- added some video's...... daylight vids... worth watchin for a laugh ...... first grow, so idk what i'm doin, ... any help/comments appreciated
Day 32 -- added some pics of the late night trim and LST,... idk looks ok....
Day 34 -- added a video...