


Likes
Comments
Share


@dataTwiiix
Follow
11/24: 1 mois avant le réveillon de noël. Je ne pense pas que je la fumerai avant l'ans 2022.
compte rendu de ma huitième semaine coco/perlite sans aucun autre amendement, au début j'ai arrosé à la mais, aujourd'hui j'ai installer le Floraflex.com, la mise au point est presque finie enfin quand on commence avec ça on ne sait pas ou ça s’arrêtera :D , en tout cas çà le fait l'irrigation a haute fréquence!
11/25: la récolte est proche pour celle qui a flippé en cro. Et une des grandes dames commence à montrer des signes de mûrissent :) encore 2/3 semaines et je coupes la stressée. #72
11/30: quelques drippers bouchéent vive le calcaire :( #77



Likes
3
Share


@Flako1985
Follow
Transplanting on 05/30/2019. That when I'll turn on the 600w MH. Germinated on May 12,2019. Popped and Planted with 24 hrs.

Likes
16
Share


@BLAZED
Follow
Week (21-10 to 27-10)
21-10
Temps: 19.4 to 26.6 degrees
Humidity: 47% to 66%
22-10
Temps: 18.2 to 26.5 degrees
Humidity: 42% to 64%
Watering: 2000 ml.
There are only 1/2 weeks left before harvest, so i will stop with the nutrients and will only give her water from now.
23-10
Temps: 19.4 to 26.2 degrees
Humidity: 47% to 66%
24-10
Temps: 19.2 to 26.8 degrees
Humidity: 45% to 66%
Watering: 2000 ml.
25-10
Temps: 19.5 to 25.9 degrees
Humidity: 46% to 67%
26-10
Temps: 19.8 to 26.5 degrees
Humidity: 46% to 66%
27-10
Temps: 17.9 to 26.2 degrees
Humidity: 44% to 67%
Watering: 2000 ml.

Likes
5
Share


@Panda207
Follow
Ended up deciding on this pheno, a light chocolate and sweet gelato flavor.

Likes
1
Share


@TheOutkast
Follow
2 weeks into flower guys. Looking real nice stayed really short considering they nearly had a 6 week veg , and the write up on them says they have an explosive stretch during the flip not seen they yet but I'm not complaining . Changed the nutrients from pre flower to full flowering feed as stated on the chart . Picked a few fans of all of them yesterday not to much just anything overlapping.

Likes
132
Share


@rhodes68
Follow
2/1 Week 12!
Re-introducing the Peak PK in low dose as I begin to migrate the plant to all Peak and then flush I hope all in less than two weeks.
Will step things daily, tomorrow it will be 10 ml CT 10 ml Peak with an eye on the ppm. You get the idea, she has to finish and fast.
Valuable lesson, don't have anything ever backed up behind a sativa grow waiting on them to finish, it aint worth it. Grow em at the end of a cycle.
2/2 put the feed at 12ml CT 7ml Peak thought maybe its too much of a swing, tomorrow 10 and 10
2/3 10ml of each this morning.
Got to move things along, new plan is to begin flush at start of new week this weekend,
At flush changing lights to 12/12 , binding her back up just a little, then placing one of the testers on a stand in the tent to take pressure off the veg tent.
5-7 days later we harvest based on what we see.
We cannot come up with anything better
As far as growth she is doing great, its a heavy plant and the hairs are still straight and 95% white! Build so fast
2/4 All is well
Tara really seems to like the 10-10 dose so leaving it for now.
Changed light schedule to match the veg tent. This is to accommodate the near arrival of one of the photos.
In a few days the plant will have to finish off at 12-12 so the photo can flip. Not ideal but practical from our point of view.
Keeping our hopes up here and uttering my characteristic prayer... Please God dont let me foul this up... Amen
2/5 Feeding as before
Had to bind her up a bit, she is so heavy we were afraid of her toppling over. Seriously this plant is TOP HEAVY.
Which is good I guess 😬
Not flushing till I see it is time, not messing this one up.
Dont get plants like this everyday.
2/7 Ending the week with a full tent again
Switched lights to 12-12 and bound her up to fit in half the tent, we literally could not come up with anything else for this.
She just keeps going and going lol
DRY WEIGHT ON RIPLEY!
261 grams
Hoped for more but meh sativas.
Still nothing to sneeze at 😇

Likes
81
Share


@NugLife420
Follow
Well it has finally come to an end. Well, at least the growing part; still need to dry and cure. I will update when I have a dry weight. Thanks to everyone who supported me in this grow. 😎

Likes
22
Share


@StrontiumGrow420
Follow
Ready for harvest, chopping this week. Flushed with molasses water for 6 days. Lost most of the fan leaves, yellowing off and some heavy reds in the leaf at the end of flower. Nice toke, OG flavour


Likes
2
Share


@I_Identify_As_A_Dan
Follow
Day 70...
Shes starting to get a little ugly :/
But shes starting to fatten up so probably 3 weeks to go.
Shes starting to get a bit of an odour to her.


Likes
18
Share


@BABS_Babies
Follow
I did a low wet trim, and saved the trimming for butter and oil. I dried in a mesh for 12 days, then kept in mason jars and burped them.


Likes
28
Share


@PrairieFrostGrow
Follow
This little girl started her journey on April 4th with germination into a water glass and finished up on June 27/20 – Day 78 from germination. She was a fun grow and was very resilient through the whole run. She spent most of her grow time in a 20/4 light schedule. She formed nice frost levels and stayed to a very nice and manageable height of roughly 20” tall without topping or bending her main stem. She was not as fussy about nutrient levels and took them well. She does like her medium on the dryer side though. Small little auto bush of OG Kush crossed with Indica genes😃 She would make a nice a plant to run while you are vegging out some photos for 6 or 8 weeks as she is not very big in size but will swell up and yield decent weight👍
She was grown in a 3 gallon fabric pot with coco coir and maybe 15% perlite. She was fed salt based nutrients……..so sorry but they are flushed out and that is what I am more comfortable with. Focus on the early growth with microbes, fungi and kelp!! She was fed the normal pattern with pH being held around the 5.4 to 5.8 range in feeding. Then as flower approached, I gave the pots a more consistent look at the runoff numbers and she was running 7.8pH coming out of her!!!!! WTF. She stayed in her pot that she was planted in and fought this issue all through the rest of her grow.
The pH issues started surfacing around week 3….as we headed into flower of course. Scratching my head for weeks, I ultimately didn’t change anything other than really low pH feeding going in…….below 4 idea. For weeks she had 3.9 water going in and still getting 7.8 running off. I initially felt it was related to cheap fabric bags so I cut slits in the very bottom of the bags that stayed and tried transplanting other girls into plastic pots, which it can be fabric pot issues but I am not as convinced anymore for this run that there was an issue there, wasn’t sure about giving her Magnesium on top of Magnesium and therefore did I mess her up good on the inside early on in week 2 idea, out of options I changed back to RO water and that seems to have solved my issues……I was using tap water that was not filtered this run🤬 The pH was high so that was adjusted but with the ppm being at 185 to 200 range I chose not to buy a filter and just dechlorinated the water only. I was tired of lugging 5 gallon water bottles in and out of the basement😃 That is a difference from all other grows…..silly for not catching this by week 4! So…….back to lugging bottles in and out of the basement😂😂😂
She really started to take shape around weeks 7 and 8 and formed a beautiful little cannabis plant and grew to 20” tall and roughly 18” wide. Main focus with her was to just perform LST on side branches and let the top go…….I wanted to just let her go and see what would happen to her main cola for size and height……plus I don’t do that…….I always bend over the tops on my grows so this was a little different for myself.
She grew very nice leaves and a lot of them. This pheno had a lot of leaves to her and that is fine……its not really my first choice in characteristics of a plant though..…..so much more work at trim time……Green Poison XL Auto, SWS71, was a dream to trim👍 as a comparison!! She didn’t fox tail very much she firmed up her buds towards the end. The resin production was a little slower coming out in her but by week 7/8 she was getting pretty impressive😋😋😋 White and sticky!! She smelt of woods with citrus notes…..works for me👌
There were no issues at all retaliated to pests or bugs……I threw in a couple sticky traps but there weren’t any to catch. She handled the high humidity in this run great and there were no signs of any powdery mildew👍👍👍 She is a very stable strain from Sweet Seeds!
Day 63 was last feeding, flushed for almost two weeks. Rezin and Liquid Weight still given for one of the weeks but the last week was plane water. In hind-site I think I should have hit her with some Flawless Finish to help get that last bit out of her. She did feed on most of her nutrients but some of the lower leaves were still more green that I would have liked. She was cut down on day 77…..11 weeks is about what I suspect looking at her in week 7…….this was roughly 8 weeks flower time……makes sense😃
She grew for 75 days and then I decided what the heck…….she needs a hole in her stem to stress her out😃 I didn’t try breaking a branch but rather drilled a hold into the base of her stem……something new to try out. I think I will try more holes next time….max 3 I think……then I want to run a couple with cracking their stems and see if there is a difference👍 I feel more in control of a drill and its accuracy vs bending branches and they snap where they want to…….anyway it was worth a try!!!! Worst case, it made it easy to hang her as a whole plant to dry😃
This girl battled pH issues all her life and as a result the buds were not where I would have liked them. There were not fluffy…..but here were not as hard as I would like for rolling joints, so the whole girl went to concentrates She dried for 7 day as a whole plant, 2 days more in smaller branches, then 1 day curing in jars before dry ice sift. She yielded 74g of dry cured buds, 2.65 ounces. Not bad…..I don’t think her buds would have gotten a lot bigger but they certainly would have had more weight if they firmed up…..grower issue, not genetics.
So…..lets make some rosin from this girl🤩 The yields on this and making her hash a perfect colour are not what this process is about…..let’s get that out of the way right away……this is about another way to enjoy and consume my cannabis for my own relaxation and medicinal needs. Taking pictures of rosin is always a challenge…..it is always dark in the pictures unless you are using a nice DSLR to let more light in.
Rather than making bubble hash with water, I just used the bags to make a dry ice kief from the buds. Unfortunately I couldn’t get a block of dry ice and had to use these cubes…….don’t like these as much because there are too many surfaces beating your green plant material and your kief goes green before long when shaking. Could have done it with out ice all together…..nicer hash but lots left on the plant afterwards that way so yield is low. Used two bags in this extraction, the 220 as the bag for edibles and the 120 as the bag for pressing rosin to smoke…..dry ice hash rosin!! The yield on this from the 74g of bud was 22.4g kief. 220 bag was 12.6g and the 120 bag was 9.8g. Not great I guess but I didn’t want to keep going for 4 and 5 minutes with the bags…..these were roughly 2 minutes with the 220 being 3 minutes on the high side. You can certainly see that the 120 product is more golden in colour than the 220 but since I didn’t crazy, the 220 is still a very nice colour.
Last step on this journey was then to take the kief and make our rosin. I pressed product using 37um bags with the temp set at 160 degrees. All were done the same for the most part……roughly 4 gram presses, the same temperature, and the time. The first presses were 90 to 120 seconds. If a second press was done on the pouch, then it was at the same temp but for only 40 to 50 seconds. The yield on this was just shy of 7 grams…….6.77g…..roughly 30% yield from Kief???,…..roughly 9.2% from flower???…….would have likely done better right from flower😂 😂 😂 it was fun, regardless of the yield😃 Tasty rosin!!!! Can’t beat rosin for getting the true tastes of the plants. These numbers are absolutely due to my abilities with extraction.......sure don’t judge the genetics based on my returns......she is a frosty plant and will give great returns!!!👍👍 Several pictures show that, I hope!!
So that will wrap up this diary for Sweet Seeds Killer Kush Auto, SWS56. Certainly give this girl some consideration if you like OG Kush and also have space concerns in your grow. She is beautiful frosty little girl with a punch. Certainly get the usual woody and citrus notes from her rosin and she has a lasting high. She helps to get get you going and willing to finally start cleaning that corner of the room you have been avoiding…….watch out though…..distractions😃……next thing you know 40 minutes go by and you are staring at a box of DVD’s wondering what happened to CD’s…….cassette tapes (the art of the “mix tape”), 8 tracks, vinyl……ALBUM COVER ART Baby!!!!!! Then its either back for another rip, or get your crap done because the next rip leads into even less work getting done😃😃
Great job as usual @Sweet_Seeds !!! Looking forward to the next one……Cream 47 photoperiod……actually, already done germination and a new diary coming👍👍…..compare a 3 gal pot to a 5 gal pot, or a fabric vs air pot, and see what my yield differences are??
Thanks for the read and greatly appreciate the comments Growmies!!!!! Love spending time on a forum for growers to help fellow growers. Much grower love and thanks again for your time, opinions, and suggestions🙏🙏🙏
Cheers!!

Likes
Comments
Share

@BasedBuds_89
Follow
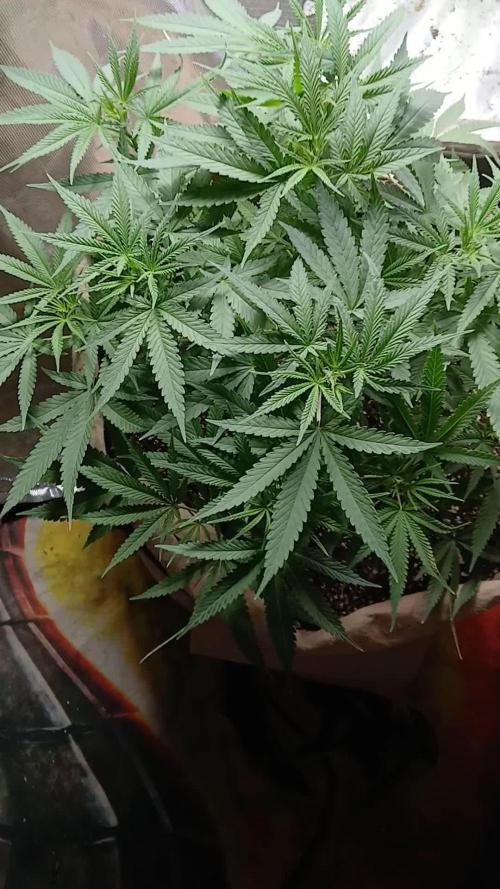
These girls are so freaking easy to grow. Very resilient. They already have a pungent skunky smell and they're color is perfect.

Likes
6
Share

@DogDoctorOfficial
Follow
🥒 Project Blue Tent – Week 7
Pickle Lemon Haze F1 – Pheno A (Folder 14A)
Hello everyone, and welcome back to another chapter of Project Blue Tent! 💙🌱
If you're discovering this diary for the first time, welcome aboard!
Project Blue Tent follows four individual plants, each documented in its own dedicated diary from seed to harvest.
All four plants share the same environment, lighting, irrigation system, nutrition and training strategy. By keeping as many variables identical as possible, we can observe something particularly interesting:
How much personality can an individual phenotype still show when everything around it remains the same?
Every plant has the same opportunity.
Every plant receives the same care.
Yet somehow...
They still manage to tell their own story.
Today we're checking in with Pickle Lemon Haze F1 – Plant A.
And this week marks a pretty important moment in her story.
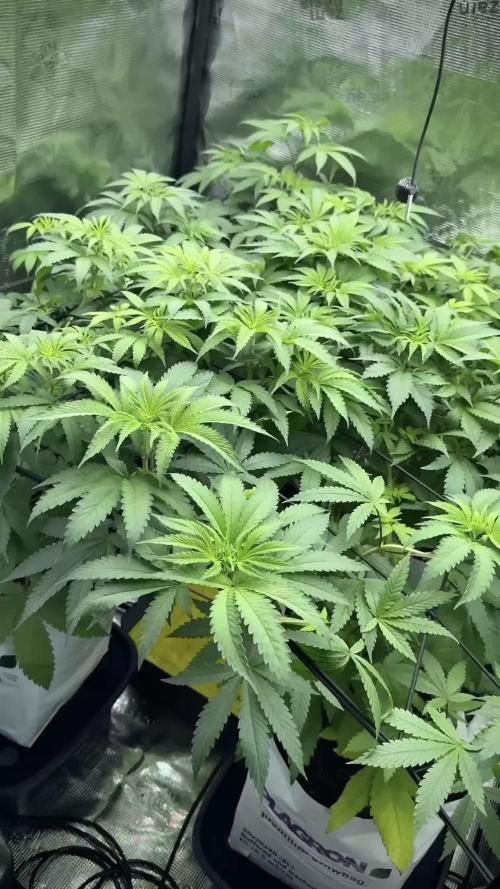
The canopy is full.
The structure is ready.
And we're preparing for the final step before flowering.
────────────────────────
🌱 Week Seven – From Building to Preparing
For the last several weeks, the entire focus has been on building the canopy.
We topped.
We trained.
We installed the SCROG.
We guided branches through the screen.
And slowly, square by square, the empty spaces disappeared.
Now the Blue Tent has reached the point where the plants have essentially done their job.
Looking from above, the canopy is remarkably even.
All four sisters are sitting at approximately 60 cm, and because the SCROG net was lowered and tightened earlier in the grow, the majority of the new growth has been directed horizontally rather than vertically.
That was the objective.
Not taller plants.
More usable canopy.
And Plant A has done an exceptional job filling her allocated space.
Her foliage is rich green, her branches are strong, and the amount of healthy growth packed into that screen is impressive.
But there comes a point where adding more foliage isn't necessarily the goal anymore.
Now we need to prepare what we've built.
────────────────────────
🕸️ The SCROG – Mission Accomplished
The SCROG has been one of the most important techniques we've used during this vegetative cycle.
For anyone unfamiliar with it, SCROG means Screen of Green.
Instead of allowing the plant to develop a few dominant vertical branches, we repeatedly guide the growing shoots underneath a horizontal screen.
As each branch moves through the screen, we can distribute the future flowering sites across a much larger area.
The result we're looking for is a relatively even canopy rather than several tall branches competing with one another.
And this isn't something that happens in one afternoon.
It's a process.
A little tuck here.
Another branch redirected there.
A few minutes of observation every day.
Eventually, the plant does most of the work itself.
This week, looking across the Blue Tent, that process has reached its goal.
The screen is effectively filled.
And that means it's time for the next stage.
────────────────────────
✂️ Defoliation – Cleaning the Canopy Before Flower
This week's main event is defoliation.
And because this technique is sometimes misunderstood, I want to explain exactly what we're doing and, perhaps more importantly, what we're not doing.
Defoliation is not simply removing leaves because we don't like seeing them.
Leaves are essential to the plant.
They're responsible for capturing light and supporting photosynthesis, so removing them unnecessarily doesn't automatically make a plant healthier.
The objective here is different.
After weeks of vigorous vegetative growth and SCROG training, the interior of the canopy has become extremely dense.
Leaves overlap.
Branches cross through one another.
Lower sections become increasingly shaded.
Air movement through the middle of the plant becomes more difficult.
And some foliage is simply contributing less to the productive upper canopy.
So we're performing a deliberate cleanup.
Removing selected leaves.
Opening congested areas.
Improving visibility.
Creating more space between branches.
And preparing the structure for the very different demands of flowering.
The goal isn't:
"Remove as many leaves as possible."
The goal is:
"Remove what isn't helping the structure we're trying to build."
────────────────────────
🌬️ Why Defoliate Now?
The timing is just as important as the technique.
A significant defoliation is a form of stress.
Even a perfectly healthy plant needs time to respond after losing a meaningful amount of foliage.
That's why we're doing this while the plants are still in vegetative growth rather than waiting until we're well into flowering.
Right now they're running 18/6.
They're actively growing.
They're not yet trying to produce flowers.
So if the plants need a little time to rebuild their balance after the cleanup, we have that time.
The sequence we're following is very intentional:
Build the plant.
Fill the screen.
Clean the canopy.
Allow recovery.
Then flip.
I would much rather have the plants enter flowering already recovered from this work than perform a major cleanup while they're simultaneously dealing with the transition into flower.
Once the lights are flipped, the priorities change.
The plant will begin redirecting its energy toward reproductive growth, and I want that transition to happen with a clean, well-organised canopy rather than asking her to recover from major training at the same time.
────────────────────────
🧠 Defoliation Isn't a Magic Trick
Another thing worth mentioning is that defoliation isn't some magical technique that automatically produces bigger flowers.
It's a canopy-management tool.
We're trying to improve the relationship between:
🌱 Growing sites
💡 Light distribution
🌬️ Air movement
🍃 Leaf density
? Plant structure
The upper canopy is already receiving strong light.
The problem we're addressing is congestion.
When four vigorous plants share a 100 × 100 × 200 cm space, the interior can become incredibly dense.
By selectively removing some unnecessary foliage, we're opening pathways through that structure.
Better airflow.
Better visibility.
Less congestion.
And a cleaner starting point for flowering.
It's about managing the environment that exists inside the canopy, not simply making the plants look prettier.
Although...
I have to admit...
They do look pretty spectacular after the cleanup. 😂💙
────────────────────────
🌿 Pickle Lemon Haze F1 – Plant A
And now, back to our girl.
Plant A continues to be exactly the phenotype I thought she might become when she first started showing her personality.
Vigorous.
Responsive.
Confident.
She has consistently been one of the most energetic plants in the Blue Tent.
Every time we've given her something to work with, she's responded with more growth.
Topping?
She recovered beautifully.
SCROG?
She filled it.
Daily training?
She simply kept producing new shoots.
Her internodal spacing remains nicely compact, her stems have thickened substantially, and the foliage has developed that rich green colour we've been looking for.
The most impressive part is probably how much growth she's managed to produce while still maintaining a very manageable structure.
She's not simply growing wildly.
She's growing usefully.
And that's exactly what we want at this stage.
────────────────────────
🥥 Feeding – No Changes Yet
The nutrition remains completely unchanged.
And honestly...
Why change something that is working?
Current feeding:
• Plagron Hydro A — 1.9 ml/L
• Plagron Hydro B — 1.9 ml/L
• Plagron Hydro Roots — 1 ml/L
Current EC:
1.92 mS/cm
pH:
5.8
The plants are showing excellent colour and vigorous growth, so I'm not interested in increasing the nutrient strength simply because we're approaching flowering.
Instead, we'll watch their response to this week's defoliation.
If they continue consuming aggressively and maintaining that healthy green colour, we may increase the nutrition next week as flowering begins.
But for now...
The plants are happy.
And happy plants don't need unnecessary changes.
────────────────────────
💧 The Drip Irrigation Continues to Impress
The Mars Hydro automatic drip irrigation and drainage system has also become one of those pieces of equipment that quietly proves its value every day.
Each plant is receiving approximately 1.2 litres of nutrient solution per 24 hours, delivered through the individual drip system.
The solution passes through the coco and the resulting runoff is automatically collected and removed.
That consistency is particularly useful in a project like this.
We're trying to keep four plants under almost identical conditions.
Manual watering can certainly work, but maintaining exactly the same routine every day becomes increasingly difficult as plants get larger and more demanding.
The automated system removes much of that variation.
The roots receive a consistent supply.
The plants receive the same routine.
And I get to spend less time carrying water...
And more time observing the plants.
That's a pretty good exchange in my book. 😄
────────────────────────
🌡️ Blue Tent Environment
The environment has remained very stable as we approach the transition into flowering.
This week's average conditions were:
• 🌡️ Day Temperature: 28°C
• 🌙 Night Temperature: 25°C
• 💧 Relative Humidity: 65%
• 🥥 Substrate Temperature: 24°C
• 💦 Nutrient Solution: 18°C
• ⚗️ pH: 5.8
• ⚡ EC: 1.92 mS/cm
• 💨 CO₂: approximately 450 ppm
• 💡 Light Schedule: 18/6
• 💧 Irrigation: approximately 1.2 L/plant/24h
• ? Pot Size: 8 L
• 📏 Plant Height: approximately 60 cm
At this point, maintaining consistency is more important than constantly chasing numbers.
The plants are growing beautifully.
The canopy is healthy.
The irrigation is performing reliably.
And the nutrition is producing exactly the response we're looking for.
So for now...
We observe.
────────────────────────
🌿 Four Plants Starting to Look Like One
One of my favourite things about this stage of Project Blue Tent is looking at the tent from above.
It's becoming genuinely difficult to tell the four plants apart.
The canopy is so even that the individual plants almost disappear into one continuous sea of green.
And that's actually a fantastic result from the SCROG.
We started with four individual plants.
Different branches.
Different growth patterns.
Different personalities.
Now we've shaped them into one remarkably uniform canopy.
But underneath that uniformity, the individual characteristics are still there.
And that's what makes documenting them separately so interesting.
Plant A still has her particular way of growing.
She's still one of the most vigorous.
She's still incredibly responsive to training.
And she's still quietly trying to occupy every available centimetre of space.
────────────────────────
🌬️ Cleaning for the Next Chapter
Once the defoliation is complete, the room should immediately feel different.
More open.
More breathable.
Less congested.
And that is exactly what we're looking for before the flip.
We're not trying to make the plants small.
We're not trying to weaken them.
We're simply creating a cleaner structure from which the flowering cycle can begin.
The canopy has been built.
Now we're refining it.
Then comes recovery.
And after that...
Flower. 🌸
────────────────────────
👀 Looking Ahead
This is one of those weeks where the best thing we can do after the work is simply give the plants some peace.
We've spent weeks manipulating their structure.
Now they need time to respond.
I'll be watching the new growth closely, keeping the environment stable and monitoring how quickly they recover.
The nutrient recipe may increase next week depending on what the plants tell us.
The irrigation will continue doing its job.
And if everything looks as good as it does now...
We'll be ready to flip the Blue Tent into flowering.
The SCROG is full.
The canopy is organised.
The plants are healthy.
The cleanup is done.
Now we let them recover.
Then...
we turn the page.
────────────────────────
💙 Thank You
A huge thank you to Zamnesia for making Project Blue Tent possible and for providing these fantastic Pickle Lemon Haze F1 genetics.
A heartfelt thank you to Plagron for the Premium Growbags and Hydro nutrient line that continue supporting this beautiful vegetative growth.
A special thank you to Phytonaut for the LED lighting helping us maintain such a consistent and beautifully structured canopy throughout the tent.
And a massive thank you to Mars Hydro for the automatic drip irrigation and drainage system, which continues making consistent irrigation so much easier.
Thank you to GrowDiaries for providing a place where growers from all over the world can document their journeys, share knowledge and learn from one another.
And finally...
Thank you to everyone following Project Blue Tent.
Whether you've been here since the beginning, just discovered this diary, leave comments every week or simply enjoy watching these plants develop...
I genuinely appreciate you being here. 💙
Four sisters.
One environment.
One experiment.
And four very different little personalities hiding underneath an increasingly uniform canopy.
For Plant A, this week is about finishing what we started.
The canopy is built.
The cleanup is complete.
Now she gets to recover.
And very soon...
🌸 Flowering begins.
Until next time...
Growers Love, happy growing, and take care everyone! 🌱💙


Likes
3
Share

@Organic473
Follow
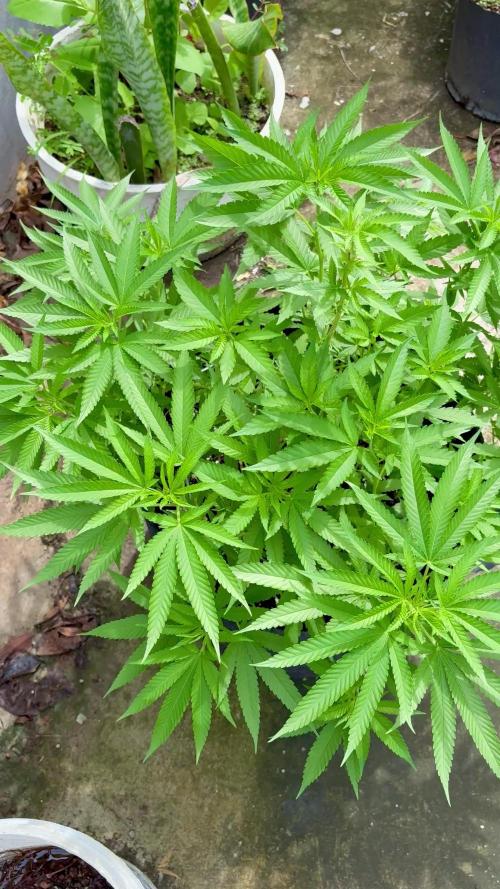
This is my longest veg time with this strain…I’m truly surprise after 3 months her height is so stunted…I may veg her out for another 2 months.

Likes
4
Share

@fadedgreentaurus
Follow
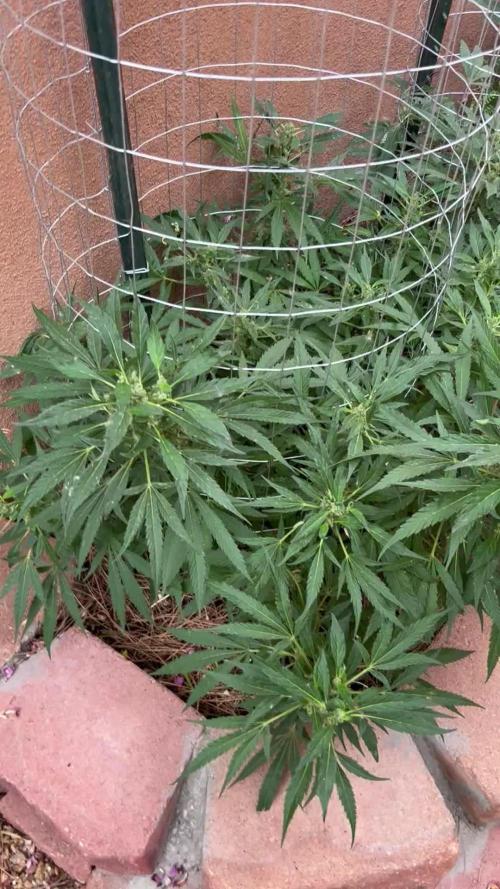
This next week should be the bounce back out of the stunt I have really been waiting for. Went with a heavy decomposing top dress instead of the teas I been brewing. Might add more castings other then that I introduced slow burning phosphorus and potassium to start breaking down into July August so it will be available to the plants then.
Will add the seed list for new cover crop soon.
Seed mix:
California Bluebells
Plains Coreopsis
Cherry Belle Radish
Cosmos Blend
Royal Carpet Alyssum
Sweet Genovese Basil
Common Chives
Slow Bolting Cilantro
Bouquet Herb Dill
Summer Savory
Sweet Majoram
Blue Borage
Parsley
Broad Leaved Sage Herb
Italian Oregano
German Thyme
Rosemary
Siberian Wallflower
China Aster Mix
Purple Coneflower
Chinese Forget-Me-Not
Lanceleaf Coreopsis
Indian Blanket
Mixed Corn Poppy
Blue Flax
Sweet Mignonette
Lacy Phacelia
Clasping Coneflower
Black-Eyed Susan
Mexican Hat
New England Aster
Bergamot
Crimson Clover
White Clover
Medium Red Clover
Yellow Blossom Sweet Clover
Hairy Vetch
Common Vetch
Flax
Fenugreek
Forage Pea
Buckwheat
Cow Peas
Millet
Lentil
Chia
Marigold
Hyssop
Lavender
Catnip
Lemon Grass
I put such a diverse blend knowing sum will win out I also need a dense buffer to accommodate any buffer nutrient and allow me also to continuously increase diversity. Included a lot pest deterrent as well as beneficial insect attracting seeds to this mix.
Lots of lst preparing the final canopy.
Going so see how it grows out from here then decide how I am going about the trellis.
Likes
19
Share


@Adam420
Follow
She drinks 6+ gallons almost daily no problem.
Every other day is nutrients with the other day just water.
Last week before flowering as I can see lower branches showing thc

Likes
13
Share


@SillyTrippyHippy
Follow
I did a top dressing, everything seems to be going pretty well they are looking Frosty.
Im debating on increasing the PhotonTek 600w pro to 75% what do yall think its in a 4x4 tent. I don't have a PPFD METER nor can I find PPFD charts for this light in a 4x4 space so I'm just winging it atm.
