


Likes
Comments
Share


@Archieballs
Follow
All 3 are nearing harvest. They are on nothing but ph water and the fade is getting amazing!! Daiquiri will be the first to harvest as her trichomes are nearly all cloudy. Daiquiri’s buds aren’t nearly as big as thee other two but she is the stickiest!!! Mazar has super dense nuts!! Ultimates nugs are gorgeous, dense sticky on the buds and amazing colas!!



Likes
24
Share


@Wicked_Stix
Follow
We are at 21 days from these girls breaking the surface and they are making progress. I noticed at the beginning of the week that they were a little overdosed on nitrogen so I added 2 gallons of tap water to the reservoir and adjusted the ph to 6. They are still looking a little heavy on N but their growth rate is going great so I think it should balance out by the end of next week. I dont plan on doing a water change until I flower them. I left the plants alone most of the week. Tied most of them down to spread them out and defoliated a few lower leaves on day 20. The branches on most of these plants are thick and solid already. They don't budge easily. Bananasicle is looking pretty funky with uneven branch and node growth but we are just going to push forward. Still pumping nutrients and beaming light 24 hours a day. I'm thinking day 28 we will switch them to flower and see if any of these ladies can bring some❄️🔥💨


Likes
9
Share


@NotoriouslyAnonymous
Follow
Girls are doing great! Tent is very stinky inside. Started watering with 6 gallons now. So 1 gallon per plant with full strength nutes. They seem to want water about every other day. Temps have gone up a little. I had to install a dehumidifier. Also added a large metal 20" fan to counteract the heat from dehumidifier. Averaging around 88 f and 50%RH. About the best I can do without getting an A/C unit.
I'm pulling out dead leaves under the bottoms. Still tucking in fan leaves daily to expose buds to maximum light. The buds are getting very sticky and frosty. Had to break out the box of rubber gloves. Or else have sticky fingers with a lingering odor of fantastic. This grow has been fun and looks like a decent possible yield for a noobie. These pics are day 28 and 29 of flowering.

Likes
2
Share


@GueedoWeedo
Follow
She has smell like a lemons but buds arent compact...great bag seed NO hermie
Likes
10
Share


@Kirsten
Follow
💚 ORION LIQUID NUTRIENTS 💜
This is a clear example of me absolutely underestimating the nutrient need when using only liquid nutrients.
The plant, as a result, has really not grown as this in comparison with the 💚ORION F1 ORGANIC DRY AMENDMENTS* 💚 Which has been topped and grown 3 times the size of this one!
I topped this plant on the 20.6.25.
Here is what I fed this week:
19.6.25:
I watered with 2L of dechlorinated water PH'd to 6.1 and containing the following nutrients per 2 litres;
♡ 1/3 Cal-Mag
♡ 1/3 Mega Crop Part B
♡ 1/3 Tsp Mega Crop Part A by Greenleaf Nutrients
PH: 6.1
PPM: 891
26.6.25
I gave 2ltrs of dechlorinated water PH'd to 6.6 with the following nutrients per 2ltrs;
♡ 2 ml Ecothrive Trace
♡ 1 Tsp Ecothrive Biosys
PPM: 811
PH: 6.6
Thanks for stopping by this week 💚✌️🍃😊🌱

Likes
5
Share


@MindFlowers68
Follow
Got a little hot outside this week again and temps in the tents reached a high of 92. They hovered around 85-88 most of the time, and nighttime temps around 75. The plants have been loving the tropical like environments, and in fact showing less signs of stress now they are in warmer temps. I got my magnesium dialed back in with a few applications of Epsom Salt. The pants drank twice as normal this week. I also gave them a feeding with my fermented fruit juice I made and they seem to be loving it. I got a new bottle of cal-mag and does not seem to be as acidic, so i can add a little more than I was without it ruining my ph. It too about 15ml per gallon of the FFJ to Ph my water down form 7.8 to 6.5. I tested it before use and its PH is around 2.5. Between the Epsom salt, FFJ, and kelp. The plants are really starting to bounce back from their slight unhappiness. They are all looking near 100 percent health. At the end of the week they are are raging and praying to the light like theirs no tomorrow. Glowing vibrant lush green, the buds are also already a decent size for only being week 2. The plants and in much need of some defoliation but I will wait one more week after stretch to get that taken care of. The dehumidifier running during night cycle has been keeping things in check. The clones rooted and I potted them up to 1 gallon so I now have small moms. I got new worms and my worm bins cleaned out and set up again. Each of the 65 gallon pots got a small ball of worms added to the top soil to get the worm populations growing in them again. I was hoping those casting I added a few weeks ago with added worm eggs would hatch some but no luck so i just got some from Uncle Jim's worm farm.

Likes
14
Share


@Weedbadk
Follow
Día 1 y todas geminaron vamos a usar lst a todas y algunas lst y poda apical
Día 5 desde puesta en sustrato
Solo pulverizó
Likes
5
Share


@MG2009
Follow
03/15/2021
Reppoting of GSC done
I used Bonide(4-10-3) Root&Grow with iba! to lessen shock of transplant and heavy defoliating.
Flipping to 12-12 today (the first clones will be for outdoors) made before and after videos of defoliation, and reppot.
Blue Dream is cruising along nicely with a little LST bending of branches & stems,so all in all not a bad week..
Likes
116
Share


@GMSgrows
Follow
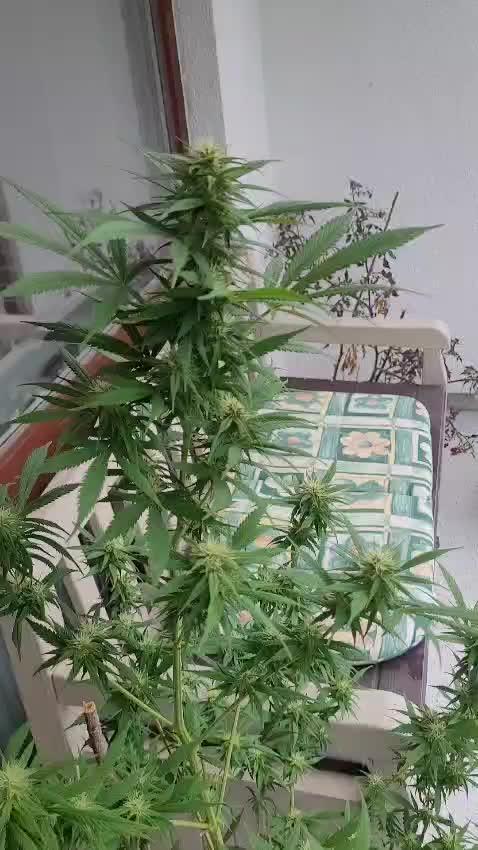
Girls will get a feed of 400 ppm 0.8 ec of Massive Bloom Formulation, 600 ppm 1.2 ec of Flora Nova Bloom, and 200 ppm 0.4 ec of Floranova grow for a grand total of 1200 ppm 2.4 ec.
Girls are stacking, node spacing is close. Smell is amazing and she is a very healthy big bush.😍




Likes
11
Share


@Emperor
Follow
Growing like they should grow. Started with plagron alga grow. And weekly fish force.
Waiting with topping till next week.


Likes
8
Share


@SkunkyDog420
Follow
Hallo zusammen 🤙.
Sie wächst sehr schön und macht keine Probleme.
Rabattcode für den BIOTABS-Webshop https://biotabs.nl/en/shop/ GDBT420, damit erhalten Sie 15 Prozent

Likes
12
Share


@rickhaZe
Follow
Dia 32: agregamos mas sustrato a cada planta y realizamos poda de hojas bajas y nudos mas desfavorable
Dia 35: agregamos la primera dosis de blossom blaster pro.
6 ml en 6 litro de agua, aplicamos 500ml a cada planta.
Dia 37: aplicamos 500ml de agua por planta.
Dia 38: sesión de fotos a todos los ejemplares de este cultivo y rotación de las plantas dentro de la carpa, todos los dias hago estos movimientos para que todas capten la misma luminosidad y el sustrato se seque mas parejo.
Dia 39: aplicaremos monster bloom en el cultivo, la solución será de 1.8g (ya que es en polvo) en 6 litros de agua

Likes
4
Share

@Ensign420
Follow
|»» LOG DISCLAIMER: Not intended as a grow guide. Grow log entries are usually posted 3 weeks later and are for my learning reference. ««|
Introduction - Week 26 Summary -
Ensign's log, stardate 17608.3,
Wow what a week!
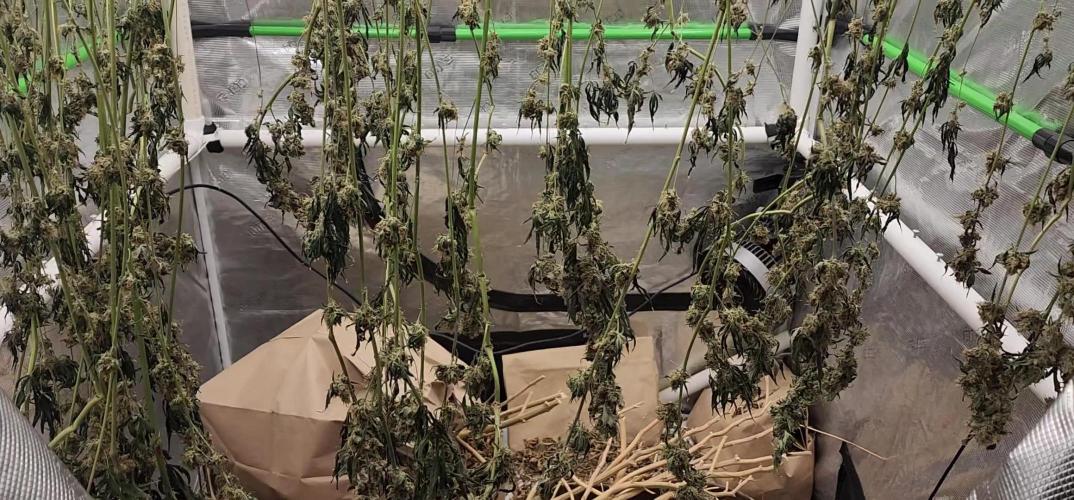
Drying is always pretty simple and been checking daily. Buds are drying nicely and terps are smelling pretty dank!!
Most of the week has been in the veg tent with tissue culture! Mixed another batch of establishment media and took proper explant cuttings. Also super-cropped the mothers to even out the canopy.
Ahh yea! Getting hyped for trim day next week!
Next week will also be the last week for this grow log, but am already planning out the next cycle.
Anyways! Onwards to next week!
[START OF WEEK 26]
==========================================================
---------- [ 4x4 MAIN TENT ] ----------
Heady OG BX1 #1 [Round4 ~Wk19] - WEEK 26 - Dry Wk1
----------- [ 3x3 VEG TENT ] ------------
TKO - WEEK 09 - Full Veg
Gorilla Goat #1 - WEEK 05 - Full Veg
Heady OG BX1 - WEEK 09 - Full Veg
Garlic Budder OG#1 - WEEK 05 - Full Veg
10/13/25 → 10/19/25
This Week's Estimated Goals
----------------------------------------------------------------------------------------------
DLI: ~0 mol/m²/d
PPFD: ~0 μmol/m²/s
VPD: ~1.5 kPa
This Week's Meter Readings & Averages
----------------------------------------------------------------------------------------------
Light On/Off: 00:00 - 00:00 | Wattage: ~000.0W [LV00]
Distance From Canopy: ~00”
DLI: ~0.00 mol/m²/d
PPFD: ~0 μmol/m²/s
VPD: ~1.17 kPa
Soil %: [47.4, 34.1, 35.0, 55.7, 43.7, 43.6, 44.0, 43.3]
==========================================================
Day 01 - Monday - 10/13/25 - Total Days: 183
-----------------------------------
Daily Averages ~[+01:00]
- Temps: 78.8°F [26.0°C]
- Humidity: 64.4%
- VPD: 1.19 kPa
- Soil %: [49, 34, 35, 57, 44, 44, 44, 42]
-----------------------------------
- [22:05]: Night check on the 4x4 tent.
--- Ca-Caw!! Looking great!
--- Heady OG BX1 #1 is drying along and no signs of mold. Also airflow and RH is stable and within the 60-70% range.
--- Getting stoked! Trim day is 9 days away!
- [22:09]: Checked the Ecowitt soil moisture sensor data:
------------------ [ 4x4 MAIN TENT ] ---------------
------ 48% - [CH01 FT » G30 - Heady OG BX1 #1]
------ 35% - [CH02 FB » G30 - Heady OG BX1 #1]
------ 35% - [CH03 BT » G20 - TKO]
------ 56% - [CH04 BB » G20 - TKO]
------------------ [ 3x3 VEG TENT ] ----------------
------ 46% - [CH05 BL » GR7 - TKO]
------ 40% - [CH06 BR » GR7 - Gorilla Goat #1]
------ 40% - [CH07 FL » GR7 - Heady OG BX1 #1]
------ 40% - [CH08 FR » GR7 - Garlic Budder OG#1]
--------- Veg: 38% - 45% | Flower: 45% - 55%
--------- General: 30% [Dry] «| 45 - 60% [Moist] |» 70% [Wet]
- [22:18]: Checked the 3x3 veg tent.
--- Looking healthy in the veg garden!
--- All of the vegging mothers are looking great and the canopy is starting to even out.
--- Also clones look healthy and no need to water yet.
--- The stems, err, I mean, explants, don’t show any signs of contamination.
--- Staying positive, glad the growth media is sterile and the overall procedure was successful.
--- Anyways! Plan to create more establishment media and cut proper explants soon!
- [22:21]: Checked the humidifiers.
--- Tanks are still full and no leaks found.
Day 02 - Tuesday - 10/14/25 - Total Days: 184
-----------------------------------
Daily Averages ~[+01:00]
- Temps: 76.9°F [24.9°C]
- Humidity: 64.8%
- VPD: 1.11 kPa
- Soil %: [46, 34, 35, 56, 43, 43, 44, 43]
-----------------------------------
- [21:44]: Night check on the 4x4 tent.
--- Looking good in the dry tent!
--- Heady OG is drying along and humidity levels look great!
--- Nothing to do but maintain and wait to trim in 8 days!
- [21:55]: Checked the Ecowitt soil moisture sensor data:
------------------ [ 4x4 MAIN TENT ] ---------------
------ 45% - [CH01 FT » G30 - Heady OG BX1 #1]
------ 34% - [CH02 FB » G30 - Heady OG BX1 #1]
------ 35% - [CH03 BT » G20 - TKO]
------ 56% - [CH04 BB » G20 - TKO]
------------------ [ 3x3 VEG TENT ] ----------------
------ 41% - [CH05 BL » GR7 - TKO]
------ 40% - [CH06 BR » GR7 - Gorilla Goat #1]
------ 47% - [CH07 FL » GR7 - Heady OG BX1 #1]
------ 46% - [CH08 FR » GR7 - Garlic Budder OG#1]
--------- Veg: 38% - 45% | Flower: 45% - 55%
--------- General: 30% [Dry] «| 45 - 60% [Moist] |» 70% [Wet]
- [21:59]: Checked the 3x3 veg tent.
--- Looking healthy and growth is raging!
--- All mothers are looking beautiful!
--- Clones are getting taller and looking healthy!
--- Gorilla Goat #2 needs watering. Let’s go Ensign!
- [22:03]: Here is the starting initial watering range:
------ Gorilla Goat #2 » 255.4g → 300.3g and was last watered 4 days ago.
--------- General Solo Range: [Dry] «| [Initial Cup Weight] + ~55-100g |» [Wet]
--- Took the starting weight before watering,
------ Gorilla Goat #2 » 230.8g
--- While on a scale,
--- Gently misted her straw mulch with RO water.
--- Tried to keep the top growth dry.
--- Misted 5-10 sprays. Waited a few seconds, then misted again.
--- Made sure to reference the watering weights.
--- Repeated this process until the cup weighted at least 300g.
--- There was no runoff.
- [22:23]: Took the saturated weight after watering,
------ Gorilla Goat #2 » 345.7g
--- Marked the watering date on the side of the cup. Also marked the saturated weight on the back.
--- Placed her back into the tent.
--- Decided to train and super-crop both clones.
--- Bent the taller branches to lower the canopy.
- [22:38]: Checked the humidifiers.
--- Tanks are still full and no leaks found.
--- Onwards Ensign!
Day 03 - Wednesday - 10/15/25 - Total Days: 185
-----------------------------------
Daily Averages ~[+01:00]
- Temps: 75.6°F [24.2°C]
- Humidity: 63.8%
- VPD: 1.09 kPa
- Soil %: [48, 34, 35, 56, 44, 43, 44, 42]
-----------------------------------
- [+01:33]: Quick night check on the 4x4 tent.
--- Looking great in the dry tent!
--- Also starting to smell dank!
--- 7 more days until the big trim!
- [+01:37]: Checked the 3x3 veg tent.
--- Veg garden is healthy and growth is green!
--- Both the Heady OG BX1 #1 and TKO mothers will need another topping soon.
--- Clones in the propagation tray also look great and no need to water.
--- The explant media is still looking sterile with no signs of contamination.
--- Easy night in the garden. Nice!
- [+01:40]: Checked the humidifiers.
--- Tanks are still full and no leaks found.
--- Okay! Tomorrow plan to dive back into tissue culture and prep more growth media.
--- Onwards Ensign!
Day 04 - Thursday - 10/16/25 - Total Days: 186
-----------------------------------
Daily Averages ~[+01:00]
- Temps: 74.6°F [23.7°C]
- Humidity: 62.2%
- VPD: 1.11 kPa
- Soil %: [46, 34, 35, 56, 43, 44, 44, 45]
-----------------------------------
- [11:41]: Alright! Back to tissue culture and time to start another batch of establishment media!
--- Took the plant growth regulators out of cold-storage (my fridge).
------ [ » SMOKES A BOWL « ]
--- While the products warmed up, gathered the necessary supplies and setup my workstations.
--- Currently, focusing on:
------ PHASE 01 » ESTABLISHMENT
--------- » DAY 01 » MEDIA - PART 01 - Mixing the growth media
--------- » DAY 01 » MEDIA - PART 02 - Sterilization of media and tools [via autoclaving]
--- Going to use the same establishment formula, but doubling the yield.
--- Also using RO water instead of distilled water.
--- Here's the establishment media formula:
--- [» VER.0001 |» INITIAL TROPICAL PLANTS FORMULA |» 0.5L (500mL) RO WATER «]
------ MS [Muashige & Skoog]
--------- » 2.22g
------ Sucrose [Cane Sugar]
--------- » 15g
------ BAP [6-Benzlaminopurine | Cytokinin]
--------- » 0.5mg » 0.5mL » 500μL
------ IBA [Indole-3-Butyric Acid | Auxin]
--------- » 0.05mg » 0.05mL » 50μL
------ AGAR [Jelling Agent]
--------- » 3.5g
------ PH [Potential Hydrogen]
--------- » 5.7
--- [» 1mg/mL CONCENTRATION ratio | 1mg = 1mL | 1mL = 1000μL «]
- [12:59]: Time to prep the growth media!
--- Made sure to turn OFF the lung-room's oscillating fan.
--- Filled a measuring cup with 400mL of RO water.
--- Dropped a clean magnetic mixing bar into the measuring cup.
- [13:05]: Placed the measuring cup on the magnetic stirrer.
--- Turned the unit ON and have the unit on LOW.
- [13:11]: Using a precision scale (sensitive to 0.01g) along with a micro-pipette (1000μL capacity along with tips) and disposable (100mL) weigh boats,
------ Added 2.22g of MS [Muashige & Skoog]
------ Added 15g of Sucrose [Cane Sugar]
------ Added 500μL of BAP [6-Benzlaminopurine | Cytokinin]
------ Added 50μL of IBA [Indole-3-Butyric Acid | Auxin]
------ Added 3.5g of AGAR [Jelling Agent]
------ Then filled the measuring cup to the 500mL line before covering the top with plastic wrap.
--- Alright!
- [13:46]: Let the media mix on the magnetic stirrer for a bit.
--- Have the unit set to LOW with a steady vortex.
------ [ » ~20 MINUTES LATER « ]
- [14:09]: Okay! Time to pH the establishment media!
--- Gently removed the bottom cap of the AC Infinity PH Meter PRO [AC-PHM7]. Placed the cap in the storage case for later. Covered the top with plastic wrap (KCL solution still inside the cap).
--- Swirled the probe in a cup of RO water to rinse off the storage solution.
--- Shook the excess water out and wiped the unit with a clean paper towel making sure all mineral buildup was removed (kept away from the very tip of the probe).
--- Temporarily placed the meter back into the cup of RO water.
--- Removed the plastic wrap of the establishment media.
- [14:13]: Using the AC Infinity PH Meter PRO [AC-PHM7],
--- Took the establishment media's initial pH reading.
--- The pH was at 5.14
--- Using the micro pipette,
------ Added pH Up solution.
--- Made sure to let the media solution mix for a bit before checking for pH readings.
- [14:21]: Adjusted the media's pH until it stabilized to 5.58
--- For this batch, tried to go for a range of 5.4 to 5.8 pH.
--- Also glad that I did not need to add PH down.
- [14:43]: Poured the pH'd establishment media into separate polypropylene containers.
--- Made sure to re-mix the media solution between container fillings.
--- Ended up splitting the media solution into 12 containers.
------ 8x » 125mL Polypropylene Bottles [with screw cap lids]
------ 4x » 236mL (0.5pt) Glass Mason Jars [with polypropylene jamming lids]
--- Have the lids of all vessels loosely on and set each aside for later autoclaving.
--- Also filled 12 empty polypropylene bottles with RO water and placed the lids on loosely (4 bottles are re-used).
- [14:58]: Prepped the tools for sterilization.
--- Took a new 5.25in x 10in sterilization pouch and added the following tools:
------ 3x stainless steel forceps
------ 3x stainless steel scissors
--- Before placing into the pouch, wiped each tool with a paper towel sprayed with 70% isopropyl alcohol.
--- Sealed the bag and marked the date.
--- Time to autoclave everything in the pressure cooker!
--- Filled a Presto 23qt-Pressure Cooker with 12 cups of RO water.
- [15:06]: Added a few aluminum foil balls to the bottom of the pressure cooker.
--- Placed the first rack on top of the foil.
--- Made sure the rack was level and stable resting above the water.
--- Gently placed the containers of media into the pressure cooker and onto the first rack. Lids are still loose.
--- Made sure to give space for each container and kept them away from the sides of the pressure cooker.
--- Placed a second pressure cooker rack on top of the containers of media.
--- Placed the containers of RO water onto the second rack. Lids are still loose.
--- Placed the third rack on top of the containers of water.
- [15:16]: Lastly, placed the sterilization bag of tools on top of the third rack.
--- Took the pressure cooker lid and made sure the release vent was clear of debris before placing it on.
--- Sealed and secured the lid.
--- Pressure vessel has been sealed!
--- Alright! Time to sterilize!
--- While keeping the vessel level and straight up, moved the sealed pressure cooker to the kitchen for heating.
- [15:23]: Placed the pressure cooker onto a butane-gas stove.
--- Turned the stove ON and set it to HIGH.
------ [ » ~20 MINUTES LATER « ]
--- Once steam was venting out of the release vent,
--- Placed the metal rocker onto the vent.
--- Shortly afterwards, the pressure top-lock sprung up to indicate the vessel was under pressure.
--- Then the pressure gauge started to rise.
------ [ » ~10 MINUTES LATER « ]
--- At 15psi, the metal rocker started to rock!
- [15:56]: Turned down the stove down to LOW.
--- Set a timer for 15 minutes and began monitoring the pressure gauge.
--- Maintained the 15psi by making minor adjustments to the stove.
------ [ » ~15 MINUTES LATER « ]
- [16:12]: Turned the stove completely OFF and waited until the pressure cooker's top-lock dropped down which indicated that pressure levels were safe to open.
------ [ » ~40 MINUTES LATER « ]
--- Once the pressure cooker was at safe levels (0psi) and the top-lock was down,
- [16:48]: Moved the pressure cooker into the lung room.
--- The pressure cooker was still quite hot so was careful to keep the vessel straight up and level during transport.
--- Used towels for insulation.
--- Rested the hot pressure cooker onto a stack of 5-gallon buckets covered with layers of towels and folded paper bags.
--- Gently opened the pressure cooker and set the lid aside.
- [16:57]: While wearing nylon gloves, sprayed my hands with 70% isopropyl alcohol.
--- Gently removed the bag of sterile tools placed it onto a Pyrex dish.
--- Removed the top rack and set it aside.
--- Then one container at a time,
--- Gently tightened and secured the lids of each bottle of sterile water before placing onto the Pyrex dish.
--- Removed the middle rack and set it aside.
--- Then one container at a time,
--- Gently tightened and secured the lids of each bottle and jar of sterile media before placing onto the Pyrex dish.
--- Throughout the entire process, kept the gloves on and sprayed my hands regularly with 70% isopropyl alcohol.
--- Decided to store all the bottles in the Pyrex dish.
- [17:16]: Have the dish resting on a shelf in the lung room. The jars of media are set right next to the Pyrex dish on a towel.
--- To prevent dust, covered everything with towels.
--- Done for now and will check on the growth media tomorrow.
--- If all goes well, should be taking new explant cuttings in a couple days!
- [17:39]: Night check on the 3x3 veg tent.
--- Looking beautiful and healthy in the veg garden!
--- All moms are getting bushy and getting pretty close to the grow light.
--- Since I plan to take explant cuttings soon, not going to top or train quite yet.
--- Clones also looking healthy and seem unaffected by the super-cropping. Nice!
- [17:57]: Checked the Ecowitt soil moisture sensor data:
------------------ [ 4x4 MAIN TENT ] ---------------
------ 45% - [CH01 FT » G30 - Heady OG BX1 #1]
------ 34% - [CH02 FB » G30 - Heady OG BX1 #1]
------ 35% - [CH03 BT » G20 - TKO]
------ 55% - [CH04 BB » G20 - TKO]
------------------ [ 3x3 VEG TENT ] ----------------
------ 43% - [CH05 BL » GR7 - TKO]
------ 45% - [CH06 BR » GR7 - Gorilla Goat #1]
------ 42% - [CH07 FL » GR7 - Heady OG BX1 #1]
------ 44% - [CH08 FR » GR7 - Garlic Budder OG#1]
--------- Veg: 38% - 45% | Flower: 45% - 55%
--------- General: 30% [Dry] «| 45 - 60% [Moist] |» 70% [Wet]
- [17:59]: Checked the 4x4 main tent.
--- Ca-Caw!! I got Headies!
--- Wow! Heady OG BX1 #1 is drying along beautifully and she is smelling dank!
--- Also no signs of mold and RH levels look stable!
--- 6 more days until the big trim!
- [18:11]: Checked the humidifiers.
--- Tanks are still full and no leaks found.
--- Wow what a day!
--- Still gots more to do!
--- Let’s go! Let’s grow!
--- Onwards Ensign!
Day 05 - Friday - 10/17/25 - Total Days: 187
-----------------------------------
Daily Averages ~[+01:00]
- Temps: 76.0°F [24.4°C]
- Humidity: 62.0%
- VPD: 1.16 kPa
- Soil %: [48, 34, 35, 55, 44, 44, 44, 42]
-----------------------------------
- [22:57]: Night check on the 4x4 tent.
--- Ca-Caw! Headies is smelling dank!
--- RH levels are getting a bit dry, but are okay.
--- Wow buds are frosty with trichomes!
--- With 5 days until trim day, getting stoked!
- [23:04]: Checked the Ecowitt soil moisture sensor data:
------------------ [ 4x4 MAIN TENT ] ---------------
------ 47% - [CH01 FT » G30 - Heady OG BX1 #1]
------ 34% - [CH02 FB » G30 - Heady OG BX1 #1]
------ 35% - [CH03 BT » G20 - TKO]
------ 55% - [CH04 BB » G20 - TKO]
------------------ [ 3x3 VEG TENT ] ----------------
------ 46% - [CH05 BL » GR7 - TKO]
------ 40% - [CH06 BR » GR7 - Gorilla Goat #1]
------ 45% - [CH07 FL » GR7 - Heady OG BX1 #1]
------ 50% - [CH08 FR » GR7 - Garlic Budder OG#1]
--------- Veg: 38% - 45% | Flower: 45% - 55%
--------- General: 30% [Dry] «| 45 - 60% [Moist] |» 70% [Wet]
- [23:11]: Checked the 3x3 veg tent.
--- Looking healthy in the veg garden!
--- Mothers are getting bushy and tall!
--- Super-cropped and trained the taller branches down to lower the canopy.
--- Plan to take tissue culture cuttings tomorrow so glad there are plenty of tops to choose. Still deciding on which mother to preserve next.
--- Clones in the propagation tray look healthy!
--- The original Garlic Budder #2 clone needs watering.
- [23:26]: Here is the starting initial watering range:
------ Garlic Budder OG#2 » 256.4g → 300.2g
--------- General Solo Range: [Dry] «| [Initial Cup Weight] + ~55-100g |» [Wet]
--- Took the starting weight before watering,
------ Garlic Budder OG#2 » 258.9g
--- While on a scale,
--- Gently misted her straw mulch with RO water.
--- Tried to keep the top growth dry.
--- Misted 5-10 sprays. Waited a few seconds, then misted again.
--- Made sure to reference the watering weights.
--- Repeated this process until the cup weighted at least 300g.
--- There was no runoff.
- [23:40]: Took the saturated weight after watering,
------ Garlic Budder OG#2 » [000.0]g
--- Marked the watering date on the side of the cup. Also marked the saturated weight on the back.
--- Placed her back into the tent.
- [23:45]: Checked the humidifiers.
--- Tanks are still full and no leaks found.
Day 06 - Saturday - 10/18/25 - Total Days: 188
-----------------------------------
Daily Averages ~[+01:00]
- Temps: 76.8°F [24.9°C]
- Humidity: 60.3%
- VPD: 1.25 kPa
- Soil %: [47, 34, 35, 55, 44, 44, 44, 47]
-----------------------------------
- [15:19]: Decided to decrease the VPD level a bit.
--- Within the AC Infinity App,
--- Changed the schedule name from 'Flower [12/12]' to 'Drying [0/24].' Oops.
--- For the Main Tent [4x4] controller,
--- Adjusted the 'Drying [0/24]' Schedule for the exhaust fan.
------ Decreased the VPD LOW trigger value from 1.5kPa to 1.4kPa
--- Adjusted the 'Drying [0/24]' Schedule for the humidifier.
------ Decreased the VPD target value from 1.5kPa to 1.4kPa
--- This should increase the relative humidity a bit and will maintain a 60-65% range
- [16:59]: Evening check on the 3x3 veg tent.
--- Wow the veg garden is raging with healthy growth!
--- Even with the lower veg temps, growth has been perky and bushy!
--- The TKO mother has been looking a bit on the purple-side, but I plan to increase the temps back after trim day.
- [17:23]: Okay! Time to continue the tissue culture journey!
--- Checked on the sterilized media, water, and tools.
--- Ooo yea! The growth media in the glass jars have solidified nicely!
--- The media in the bottles also look great! Found only one that did not gel properly.
--- Hmm. The sterile water bottles are not looking sterile. Unlike the first batch (using distilled water), each RO bottle had tiny white particles floating in the water.
--- I think this was due to the water source. The RO water used was from the plant reservoir. For the next sterilization, will try using water straight from the tap. Will discard the entire batch and try again later.
- [17:34]: Anyways! Time to cut and sterilize another batch of explant cuttings.
--- Using the similar protocols as last time, but with a few changes.
--- Instead of distilled, using reverse-osmosis (RO) water.
--- Also simplifying the workflow and will not be using the sterile water.
--- Only taking cuttings from one cultivar.
--- Today, attempting to preserve Heady OG BX1 #1
--- Unlike the last attempt, going to be cutting apical nodes and will leave all leaf growth on.
--- Last attempt was more for monsteras and not cannabis.
- [17:35]: Made sure the lung room's oscillating fan was OFF during the entire process.
--- Put on a fresh pair of nitrile gloves.
--- Okay! Let's grow Ensign!
- [17:47]: Filled a glass beaker with 180mL of RO water.
--- Using a micro-pipette,
------ Added 20mL of Clorox bleach
--- Mixed the solution.
- [17:52]: Poured the bleach solution into a glass mason jar.
------ Added 1 drop of Dawn dish soap.
--- Dropped a magnetic mixing rod into the jar before setting it onto the magnetic stirrer.
--- Turned the unit ON and set it to a low setting.
--- Placed a polypropylene lid loosely on.
- [18:02]: Rinsed and filled the glass beaker with 70% isopropyl alcohol.
--- Filled another glass beaker with RO water before adding a drop of Dawn dish soap. Mixed the solution.
--- Okay! Time to take the cuttings!
--- Using a clean pair of trimmers,
- [18:09]: Gently cut two clone cuttings from the Heady OG BX1 #1 mother.
--- Stripped each cutting down to 2-inch apical nodes making sure to leave about 0.5 inch of stem growth for planting.
------ Prepared a total of 2 nodal cuttings.
--- Dropped the nodal cuttings into the cup of soapy water.
--- Swirled the cuttings in the soapy water for a bit.
--- Opened the jar containing the 10% bleach solution.
--- Using clean tweezers,
--- Took each cutting out of the RO water and carefully submerged it into the beaker of 70% isopropyl alcohol for about 30 seconds.
--- Then transferred the cutting from the isopropyl alcohol straight into the jar of bleach solution.
--- Once both cuttings were in the jar, sealed the top with the polypropylene lid.
- [18:23]: Flipped and set the entire bleach jar upside down onto the magnetic stirrer.
--- Started using the magnetic stirrer.
--- But the cuttings were getting hit by the bar so ended up turning the unit OFF.
--- Instead, made sure to swirled the bottle every few minutes to agitate the cuttings.
--- For a proper sterilization, the cuttings should be agitated in the hypochlorite (bleach) solution for at least 20 minutes.
--- While waiting for the explants to sterilize, prepped the still air box.
- [18:39]: Unfolded and placed a Safloga still-air box onto my desk.
--- Thoroughly misted the inside of the air box with 70% isopropyl alcohol making sure to coat the entire chamber.
--- Then isopropyl misted and placed the following items inside of the still air box,
------ x1 » Jar of Establishment Media
------ x1 » Bottle of Establishment Media
------ x1 » Glass-Bead Sterilizer
------ x1 » Roll of Plastic Wrap [pre-cut]
------ x1 » Sterilization Bag Containing:
--------- x3 » Stainless Steel Forceps
--------- x3 » Stainless Steel Scissors
--- Made sure to fully coat the outside of the tool bag and each of the containers with 70% alcohol.
--- The bag had a torn corner (Oops), so made sure to spray the inside with a few mists of isopropyl alcohol.
--- For the glass-bead sterilizer,
------ Wiped the entire unit with isopropyl alcohol.
------ Before filling the unit with the included beads, misted the heating chamber with a spray of isopropyl alcohol.
------ Misted the glass beads again with a spray of isopropyl alcohol.
--- Set the cleaned glass-bead sterilizer into the still air box.
- [19:02]: Still air box fully prepped for explants!
--- Okay! Explant nodal sterilization complete!
--- While still wearing gloves,
--- Misted the outside of the explant jar with 70% isopropyl alcohol before placing it into the still-air box.
--- Turned the glass-bead sterilizer ON.
--- Made sure to re-seal the chamber.
- [19:05]: Okay! Finally time to start the tissue culture transplant!
--- Let's go Ensign!
--- Sprayed my gloved hands with 70% isopropyl alcohol (also put on a pair of cloth arm sleeves),
--- Placed my hands through the arm holes and into the still air box to begin the process.
--- Started by laying out my initial workspace:
------ » Far Left Quadrant » Jar of Sterile Establishment Media
------ » Far Center » Bottle of Sterile Establishment Media
------ » Far Right Quadrant » Glass-Bead Sterilizer
------ » Mid Center » Bleach Jar with Explant Cuttings [Main Workspace]
------ » Near Left Quadrant » Empty [Trash Area]
------ » Near Right Quadrant » Bag of Sterile Tools & Roll of Plastic Wrap
--- Opened the bag of tools and placed the forceps and scissors into the pre-heated glass-bead sterilizer.
--- Set the bag in the trash area (near left quadrant).
--- Loosened the lids of both containers of sterile media but did not remove the lids. The lids were resting on top and could easily be lifted.
--- Also took lid off of the bleach jar and gently set it on the table.
--- Took the jar of sterile media and set it in the center of my workspace (to the right of the bleach jar).
--- Using my left hand, took a set of scissors from the glass-bead sterilizer and gently cut the bottom of the first cutting.
--- Once the bottom cut was made, placed the scissors back into the glass-bead sterilizer.
--- Using my left hand, lifted the lid off of the jar of sterile media and inserted the trimmed end of the cutting straight into the growth media (using my right hand).
--- Covered the jar with the lid and placed the forceps back into the glass-bead sterilizer.
--- Tighten the lid of the jar and set it aside.
------ [ » REPEATED THE ABOVE PROCESS FOR THE BOTTLE OF GROWTH MEDIA « ]
--- Once the last cutting was transferred from the bleach jar into the sterile media,
--- Turned the glass-bead sterilizer OFF.
--- Cleaned up my workplace and placed the scrap stem tips and bleach jar out of the way (near left quadrant).
- [19:28]: Wrapped the lid of each explant container with plastic wrap before setting it in the center of the workspace.
--- Explant transplant completed!
- [19:59]: Using a label printer (Brother DT410), made a set of labels for each container:
------ Heady OG BX1 #1 | 04.24.25 | Photo | Reg
------ Formula: v0001 | ExBatch: 0002 | Lot: 01 | Pod: 01
------ Establishment Media | Sealed On: 10/18/25
--- Opened the still air box.
--- Then one container at a time, took an explant out and wrapped the lid with a label.
--- Set the labeled containers onto the propagation tray (in the 3x3 veg tent).
- [20:07]: Done!
------ The explants are around 37 μmol/m²/s which gives a DLI of 2.40 mol/m²/d under an 18/6 light cycle.
--- Will check daily for contamination.
--- Ca-Caw!! Ahh yea!
--- Heady OG BX1 is now officially my first true attempt at cannabis tissue culture!
--- Using this new workflow, I may try reusing the TKO media. Do plan to take new cuttings soon. May even try using the liquid media.
--- Shout out to microclone and Bill Graham! His 'Tissueponics' video contains tips and tricks of the trade that have straight up changed the way I think of DIY cannabis tissue culture.
--- Plan to further refine my process and will continue to refine the workflow with each attempt.
- [20:15]: Checked the Ecowitt soil moisture sensor data:
------------------ [ 4x4 MAIN TENT ] ---------------
------ 54% - [CH01 FT » G30 - Heady OG BX1 #1]
------ 34% - [CH02 FB » G30 - Heady OG BX1 #1]
------ 35% - [CH03 BT » G20 - TKO]
------ 55% - [CH04 BB » G20 - TKO]
------------------ [ 3x3 VEG TENT ] ----------------
------ 43% - [CH05 BL » GR7 - TKO]
------ 48% - [CH06 BR » GR7 - Gorilla Goat #1]
------ 42% - [CH07 FL » GR7 - Heady OG BX1 #1]
------ 45% - [CH08 FR » GR7 - Garlic Budder OG#1]
--------- Veg: 38% - 45% | Flower: 45% - 55%
--------- General: 30% [Dry] «| 45 - 60% [Moist] |» 70% [Wet]
- [20:56]: Checked the 4x4 tent.
--- Ca-Caw! Looking great my ladies!
--- Humidity levels are still a bit on the dry side, but still okay.
- [21:08]: Checked the humidifiers.
--- Tanks are still full and no leaks found.
--- Wow what a day!
--- Oh yea, 4-more days until trim day!! Ca-Caw! Let’s go!
Day 07 - Sunday - 10/19/25 - Total Days: 189
-----------------------------------
Daily Averages ~[+01:00]
- Temps: 76.7°F [24.8°C]
- Humidity: 59.4%
- VPD: 1.27 kPa
- Soil %: [48, 35, 35, 55, 44, 43, 44, 42]
-----------------------------------
- [07:08]: Quick morning checked on the 3x3 veg tent.
--- The veg garden is healthy and perky!
--- All moms and clones are healthy and raging with growth!
--- Both Heady OG BX1 #1 explants also look alive and green!
- [19:26]: Night check on the 4x4 tent.
--- Ca-Caw! We got MENDO DOPE in the trunk!
--- Wow terps are getting loud and buds are drying along nicely!
--- Looking frosty and coated in trichomes!
--- Three more days until trim day!!
- [19:33]: Checked the Ecowitt soil moisture sensor data:
------------------ [ 4x4 MAIN TENT ] ---------------
------ 46% - [CH01 FT » G30 - Heady OG BX1 #1]
------ 35% - [CH02 FB » G30 - Heady OG BX1 #1]
------ 35% - [CH03 BT » G20 - TKO]
------ 54% - [CH04 BB » G20 - TKO]
------------------ [ 3x3 VEG TENT ] ----------------
------ 40% - [CH05 BL » GR7 - TKO]
------ 43% - [CH06 BR » GR7 - Gorilla Goat #1]
------ 47% - [CH07 FL » GR7 - Heady OG BX1 #1]
------ 41% - [CH08 FR » GR7 - Garlic Budder OG#1]
--------- Veg: 38% - 45% | Flower: 45% - 55%
--------- General: 30% [Dry] «| 45 - 60% [Moist] |» 70% [Wet]
- [19:35]: Checked the 3x3 veg tent.
--- Vegging along beautifully in the garden!
--- Mothers are getting taller and probably could train, but will wait until tomorrow.
--- Clones and explants also look healthy and green!
--- Gorilla Goat #2 needs watering!
- [19:44]: Here is the starting initial watering range:
------ Gorilla Goat #2 » 255.4g → 300.3g and was last watered 5 days ago.
--------- General Solo Range: [Dry] «| [Initial Cup Weight] + ~55-100g |» [Wet]
--- Took the starting weight before watering,
------ Gorilla Goat #2 » 244.9g
--- While on a scale,
--- Gently misted her straw mulch with RO water.
--- Tried to keep the top growth dry.
--- Misted 5-10 sprays. Waited a few seconds, then misted again.
--- Made sure to reference the watering weights.
--- Repeated this process until the cup weighted at least 300g.
--- There was no runoff.
- [20:04]: Took the saturated weight after watering,
------ Gorilla Goat #2 » 345.6g
--- Marked the watering date on the side of the cup. Also marked the saturated weight on the back.
--- Placed her back into the tent.
- [21:41]: With a few days before the big trim, decided to sample a few buds!
--- Cut and trimmed branch for sampling and wow she’s got terps!
--- Buds are dense and have a gassy diesel funk! Ca-Caw!! Wow!
--- Without even curing, pretty sure she’s the one!
--- Plan to grow out another cycle (in clone of the same pheno), but I think I found my female for my first breeding project!
- [22:01]: Checked the humidifiers.
--- Tanks are still full and no leaks found.
--- Ahh yea! Three more days until the big trim!
--- Also next week will be the last for this log.
--- But already stoked for the next!
--- Planning on popping more seeds and continuing the pheno hunt for another female!
--- Since I lost TKO this harvest cycle, plan to grow a clone cutting of the same pheno (#2).
--- As for seeds, popping more regulars and going to attempt to grow some of Mr. Grow-It’s Chillout OG!
--- Got a pack of F3s and am stoked to give them a try!
--- Also going to sprout some beans of Dead Ops OG from Zaza Genetics!
--- Chillout OG, Dead Ops OG, and another round of TKO! Let’s go! Let’s grow!
--- Hunters of the dank! Ca-Caw!
--- Anyways!
--- Onwards to next week!
[END OF WEEK 26]




Likes
5
Share


@BelgianBudtender
Follow
Hey growmies,
first week of flower and i pushed my comfort zone and defoliated a lot, I also taken off most lower nodes, as my previous plants have always had a bit too many popcorn buds.
Weaved most of the branches through a trellis, I need a better one but it still worked out okay.
I will probably be taking off the odd fan leaf every now and then for the next few weeks, aswell as ill try to keep her as even as possible
theres very little signs of flower yet, so i think she'll be stretching soon
That's it for this week Growmies,
I am looking for a reputable seedbank for Black Diamond Kush, a strain I fell in love with after I bought it in a Candy Store in Flatbush, NYC the week I met my Wife, I would really like to grow it myself and chase that nostalgia, If you know of any HMU

Likes
18
Share


@valiotoro
Follow
Hello everyone week 2 of flower has passed for this Gelato auto 🍦
Spider Farmer SE7000 80%
have a great day and wish you all happy growing 😎👨🌾🏻