


Likes
Comments
Share


@Unkraut
Follow
Great week again...work effort was like 3h whole week...only had to refill NS (+-20L every 2 days)
Buds getting fatter every day...no brown pistrills yet so budgrowth is still in full effect
PH was very stable again, 6.1-6.2 all week
EC fell slighty before refilling NS
I think EC 1.3 could be a bit too much for them...leaves are quite darkgreen and they start to get nuteburn on tips...but i'll leave it at 1.3 for the rest of the grow
I decided that i won't exchange NS completely anymore...will leave it be till i replace it with pure water in 2 weeks (will be a 3 week cycle then)
Roots look great + i put in 15g of TNT Bactorr, water temp is at 20-21° so no need to worry about rot till the end of the grow i think

Likes
1
Share


@MindFlowers68
Follow
She was looking slightly rough from whatever started to eat those few leaves but by the end of the week you can hardly tell she was even affected. It was very rainy and cloudy most of the week so I only had to water once with my cal mag/kelp solution, and she got a good amount of rain which seemed to help her growth rate despite the cloudiness. This week it going to be very sunny so should be a big week for growth.

Likes
55
Share


@Roberts
Follow
Lemon cherry cookies has grown really well in the Agrogardens nutrition, under the Medic Grow Mini Sun-2. I did not have any major issues during the grow. The buds have a slight purple hue to them. She has a strong sweet but sour cherry and citrus aroma. She was a good grow. Thank you Agrogardens, Medic Grow, and Fast Buds. 🤜🏻🤛🏻🌱🌱🌱
Thank you grow diaries community for the 👇likes👇, follows, comments, and subscriptions on my YouTube channel👇. ❄️🌱🍻
Happy Growing 🌱🌱🌱
https://youtube.com/channel/UCAhN7yRzWLpcaRHhMIQ7X4g
If anyone needs to purchase fastbuds here is a link for my affiliate program
https://myfastbuds.com/? a_aid=60910eaff2419
Likes
11
Share


@PinkFloydLover
Follow
Flushing the bigger girl since day 140. Harvested the smaller girl on day 141, but will show you the results after I harvest the other one. I had a little of it, but I had cut some branches to smoke some weed previously!

Likes
11
Share


@tangie
Follow
Chopped her two days into week 14.
What else. Buds. There are a lot of them. And they are quite large. And they look like they will require little effort to trim.
What more can I wish for? I am a very happy man.
Upd 1: Trimming is SO SIMPLE! Not much sticking out to begin with, because of the amazing bud structure and me plucking most bud node fans. Solid nugs which are not bothered by anything, so pulling smaller sub-bud fans is very simple too, while the buds are what I would call moist. I'll call this Moist Trim 😄
✂️✂️✂️ Went for the best trimming tools available on the market (well at least my research concluded so) and LOVING every minute of trimming with the B-500SRF. Why would I or anyone else use something less suitable or less comfortable for such a delicate and long job is beyond me, except if you cannot afford one right now, in which case I wish you to experience it one day.
Fiskars are also very good in therms of the blades, coating and cutting ability and precision, but the spring is just too stiff, like way, way to stiff for something that is to be used for hours on end. One might argue that such spring force helps overcome resin buildup, but please just rinse your instrument regularly in an appropriate solvent (ethy, iso, whatever — consider you instrument materials as well) and wipe it after. Why would you let significant amounts of resin to accumulate on such a gentle and precise tool? Kinda defeats the purpose?

Likes
8
Share
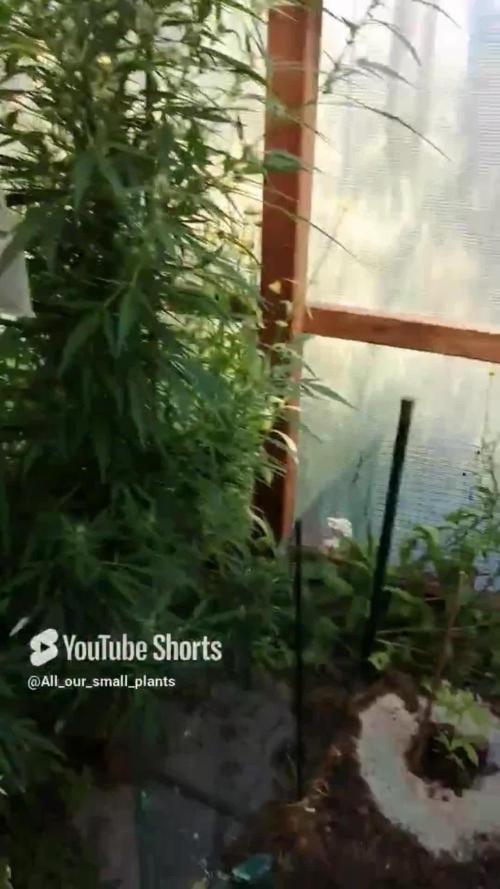

@All_our_small_plants
Follow
Bewässerung: 500 ml jeden 3 Tag in der Fünften Woche
pH-Wert: 5,8
EC-Wert: 0,4 mS/cm
Temperatur: 30ºC
Luftfeuchtigkeit: 50%
Schädlingsbekämpfung: im Moment haben wir keine Anzeichen von befall wir haben nur mal zur Prävention etwas Sand gegen die Schnecken um die Pflanze gemacht, dies verhindert das diese sich nähern.
PPFD: Direktes Sonnenlicht
DLI: Direktes Sonnenlicht
Besonderheiten: Sind in kleinen Töpfe gepflanzt und werden diese Woche in den Boden gesetzt.
-Tag 29 Heute wurden Beide in den Boden Gesetzt und wurde mit Sand umrandet. Das dient dazu das sich keine Schnecken nähern, zusätzlich haben wir sie mit einem kleinen Zaun umrandet damit sie unser Tiger nicht gleich entlaubt 🙀 sehen beide soweit gesund aus.
-Tag 31 beide haben die Verpflanzung in die Erde überlebt 😍

Likes
9
Share


Likes
8
Share


@DogDoctorOfficial
Follow
💙 Project Blue Tent – Week 7
Blue Waffle F1 – Pheno A (Folder 13A)
Welcome back everyone to another week inside Project Blue Tent! 💙🌱
If you're new here, welcome aboard.
This project is all about exploring the incredible Blue Waffle F1 genetics from Zamnesia while putting the complete growing ecosystem through its paces.
Rather than documenting four plants as a single diary, each phenotype receives its own individual journey from seed to harvest. They share the same tent, the same environment, the same nutrition, the same irrigation and the same lighting.
And yet...
They still manage to tell four completely different stories.
As I always like to say:
We're not just growing plants.
We're getting to know them.
────────────────────────
🌿 Week Seven – The Final Cleanup
This week feels like a milestone.
The SCROG has done its job.
The canopy is full.
The plants have established their structure.
And now it's time to prepare everything for the next chapter...
Flowering. 🌸
Plant A is looking absolutely beautiful at the moment.
Her foliage has developed into the rich, healthy green I've been hoping to see, and the overall structure is remarkably balanced. After several weeks of gently guiding branches underneath the SCROG, we've managed to create a canopy that is surprisingly even from one side of the tent to the other.
At approximately 60 cm, she's sitting comfortably within the space we've created for her.
And although she could certainly continue growing vegetatively, I don't want to simply keep filling the tent with more and more foliage.
At some point, you have to stop building the canopy...
...and start preparing it for what comes next.
That's exactly where we are now.
────────────────────────
🕸️ From SCROG to Flower
Over the last couple of weeks, the SCROG has completely changed the way these plants occupy the tent.
Instead of allowing individual branches to dominate vertically, we've been gently guiding them horizontally beneath the screen.
The result is exactly what we were looking for:
A broad, relatively even canopy with many developing tops sharing the available light.
SCROG isn't about forcing a plant into submission.
It's about working with its natural growth and redistributing that growth across the available space.
And looking at the tent now...
I'd say the mission has been accomplished.
The screen is filled.
The plants have claimed their territory.
Now we need to create the best possible starting point for flowering.
Which brings us to this week's main job.
────────────────────────
✂️ Defoliation – Cleaning Today for a Better Tomorrow
This week we're performing a deep, purposeful defoliation across the canopy.
For anyone unfamiliar with the technique, defoliation simply means selectively removing leaves from the plant.
But it's important to understand what defoliation isn't.
It isn't stripping a plant bare.
It isn't removing leaves just because they're in the way.
And it isn't something that should automatically be performed every week.
The purpose is to improve the structure we've already created.
After several weeks of SCROG training, there is now a tremendous amount of foliage packed into a relatively small space. While those leaves are essential during vegetative growth, too much overlapping foliage can eventually create unnecessary congestion inside the canopy.
So we're removing selected leaves that are:
• Blocking developing growth
• Creating unnecessary overlap
• Restricting airflow through the interior
• Shading lower areas that we've decided to retain
• Or simply no longer contributing enough to justify occupying that space
The goal isn't to make the plant look empty.
The goal is to make the plant efficient.
────────────────────────
🌬️ Why Defoliate Before Flower?
Timing is everything.
We're doing this now because the plants are still in vegetative growth and have time to recover before we ask them to transition into flowering.
Defoliation is a form of stress.
Even when performed carefully, removing a significant amount of foliage temporarily changes the plant's balance between its leaves, roots and growing points.
That's why I don't want to perform a major cleanup deep into flowering unless there's a very good reason.
Right now, the plants can take that short period of recovery while they're still operating under an 18/6 light schedule and actively producing new vegetative growth.
After the cleanup, we'll give them time to recover, settle and rebuild their foliage before flipping the lights.
The idea is simple:
Stress now.
Recover now.
Flower later.
Rather than asking the plant to simultaneously deal with a major transition into flowering and a significant amount of pruning, we're separating those events.
One step at a time.
That's especially important in a project like this, where I'm trying to observe the plants rather than simply push them as hard as possible.
────────────────────────
🌿 Plant A – Looking Better Than Ever
Plant A continues to impress me.
The first thing that stands out this week is the colour.
That slightly lighter appearance we saw earlier in the grow has completely disappeared. The foliage is now displaying that rich, healthy green that tells me the current nutritional strategy is working extremely well.
She's vigorous without looking excessive.
Healthy without showing signs of nutritional stress.
And most importantly...
She's balanced.
Her branches have responded beautifully to the SCROG, and the canopy has developed into a very usable structure for flowering.
This is one of those moments where you can look at the plant and realize that the weeks of small adjustments have finally come together.
The topping.
The recovery.
The daily SCROG work.
The irrigation.
The feeding.
The environmental stability.
None of those things created this canopy by themselves.
They're all pieces of the same puzzle.
────────────────────────
💧 The Drip Irrigation System
One of the things I have become particularly impressed with during this project is the automatic drip irrigation system.
It's working beautifully.
With the plants now drinking more consistently and the canopy becoming increasingly demanding, having a reliable irrigation system makes maintaining uniformity across the tent considerably easier.
Each plant is currently receiving approximately 1.2 L per 24 hours, delivered through the drip system.
And the plants are clearly enjoying the consistency.
One of the advantages of automated irrigation isn't simply saving time.
It's repeatability.
Instead of relying on every watering being manually performed at exactly the same interval and volume, the system provides a much more consistent routine for the plants.
That consistency becomes increasingly valuable as the root systems develop and the plants transition toward flowering.
So far...
The system is doing exactly what I wanted it to do.
And honestly, watching four plants respond so uniformly to the same irrigation strategy has been one of the most satisfying parts of this project.
────────────────────────
🥥 Feeding Program
The feeding recipe remains unchanged this week.
And for now, I don't see a reason to interfere with something that is clearly working.
Current nutrition:
• Plagron Hydro A — 1.9 ml/L
• Plagron Hydro B — 1.9 ml/L
• Plagron Hydro Roots — 1 ml/L
Current EC remains approximately:
1.92 mS/cm
with the solution maintained around 18°C and pH at 5.8.
The plants are showing excellent colour, strong growth and healthy leaf development, so I'm perfectly comfortable maintaining the current recipe for now.
We may increase the nutritional strength next week depending on how the plants respond after defoliation and as flowering approaches.
But that's exactly why I don't like changing several variables at once.
First, we observe.
Then we adjust.
The plants will tell us what they need.
────────────────────────
🌡️ Environmental Conditions
The Blue Tent continues to remain remarkably stable.
This week's average conditions were:
• 🌡️ Day Temperature: 28°C
• 🌙 Night Temperature: 27°C
• 💧 Relative Humidity: 65%
• 🥥 Substrate Temperature: 24°C
• 💦 Nutrient Solution: 18°C
• ⚗️ pH: 5.8
• ⚡ EC: 1.92 mS/cm
• 💨 CO₂: approximately 450 ppm
• 💡 Light Schedule: 18/6
• 💧 Irrigation: approximately 1.2 L/plant/24h
• ? Pot Size: 8 L
• 📏 Plant Height: approximately 60 cm
The plants are continuing to respond beautifully to these conditions.
The root-zone temperature remains particularly stable, irrigation is consistent, and the canopy has enough air movement to support vigorous transpiration.
As we move toward flowering, environmental management will become even more important.
The room we've created now needs to support not only vegetative growth...
...but the much denser flowering structure that is coming next.
────────────────────────
🌬️ Why the Cleanup Matters
One of my main objectives with this defoliation isn't simply aesthetics.
It's airflow.
When four vigorous plants completely fill a 100 × 100 × 200 cm tent, the amount of foliage inside that space becomes considerable.
From above, everything can look absolutely perfect.
But underneath that beautiful canopy is another story.
Leaves overlap.
Branches cross.
Interior spaces become crowded.
Air needs to move through all of that.
By selectively removing excess foliage now, we're opening those internal spaces before flowering begins.
That gives us a cleaner structure going forward and makes it much easier to inspect the plants, maintain airflow and monitor the developing flowers.
This is also one reason I'm much happier doing the major cleanup before the flip rather than waiting until the plants are deep into flowering.
Once flowering begins, the priorities change.
I want the plant concentrating its energy on developing flowers rather than repeatedly recovering from major structural work.
So we're preparing the room now.
Clean canopy.
Good airflow.
Healthy structure.
Then...
Flower.
────────────────────────
🧠 Defoliation Isn't About Removing Leaves
One of the biggest misconceptions surrounding defoliation is that more leaves automatically means a worse plant.
That's not true.
Leaves are incredibly important.
They're the plant's solar panels.
They capture light and help drive photosynthesis.
So the objective should never be:
"How many leaves can I remove?"
The better question is:
"Which leaves are no longer contributing enough to justify occupying this space?"
That's the philosophy I'm following here.
We're not trying to weaken the plant.
We're trying to improve the relationship between:
Light → canopy → airflow → growing sites.
And because we've already spent weeks creating the structure with SCROG, this cleanup is simply the final refinement of that work.
────────────────────────
🌱 Plant A's Personality
Every phenotype continues to develop its own personality, even when all four plants are living under almost identical conditions.
Plant A has consistently been one of the more balanced girls in the tent.
She doesn't appear interested in becoming the biggest plant in the room.
Instead, she seems much more interested in becoming an efficient one.
Her growth is structured.
Her canopy is balanced.
Her foliage is beautiful.
And after weeks of training, she has settled into the SCROG extremely well.
Now, after today's cleanup, she looks almost like a different plant.
Less crowded.
More open.
More organized.
And ready for the next chapter.
That's the part of growing I really enjoy.
You spend weeks slowly building something...
Then one day you step back and suddenly realize:
It all came together.
────────────────────────
👀 Looking Ahead
The next few days will be about one thing:
Recovery.
No unnecessary training.
No chasing perfection.
No constantly changing the environment.
Just observation.
The plants have been through topping.
They've been trained beneath the SCROG.
They've filled the canopy.
And now they've received their final major vegetative cleanup.
So we're going to let them breathe.
Let them recover.
Let them continue growing.
And then, assuming everything continues to look as good as it does today...
we flip the Blue Tent into flower. 🌸
This is the point where all those weeks of preparation finally start paying off.
The screen is full.
The structure is ready.
The plants are healthy.
Now we just need to let them do what plants do best.
Grow.
────────────────────────
💙 Thank You
A huge thank you to Zamnesia for making Project Blue Tent possible, from these fantastic Blue Waffle F1 genetics to the complete ecosystem surrounding this grow.
A massive thank you to Plagron for providing the Premium Growbags together with the Hydro nutrient line, which continues delivering excellent results and beautifully healthy growth.
A special thank you to Mars Hydro for the drip irrigation and automatic drainage system. After watching these plants respond to the consistency of automated irrigation week after week, I'm genuinely impressed with how well the system is performing.
Thank you as well to GrowDiaries, for giving growers around the world a place to document their journeys, exchange knowledge and learn from one another.
And finally...
Thank you to everyone following Project Blue Tent.
Every comment, every question, every bit of feedback and every person simply stopping by to see how these four phenotypes are developing means more than you probably realize.
We've spent weeks building this canopy together.
Now the really exciting part is about to begin.
The plants are cleaned.
The SCROG has been filled.
The room is ready.
Flower is next. 🌸💙
Until next week...
Growers Love, happy growing, and take care everyone! 🌱💙
Processing
Likes
21
Share


@SmithicusAlbertaCanada
Follow
So, Linda decided it was time to stretch, could it be that all four of these ladies are different phenos?
It's looking like strong growth, so far - fingers crossed!
Let me know what you think! Thanks, have a good one! 🙏
Likes
9
Share


@Wenz004
Follow
Experiment explanation see week1
was able to stop the expansion of CaMg deficiency by increasing the ph to 6.4...currently give this:
Plagron sugar royal 1 ml/l
Plagron power buds 1 ml/l
Plagron alga bloom 4 ml/l
Plagron green sensation 1 ml/l
Aptus regulator 3 drops/l
Aptus CaMg booster 0.7 ml/l
Drinks appr. 2 litre per day at the moment...nutrified


Likes
223
Share


@HazeyBobby
Follow
So the story continues... this grow is really an experiment for me to train one plant within my 4'x2' grow space to ScrOG vertically and use the SP250 light on its side. For the majority of the vegetative stage the light will be hung normally above the plant until a week prior to flipping the light schedule and initiating flowering.
The plant passed its seedling stage and has been vigorously growing albeit showing strong signs of over-watering and calcium deficiencies. It's really a transpiration issue which I have not solved yet. Increased distance to light as the plant may be growing too fast for its root mass. From feedback at Coco for Cannabis (CFC), it is a Cal deficiency and a young plant getting used to the grow in coco - quite common and not a sign of over-watering. Measuring run-off EC at each fertigation event as I increase the feed EC to monitor what the plant is doing/feeding.
Fertigation is now maintained at twice a day (at lights on and 4hrs prior to lights off period) to maintain the target EC. Light period is during the night time to better maintain heat/humidity conditions during light off period (which happens during daytime).
-----------------------------------------------------------------------------------------------------------------------------------------------------------------------------------------------------------------------
The grow setup includes ;
- Secret Jardin DS120W tent (120cm x 60cm x 180cm) placed inside the bedroom
- Mars Hydro SP250 LED light
- extraction fan - AC Infinity Cloudline T6 (gives me great control over the environment)
- ventilation fans
- aquarium heater for nutrients solution (for winter use only)
- small oil heater (for winter use only)
- small dehumidifier
- 20L Airpots (as final pots) and 3.5L general plastic pots (for seedling stage)
- Canna Coco substrate mixed with 40% perlite
- GHE Flora Trio as base nutrients and various additives
- pH and EC/TDS meters
- 2x Govee Thermo/Hygro meters (one at canopy, the other at the roots level - these allow for external monitoring and recording)
-----------------------------------------------------------------------------------------------------------------------------------------------------------------------------------------------------------------------
Some strain info from Royal Queen Seeds ;
An amazing mix of genetics background - Its true genetics are unknown. Some say OG Kush is a mix of ChemDawg with a Lemon Thai and Pakistani Kush. Others say that it’s just a special cutting of ChemDawg from the early 90s. The most obvious trait of OG Kush is its strong, unique, very dank, slightly citrus aroma, almost like fuel or strong detergent. The flavour of OG Kush is equally as strong and dank, with a long-lasting aftertaste.
Strong mental and physical high - OG Kush is an extremely strong cannabis strain, with most experienced smokers listing it as one of their favourites. The effect is as strong physically as it is mentally. Though its effect is like an Sativa, the strain's genetics are mostly Indica. The effect is as strong and complex as the flavour. OG Kush takes around 8 weeks to flower and on average the yield is 500 grams per plant.
Big buds with lovely tones - OG Kush is known to stretch slightly during growth but soon starts to fill out during flowering. Generally, it will reach a height of 90 to 160 cm. Its buds are large and dense, lime green clusters covered with a large amount of resin.

Processing
Likes
6
Share


@Ferenc
Follow
Day 61: I left them in darkness for 3 days and just switched on the lamp for 12/12 with today the foirst day of the 9th week.
Fertilization goes on the same days with the nutrients above and water intake approx 250 ml per plant per day.
Nice green color comes they always look nice after darkness :) Lets' go.
Day 66: Growing growing growing...


Processing
Likes
21
Share


@Dunk_Junk
Follow
Doubled her height this week! Now she's 13cm tall.
She was repotted a day short of 3 weeks into a 20 litre airpot with fresh compost that has been flushed.
I had concerns about her being rootbound....
In reality she was far from it, could have gone easily another week.
On she goes!



Likes
38
Share


@STAYINGONMYMAINCBATORUNTWO
Follow
Right so took 7 days to bag dry and then a week in the jar! At first I opened the jars twice a day for a few minutes! Then once a day after that!
This is the best strain I’ve grown by far! Training went above 💯 she just kept pushing and pushing blossomed and bloomed! Fully covered in beautiful trichomes, ended her at 50/50! From when I dried her I smoked her and she had flavours ultimate flavours! Tastes like lemon and lime tictacs with a hint of Coca Cola vanilla! And that’s before cure! The Terps on this girl are strong and feelings that run though your whole body are amazing! You have a whole body feel inc head! Makes you feel euphoric and warm inside! I struggle to not want to do something and then left with power hit that leaves u closing your eyes and having some relaxed thinking Time lol best one ever! Fastbuds have done some magic with this girl!
I haven’t weighed the popcorn and sugar leaves but I have a full 2L jar! So all in all I may have about 7-8oz and I plan to make edibles in all forms! Will continue to upload here check back in time for update on smoke and ash report Tastes like a powerful fruity cheese 🧀 hits you with streams of effects starting with mind lapsing lol then you get further into it your body super relaxes and you try to control your breath but best to enjoy and sit back as it sinks u into an ultimate high! Has me in thoughts so deep and brings out the puffy eyes lol love thus strain I’ll always want this one in my life can’t wait to know what it is!

Likes
15
Share


@Luckydope69
Follow
Dies ist die letzte Woche der Vegetation. Ich habe zu Beginn noch einmal etwas defoliert und werde es nun die ganze Woche wachsen lassen. Der Triebwuchs ist sehr schön und es wird einen Haufen Spitzen geben.


Likes
5
Share


@prebiancagrower
Follow
Hi lovely people, how are you doing?
So, week 3 here since I put the seed to germinate and the plant is AMAZING, I really like how the plant is developing!
I started the LST this week, can you people tell me if I am doing it well?
Thank you for the help.
Love you all :-)
Likes
15
Share


@Oetelando
Follow
We have Day 1 of Week 6.
The buds Get Biger And Denser.
Last week of Nutrients and week 7- Harvest only Water.
They smell like Exotic Fruits.
