


Likes
Comments
Share


Likes
13
Share


@TightNugs
Follow
Pretty good week with plenty of bud sites fattening up.Loads of defoilation needed to get light into lower areas.
All good 🤞🍁

Likes
20
Share


@Adkguerrilla44
Follow
I messed up and didnt get many pics as me and my buddy were very very busy trimming from 10am-10pm got the 1 blue cheese plant finished!!! In 12 hours we did 1 plant thats fricken insane considering me and him did 8 of his outdoor plants in less time back in fall,more bud than i have ever seen on a plant under 3ft shit it had more bud on it than the 8 footer i grew last fall lol just so impressed with this plant i will definitely be growing many more blue cheese using FOOP nutes in the future thats for sure ,i am not touching any of this nugget until its dried and cured...gonna be hard to resist lol but it will be worth it for sure 😉

Likes
37
Share


@MG2009
Follow
10/13/2018
#1 still looking good, no fade. Start of week 9 of flower hope buds put on some weight this week should be 1 week maybe 2? Gonna be cold mid- week 38° on two nights. I know they can handle lower 40's without any problems but we will see in next weeks update,a cold tolerant sativa leaning girl is welcome hereCanfy
#4 sweet fruit,and smelly shoes


Processing
Likes
1
Share


@lawnichak
Follow
gained 10" in the last 7 days. 19" in the last 2 weeks. doing extremely light stress training. just enough to get the light evenly to the leaves. there are multiple colas coming up together. hoping for a decent amount from these plants. im doing a light defoliation each week. changed the way the lights hang in the 3rd tent to give more room to grow and light covers more of the plant now
Likes
21
Share


@HeyJude
Follow
The flowering period has begun and we have gone to sodium light. I give more than part A to encourage the plant to make branches


Likes
5
Share


@Ensign420
Follow
Greetings fellow growers 🖖 and welcome to my first grow ever. This adventure actually started several months ago when I decided to stop buying flower from dispensaries and just grow my own bud. How hard can it be!?
This is actually my second seed of this strain. The first bean sadly died due to over watering (sorry girl, RIP). I was literally watering the cube to the point where water was dripping from the bottom, then heavily sprayed the humidity dome and tray with the vents completely closed. Everyday. Multiple times. I never let the dome or try dry out. So after about 8 days of not sprouting, there was a funky smell of rot. So that was that.
Later I learned that rockwool retains a lot of water and can easily drown seeds. So a wet/dry cycle is best for rockwool germination.
So even after hours of researching and digging through forums and tutorial videos, I was still under prepared for this journey. Did not consider how delicate the germination phase is. Oh well. Lesson learned. Reset and try again!
I hope everyone is safe and stoned during this corona crisis. Just like everyone else in the world, I want this pandemic to be over with. But in the meantime, let's grow some weed! 🖖
[START OF WEEK 01]
Day 01 - Monday - 08/03/20 - Total Days: 001
-----------------------------------
- [0830]: Light Schedule: 24Hrs/0
--- Soaked cube in 5.5 PH water for 10 min. Did not shake water out.
--- NO NUTES! Only PH'd down to control the PH levels.
--- Did not use the default hole (way too deep).
--- Flipped cube upside down and made a shallow hole for the seed (less than 0.25" deep).
--- Placed seed in and pinched hole close. No additional water added.
--- Sprayed the tray and dome with straight water (5.5 PH).
--- Vents are cracked opened a for ventilation (about 1/4 opened each).
--- Distance between the light and tray was 53"
--- AC was set to 80 °F
--- Exhaust fan was set to 86 °F
--- Room average temp was at 85 °F
--- Dome humidity was at 85-99% when sprayed.
--- Allowing to completely dry before respraying.
- [2200]: Dome and tray were completely dry! Sprayed only tray and dome with more water.
Day 02 - Tuesday - 08/04/20 - Total Days: 002
-----------------------------------
- [0845]: Sprayed dome and tray in the morning. Everything was dry.
--- Hoping for the best!
- [2130]: Everything was dry again, so sprayed dome and tray at night along with a light spray on the cube.
Day 03 - Wednesday - 08/05/20 - Total Days: 003
-----------------------------------
- [0830]: Everything was dry again. Resprayed dome and tray. Slightly sprayed cube.
- [2125]: Hooo damn!! She popped! Am little stub is visible! Resprayed dome and tray again.
--- Still going 24/0 for lights.
- [+0033]: Just checked up on her and I swear she grew a bit taller! Getting excited!
Day 04 - Thursday - 08/06/20 - Total Days: 004
-----------------------------------
- [0845]: Wow! Went from a little stub to fully sprouted overnight! Everything was pretty dry again so resprayed dome and tray.
- [2200]: Tap root is visible! Over 1" long too! Just resprayed dome and tray again.
-- Going to prep for hydroton transplant tomorrow!
Day 05 - Friday - 08/07/20 - Total Days: 005
-----------------------------------
- [0930]: She keeps growing!
-- Added a bit of CalMag to the spray bottle (8 drops to 650ml of distilled water). Resprayed dome and tray. Water was at a 5.4 PH with 141 PPM.
- [1045]: Prepped the bubble bucket with 4.5gal of water. Water is high enough to reach about 0.25" above the bottom of the net pot.
--- Added 3 drops of Superthrive
--- Added 3.5ml of CaliMagic
--- Added 2ml Hydroguard
--- Then PH'd down to 5.6
--- Solution Strengh: 120 PPM
--- Water chiller is set to 20 °C
- [1100]: Transplant time!
--- Filled the net basket 1/3 with hydroton. When placed in the bucket, air bubbles are not visible, but are slightly below the surface (slight digging will reveal the water/bubbles below).
--- Removed plastic on rockwool cube and placed in basket, then filled around and covered with hydroton. Making sure to block any light from passing through the net pot and into the nutrient solution.
--- Covered with a half-bottle dome sprayed with the CalMag water from earlier.
--- Hoping for the best!
- [1300]: Raised Bucket 5" higher. Now light distance is 48" to top of bucket.
- [1820]: Lowered tent exhaust temp to 76 °F
--- Lowered AC to 75 °F
--- Raised bucket even higher so light distance is 30" to top of bucket.
- [2300]: Looking good!
--- Sprayed dome and surrounding hydroton with more CalMag water.
--- Attached timer to light! So new 18 Hrs On/6 Hrs Off light schedule.
--- Lights On: [1600] (4pm)
--- Lights Off: [+1000] (10am the next day)
--- Decided to go with lights on during the evening/night and off during the later mornings/afternoon (the hottest part of the day) to see if temps can be controlled better.
--- Please survive girl!
Day 06 - Saturday - 08/08/20 - Total Days: 006
-----------------------------------
- [0800]: Everything was dry. Resprayed hydroton and dome.
- [2000]: Here first night cycle seemed to go well! Get'n taller!
--- Dry again. Removed the dome.
--- PH went up to 6.5 so PH'd down to 5.7
--- Ran the top feed drip ring for a bout a minute to wet the hydroton and rockwool with the nutient solution.
---Too scared to leave the top feed on 24hrs (I don't want over water her and cause dampening-off). Will let dry before re-watering.
- [2100]: After closer inspection, I think she's looking a bit yellow.
--- Decided to add a bit of grow nutes to the bubbler solution.
--- Added 2ml of Sensi Grow A
--- Added 2ml of Sensi Grow B
--- Solution strength after adding more nutes: 176 PPM
--- PH went up to 6
--- I hope that the extra chelating properties of the 'PH Perfect' solution is enough of a buffer for proper nutrient uptake.
Day 07 - Sunday - 08/09/20 - Total Days: 007
-----------------------------------
- [0800]: Water dropped a bit (mostly due to evaporation) so solution strength was at 190.
--- Checked PH again. Was still at 6, so PH'd down to 5.4
--- Ran the top feed for a minute to wet the hydroton a bit.
- [0915]: Since she's looking perky but still a bit yellow. So decided to up the nutrient concentration even more before lights out.
--- Added 2ml more of Sensi Grow A
--- Added 2ml more of Sensi Grow B
--- Solution strength after adding more nutes: 199 PPM
--- PH went up to 5.8
- [1700]: Checked nutrients.
--- PH: 5.9
--- Solution strength: 202 PPM
--- Added 4ml of Voodoo Juice
--- Added 4ml of B-52
--- PH after adding more nutes: 5.9
--- Solution strength after adding more nutes: 238 PPM
- [2130]: Decided to make a new foliar spray to address the continued yellowing.
--- Started with 500ml of distilled water.
--- Added 3 drops of CaliMagic
--- Added 3 drops of Sensi Grow A
--- Added 3 drops of Sensi Grow B
--- Added 3 drops of B-52
--- Added 1 drop of Superthrive
--- Solution strength: 164 PPM
--- PH was at 5.9 and did not adjust.
--- Gave her one spray.
--- Also sprayed the surrounding hydroton.
[END OF WEEK 01]

Processing
Likes
18
Share


@Silverback_Guerilla
Follow
11/9:
I took some photos and added a 35w 3500k LED to the top section and have it pointed towards the backside of one of them and my little Stardawggy.
11/10:
Today, I super-cropped about 10 different mains and branches on various plants. The canopy is now much more even.
They'll be ready for a feeding tomorrow.
11/11:
I fed them all about 1/3 gallon each with big bloom, tiger bloom, beastie bloomz, cal-mag, bembe, humic acid concentrate, myco/tricho, signal, and a little grow big.
11/12:
I spent a couple of hours tying down branches and tucking leaves to get more light down into some of the plants, and rotated the edge plants.
11/13:
I rotated the edge plants and added a TNB Naturals CO2 enhancer to the closet. I raised the thermostat on the ac infinity to 86f, so as not to exhaust it all, but with the cold air intake, it's rarely even coming on anyway.👍
11/14:
Their buds are swelling up nicely! I fed them again today because I'm still seeing some signs of potassium and phosphorus deficiencies. I went 1/2 strength with the grow big, but full strength with everything else...
11/15:
Last day of week 6 and I'm happy with their progress. I plucked off the dead shit and tried to reposition some of the lower branches to get more light. Took some photos and shot some budporn video..sexy ladies!😍


Processing
Likes
6
Share


@zombikush81
Follow
#fourth week of flowering (2)
#end of first week of flowering (1)
#beginning of the third week of flowering (1)

Likes
44
Share


@SooSan
Follow
13 jours de 12/12
OK il y a du changement !
Dans la partie du scrog vertical le stretch n’a pas été assez fort
J'ai donc abandonné la culture verticale pour cette fois
J'ai donc fusionné le bas de la tente pour avoir un espace de 90x60x90
Le ts1000 a été retiré pour laisser la place aux barres du FC-E 4800
Et bien sur gros LST pour gagner en surface et gagner 20 à 30cm de hauteur
Vu qu’il y a 16 plantes mais que sur growdiaries on ne peut mettre que 8 variétés j'ai divisé en 2 diaries pour le bas de la tente
1️⃣
🏠 90x60x90
☀️ FC-E 4800 => puissance a 20%
🍁
1x Black Bomb / Philosopher Seed
2x Amnesia Lemon / PEV Seeds
1x Blueberry / PEV Seeds
1x Blueberry / 00 Seeds
1x Wappa / Paradise Seed
1x Dark Phoenix / Green House Seed
1x Quick Sherbet / Exotic Seeds
1x Mango Cream / Exotic Seeds
1x Banana Frosting / Sensi Seed
1x Hindu Kush / Sensi Seed
4x Fast Mix / Sweet Seed
📎 https://growdiaries.com/diaries/122084-grow-journal-by-soosan
📎https://growdiaries.com/diaries/124052-grow-journal-by-soosan
2️⃣
🏠 30x60x50
☀️TS1000 => puissance a 50%
🍁 4x Quick Sherbet - Exotic Seed
📎 https://growdiaries.com/diaries/122080-grow-journal-by-soosan


Likes
11
Share


@Paradox_1ste1
Follow
Stardog room it is looking pretty good and is thriving. Hopefully get the results we asking for.
Aya room up to now is giving pretty impressive results and it looks like they like the enviroment even tho its not fully equiped.
After adding the c4 neet to celan the insides a little bit more and see how it will react.


Likes
6
Share


@Barcelona_Farmers710
Follow
Empezamos nuestro Seguimiento através de Aptus, esta le daremos 3 meses de crecimiento en una maceta de 20L y luego pasaremos a florecer en Invierno. Intentaremos sacar el Máximo rendimiento con las macetas de tela, junto algunas Bacterias para dar vidilla a la cosa Farmers buenos humos!🍁

Likes
38
Share


@Ukfarmer420
Follow
Hi guys
So day 6 of the flip and the screen is nice and full I will now let the nodes and bud sites stretch up, connecting autopots up tomorrow with just water for a week, I had to wait as needed a new air pump for the resivour.
Blue cheese is a bit droopy also due to them needing water but have perked back up now.
I raised the lights as I noticed the purple stems so obviously to much wattage set on the light.
I am changing nutes to shogun for the autopot system, hence just the water for a week.
On the whole looking good but a long way to go.


Likes
24
Share


@TerpTurtle
Follow
Flipped tent to flower
Strawberry truffle is so sticky, just defoliating veg growth and your hands are extremely tacky,
Healthy plants, All leaves are fat and genetics proving themselves to be strong+vigorous
Likes
8
Share

@DogDoctorOfficial
Follow
💙 Project Blue Tent – Week 10
Pickle Lemon Haze F1 – Pheno A
🌸 The Week We Stop Touching And Start Watching
Hello everyone, and welcome back to another chapter of Project Blue Tent! 💙🌱
And this week...
there isn't a huge intervention to report.
😂
And honestly?
That's exactly what I wanted.
After everything we did during the previous weeks, the girls have reached the point where the best thing we can do is step back and let them work.
Pickle Lemon Haze F1 Pheno A is looking absolutely beautiful.
She's healthy.
She's vigorous.
She's flowering.
And she's showing us the results of all the work we've put into her over the previous weeks.
So this week, we're not changing the architecture.
We're not performing another major defoliation.
We're not moving branches around.
We're not trying to force anything.
We're watching.
And we introduced one new element to the experiment:
💡 LumiFlora 150W Under-Canopy Lighting.
🌿 PHENO A – LETTING HER RECOVER AND DEVELOP
Pickle Lemon Haze Pheno A is approximately 145 cm tall, and she's carrying a substantial flowering structure after her long vegetative period and aggressive stretch.
If you've followed the previous update, you'll remember that this girl went through quite a transformation.
The plants stretched far more than expected.
The vertical space became limited.
The LEDs were getting too close.
We moved the carbon filter and extractor outside the tent.
We raised the LEDs.
We opened the canopy with a major defoliation.
We installed a second SCROG.
We added additional airflow underneath the canopy.
And we adjusted the flowering nutrition.
There was a lot happening.
But now?
It's time to see what all of that work actually accomplished.
And looking at Pheno A...
I'm very happy.
🌸
She's not asking for another big intervention.
She's asking for time.
So that's what we're giving her.
✂️ THE DEFOILATION IS NOW TELLING ITS STORY
One of the things I'm watching particularly closely this week is the response to the major defoliation we performed previously.
When we did it, the plants looked dramatically different.
We removed a substantial amount of foliage because the canopy had become extremely dense.
But the objective was never simply to remove leaves.
The objective was to make the flowering structure more functional.
Now we're beginning to see the result.
The plant has opened up.
The branches are easier to see.
The flowering sites have more space around them.
Air can move through the structure more freely.
And Pheno A continues developing beautifully.
That's the part I love about this stage.
The work was done weeks ago.
Now we're watching the plant respond to it.
There's nothing to rush.
There's nothing to force.
We simply observe.
🌿
And that's actually a very important part of cultivation.
Knowing when to act is important.
Knowing when NOT to act can be just as important.
💡 INTRODUCING THE LUMIFLORA UNDER-CANOPY LIGHT
There is one new addition this week.
The **LumiFlora 150W full-spectrum under-canopy light** is now part of the setup.
And with plants this large, the reason for introducing supplemental lighting underneath becomes pretty obvious.
The main LEDs are providing the primary light from above.
But when a plant reaches this size and develops this much structure, the lower portions of the canopy naturally receive less direct light.
That's simply how a dense canopy works.
So instead of constantly removing more foliage to chase light penetration, we're taking another approach.
We're bringing supplemental light to the lower canopy.
The LumiFlora is a **150W full-spectrum fixture**, with additional emphasis toward the red portion of the spectrum.
We're positioning it underneath the canopy to provide additional usable light to areas that naturally receive less from the main fixtures.
The idea isn't to replace the overhead lighting.
It's to complement it.
The main LEDs continue doing the heavy lifting from above.
The LumiFlora gives the lower portion of the plant another source of light.
And now...
we watch.
💡🌱🌸
I'm particularly interested in seeing how the lower flowering sites respond over the coming weeks.
That's the experiment now.
🕸️ THE SECOND SCROG IS STILL DOING ITS JOB
The second SCROG that we installed last week is also staying exactly where it is.
And that's another reason why we're not doing much this week.
It's working.
The first SCROG helped us organize the plant during the vegetative phase.
The second SCROG is now helping support the flowering branches as they continue developing.
With Pheno A being such a tall and vigorous plant, that additional support will become increasingly useful as the flowers gain weight.
We're not trying to force her into another shape now.
The architecture has already been established.
We're simply giving that architecture the support it needs to finish.
🌬️ AIRFLOW – KEEPING THE CANOPY MOVING
The airflow arrangement we created last week is also staying in place.
We have airflow working above and below the canopy, with the additional Zamnesia clip fan underneath helping move air through the lower portion of the plant.
That's especially useful now that we've introduced supplemental lighting underneath the canopy.
More light underneath means we want the lower canopy to remain well ventilated as well.
So we're keeping the air moving through multiple levels of the plant.
Again...
nothing dramatic.
Nothing complicated.
Just a stable environment and consistent airflow.
And when everything is working?
Don't fix what isn't broken.
😂💙
NUTRITION – KEEPING THE GIRL HAPPY
The feeding program also remains consistent.
We're continuing with the PLAGRON Hydro program:
PLAGRON Hydro A — 2.2 ml/L
PLAGRON Hydro B — 2.2 ml/L
🌱 PLAGRON Hydro Roots — 1 ml/L
🌸 PLAGRON Power Buds — 1 ml/L
pH adjusted as required
The plants are responding beautifully, so there is no reason to make unnecessary changes.
They're drinking.
They're flowering.
They're developing.
And they're showing us healthy growth.
So we continue.
This is another part of the experiment that I really enjoy.
Sometimes the best feeding strategy is simply consistency and observation.
Don't feed a number.
Watch the plant.
💙
🌸 THIS WEEK IS ABOUT PATIENCE
If I had to describe this week's update in one word, it would be:
Patience.
We've already done the big work.
Now we're waiting to see the results.
Pheno A has had time to recover from the defoliation.
She's settling into the second SCROG.
The airflow is established.
The LEDs have been raised.
The vertical space problem has been solved.
The nutrition is stable.
And now we've introduced supplemental under-canopy lighting.
That's enough variables.
We don't need to keep adding more.
😂
So this week we're simply watching her flower.
🌿 FROM BUILDING THE PLANT TO BUILDING THE FLOWERS
For so many weeks, the story of Pickle Lemon Haze Pheno A was about building the plant.
Growing.
Training.
Stretching.
Topping.
SCROG.
Branch development.
Canopy management.
Defoliation.
But now?
The structure is there.
The framework is established.
The support is in place.
The environment is stable.
And the story is changing.
Now I want to see those flowering sites become the main character.
🌸
That's why we're not touching much.
We're giving her the opportunity to turn all that structure into flowers.
🔬 SAME ROOM. SAME ENVIRONMENT. HER OWN STORY.
One of the most interesting parts of Project Blue Tent is that all four plants are sharing the same ecosystem.
Same room.
Same lighting.
Same irrigation.
Same nutrition.
Same environmental conditions.
Same cultivation philosophy.
And yet...
each phenotype still tells her own story.
Pickle Lemon Haze Pheno A has certainly given us one hell of a chapter.
😂💙
She's been vigorous.
She's stretched aggressively.
She's needed structural management.
She's gone through a major defoliation.
She even lost one branch during training.
And despite all of that...
she's still standing beautifully.
That's her story.
And now we're getting to see what she does with the space we've created for her.
🌸 CURRENT GROW CONDITIONS
🌸 Flowering: Week 10
📏 Height: approximately 145 cm
💡 Light schedule: 12/12
☀️ Day temperature: 27°C
🌙 Night temperature: 27°C
💧 Relative humidity: 61%
⚗️ pH: 6.01
⚡ EC: approximately 2.49 mS/cm
🌡️ Solution temperature: 24°C
🌱 Substrate temperature: 24°C
🌬️ CO₂: approximately 666 ppm
💦 Watering: approximately 1.6 L per plant / 24h
? Pot size: 8 L
💡 LumiFlora Under-Canopy: 150W Full Spectrum
💙 THE BEST THING WE CAN DO RIGHT NOW
Looking at Pheno A this week, I keep coming back to the same thought:
Leave her alone.
😂
Not literally, of course.
We're still monitoring everything.
We're still checking the environment.
We're still watching the nutrition.
We're still observing the flowers.
We're still making sure the airflow is doing its job.
But we're not trying to constantly manipulate the plant.
We've done the structural work.
Now we want the plant to show us the result.
And that's a very satisfying stage to reach.
🔭 LOOKING AHEAD
Over the next few weeks, I'll be watching several things closely.
🌸 Flower development throughout the canopy.
💡 The response of the lower flowering sites to the LumiFlora.
🌿 How Pheno A continues recovering from the heavy defoliation.
🕸️ How the second SCROG supports the developing branches.
🌬️ How the airflow performs through the mature canopy.
How the plants continue responding to the current feeding program.
But for now...
no major changes.
No unnecessary intervention.
Just observation.
Because Pheno A is looking happy.
And when she's happy...
I'm happy.
😂💙
🌸 FINAL THOUGHTS – NOW WE WATCH
What a difference a few weeks can make.
Not long ago, we were looking at this plant and wondering how we were going to fit her into the tent.
The stretch was aggressive.
The LEDs were getting too close.
The canopy was becoming too dense.
We had to move equipment.
We had to raise the lights.
We had to defoliate.
We had to install another SCROG.
We had to improve the airflow.
And now?
We're standing back and watching.
That's the beauty of this stage.
The work has already been done.
The plant has been given the structure.
The room has been given the space.
The branches have been given support.
The canopy has been opened.
The environment is stable.
And now we've added one more tool to the experiment:
The LumiFlora 150W full-spectrum under-canopy light.
It's not about throwing more and more equipment at the plants.
It's about giving the lower canopy an additional source of light now that the plants have become so large.
And then...
we wait.
Because sometimes the best thing a grower can do is recognize when the plant doesn't need another intervention.
Pickle Lemon Haze Pheno A has already done her part.
She's built the structure.
She's survived the stretch.
She's recovered from the defoliation.
She's adapted to the new architecture.
She's continued flowering.
And now...
she gets to finish.
💙🌸🌿
🙏 A HUGE THANK YOU
A huge thank you once again to Zamnesia for making Project Blue Tent possible and for giving us the opportunity to explore these beautiful Pickle Lemon Haze F1 genetics phenotype by phenotype.
Thank you to PLAGRON for the Hydro nutrient line supporting these vigorous girls through their flowering cycle.
A massive thank you to Zamnesia for the Phytonaut LED lighting, curved scissors and clip fans that continue playing such important roles inside this project.
Thank you to Mars Hydro for the irrigation and drainage system that keeps these girls consistently supplied and the ecosystem running smoothly.
And a special thank you to **LumiFlora** for the 150W full-spectrum under-canopy light, which we're now introducing into the experiment to see how supplemental lower-canopy lighting performs during this stage of flowering.
And of course, thank you to GrowDiaries for giving us the platform to document the entire journey.
Most importantly...
thank you to everyone following Project Blue Tent.
This week wasn't about doing more.
It was about seeing what everything we've already done has created.
We trained her.
We supported her.
We opened her up.
We gave her room.
We improved the airflow.
We raised the lights.
And now...
we watch.
Pickle Lemon Haze Pheno A is healthy.
She's vigorous.
She's flowering beautifully.
And she's got everything she needs to continue the journey.
So this week, we're putting the tools down...
taking a step back...
and letting this beautiful girl do what she does best.
Grow.
Flower.
Finish.
💙🌸🌿
Until next week...
More flowers.
More observation.
Less interference.
And hopefully...
a whole lot more Pickle Lemon Haze F1 magic.
Growers Love, happy growing, and take care everyone! 🌱💙
Likes
2
Share

@Kcnvp
Follow
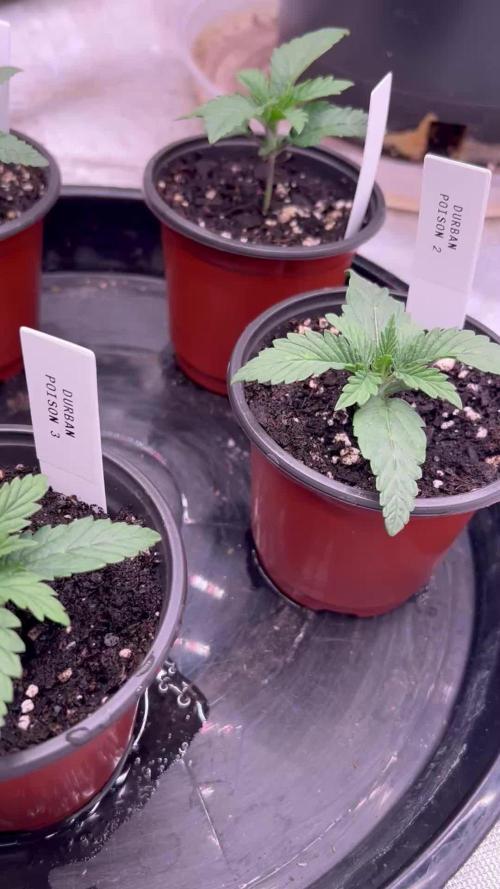
Week 2 veg.
Mixed 3 drops of Botanicare cal-mag plus and 10 drops of Flora Nova Grow into 500ml of water. Ph’d the water to 6.5. Based on the general hydroponics feed chart, it should come out to about a medium strength feed.
Still happy with the growth under the 24hr schedule.
