


Likes
Comments
Share


@Buddyman75
Follow
Grew well and so far there's no pests. I think they're growing on schedule with no stunt so far.
I think they should start packing on weight next week. We will see.
All Good!


Likes
11
Share


@emeraldlabs
Follow
The final stretch. She MAY be foxtailing a bit, but she’s a 9-10 weeker (more typical?), pretty even throughout plant (so likely genetic?), and I plan to harvest in max 1 week so we will ride it out.
Video/photos taken 112 days after breaking soil, day 63 of flower.
UPDATE: Chopped on 3/21, day 69 of flower

Likes
37
Share


@Wrongholn519
Follow
Day 70 for these Fastbuds beauties
Blackberry Auto:
With dark purple buds glowing fiercely and a dank smell to match, this girl could make anyone's tent look amazing. During the last few weeks her buds have become incredibly dense and sticky. She is very short and thick in stature compared to the other plants I have in flower. I inspected her trichomes over the weekend and ive determined that she is pretty much ready for harvesr. I expect about 2 oz of high quality flower after dry/cure.
Forbidden Runtz Auto
I'm really blown away with the turnaround in this girl. She was mutated & so small I almost tossed her out during early veg; I'm glad I changed my mind.
She stretched significantly between weeks 4-6 and I really wasn't expecting much from her. In reality, she has blown my mind... incredibly dense and sticky buds have developed in the past 4 weeks.
She's got the zkittles smell mixed with a gassy terp profile.. I think the higher humidity through flowering phase really helped develop these dense buds.
When I checked her trichomes over the weekend I determined that she will be cut down within the next 7-10 days.
Process/ Environment changes:
- Lowered my SF4000 roughly 20 cm to increase photon delivery to the canopy
- Water/kelp meal only from this point to harvest
- My temperature has risen due to change of seasons .. roughly at 27-28 deg C during daytime.. this is why I lowered my lights rather than turning them up
- Defoliating any unnecessary fan leaves at every chance I get
- I've had to use spools of twist tie to use to keep the branches from falling over from their own weight. I'll tie one end to the top of a branch, and the other to the stock. Not ideal but its working.
Cheese auto dry/ cure update:
After 10 full days of drying, I gave the buds a decent trim and put them inside glass jars where they will remain for many weeks. I add 2 way Boveda humidity packs to help regulate the relative humidity within the containers. I also use tiny hydrometer pucks to measure the humidity and temperature inside the jars. My ideal cure is at 62% RH

Likes
9
Share

@purpleme
Follow
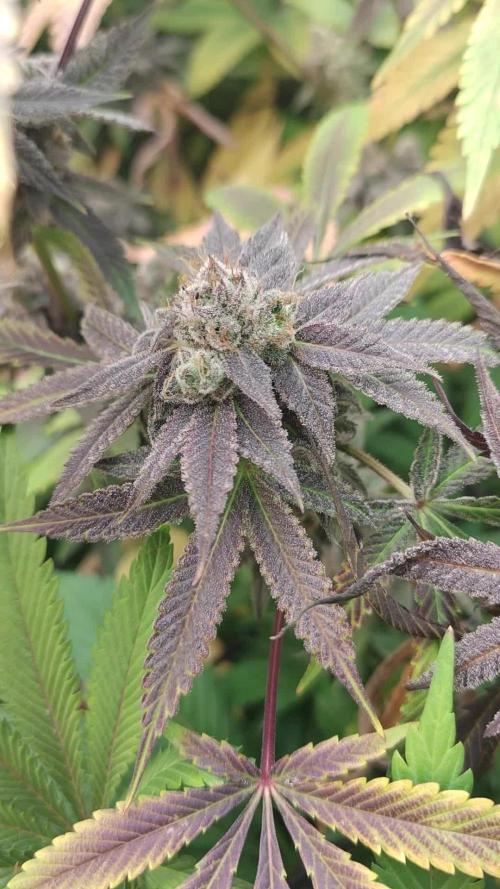
Noch viele durchsichtige Trichome. Laut plan haben sie jetzt auch noch 7 Tage bis sie fertig sein sollen. Kann momentan nicht abschätzen wie viel es wird aber qualität scheint gut zu sein und scheinen alle auch sehr hart geworden zu sein. Abwarten



Likes
8
Share

@CannabisDemon
Follow
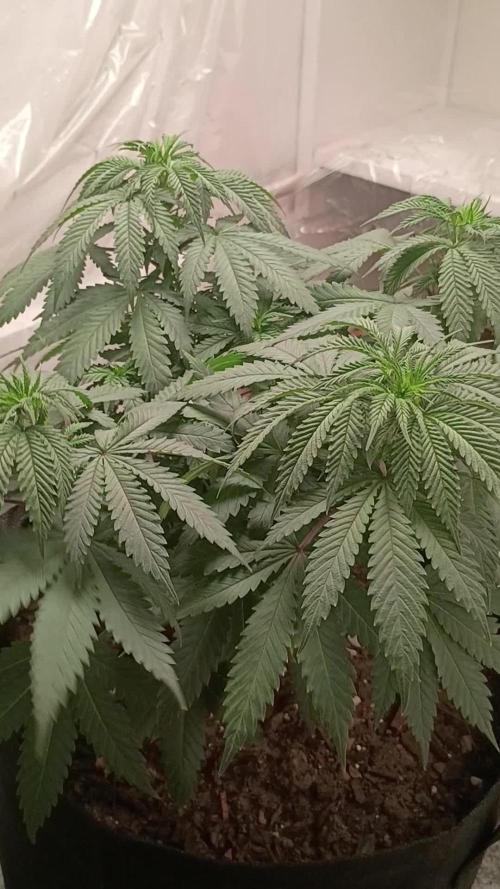
I really enjoy this variety I love how the stems are already turning dark purple the plant has grown great so far did a major defoliation I would like to get them into flower in the next week or two but I'm not 100% sure what I'm going to do yet. I would like them to be just a little bit bigger.


Likes
29
Share





Likes
3
Share


@Aircoholic
Follow
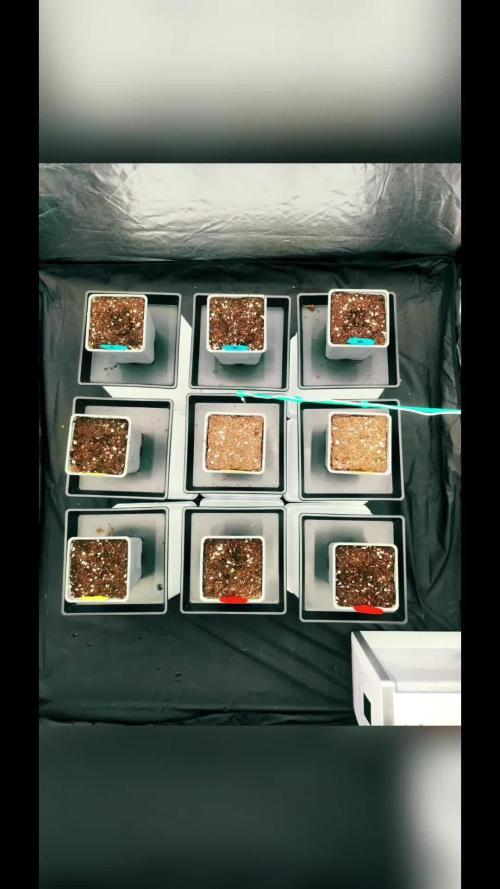
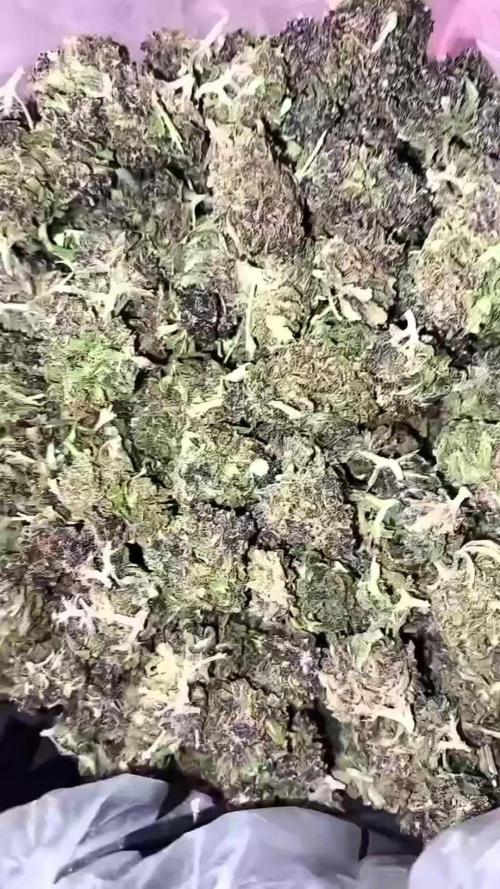
She was ready to get topped! She looks so healthy and vital with enough internodal spacing - so I decided her 3-week anniversary after germinating is a good moment to take her top off. As a beautiful surprise, she has triple stalks at the fourth node, her new top, which will look super pretty when going into LST camp!
Also, her lower stalks are already growing strong and long, giving me the feeling, she'll be a bushy lady.


Likes
13
Share


@gr3g4l
Follow
Empezamos la semana cambiando los nutrientes al observar ya unos pequeños pistilos o estigmas , en definitiva, empezaron a mostrar tímidamente el sexo. Empiezo con poco y iré subiendo la dosis hasta 4ml/L hasta que vuelva a cambiar de nutrientes.
Creo observar del Lumatek ATSpro que le fataria un punto de luz en el centro del panel. Por lo general con otras luminarias la planta del medio me solia crecer mucho mejor y esta vez está quedando retrasada. Seguiré cultivando y si me sigue pasando lo mismo entonces no tendré ninguna duda, por ahora solo son conjeturas, xd
De lo anterior rectifico , tengo que decir que pasados dos dias lo estoy viendo diferente, la del medio parece que sigue por buen camino, ahora apenas notaria la diferencia.
La semana anterior, la sexta, se les hizo una segunda pulverización con dosis alta de 3ml/L con spiderbloom ( "fitofortificante de impacto muy rápido") pero de nada sirvió, durante esta semana subió la temperatura a 30ºC un par de dias y las arañas salieron a pegarse el gran festín.
Una vez constatada la existencia de araña roja correteando por el envés de las hojas solo toca desinfectar bién el armario, lavarlas a todas una a una con agua corriente para arrastrar el máximo de arañitas y una vez secas darles con algun acaricida químico. De no hacerlo ahora me seria imposible más adelante y no tengo ningunas ganas de dejar perder este cultivo. No soy partidario de lo químico pero menos de dejarlas perder.

Likes
20
Share


@Densko
Follow
2/5 is insanely big for day 35.
It has many shoots and im debating whether or not i should lollipop this plant, what do you guys reckon?
Flowering mode has really begun this week, extra shoot production stopped and more and more pistils are forming. The stretching has also stopped.
I really think topping is the way to go for these genetics, with this short veg time. Or my LST is just bad and i should do it differently.
Still watering 3L of water every 2/3 days.
Let's see those buds form😍. Way to go RQS for this record holding autoflowering seed to harvest time.
Likes
5
Share


@MisterZ
Follow
Hello my grower friends.
As @xii_xii_mrgreen suggested me, I am sharing with you the recipe for Marrakech butter. It's cannabis butter made with all the leftover waist, curing, and leftover grinders. Each time a leaf is filled with resin, I put it aside. After a few sessions, I have enough to make ganja butter. For this tour there are cultural leftovers loaded with THC and almost as much CBD.
It is also a good technique to fully use plants grown outdoors that have more leaves than indoors.
Ingredients and utensils
I live in an area that produces a lot of butter. I chose the best: echiré butter. https://www. echirelebeurredefrance. fr/ I saw some at Harrods, KDW and Corte Ingles. I only visit the top floor of these stores. Otherwise, choose a good, greasy, yellow butter. Gauze or compresses filter the mixture finely so as not to find small pieces of grass in the butter. This recipe is only valid for real butter and does not work with vegetable butter.
Preparation
Before rolling the recipe you can boil your ganja for 5 minutes to “clean” it if it is dusty. It must then be dried for at least 2 days. I do not do this so as not to degrade the good stuff and when cooling the impurities remain at the bottom in the juice, the butter is on top.
Recipe
THC and CBD are activated by decarboxylating ganja. You have to put everything in the grinder first, there are other faster techniques, but the grinder produces a fine cut. I used a bigger one than in the photo. Place everything on a wire rack with baking paper for 40 minutes at 110°C in the oven. It smells great, watch out for your neighbors. At this stage you can set some aside to season your pizza. Estimate the quantity compared to what you put into a hit. It is not necessarily a good idea to put it in a simmering dish because it changes the taste a lot.
I melt 4 times the weight of the butter leaves in 4 times the weight of the butter in water. So here for 35g of leaves I melt 140g rounded to 150g of butter in 600g of water in a stainless steel saucepan. Heat until the butter. Add the leaves and mix gently. Cover a tiny amount of broth. The water stays below and should not completely evaporate. This is very important otherwise the butter or the leaves are burnt. It is necessary that the grease begins to isolate on the surface. It takes between 2 am and 3 am. It smells much less good than in the oven and disgusting, which is why I do not recommend putting it in stewed dishes. Allow to cool to room temperature. When the soup is lukewarm it must be filtered.
To facilitate demolding, I recommend that you put plastic film at the bottom of a fully concave bowl, put gauze or compresses to refine the filtration. It's also easier to press the rest of the leaves. The fats will float on the cooking juices. When the bowl is cold, put it in the fridge. The next day unmold. I got 92g of Marrakech butter.
Potency should be tested on an empty stomach and adjusted in small quantities every hour.
Use
Butter is ready and can be consumed immediately. It is perfectly digestible but the taste is not very good.
In the form of butter, the best is to spread it on bread with a slice of smoked salmon on top, a few drops of lemon and serve a glass of chablis. Very good also spread on bread to accompany oysters. Probably its green, grassy taste is reminiscent of seaweed.
It loses some of its flavor mixed with chocolate and spread.
You can melt a little bit of it in the tomato sauce of your pasta or the soysauce of your rice especially if you eat fish: soysauce water nuoc mam 30 seconds in the microwave, melt only after a little butter in the hot sauce and pour over your rice.
You can use it in all hot or cold culinary preparations in place of regular butter if you don't use it all, cut it into individually wrapped portions in cling film and put all of these portions in a freezer bag in the freezer. It holds up very well.
Tell me if it is not clear, I will make as many changes to adapt the translation.
Bon appetit.
M assisted by Mister Z.
Likes
37
Share


@GrownwithLED
Follow
After germinating the seeds are transplanted into small pots with soil (see tutorial in VIDEO above). The soil is prepared with water mixed with a little bit of BIO NOVA Roots (0,5 ml/l), which aids the development of the seedling. Transplanting is very easy now, because they have grown a STRAIGHT tap-root while hanging during the SERIOUS' WAY of germination. This straight root allows for easy potting of the seeds. Simply make a little hole in the center of the soil with your pinky finger and carefully place the germinated seed with the white root pointing DOWNWARDS into the hole. Best is to lay it onto one side-wall of the hole with the seed shell right at the surface. Then I push the other side inwards and enclose the whole root with soil. At the end only the top of the seed-shell peeks out of the soil. IT IS VERY IMPORTANT to plant the seeds NOT TO DEEP into the soil. The seedling only needs extra strength to work itself upwards thru the soil and you run the risk of the soil drying out and the seed dying off. When you PLANT THE SEED VERY SHALLOW into the soil (=with the top of the seed-shell still peeking out) your seedling can grow out right away and you have a small plant already 24 hours after putting the seed into the soil.
The small seedling sometimes still has the seed-shell on its 'head', it normally falls off by itself, but sometimes you have to carefully help and take it off with your finger nails. Be careful to NOT clip of the seedling accidentally when you do this!
The seed-shall has an inner lining, which feeds the small seedling when it germinates. This inner lining sometimes gets tangled around the stem of the small seedling after the shell has fallen off. This little skin MUST be taken off the stem right away! Once it dries up, it gets hard and can strangulate the seedling around the stem. In order to avoid this, the skin must be taken off as soon as possible! I show it in the pics above and also made a video about taking off the inner lining of the seed.


Likes
4
Share


@Ninjabuds
Follow
My LIT Marker plant is thriving, and it's interesting to see the similar leaf structure to the Black Valentine I grew from LIT Farms. I gave it a dose of calcium this week, hoping it will help green up the leaves and keep it healthy.
It's been a challenging week with the constant rain and ridiculously high humidity. Keeping things dry indoors has been a real struggle. Despite the weather, I managed to flip all my feminized photoperiod plants to flower this week. I'm hoping the switch will go smoothly, but with this humidity, it's going to be tough.


Likes
16
Share


@Chocolopeison
Follow
Comenzamos la floración con estas chicas, estoy muy encantado con ellas la verdad para que les voy a mentira, muy ansioso de empezar a ver sus flores, pretendemos fertilizar solo hasta la semana 5 por ahora. Estamos solo con 1 riego diario estuvimos de 1L ahora lo subimos 2L y lo recibieron muy bien.
Algo en particular es que estamos probando cannaboost folear, se lo estamos dando 3 veces por día a la planta hace 10 días y no vamos a parar hasta el día 21 de floración para luego cambiar a dosis radicular, estamos haciendo esto para economizar cannaboost y comparar resultados con su dosis full que ya la eh testeado.
A las nenas se les hizo super cropping (en mi instagram pueden ver un tutorial @chocolopeison) hace 7 días a las cuales también le agregamos unos soportes y hoy ya la pasamos a floración recuperadas con una gran defoliación de bajos. Ahora esperaremos día 14 para hacer otra defoliación, super cropping y guiado de malla que pronto estaremos instalando.
La iluminación estamos con 540W de qb (2 @heavengrowlight y 1 @meijiu)


Likes
2
Share


@Fleetwood
Follow
Still just want to keep the defoliation to a minimum. I wanted to have a grow with the plants 'O Natural' with no topping or other techniques. I thinned out almost all but the top 2 sets of fan leaves

Likes
3
Share


@Gbomb
Follow
Trichromes all milky and a little amber - plants are going to be in complete darkness until they get chopped. Will update harvest when complete
