


Likes
Comments
Share


@Ganjaman19
Follow
Another banger by @divineseeds make sure your following them on Instagram awesome company awesome genetics top service and some top fire strains
Thank you Divine seeds for this opportunity its been great and hopefully be doing work with you guys all the time now


Likes
1
Share


@tterpy
Follow
Girls are slowly recovering from being stunted from barely getting nutrients.. much more lateral growth and starting to fill out
Likes
23
Share


@StantonGrowsUk
Follow
Been a nice grow and lots of knowledge gained 🙂
The 4 girls are looking frosty now.
I'm going to start flush from next feed which is tomorrow.
Hopefully they swell up nicely and get frosty.
Will tune over the next few.
Take care guys and be good 👍
Stanton


Likes
6
Share


@Ross4Twenty
Follow
Was showing signs of nutrient lockout so decided to start flushing process.. amazing smell but this will be the last ever diary of disco biscuits as she has outstayed her welcome.
Not as fat as I’d like her to be but still 2 weeks remaining before chop.
Likes
37
Share


@GrownwithLED
Follow
After germinating the seeds are transplanted into small pots with soil (see tutorial in VIDEO above). The soil is prepared with water mixed with a little bit of BIO NOVA Roots (0,5 ml/l), which aids the development of the seedling. Transplanting is very easy now, because they have grown a STRAIGHT tap-root while hanging during the SERIOUS' WAY of germination. This straight root allows for easy potting of the seeds. Simply make a little hole in the center of the soil with your pinky finger and carefully place the germinated seed with the white root pointing DOWNWARDS into the hole. Best is to lay it onto one side-wall of the hole with the seed shell right at the surface. Then I push the other side inwards and enclose the whole root with soil. At the end only the top of the seed-shell peeks out of the soil. IT IS VERY IMPORTANT to plant the seeds NOT TO DEEP into the soil. The seedling only needs extra strength to work itself upwards thru the soil and you run the risk of the soil drying out and the seed dying off. When you PLANT THE SEED VERY SHALLOW into the soil (=with the top of the seed-shell still peeking out) your seedling can grow out right away and you have a small plant already 24 hours after putting the seed into the soil.
The small seedling sometimes still has the seed-shell on its 'head', it normally falls off by itself, but sometimes you have to carefully help and take it off with your finger nails. Be careful to NOT clip of the seedling accidentally when you do this!
The seed-shall has an inner lining, which feeds the small seedling when it germinates. This inner lining sometimes gets tangled around the stem of the small seedling after the shell has fallen off. This little skin MUST be taken off the stem right away! Once it dries up, it gets hard and can strangulate the seedling around the stem. In order to avoid this, the skin must be taken off as soon as possible! I show it in the pics above and also made a video about taking off the inner lining of the seed.


Likes
2
Share


@cboyaki
Follow
I am happy how this grow went , didn’t come across no issues at all it was a pretty smooth run , it took all nutrients like a champ , never had any over watering problems or nothing
The water I use is 6.4 PH from Lidl and haven’t occurred no problems across my grows
I don’t even have a PH or TdS tester 🤭
Overall this was a joy to grow very strong sour citrusy apple smell , looking forward to trying it so hope the dry and cure goes well as the rain hasn’t helped the humidity
Temps around 19-22c Humidity 50-67
I’m trying to control it as much as possible also with a oscillation fan blowing air around the room
Likes
18
Share


@BudXs
Follow
This mother is gonna be grown out to see what she can do. Transplanted into 5 gallon container following the clone cuts. Will look for some stretch and try to get her 4+ feet tall.
Happy growing, growmies




Processing
Likes
6
Share


@Godsgrower316
Follow
Never done this strain before have another going that the seed is supposed to be female. Testing said way to see seed dont think it work but why not

Likes
22
Share


@Strega
Follow
This is the last week 😍💚💚 I really want to say thxs to Sweet seeds for the wonderfull seeds. I love my mandarine and now, when this grow is at the end, I just have to wait

Likes
8
Share


@GrowsGanjaGuy
Follow
So far 44 grams total dry weight of flower. I have 1 zkittlez girl left. Smoke is amazing and the sedating effects come after the peak. Overall great looking and tasting bud.

Likes
7
Share


@CouchlockAussie
Follow
Day 21 everything seems to be going good, turned light all the way up (147watt) 35000 lux = 561 umol = 40.39 DLI, next week ill add my other bp1500


Likes
18
Share


@BudgetGrows
Follow
So the beans are in the water, the medium is ready, let's see how we get on, once the beans pop or not I will change the germination date.
3/3 beans popped and now in the soil as of 14th
Thanks for stopping by 👍

Likes
10
Share


@Ieiogrow94
Follow
Eccoci qui!!!
Tutto procede per il meglio, i pistilli sono usciti e ora si va dritti dritti alla maturazione, NE VEDREMO DELLE BELLE!!!
Che dire se non WOW, due bimbe in salute e dalle quali mi aspetto molto!!
Reagiscono molto bene alle fertilizzate e già emanano un odore veramente incredibile, OTTIMA GENETICA!!
Grazie a tutti per il supporto ❤️🔥🌲
Likes
69
Share


@nonick123
Follow
Día 87 (26/08) Aplicación foliar de Bacillus thuringiensis a 1 g / litro para evitar a las temidas orugas de los cogollos!
Hace un día nublado (29 ºC de maxima) y NO es necesario regar
Elimino la malla de sombreado de la cara sur, ya que las temperaturas son más suaves después de la canicula
Día 88 (27/08) Riego con 500 ml H2O pH 6,5
Empiezan a bajar las temperaturas a 29 ºC de máxima, y se nota en la demanda de agua por parte de las plantas!
Día 89 (28/08) Riego con 500 ml H2O pH 6,5
Cada planta empieza a ir un poco a su marcha en la demanda de riego dependiendo de su tamaño y estado de floración
Día 90 (29/08) Riego con 250 / 500 ml H2O pH 6,5
He detectado un gusano de los cogollos muerto sobre una hoja! 💥 Parece que los Bacillus thuringiensis funcionan estupendamente! 😁
Día 91 (30/08) Riego con 250 / 500 ml H2O pH 6,5
Día 92 (31/08) Riego con 1 litro H2O pH 6,5 + 25 ml de Humus de Lombriz Liquido
Día 93 (01/09) Aplicación foliar Bacillus Thuringiensis
No es necesario regar tras el litro de ayer y dia nublado con pequeños chubascos!
💦Nutrients by Lurpe Solutions - www.lurpenaturalsolutions.com
🌱Substrate PRO-MIX HP BACILLUS + MYCORRHIZAE - www.pthorticulture.com/en/products/pro-mix-hp-biostimulant-plus-mycorrhizae
Likes
37
Share


@PapaNugs
Follow
Another good week generally speaking. The girls are drinking a lot but nothing crazy. Things are wrapping up here in this tent shortly.
This girl is almost done. She's finishing up over this week and will see how she goes. Some smell from her but not that fat.
Dimmed to 80%
Here are the lights details:
Medic Grow Mini Sun-2 150W LED
Model: MN150-022
Spectrum mode: V1
Efficacy: 2.8 umol/J
Thanks for stopping by!
You can find the light on Grow Diaries:
https://growdiaries.com/grow-lights/medic-grow/mini-sun-2-150-watts
You can find the light on Medic Grow's website:
https://medicgrow.com/
Likes
Comments
Share


@YOREEL
Follow
Well...that escalated quickly...she's stretching and stretching i was worried i'd run out of space. I started using 'bends' to supercrop some of the primary tops to level out the canopy.
Upped the PPM to 700 and she didn't like it again. The PPM increased after three days so I backed off and decreased it to 600. Not sure if it's the nutes collecting at the bottom of the res but i moved the meter around.
Added some Zyme as I had some sample capsules - Hopefully will benefit her.
Everything looks fine so far and doesn't seem to be any deficiencies.
Timelapse is over the course of 11 days - final timelapse is day 25 of flower..

Likes
4
Share

@GREENPHOENIX6262
Follow
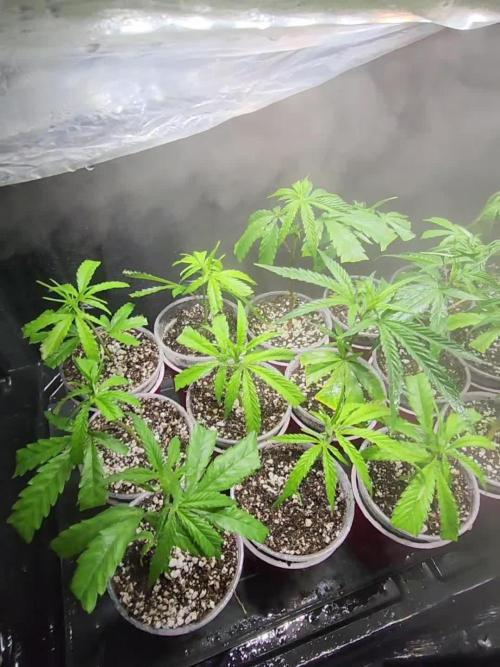
09/07 - Reveg still in process - Mother plant in recover from clone clipping - unhealthy clones disposed - cutting new clones this week - Myco and Superthrive feed increased - Net dropped an LST.
