Likes
Comments
Share


@JL420
Follow
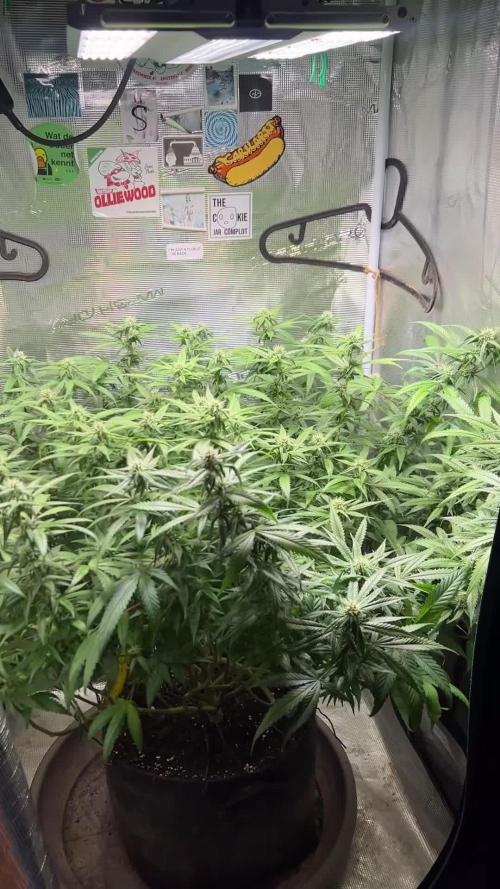
los cogollos estan engordando y el olor ha aumentado tanto que me toco poner el filtro de carbon activo.
Hubo un pequeño exceso y regue un par de dias solo con agua de osmosis ec 0,17 y ph 6

Likes
18
Share


@Pokan187
Follow
All is good so far, the seeds of all the different strains have been quite vigorous. Lost my first sour diesel due to my impatience, but the second time around was a charm .

Likes
19
Share


@SinSemillaWhisperer420
Follow
She’s a fast grower! Getting big quick. She is also getting natural sunlight in through the window when conditions are good. At 18 hrs on & 4 hrs. off, she is under a Phlizon ph2000 watt.


Likes
56
Share


@Master_weeda
Follow
Bonjour à tous les padawans et les maîtres jedis
Pour cette semaine 3 au jour 19 ma plante fais 21 centimètres et son septième noeud apparaît je décide donc de pratiquer un LST sur ma plante.
Pour ce j'utilise du fil de fer galvanisé que je plante directement dans le substrat en faisant attention de ne pas endommagé les racines car n'oublions pas que ce qui pousse dessus pousse aussi dessous.
Jour 17 je pulvérise du une solution composé d'une cuillère à café de savon noir mou (marque briochin) dilué dans un demi litre d'eau en prévention d'éventuels nuisibles.
Pourquoi le savon noir mou ?
Savon noir : quelle utilisation pour le jardin ?
Le savon noir est un produit naturel dont les propriétés nettoyantes sont connues depuis l'Antiquité. Utilisé pour l'entretien de la maison et pour les soins corporels, ses vertus antibactériennes et insecticides en font un allié précieux pour le jardinier bio.
Le savon noir est fabriqué à partir de potasse et d'un corps gras de type huils végétale comme l'huile d'olive, de lin ou de maïs.
Produit naturel et biodégradable (s'il ne contient pas d'additifs, comme cela peut-être parfois le cas), c'est un très bon produit nettoyant, pour les sols, la cuisine, la vaisselle, le linge, etc... Très polyvalent, il est également économique, comparé aux multiples détergents classiques du commerce.
Le savon noir se trouve sous forme de pâte molle et brune ou sous forme liquide, dilué avec de l'eau. C'est du savon noir liquide dont on se sert généralement au jardin, car son utilisation est plus simple. Il s'achète dans les magasins bio ainsi qu'en grandes surfaces ou jardineries.
Attention : la recette du savon noir de ménage et celle du savon noir utilisé en cosmétique ne sont pas forcément les mêmes ; les savons noir de ménage (multi-usages) peuvent contenir davantage de potasse afin d'améliorer le pouvoir dégraissant (irritant ou desséchant pour la peau), voire même certains additifs chimiques.
Au jardin, ce sont en priorité les propriétés antiseptiques et insecticides du savon noir qui sont utilisées.
Le savon noir liquide est utilisé pour lutter contre les pucerons, les cochenilles, les araignées rouges, les aleurodes, les psylles et autres thrips. C'est un insecticide de contact ; il tue les larves et nettoie le miellat qui englue les feuilles.
La recette de l'insecticide à base de savon noir (mou pour ma par marque briochin) est simple à réaliser : une ou deux cuillères à café de savon noir mou (briochin) diluées dans 1 demi litre d'eau tiède (dilution à 5 %) ; une fois la préparation refroidie, pulvérisez-la sur les plantes atteintes, en prenant soin de ne pas oublier l'envers des feuilles. À renouveler 1 à 2 fois si nécessaire, pour être totalement débarrassé des indésirables.
Comme il est de mise pour la plupart des traitements, ne pulvérisez pas la solution à base de savon noir en pleine journée, sous le soleil (ni sous la pluie !) ; procédez le matin de bonne heure ou patientez jusqu'à la fin de journée, lorsque les températures sont en dessous de 20°C.
Jour 18 Je corrige mon LST suivant la pousse de ma plante ...
Pour ma par c'est la manière dont je procède mais petit rappel de la technique du LST
Quand commencer à appliquer la technique LST ?
De nombreux cultivateurs commencent la manipulation dés que les plantes possèdent entre 3 et 6 nœuds ou une paire de feuilles. Durant cette première étape de la croissance, le tronc encore flexible est pliable sans risque qu’il ne se casse, même si au fur et à mesure du développement de la plante il sera de plus en plus difficile de le plier. Nous pouvons continuer à guider la croissance des branches durant toute la culture, même durant la floraison, ce qui pour cette étape représente un grand avantage face à la taille, qui n’est pas du tout recommandé une fois que la formation des têtes commence, cela stressera en effet la plante, ce qui aura pour effet de retarder la récolte.
Comment appliquer la technique de guidage LST
Si nous sommes prudents, la flexibilité naturelle des fibres du cannabis permet de plier leur tronc et branches avec une relative facilitée, même durant la floraison des plantes.
En utilisant une corde fine, nous pouvons accrocher la pointe de la plante à la base du pot par exemple ou à un tuteur que nous aurons planté dans le substrat. Nous plierons le tronc avec précaution et nous le fixerons avec la corde, à partir de là, nous pouvons augmenter progressivement la tension de la corde, chaque jour un peu plus, jusqu’à obtenir la position souhaitée. Soyez attentif à la réaction de la plante, essayez de ne pas appliquer trop de pression sur la corde et rappelez-vous que la flexibilité des branches peut varier d’une plante à l’autre.
Pour obtenir de meilleurs résultats, il suffit de suivre quelques règles simples. Pour commencer, nous devons choisir une corde fine mais pas trop pour ne pas blesser les troncs au fur et à mesure qu’ils grandissent et qu’ils deviennent plus gros.
Nous pouvons utiliser des crochets en plastique souple ou de n’importe quelle autre matière flexible pour éviter d’endommager les plantes. Spécialement en intérieur, utiliser des cordons en plastique de couleur (voir les diaries de @Silky) est très pratique pour voir facilement les accroches et faciliter le travail au milieu du réseau formés par les cordes, les tuteurs, les mailles ou les supports que nous aurons dans la culture. Bien entendu, en culture extérieure et surtout en guerilla nous ferons juste le contraire et nous utiliserons des matériaux de couleur qui n’attirent pas l’attention pour que notre jardin reste discret.
Pour stresser les plantes au minimum, la mieux est de réaliser ces manipulations le soir ou juste après que les lampes en intérieur s’éteignent, ce qui leur permettra de se remettre durant la nuit. Normalement, le jour suivant nous pourrons observer comme les pointes des branches que nous avons pliées se dressent de nouveau vers le haut à la recherche d’une source de lumière.
Que la force soit avec vous💪

Likes
1
Share


Likes
6
Share


@SkunkyDog420
Follow
Hallo zusammen 🤙.
Sie wächst sehr schön und macht keine Probleme.
Rabattcode für den BIOTABS-Webshop https://biotabs.nl/en/shop/ GDBT420, damit erhalten Sie 15 Prozent
Processing
Likes
4
Share


Likes
13
Share


@Truta
Follow
A planta fastberry apresta uma anomalia na metade da planta, com folhas atrofiadas e brotos nascendo viradas para baixo, não sei o que possa estar acontecendo, se alguém tiver uma dica provável. Obrigado


Processing
Likes
2
Share


@Justrite
Follow
End of week one of germination .
Currently setting up veg tent and still tinkering with set up .
Germinated in pre soaked rock wool cubes with rooting stims and a 1ml of m g b and then cover with a bit of light mix and just using cal mag water watered over the top when required , when they start to take off I’ll use a mix with rooting Stims Again to get theM working with the autopot system
Pizza , luv & Techno ;)

Likes
4
Share


@Nookandplant42o
Follow
Alright Robust in the original shape of a Christmas tree, its thick leaves and well-resined flowers the pistil phase starts to turn orange the trichomes we can go further to have milky with amber, and enjoy its performance until the end its smell is very strong it is sweet .

Processing
Likes
Comments
Share


@Ogbangbang2981
Follow
this week was a good week I watch my girl.grow from a seed to a plant and is now starting up.flowering stage she's the shortest out of my 3 plants and I just added one plant to my family didnt wanna be to excited with this one because I lost her twin sister already but her strain is (its 1 day since she popped up)"wedding cake "
Likes
7
Share


@MicroHidroGrow
Follow
Día 15. Las plantas ya alcanzaron un altura muy buena. Ya empiezan a aparecer los primeros pelos blancos. Por el momento me ha sorprendido la reacción de las plantas al bud blood. Si puedo voy a comprar bud candy para ayudar un poco a la mezcla. Por el momento decidí mantener el bud blood a media dosis durante una semana más con el big bud. Veremos que tal resulta.
Día 17. El estirón siguió y las plantas alcanzaron 51 cm. Las pequeñas directamente quedaron tapadas. En este experimento se puede ver la diferencia entre tierra e hidroponia. La verdad que estoy sorprendido. Creo que los productos usados son los que han marcado la diferencia. Las plantas quintuplicaron la altura total que tenían al momento de pasarlas a floración. Y sospecho que van a seguir estirándose una semana más. Espero no tener problemas de altura porque no lo planeaba. Creo que voy a cortar algunas ramas bajas más, dado que se están generando muchas sombras nuevas. Seguiré actualizando.
Día 19. El estiramiento continua, pero levemente. Ya alcanzaron 55cm. Estuve cortando algunas ramas y hasta supongo que podría cortar más. Pero a esta altura ya todo lo que hay recibe buena luz. La diferencia entre la madre que está en tierra y los esquejes en hidroponia, es cada vez más notoria. Si bien ya la he visto, tener una planta al lado de la otra bajo la misma luz, hace la parte alevosa de todo esto.
De todos modos, he comprobado que el sabor obtenido en tierra, es más fiel al de la hidroponia. En hidroponia en principio, las plantas son mas fuertes en todo, pero el sabor de alguna forma, es demasiado afectado por los nutrientes. Incluso habiendo lavado dos o tres semanas, la planta sostiene un sabor constante en todas las variedades, que parece estar atado a la nutrición. Siendo que en tierra, cada variedad tiene su sabor distintivo, siendo una distinta de otra.
La próxima actualización será en la nueva semana, ya que al quedar poca solución, la voy a cambiar antes y voy a poner 12 litros en lugar de los 10 que vengo usando. Las plantas vienen comiendo mucho.


Likes
37
Share


@NewbieLearner
Follow
Was a busy week with other projects so didn't have much time to take proper photos. Next two weeks have some nice pics asI uploaded three weeks in one sitting so I know the next weeks pics are nice especially week 18.


Processing
Likes
76
Share


@ThrashedTV_BakedByGlaze
Follow
MY WEED SMELLS LIKE WEED.
Filling the room, creeping through the apt, what a glorious time. No major smell worries where I am so I'm just enjoying the atmosphere. 😍
On to Backbuilding/Bud Tipping. (Shoot me any advice on this down below!)
I experimented back mid-week with 3 tipped buds that had similar control buds side-by-side.
After 4 days there is a noticeable difference in density and bud structure in the 3 tipped buds compared to the very fluffy and softer buds next to them. No overall size difference but the tipped buds are rock hard and filling in gaps down the cola compared to the untipped buds. A light squeeze on both a tipped bud and untipped will tell you the difference right there.
Happy with the results after seeing them for myself and lucky enough to find this technique at the end of week 4, I tipped majority of the main colas on Danny and some larger buds on Arnold today. Which means I also get what OG growers call a "First Taste" once my tips dry out and cure for a few days. 😛
Other than tipping, I've just had to keep up with Arnold's feedings since lower leaves are still fading if I skip mineral nute feedings. Looks like they will be getting only PH Perfect and/or Molasses feedings until the final flush since they can't get enough food in the ProMix medium. I've still had constant defoliation during to avoid leaf overlap and light blockage. Since I'm now entering week 5 of flower I'll have to get it where I want in the next couple days and go hands off for the last month or so.
Thanks for checking out my grow! Follow along as we're getting to the good part and I'll update again this week once the tipping sets in 💪
MID-WEEK UPDATE:
Random Heat/Humidity wave in Southern Ontario so I'm keeping a close eye on the buds after dark periods. Keeping air moving well so far so hopefully I can avoid mold/mildew in last few weeks.
Twins are looking good. Arnold still super hungry so I've upped the nutes a tad and skipped plain water feeding until the flush. Just fed them PH Perfect/Molasses cocktail. Big Arnold on the right is definitely rootbound by how the water is draining so I'm looking at a lower yield from the right plant. I get run off from small Danny during a regular feed but takes a lot more to get any from Arnold and I don't want to overwater in this random heat/humidity wave.
The Backbuilding/BudTipping is working like a charm. The tipped buds are filling down and way more dense than the untipped.
Popped the SoundLink in the tent today to give the twins some music while I go about my business.
PLANT PLAYLIST:
Vulfpeck - Mr Finish Line
Anderson Paak - Ventura
Prince - Purple Rain Remastered
Unless anything crazy happens I'll update at start of week 6 flower.
Thanks for stopping by, liking, following, what-have-you 😃

Likes
10
Share


@SgtDoofy
Follow
2/28:
Amnesia has some yellowing of the leaves that appeared around about 12 hours before my usual every-3-day feedings and after I started to defoliating some of the previous yellow leaves from the previous accidental lack of water. I'm not sure if it is progressing, or it's just because I'm dialing in the watering schedule and she's using the nutrients in the extra, fatter, lower leaves. I've increased Amnesia's light distance to 16 inches and am lowering the humidity to stick between 60-70% RH with the automatic fan set to remove excess humidity near the higher end of that range. Fresh air fan blowing around the tent and into the 2 lower vents. Smells like a fresh garden outside of the tent, however smells green when the tent is opened. Not a strong green smell, but mildy recognizable.
3/1:
Welp, it's worsened, and has shown itself in both plants now. Since they share the same environment and nutrients, I suspect this to be a nutrient issue. Trainwreck was known for potentially having excess Nitrogen as shown by the extremely bushy growth, dark green leaves, and downward curling leaf-tips. However, Trainwreck is now no longer exhibiting those symptoms, and has lightened up and is stretching. But! Trainwreck is showing signs of potassium deficiency, with brown spots appearing on upper leaves. The same goes for Amnesia, brown spots have migrated their way to upper leaves. I'm thinking a banana tea will be good for them, so I've got a couple large banana peels steeping in the pump sprayer for this evenings watering.
My conclusions:
1. Nutrient burn hitting Amnesia hard, but Trainwreck is riding it out from its stored excesses.
2. Both are lacking some potassium now that they're beefing up in flowering stage.
Edit: I've decided to add a quarter-strength nutrient to this banana tea so as to not completely flush out the remaining nutrients. I believe that would leave her starved in between her next feeding, in 3-4 days from now.
3/2:
Welp! That made it worse! Time to test the PH of my soil. If the PH is too far in one direction or the other, certain nutrients will be locked out. I've ordered a PH meter instead of these PH testing drops. I didn't know that the difference between 6.0 and 6.5 would be so drastic, but with that said, I need to be more precise about my PH levels if I want to maximize these nutrients. Until the PH meter gets delivered tomorrow I may, if my research says that I should, flush with plain water ph'd water to try to flush out salts and try to get the PH back to 6.5 where it needs to be.
Edit: I do not believe this to be overfeeding, as I would expect nutrient burn on the tips of all leaves, but there are colas that are completely unaffected by the recent feedings. However, if the PH is off, and I suspect it is, individual deficiencies will pop up and affect the leaves differently. The other plant, trainwreck, which was planted later, may have contained less Ocean Forest nutrients from the top of the bag, and also more Happy Frog; so it's riding out these issues just fine.
3/4:
The discoloring on Amnesia has not spread to any other leaves. I've done a little bit of defoliating on the yellow and crispy leaves. Looks like they're already being replaced.
I've got my ph meter now, and doing a slurry test came out 6.4 on the top inch of soil, the only soil I could get to without ripping up the roots. Either way, I'm doing to be certain to PH tonight's feeding (half strength) perfectly to 6.5, as opposed to trying my best using PH testing drops, which is almost impossible! Trainwreck is getting some spots on her leaves, so she'll be ready for her feeding tomorrow.
Likes
51
Share