


Likes
Comments
Share


@Eauderay
Follow
Such pretty and easy plant to grow, just top dressed with handful of worm castings and less than half handful of bat guano few days ago and she just is exploding with white pistols all over and trichomes also, she smells like sweet lavender with skunk.
Very pleased with Zambeza Critical++, anyone could grow her!
I cropped one of my Critical the other was LST
I can see bigger buds on the cropped one, but it is not obvious so far which one is producing more weights.
Just changed Hps 400w to Voost 240w, plants responded well, some older fan leaves were started to cook and burn under hps, way too hot mid day, I can tell some leaves needed a break...
Let's see if LEDS helps with heat/light stress...
They are at 60cm from canopy, I will bring them down little by little during the next few days...
That is it, thank you for following fellow Cannabis lovers!

Likes
2
Share


@knicko
Follow
ab der Woche 3. (1.11.24) kriegen die Ladys ihren Dünger dieses mal von Advanced Nutrients das starter kit bin gespannt auf die Ergebnisse (gedüngt wird nach düngeshema)

Likes
93
Share


@Roberts
Follow
Aito Opium looks to have finished stretching. She looks to be going into bulking now. She is starting to form some frost already. She has been growing great so far. Everything is looking good. Nothing else to report at the moment. Thank you Medic Grow, and Divine Seeds. 🤜🏻🤛🏻🌱
Thank you grow diaries community for the 👇likes👇, follows, comments, and subscriptions on my YouTube channel👇.
❄️🌱🍻 Happy Growing 🌱🌱🌱
https://youtube.com/channel/UCAhN7yRzWLpcaRHhMIQ7X4g

Likes
5
Share


@RastaRick
Follow
Keeping natural form. Blackberry gum is huge as I heard from others. Did some heavy defoliation.. first time ever so it's an experiment. Flooded my tent with no tray... Needed to redo connections on the tubing... Then flooded with a new tray, needed to secure the AQUAVALVES on one autopot base.... Looking good. Still running 24 hrs... Rock and roll 🤘

Likes
8
Share


@Baba_VJ
Follow
In the end : 20 g of dried weight but had a really nice high even when I harvested it 2 weeks ago.
First grow and one of the best bud I grew in last few months.
Learned a lot from this, also started with another plant of the same strain a month ago indoor.

Likes
62
Share


@Herbz_Unkraut
Follow
Lowered the lights & will set 24h light on monday
Most of the roots show on the bottom of the pots


Likes
11
Share


@Young_agronomist
Follow
23.09.23-85 дней этому растению .
Она немного растянулась и я решил убрать пару больших листьев и немного подвязать , чтобы свет лучше проникал .
На этой неделе я поднял ппм раствора до 1000 . Все девочки активно пьют и выглядят здоровыми .
26.09.23-88 день )
За эти 3 дня растение продолжило растяжку и прибавило около 8 см 😎😎
Шишки красиво формируются и на листьях уже виден Сахар .
В планах на ближайшие дни провести легкую дефолиацию и добавить света .
Всем мир
28.09.23- 60 дней вегетации и 30 дней цветения ! Растение продолжает медленную растяжку и прибавило 5 см за 2 дня , в остальном изменений нет .
Завтра добавлю ей 120 w .
Likes
12
Share


@CheeRz
Follow
We r gettin' close to flower stage 💚💚💚. I'm kinda worry about the Cookies Kush cuz they ain't lookin' that good. We'll give 'em a shot anyways. So stay tuned guys
Likes
21
Share


@Highgrade_Harvests
Follow
Week 1 of flower is in the books and she's starting the stretch. She's looking really healthy and showing a lot of potential bud sites. I have trimmed up some leaves to allow more light penetration throughout the entire canopy. I really wish I put up a trellis but oh well. Looking forward to the buds this one puts out.


Likes
10
Share


@Chucky324
Follow
Hello. This is the end of week 1 and the beginning of week 2 of flowering.
I turned these girls over to flowering 6 days ago. So I'm hoping to harvest about Aug 20th or so
The plants are doing good and filled out their space so I can't see the floor through them.... Time to flower...
Showed some pics of my Peyote's. Lost 2 this year to the cold, but repotted more young ones to make up for the loss.
The paper wasps are the least aggressive of the wasps. I can walk in and out of the greenhouse and they don't bother me
They just fly around my head to get out or come in. They are great for the garden.
I see them flying in, loaded with caterpillar parts and other insects parts for their young.
They circle like bombers climbing higher and higher to their nests which they grab with a front leg and swing in.
They make open nests and under the white caps are the young.
The only time they get upset is when a Yellow jacket Wasp or Bald Faced Hornet come to get their young.
OK. Be Great.
Chuck.

Likes
9
Share

@Legendaryseedthumb
Follow
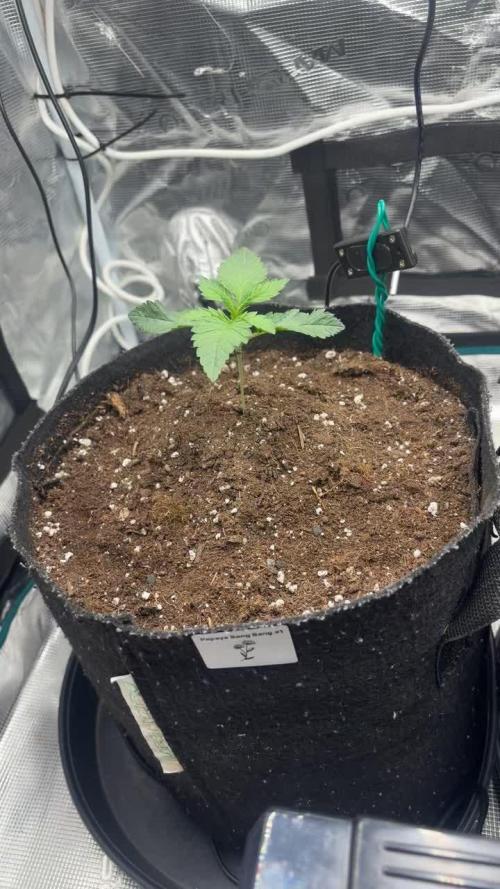
Day 8: she’s doing very good :D
Day 14: had to put support on the stem because i had too much fan power so she started to lean. Will recover in 24/48hrs!
We are entering week 3 now! I see forward to it, I will be topping at the 5th node.
She looks super healthy, I’m so exited!!

Likes
132
Share


@Crashoverite
Follow
Hi all👨🌾👋
Welcome to my another week update
Hope everyone doing well 🧑🌾🤤
Week 3
Feb 16 - Feb 22
It was a very easy week. Both baby girls are growing steady but not in rapid speed yet. 2 waterings of 500 ml each on Feb 17th and Feb 22nd alongside with foliar feedings(100ml water and fish mix) both looking healthy and happy. LST is coming next 😁🧑🌾✨🍀
Wishing you all a wonderful week✨🍀
Much appreciate all your likes, follows and comments. 🙏💚❤️💜
Peace and love brothers and sisters 👨🌾✌️💚
Links
https://2fast4buds.com/seeds/TROPICANA-COOKIES-AUTO
https://www.biobizz.com/
https://fishheadfarms.com/
Likes
4
Share


@TheNaturalist
Follow
Transplanted and topped today. I always transplant and top at the same time as new shoots equals new roots! Maximize your grow! The roots are looking amazing for this transplant. I made another coco perlite and gaia green mix. This time with a 1:2 ratio of the 4-4-4 and 2-8-4 because I will be flipping to flower the week after the plants have recovered from topping. On transplant I use a mycorrhizae powder to reduce transplant shock and aid in nutrient uptake and root development. They still need some nitrogen to support them during the stretch but the added phosphorus helps with the stretch along with potassium to setting buds. I also installed my first layer of trellis to weave the plants in early. At the end of the week I got 2 autos and wanted to see what I could do with them so I planted them and then also got rid of one of the Caramel Creams (C.C) because it was lagging behind the other one a little to much.
Likes
9
Share

@Canna96
Follow
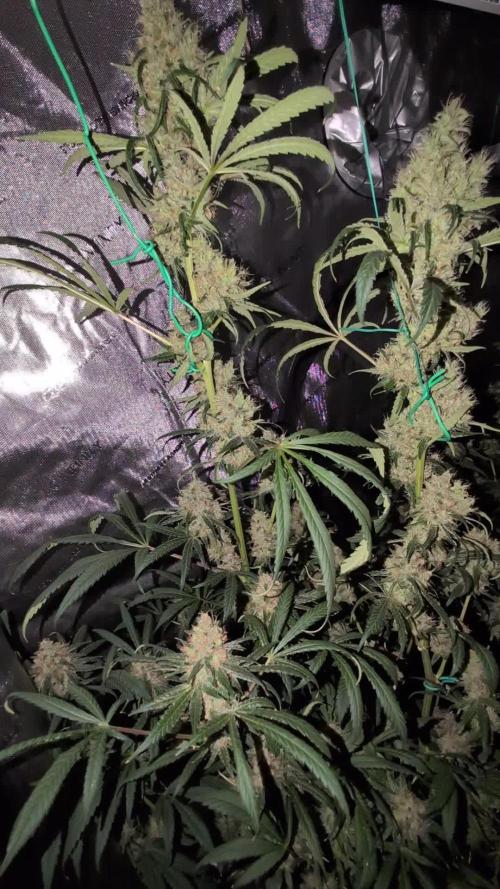
Hey now, hope everyone is having a great weekend! The Donuts is flushed and ready to chop, the flowers are very dense and smell amazing. I will start flushing the Cherry Garcia tomorrow, and the Apple Fritters and Durban Thai X C99 need another 2 weeks or so. Hopefully the flowers continue putting on weight. Thanks for stopping by, stay safe, and blaze on!


Likes
4
Share
@lolasher
Follow
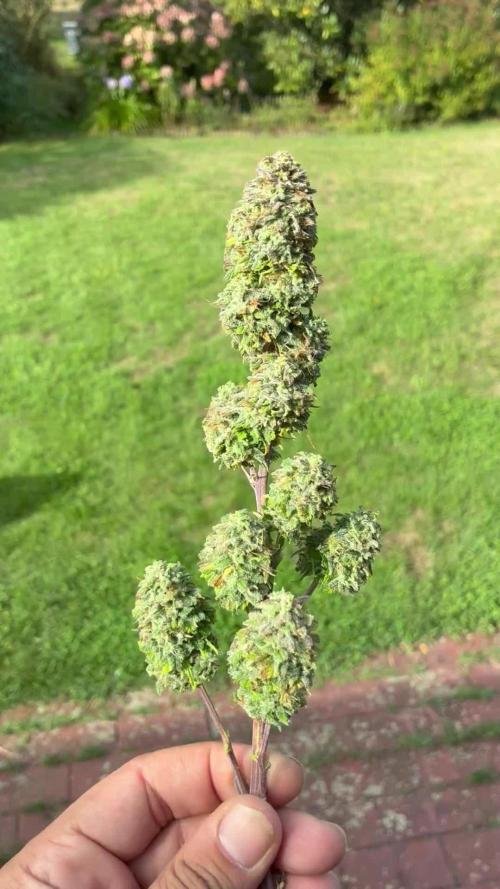
Es ist geschafft. Nach fast acht Wochen wurde geerntet. Trotz großer Probleme in der Blüte, bin ich absolut überrascht.
Das sich so tolle Buds unter den endlosen Blättern versteckt haben, hätte ich nicht erwartet. Steinhart, harzig und echt wenig Popcorn.
ich habe wohl noch nie so lange an einer Pflanze gesessen. Das Blätter - Blüteverhältis hatte leider nicht so ganz gepasst, aber egal. Um so besser, dass es nun erledigt ist.
Der Geruch wurde gegen Ende der Blüte glücklicherweise graslastiger.
Jetzt trocknet alles im Keller bei 18 Grad und 60% rlf.
Das war auch mein erster Photorun mit Living Soil. Die Probleme in der frühen und mittleren Blüte möchte ich nicht darauf schieben. Die Pflanze wurde echt noch super zum Schluss.

Likes
15
Share


@the_big_pink_place
Follow
01/03/22 Watered plants 2L of nutrient water each , assessed plants to determine what LST I'm doing, looks like these plants have potential to be monsters. Let's hope I don't fuck it up now. 01/01/22 Topped and defoliation was done, didn't water that day even though they needed it I wanted to give them a day or two from the stress they went through, watching to make sure they didn't wilt. Its paying of not listening to my ocd mind thinking I need to do something everyday, I didn't even want to top them, but they where looking very kushy type of plant. And I have trellis going in later two tiers. 01/08/22 Did a full water threw tested run off , it's sitting 800ppm above what I'm feeding, next watering straight 6.0ph water. Lights at 💯%

Likes
35
Share


@Master_weeda
Follow
Bonjour à tous les padawans et les maîtres jedis
Pour cette semaine je prévoit de pratiquer comme technique spéciale le LST et juste un arrosage.
Pour cela comme à mon habitude j'attend le cinquième noeud ou que je juge la plante robuste.
Je profite que cette semaine qui va être relativement calme pour faire un LST appliqué et vous faire un rappel de ce qui est pour moi la meilleure technique pour arroser une autofloraison et la façon dont je pratique le LST.
En suivant ces quelques simples conseils vous obtiendrez un résultat optimal tout au long de votre culture :
Le cannabis est une plante qui n’aime pas recevoir un léger arrosage en continu. Il est impératif de l’arroser en grosse quantité, puis d’attendre que la terre soit bien sèche avant d’arroser à nouveau!
Pour calculer la quantité d’eau nécessaire à chaque plante, suivez cette règle :
Le volume d’eau à donner lors de chaque arrosage doit représenter au moins environ un quart du volume du pot !!
Exemples :
pour un pot d’1L, donnez 0,25L d’eau à chaque arrosage pour un pot de 4L, donnez 1L d’eau à chaque arrosage pour un pot de 12L, donnez 3L d’eau à chaque arrosage pour un pot de 30L, donnez 7,5L d’eau à chaque arrosage !etc…
Pour donner un tel volume d’eau, il est souvent nécessaire d’arroser en deux (voir trois) fois, lentement et uniformément sur toute la surface. Disposez de bonnes coupelles sous les pots, celles ci se rempliront d’eau qui remontera dans le pot par capillarité en moins d’une journée. Il est également très important d’utiliser un bon terreau de qualité, avec une bonne capacité de rétention d’eau mais qui assure également un bon drainage (celui ci doit contenir de la perlite, et/ou de la coco, etc..)
Il vous faut alors maintenant attendre quelques jours en sous-pesant régulièrement les pot avec vos bras. Quand ils seront redevenus très légers, vous pourrez arroser à nouveau !!
En effet, comme l’eau pèse beaucoup plus lourd que la terre, un pot gorgé d’eau pèse plusieurs fois le poids d’un pot d’une plante prête à être arrosée. Avec un peu d’entraînement, vous apprendrez donc très rapidement à sous-peser vos pots pour savoir quand une plante a soif.
C’est une technique à la fois très facile et très efficace, et qui peut être appliquée à toutes les plantes en pots !
En arrosant de cette façon, en général vous devrez arroser vos plantes tous les 3 à 6 jours.
Pour cette semaine 3 au jour 17 ma plante fais 12 centimètres et son cinquième noeud apparaît je décide donc de pratiquer un LST sur ma plante.
Pour ce j'utilise du fil de fer galvanisé que je plante directement dans le substrat en faisant attention de ne pas endommagé les racines car n'oublions pas que ce qui pousse dessus pousse aussi dessous.
Jour 17 je pulvérise du une solution composé d'une cuillère à café de savon noir mou dilué dans un litre d'eau en prévention d'éventuels nuisibles.
Je corrige mon LST suivant la pousse de ma plante ...
Pour ma par c'est la manière dont je procède. Comme promis petit rapel de:
Quand commencer à appliquer la technique LST
De nombreux cultivateurs commencent la manipulation dés que les plantes possèdent entre 3 et 6 nœuds ou une paire de feuilles. Durant cette première étape de la croissance, le tronc encore flexible est pliable sans risque qu’il ne se casse, même si au fur et à mesure du développement de la plante il sera de plus en plus difficile de le plier. Nous pouvons continuer à guider la croissance des branches durant toute la culture, même durant la floraison, ce qui pour cette étape représente un grand avantage face à la taille, qui n’est pas du tout recommandé une fois que la formation des têtes commence, cela stressera en effet la plante, ce qui aura pour effet de retarder la récolte.
Comment appliquer la technique de guidage LST
Si nous sommes prudents, la flexibilité naturelle des fibres du cannabis permet de plier leur tronc et branches avec une relative facilitée, même durant la floraison des plantes.
En utilisant une corde fine, nous pouvons accrocher la pointe de la plante à la base du pot par exemple ou à un tuteur que nous aurons planté dans le substrat. Nous plierons le tronc avec précaution et nous le fixerons avec la corde, à partir de là, nous pouvons augmenter progressivement la tension de la corde, chaque jour un peu plus, jusqu’à obtenir la position souhaitée. Soyez attentif à la réaction de la plante, essayez de ne pas appliquer trop de pression sur la corde et rappelez-vous que la flexibilité des branches peut varier d’une plante à l’autre.
Pour obtenir de meilleurs résultats, il suffit de suivre quelques règles simples. Pour commencer, nous devons choisir une corde fine mais pas trop pour ne pas blesser les troncs au fur et à mesure qu’ils grandissent et qu’ils deviennent plus gros.
Nous pouvons utiliser des crochets en plastique souple ou de n’importe quelle autre matière flexible pour éviter d’endommager les plantes. Spécialement en intérieur, utiliser des cordons en plastique de couleur (voir les diaries de @Silky) est très pratique pour voir facilement les accroches et faciliter le travail au milieu du réseau formés par les cordes, les tuteurs, les mailles ou les supports que nous aurons dans la culture. Bien entendu, en culture extérieure et surtout en guerilla nous ferons juste le contraire et nous utiliserons des matériaux de couleur qui n’attirent pas l’attention pour que notre jardin reste discret.
Pour stresser les plantes au minimum, la mieux est de réaliser ces manipulations le soir ou juste après que les lampes en intérieur s’éteignent, ce qui leur permettra de se remettre durant la nuit. Normalement, le jour suivant nous pourrons observer comme les pointes des branches que nous avons pliées se dressent de nouveau vers le haut à la recherche d’une source de lumière.
Que la force soit avec vous
Likes
10
Share


@brunoazazel
Follow
dia 169 desde germinado..
aproximadamente semana 22-23, dia 15 de flora, empezando tercera semana.
regando con 8ml/L de PK y 2cda/5L de melaza.
