


Likes
Comments
Share


@WizzardSpider
Follow
Day 43
All four ladies are now in flower mode. They are still looking healthy but the fight against aphis continues. I've tried garlic a few times but they keep coming, so now I am going to make a tomato leaf mixture. I've read garlic chases everything, but tomato leaves chase only the bad bugs. Tonight I will water with plain water with a ph of about 6.5, then give them a stronger dose of nutes for its current stage of growth this Saturday.
Day 45
Did a bit more LST on Sour Diesel, Diesel and Royal Kush. They all got the full treatment today, I watered them with nutes and after a bit I sprayed neem oil to deal with the aphids.
Day 48
Everything is still looking really nice. I sprayed some Bioneem Oil a little while ago and left it from there. I've been going every night picking off the bugs, but with the neem I've left it to see if they still try. Each day I do a little training to make sure the growth is guided.
Day 50
We are on the last day of this week and I'm just amazed at the growth. My previous auto grows were just sad and nowhere near as good a looking as these. The neem seems to be working ok I guess, but I have only sprayed once. I want to get a solid schedule going with watering, nutrients and pest control. I was going to water twice but the grow medium holds water really well.
Saturday = Nutrients
Monday = Pest control
Wednesday = Water


Likes
23
Share


@Bongtokinalkoholik1605
Follow
Everything is going very well no deficiency or over feeding I raised the ppm from 650-800 area to right at 1000 plants really seemed to appreciate that the best thing about this entire grow is the day to day progress you can very easily see this strain has been awesome and fun . Just did probably the last major defoliation the girls will see from here on out im just going to let them do there thing well thats all I got til next week 😎😎😎

Likes
574
Share


@TOTEM
Follow
Hello everybody! This week will be the hardest one. I’ll have to work a lot inside the room, and even on GD to document all the changes. Last week I topped for the last time (in reality this happened the first day of this week), and finally stopped with high stress training. From now on, our attention will fall totally on ScrOG.
Day 43: Topped the 4 colas at the extremities. Red blood came out from them (see the photos). Amazing! Sorry for the bad quality, but I got just the phone with me when I did the job. When I took the second photo (a few hours later), the plant had already sucked up all the lymph. You can still see the red blood by the way.
Day 44: Set the timer to start with 12/12 from midnight of day 45.
Day 45: SO MANY THINGS HAPPENED TODAY. Flowering started, baby! 🤩 Today, in the evening, I worked for about 4 hours to prepare the ScrOG environment.
- Improved the LST before placing the grid.
- Took some photos.
- Removed the humidifier.
- Since my LED panel has half of the blue lights broken (this happened three weeks ago), resulting in 100W less of total potency, I added 3 new lights pointing where the panel is broken (2x 36W led bulbs and 1x 30W COB led light). I uploaded a photo and a video to better understand what I’m talking about. I even tried changing the broken LED driver, but it didn’t work, so now I’ll have to wait until the end of this cycle to send it to maintenance.
- Put 20gr of BatMagno (which is bat guano), 10gr of “Farina di Neem” (Neem Flour), and 50gr of Alghe, all of them over the soil. I’ll write something about these fertilizers at the end of the comment.
- 4.5L of tap water (corrected to PH6.5), which gave zero runoff. Haha, she’s drinking like a camel.
- Placed the grid.
- Took a few photos.
- Little defoliation.
- Took all the other photos.
- There we go!
I preferred not to add the bloom fertilizer now because I’m a little worried about overfertilizing this baby. During veg, she showed me she doesn’t like nutrients, so I’m just listening to her requests. I’ll add the bloom one as soon as she seems hungry again. By the way she’s just 20cm tall (I’m so proud of this result) and the grid is located a few centimeters above her. Let’s see if I switched to 12/12 at the right time: I heard this strain usually stretches for about 6 weeks!!! 😱😱
Let’s talk about the ferts I placed on the surface of the soil.
- BatGuano: it’s a mixture of organic fertilizers of natural origin and suitable to produce a high amount of organic nitrogen and phosphorus that can be assimilated at 100%. It’s a natural slow-release fertilizer for flowering: the raw materials used (guano, dried borlanda with ammonium salts, kieserite of natural origin, flagpole, meat meal, bone meal and dried poultry) are the result of a careful selection which ensures a low salinity and a gradual transfer of the elements. The phosphorus content in BatMagno (being organic) does not undergo insolubilization.
- Alghe: they are a portentose substrate activator made of a mixture of algae of the species Ascophillum, Fucales and Laminariales, obtained through a process of dehydration and grinding without the use of any chemical substance. They can be used during the preparation of the soil, and increase and strengthen the formation of the root system, mobilize the nutrients in the soil, reinvigorate the plants, protecting them from adverse weather conditions, help plants to overcome stress conditions and improve the quantity and quality of production. All of this is possible thanks to the presence of betaine, cytokinins, vitamins, auxins and alginates polysaccharides.
- Farina di Neem (Neem Flour): it’s a vegetable product based on Neem seeds, obtained from the extraction of Neem Oil through a process of cold-squizzing out, which increases crops, improving both growth and flowering, as well as strengthening the roots of the plants. The Neem Flour is mixed with nitrogen fertilizers, that slow down the conversion and leaching of nitrogen. Repeated interventions improve the endogenous resistance of plants to pathogens, creating an unsuitable environment for the development of insects and cryptogams. Due to the presence of important trace elements for plant life, it prevents imbalances and nutritional disorders. It also protects plants from Nematodes, ants, insects and soil larvae.
Let’s say Alghe is the most smelly product. My room now smells like seaweed! I need to figure out how to give her water now that the grid is on. I think I’ll plug a 2m pipe at the end of my watering can. That’s the most easy and cheap way to fix this problem. I just need to find the right size of the pipe. I’ll show you my solution next week.

Likes
11
Share


@Ferelite
Follow
Harvested #2, 40/60 amber to cloudy trichome ratio, couldn't weigh wet
25/10/24 - Harvested #1, 50/50 amber to cloudy trichome ratio
Haven't weighed #2 final dry weight yet, still in the process of trimming
#2 final dry weight: 273.9g, just under 10 ounces.
02/11/24 - #1 is dry, haven't had time to trim, in jars until I have time. Estimate #1 will yield more then #2
#1 final dry weight: 351.8g, 12.5 ounces
625.7g total off both plants
#2 has better bag appeal, smell is very floral and piney. #1 is not as nice looking in appearance but takes the win for smell, has a strong skunk smell, get a whiff of cat piss whenever the jars are opened as well. Was very prevalent in the final week of flower, kept thinking the cats had got into the room and peed somewhere.
Overall happy with the results.


Likes
3
Share


@CannaGods
Follow
I am just going to add some pictures of the reveg. If you're interested in me expanding the diary make some comments and if I have time I will.
Processing
Likes
5
Share


@AgroCultiveta
Follow
Son fotos y videos de múltiples cultivos debido a que nunca e realizado un seguimiento como tal, espero realizar uno ahora!
Nutrientes Utilizados en general Trybac y Trypack biobizz.
Las criticas siempre serán bien recibidas!😋
Espero les guste el contenido!


Likes
16
Share

@LST420
Follow
Week 15
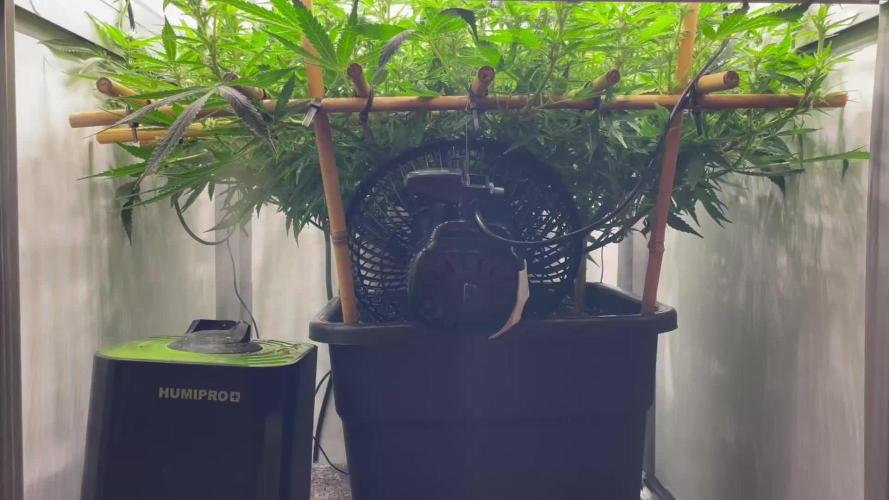
Added another Biotab attached to a wire so in case the plant gets too much Nitrogen I can pull it out. 😎


Likes
41
Share


@Ganjagrandaddy
Follow
DAY 21 F: Hi all. Another productive week for the fast buds jungle and the #Fc3000 . The room is full of limbs , leaves and chunky stalks all rounded off with sexy little budlets dancing in the wind for me every time I open the tent . Makes me feel like Hugh Heffner !!!.
All of the plants have finished their stretch totally now and a huge surprise has been the midget Mexican airline now being the same height as her sister. I expected her to stay smaller due to the past growing period ect.. but she has somehow hit the same height now. Her buds are not as advanced as the #2 M.a but time should change that too. #1 is forming some very nice looking open flowers now with bundles of fresh pistils to them too.
Both of the six Shooter are looking productive in their different set ups. The #1 has reached around 2ft and has some very nice sites setting up now. #2 has been more spread horizontally and is a long distance from the light too. With the canopy height being dictated by the huge Strawberry Pie girls , I felt it would be a good way to see how far away the light can help develop buds rather than supercrop all the big girls for one squat lady. So far the amount of bud sites is promising and it does look as though they are getting enough to develop.
Both of the Strawberry pie have really hit their peak with at least 2.5ft tops. Buds are for.ing nicely and the sides are also well developed and in good positions for their own light grabs. It does give hope of some bigger buds than the long node lengths would suggest. Let's see in a few weeks shall we. Lol
They had a top dress of charge and life-cycle too to help boost the flowering stage a little. Soil is performing as expected and the watering is going well so far with no excesses either way . Until next time growmies , be safe and well.
Likes
44
Share

@RakonGrow
Follow
+
data+charts online rakongrow.lima.zone/growme-mango-kush-auto-015.html
Tag 106:
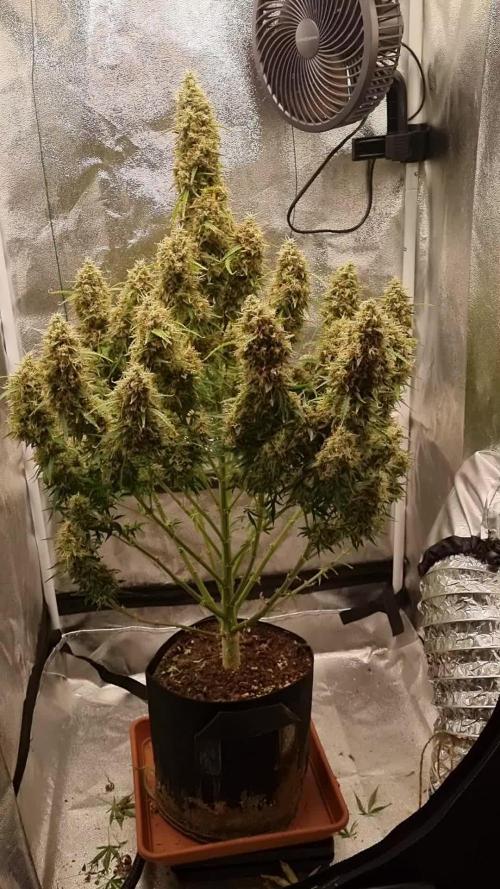
trocknet schon seit 3 tagen kopfüber .
Tag 102 :
Entlaubung und Vorbereitung zur Ernte , nach 4 tagen wasser gibts nichts mehr , reduziertes licht und langsames ausstrocknen .
Tag 99:
ja , da ist noch einiges dazu gekommen , ich bleib jetzt bei Wasser pur
+

Likes
40
Share


@Peeman
Follow
Trainwreck #1 suffered from bud rot and had to be thrown out. That was unfortunate considering the original bud structure was spectacular.
Oct. 24 Trainwreck #2 was trimmed & jarred. Final weight was 4 ounces of smokable bud and 10 ounces for Ice water hash.
Thanks for stopping by
See ya next season
Stay safe

Likes
2
Share


@Mastr
Follow
Week 4 come along and lady's doing pretty well I keep do lst every 2 days and just feed them with water willing to use nutrients soon
Day 25 I just start give them grow and calmag plantvare almost ready for flowering
Likes
20
Share


@eldruida_lamota
Follow
Venga familia que ya viene la cosecha de esta Panty Punch de Seedstockers, que ganas que tenia ya de darles machetazo.
No veas que pinta que tienen estas plantas.
Las flores aparte se ven bien resinosas, y son bien prietas, aparte son súper aromáticas huelen mucho.
(COLOQUEN UN BUEN FILTRO PARA EL OLOR).
a sido una genética con la que disfruté mucho cultivarla, la genética es perfecta para SOG y es bien vigorosa, es muy fácil cultivarla y muy resistente merece la pena si eres cultivador principiante.
Hasta aquí es todo, espero que lo disfrutéis, buenos humos 💨💨.

Processing
Likes
5
Share


@Tryhard1988
Follow
She doing well and starting to show some purple coming through gg4 all over this on smells fire can't wait to try her
Just feeding water for three week now

Likes
13
Share


@SimFarmer
Follow
First of all thank you @fast_buds for this amazing strain, had a blast growing and experiment with her.
It turns out that growing cannabis is not that difficult. All it takes is enough watering to balance the substrate.
During the grow I did not even measure ph or ec once. And the leaves were healthy all the way through.
In flowering I watered about half the size of the airpot every day.
In order to successfully water as such every day and grow without unnecessary measurements need a ventilated flower pot And a Soil substrate enriched with perlite.
The plant responded great to massive watering, grew quickly and recovered easily from stress.
I took her to the limit But I did not provide her with sufficient lighting, it was reflected in the flowers that came out bit airy. (Yet 253 grams are a respectable crop.)
So here is my next grow resolution I will make sure to provide the plants with all their needs So that they will take care of mine ;).
Likes
14
Share


@SkunkyDog
Follow
Hallo zusammen 🤙.
Sie wachsen sehr schön.
Sie erhalten 25 Prozent Rabatt in unserem Shop
Mindestbestellwert beträgt 75 Euro
https://greenbuzzliquids.com/en/shop/
Code: GD42025


Likes
7
Share

@Lapaluma420ohe
Follow
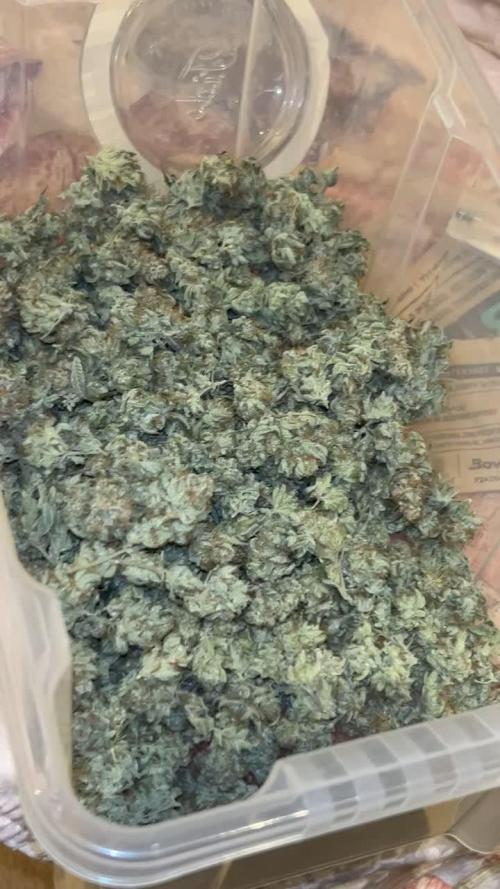
Die 4 Pflanzen haben insgesamt 160g abgeworfen. Es gab 3 unterschiedliche phenotypen und bis auf eine Pflanze haben alle schöne dichte Blüten. Geschmacklich sind sie alle sehr süß und fruchtig. Angenehmer Rauch und von der Wirkung her nicht zu stark und nicht zu schwach.
Likes
13
Share

@Pierrougarou21
Follow
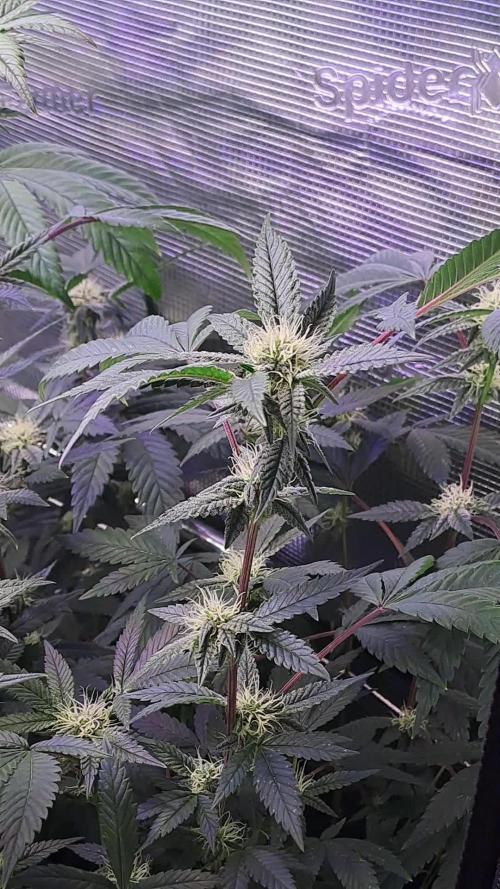
5 eme de Flo
27/01 Photos de nuit cela fait deux jours que je rentre trop tardivement pour prendre des photos avec de la lumière, comme je suis entré dans la semaine 5 depuis deux jours je ne pouvais pas attendre plus pour faire la mise a jour
Likes
5
Share


@Gingercannacat
Follow
Beginning of week 4 so far so good. The girls are reacting well to there training. Vita race from plagron is a game changer. They are super green and healthy everytime I feed them you see the difference.Did some defoliation. Nothing major just removed any leaf overlapping or blocking light to lower parts of the plant.
