


Likes
Comments
Share


@ChitownCannaChica
Follow
Umm—- well I thought this week might be the last, but based on the mid to lower trichome reading—- I have at least 2 more weeks! I was pushing this lady hard for an auto and the leaf yellowing is becoming evident. Maybe some flushing coming up. ✌️🏻💚🌿💨

Likes
34
Share


@AshBrand
Follow
11/3/21 - Looking really good today! All plants are crazy perky with big flowers that are begging for 12/12. We will flip after the aphids are gone. We will be repeating week 3 of nutrients this week.
11/4/21 - They look amazing. We got Fox Farm Force Of Nature because we have aphids :/ We will spray this evening and look each day and spray as needed. Major defoliation is going to be done throughout the week as well. We got 2 more scrog nets going in. The plants need them pretty bad. We will put one more up, mash the tops down, defoliate and add the second scrog in early flower.
11/5/21 - We didn’t have time to put the scrog up or defoliate. Also, the spray for the aphids never showed up 😡. But on the plus side, the plants looks amazing!
11/6/21 - We did some major defoliation and sprayed the aphids with an organic pesticide soap. We also added the second scrog net.
11/7/21 - We only found a couple live aphids so sprayed again. They should all be gone by now. Light needs to be bumped to 60% and also raise it a bit. They look so much smaller after some defoliation.
11/8/21 - Aphids are gone :) We will do one more week of veg then add a 3rd scrog mid flower to support the buds when they start to form.
11/9/21 - First day of flower will be 11/17. Pretty excited for them to flower up. This veg has been frustrating and challenging with 6 plants. Overwhelming at times. Next one is going to be 4 plants MAX. They look great today!

Likes
22
Share


@DrGanj
Follow
Started my flush now (tomorrow morning actually). I keep a small dose of K30 going for the first week of flush.

Likes
6
Share

@DogDoctorOfficial
Follow
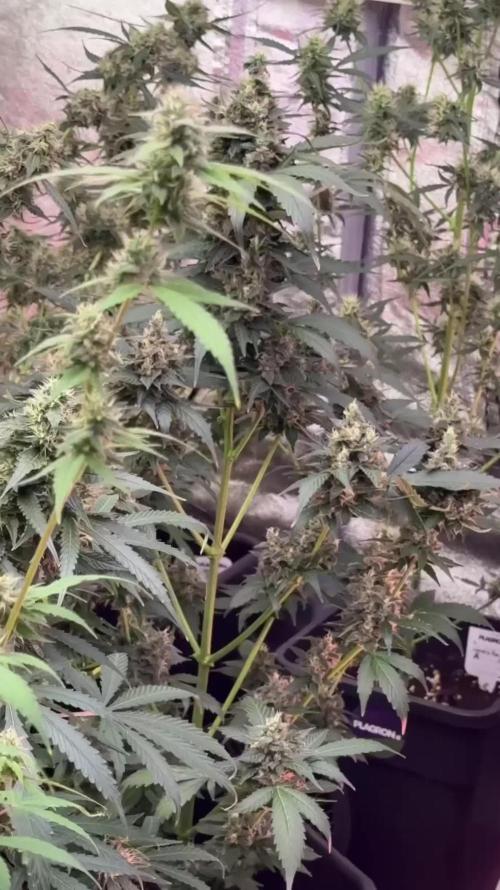
💎 Black Diamond Auto by Zamnesia – Pheno A
Week 10 | Still Shining, Still Demanding, Still Amazing 💎🔥
Welcome back to another chapter of the 8×8 Adventure! 🌱💚
Honestly...
I'm starting to run out of different ways to say it.
She keeps shining.
Every week I come into the room expecting to find something that needs attention, something that needs correcting, something that gives me a reason to complain.
And Black Diamond Pheno A keeps looking at me like:
"I'm fine. Give me what I need and let me work." 😂💎
So that's exactly what we're doing.
She demands.
We deliver.
She builds.
We watch.
And somehow, every week, she manages to look even more impressive.
The flower formation.
The colours.
The trichomes.
The overall maturity.
Everything is moving in a direction I really like.
She's not the biggest plant we've had in this 12/12-from-seed adventure, but she's definitely among the substantial ones.
And when you look at what she's putting together...
size isn't the first thing you notice anymore.
You notice the flowers.
You notice the colours.
You notice the frost.
You notice how far along she is becoming.
And then you smile.
Because this girl is doing something special.
💎 Still Shining Bright
Last week we called her Beast Mode.
I'm not sure I can take that name away from her yet. 😂
Because she's still operating in that mode.
But this week, I think the better description is simply:
She's shining.
Not because she's demanding anything unusual.
Not because she's causing problems.
Actually, quite the opposite.
She's basically telling us exactly what she wants...
and then rewarding us for listening.
Give her the environment.
Give her the nutrition.
Give her the light.
Give her the water.
Give her the room to develop.
And she goes to work.
That's the relationship I love having with a plant.
We're not forcing her.
We're not trying to make her become something she isn't.
We're simply supporting what she's naturally doing.
And what she's naturally doing is looking absolutely amazing.
🌸 The Flowers Are Getting Serious
This is where my attention keeps going.
The flower formation is becoming seriously impressive.
The individual flowers are gaining definition.
The structures are becoming denser.
The pistils are developing through the flowers.
And everything is beginning to look increasingly mature.
We're getting to the point where I don't need to imagine what these flowers might become.
They're already showing us.
And there's a lot of them.
That's one of the things I really appreciate about this phenotype.
She isn't just putting everything into one location.
She's using her structure.
She's building throughout the plant.
And as the weeks move forward, that distributed flower production becomes more and more impressive.
❄️ The Trichomes Are Doing Their Thing
And then...
there's the frost.
💎❄️
This girl continues to develop an increasingly beautiful resin-covered appearance.
The trichomes are becoming more obvious.
The flowers are getting that crystalline character.
And when the light catches them just right...
she really does shine.
That's probably one of my favourite things about documenting her.
You can look at the whole plant and see a beautiful flowering plant.
Then you move the camera closer...
and suddenly there's another world there.
The individual resin heads.
The sugar leaves.
The pistils.
The developing flower surfaces.
All those little details that you simply cannot appreciate from across the room.
Black Diamond is giving the macro camera plenty of reasons to stay busy. 📸💎
🎨 And Those Colours...
The colours are another thing that really catches my attention this week.
Her greens remain beautiful and vibrant, giving the plant that strong, healthy appearance we've been enjoying throughout the run.
But alongside those greens, we're starting to see more of the colour development that comes with moving deeper into the flowering cycle.
And together with the frost...
it's a beautiful combination.
Green.
Colour.
White resin.
Developing flowers.
It's becoming a seriously photogenic plant.
And yes...
I know I say that about several of the girls.
But that's the point of having twelve different phenotypes in the room.
They each find their own way to impress us.
Black Diamond has chosen:
"I'll do it with flowers, colour and frost."
😂💎
🌿 Big Enough to Make Herself Known
At around 169 cm, she's certainly not a small plant.
She's among the larger plants in this 12/12-from-seed room, or at least comfortably within the substantial group.
But what I find interesting is that her size isn't what defines her anymore.
When she was stretching and building her framework, height was part of her story.
Now?
The flowers have taken over the conversation.
She's built enough structure.
She's established enough height.
Now she's putting that structure to work.
And honestly...
I like where she's going.
👑 She Knows What She Wants
This phenotype has always had a certain confidence about her.
She doesn't seem interested in asking permission.
She just does her thing.
And that hasn't changed.
If she needs something, she lets us know.
If she's happy, she gets on with growing.
And when everything is aligned...
she produces.
That's what I mean when I say she keeps demanding whatever she wants and we keep delivering.
It's not a difficult relationship.
It's actually a very simple one.
Listen to the plant.
She's talking.
😂💚
✂️ After the Cleanup
Last week we gave her some selective defoliation.
This week, I'm much more interested in watching how she continues from there.
The plant still has plenty of foliage.
She's still green.
She's still carrying enough leaf mass to support herself.
But we've given the structure some additional breathing room.
And now the flowers are becoming even easier to appreciate.
I like this stage.
The plant isn't being stripped.
She's simply been given a little more room to show us what she's building.
And she's taking full advantage of it.
💡 Light From Above, Within & Below
The lighting ecosystem remains one of the fascinating variables throughout the 8×8 Adventure.
The primary overhead lighting continues driving the canopy, while the additional lighting throughout the lower and inner portions of the room gives us another dimension to observe.
And with Black Diamond?
There is plenty to observe.
Her flowers are distributed throughout that structure, so seeing how those different levels develop as flowering progresses remains particularly interesting.
I don't want to assume exactly what the lighting is doing to each individual flower.
I'm much more interested in documenting the result.
And right now...
the result looks pretty damn good. 💎
💧 She Wants It, We Give It
The feeding strategy remains consistent with the room.
We're not creating a special recipe just for Black Diamond.
She's part of the same overall nutritional program as the other plants.
Current flowering nutrition remains:
🌸 Terra Bloom — 2.2 ml/L
🌱 Power Buds — 1 ml/L
✨ Green Sensation — 1 ml/L
🍯 Sugar Royal — 1 ml/L
⚗️ pH adjustment products — as required
The solution remains around pH 6.0 with an EC around 2.0 mS/cm.
And apparently...
she's happy with the arrangement.
😂💎
She asks.
We provide.
She builds.
Everybody wins.
🌡️ Current Environment
The current recorded conditions for Week 10 are:
🌸 Flowering: Week 10
📏 Height: 169 cm
💡 Light schedule: 12/12
🌡️ Day temperature: 29.9°C
🌙 Night temperature: 25°C
💧 Relative humidity: 60%
⚗️ pH: 6.0
⚡ EC: approximately 2.0 mS/cm
💦 Solution temperature: 25°C
🌱 Substrate temperature: 26°C
🌬️ CO₂: 639 ppm
? Pot size: 15 L
💧 Watering: approximately 1.3 L per plant / 24h
Once again, the environment remains consistent.
And that's important.
Because this entire project is built around giving the plants a shared environment and then watching how differently they express themselves.
Same room.
Same general conditions.
Different genetics.
Different personalities.
Different results.
And Black Diamond Pheno A is definitely giving us one of the more impressive results.
📸 The Camera Is Having Fun Again
Looking through this week's photographs, I keep seeing the same thing.
There's a lot going on.
The wide shots show her overall scale and structure.
The closer photographs reveal the flowers.
And once we move into the detailed shots...
the trichomes start taking over.
That's what makes this stage so enjoyable.
We're seeing the plant transition from a flowering plant into something that increasingly looks like it's approaching the more advanced stages of its journey.
I'm not saying she's finished.
Far from it.
But she's clearly moving.
And she's moving fast enough to get my attention.
I know she's not a racehorse. 😂
She's a plant.
But when you watch her progression from week to week, the pace of development is absolutely noticeable.
And I like it.
💎 The Green Is Beautiful
I don't want the frost and flowers to distract from something else I really like about this girl:
her green.
The foliage still has that beautiful, healthy appearance.
The greens contrast beautifully against the developing flowers.
And when the resin starts catching the light...
the whole combination becomes something really special.
Green leaves.
Bright pistils.
Developing colours.
White frost.
Dense flowers.
That's Black Diamond right now.
And she wears it very well.
🔥 She's Becoming a Heavyweight
We're also starting to see the consequences of all that flower production.
She's carrying weight.
A lot of it.
The structure that looked impressive earlier in the run now has a job to do.
It has to support everything she's been building.
And that's where the combination of good structure and sensible support becomes important.
We're not trying to make her stand perfectly like a showroom plant.
We're helping her carry what she created.
Because honestly...
I'd rather have the problem of supporting heavy flowers than the problem of wondering where all the flowers went.
😂💎
🧠 Another Lesson From the 8×8 Adventure
Black Diamond is another reminder that plant size and production aren't always the same conversation.
She's among the larger plants.
But her flowers and resin are what make her stand out.
And that's exactly why I don't want to judge these girls simply by height.
One plant can be huge and express itself one way.
Another can be smaller and absolutely cover itself in resin.
Another can build enormous individual flowers.
Another can distribute production throughout the canopy.
And then you have Black Diamond...
doing a little bit of everything.
😂💎
She's big enough.
She's structured.
She's loaded.
She's colourful.
She's frosty.
And she's becoming increasingly mature.
That's a pretty good combination.
🔮 Looking Ahead
Now I'm getting genuinely curious about the next few chapters.
We're entering an increasingly advanced stage of flowering.
So my attention is going toward:
🌸 continued flower swelling
❄️ increasing resin development
🎨 colour progression
🌿 overall foliage health
💎 density and structure
⚖️ how much more weight those branches will carry
👀 overall maturity
And I'm not going to try to predict exactly where she ends.
We'll let her show us.
That's the whole point.
We observe.
We document.
We learn.
And when she tells us she's ready for the next stage...
we listen.
💎 Let Her Shine
There are moments in a grow where you don't really need to say much.
You just look at the plant.
And you smile.
That's where I am with Black Diamond Pheno A this week.
She's beautiful.
She's big.
She's colourful.
She's green.
She's frosty.
She's building flowers everywhere.
And she's moving deeper into the flowering cycle with a confidence I really enjoy watching.
She keeps demanding.
We keep delivering.
And she keeps rewarding us.
Fair trade. 😂💚
So yes...
let her shine.
Because she deserves it.
💎 Black Diamond Is Still in Beast Mode
Maybe that's the simplest conclusion.
Last week:
Beast Mode Activated.
This week:
Beast Mode Continues.
😂🔥💎
Nothing dramatic.
Nothing complicated.
Just a beautiful plant continuing to do what she has been doing from the beginning.
Growing.
Building.
Developing.
Frosting.
Colouring.
And slowly becoming more and more impressive.
She's trying to steal the spotlight.
And honestly...
she's making a very good argument for it.
🙏 Thank You
Another week.
Another chapter.
Another beautiful reminder of why the 8×8 Adventure has been such a fascinating experiment.
Twelve plants.
One room.
One general environment.
One 12/12-from-seed philosophy.
And twelve completely different expressions.
Black Diamond Pheno A continues to show us her own version.
A substantial plant.
Beautiful structure.
Beautiful greens.
Increasing colour.
Amazing flower formation.
And an increasingly impressive layer of frost.
A huge thank you to:
💚 GrowDiaries — for giving growers a place to document, share, learn and inspire one another.
🌱 Zamnesia — for providing the genetics behind this beautiful Black Diamond Auto phenotype.
💜 Plagron — for the nutrition supporting this adventure.
💡 Future of Grow LED — for powering the main lighting environment.
🌿 TrolMaster — for helping maintain the controlled environment behind the scenes.
✨ LumiFlora — for contributing the additional lighting that lets us explore what happens throughout the different levels of the canopy.
And of course...
thank you to everyone following along.
Every comment.
Every question.
Every bit of feedback.
Every person stopping by to see what these twelve girls are doing.
It means a lot.
And Black Diamond?
Well...
she's still here.
Still shining.
Still demanding.
Still building.
Still getting frostier.
Still getting heavier.
And still trying to steal the spotlight from her sisters. 😂💎👑
This week, I think we can let her have it.
Because she's earned it.
The colours are beautiful.
The greens are beautiful.
The flowers are becoming seriously impressive.
The trichomes are shining.
And the whole plant is moving toward a more advanced stage of flowering that I really like watching.
So let's keep doing what we've been doing.
Keep listening.
Keep delivering.
Keep documenting.
Keep photographing.
And most importantly...
let Black Diamond shine. 💎🔥🌿
Growers Love, my friends, and happy growing! 💚🌱💎

Likes
4
Share


@Huckleberry39
Follow
She is starting to come together finally. Ive never seen a plant like this one. But, I love an underdog. She is getting some nice trichome production already, which is always good. Taking a full dose of nutes and loving it. So far so good. I am loving 420 Fast buds!!!

Likes
67
Share


@GanjaReaper
Follow
Welcome back everyone,
As you can see are almost all seedlings growing. Some where still in the soil.
Might happend when giving water(seedlings can turn or get deeper), checked it out and they are alive and well.
All pictures are from day 4.
The humidifier had been added, so I had to adjust the room.
I spotted a corner of the room that gets dryer faster. I adjust the fan for now and see what happens.
Corners are always hard to get perfect. Sometimes the light, air, watering doesn't come there properly.
Seedlings don't need much nutrients, neighter do autoflowers. with normal soil I would recommend to only give water for 1-2 weeks, since it holds nutrients in it as well.
But since I'm using Cocos for this grow, I might have to add some basic nutrients in the upcomming week.
For this week I gave/give only water turns and Startbooster/rhyzotonic turns.
Update day 5:
- Lowerd the lights to avoid stretching, they are now at 75cm distance from lamp to pots.
I want them at 40-50 cm, but I don't want to rush it.
- Added another layer of cocos to avoid the soil from drying up therefore the roots from dying.
This will happen because of lowering the lamps down, the soil will get exposed more to heat.
As you can see, the humidifier is doing his thing haha. Pictures and videos where taken without the lights + fans on.
because of that, it will look like this. Still fun thought.
Arround 7 seeds didn't reach the surface yet, lets hope they make there way up soon.
Enjoy!
Likes
16
Share


@Gardener_of_Goodness
Follow
Well this was a really straight forward grow, very very pleased with the outcome and the bud isn’t completely cured 😋
5 Gal fabric pot with BioBizz light mix, some light consistent feeding, a FIM and basic LST, look at the outcome! No wonder their strain wins awards! I will 100% be growing more NL! Thank you RQS ✌️🙌👌🙏
Likes
4
Share

@Mighty_Monaco
Follow
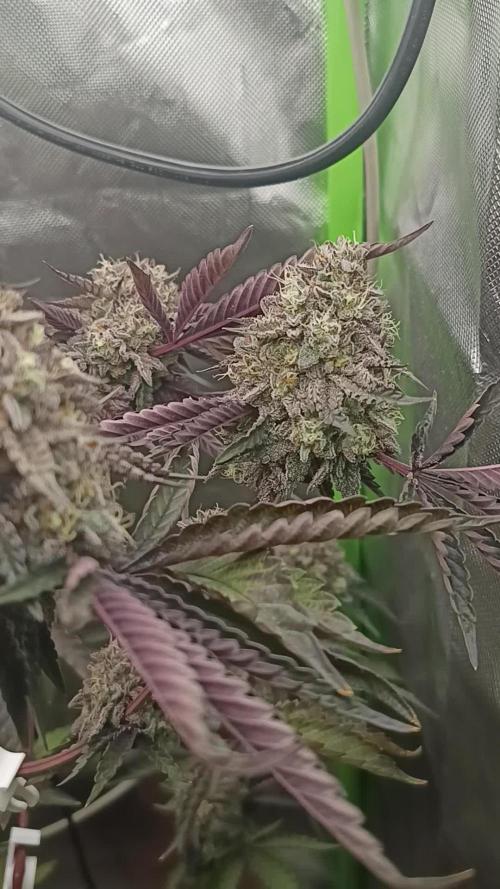
Buds are getting to heavy, i supported the main stem and a side-stem with two rods. The guy who gave me this plant, had to do the same with the mother-plant.
Leaves are very colorfull, purple and redish. Buds look awesome, you can spot trychomes with bare eyes.
I did some improvement to the closet/box. Air Ventilation is even more quiet now. An i have a cupboard in the box to store tools and other stuff.
I gave nutrition (Hesi Bloom) for the last time and will start flushing within the next days.

Likes
16
Share


@SAC87
Follow
Day 14:
These little plants are just truckin along. They’re looking good. They seem a bit small, but are indica dominant so idk yet. I’m heading out of town for a couple days so they’ll get a heavy water and be left on cruise til I’m home.
The Fast Buds from last round are curing up nicely and so powerful in potency and aroma. I’m pumped to see how these turn out.
The XS2000 is providing a perfect amount of heat at 75% that it just takes a light misting to have these little plants right in the sweet spot for temps and humidity. I’ve said this a bunch, this is a powerful light so I have it set a bit higher than recommended but I want room for them to grow up into without stress. I’d rather have a bit of stretch to contend with rather than light stress.
I’m excited to see how they look when I’m home. Hopefully quite a bit bigger!!
Happy Growing 🌱
Likes
8
Share


@MadeInGermany
Follow
Hey guys :-) .
Today the plant was sprayed again with neem oil.
There weren't any more trips to be seen after the second application, but to be on the safe side, you did it again today get a cure.
That's why the beautiful dark shimmer on the leaves :-).
The ladies are developing well and have 1 week before I change the time to flowering.
Normally I would let it get bigger and train because the tent only has 80x80 and 180 watts are available, so I will switch it over soon enough.
This week it was poured twice with 0.8 l each time (for nutrients, see table above).
Otherwise everything was cleaned and, as always, everything was checked.
Have fun with the update and stay healthy 🙏🏻
👇🏼👇🏼👇🏼👇🏼👇🏼👇🏼👇🏼👇🏼👇🏼👇🏼👇🏼👇🏼
You can buy this Nutrients at :
https://greenbuzzliquids.com/en/shop/
With the discount code: Made_in_Germany you get a discount of 15% on all products from an order value of 100 euros.
👇🏼👇🏼👇🏼👇🏼👇🏼👇🏼👇🏼👇🏼👇🏼👇🏼👇🏼👇🏼
You can buy this strain at :
https://greenhouseseeds.nl/
Water 💧 💧💧
Osmosis water mixed with normal water (24 hours stale that the chlorine evaporates) to 0.2 EC. Add Cal / Mag to 0.4 Ec Ph with Organic Ph - to 5.8 - 6.4
MadeInGermany


Likes
12
Share


@Roberts
Follow
Ze Chem Bang has made it. It was a rough start, but she has pulled through. Everything is looking really good now. Thank you Medic Grow, and Terpyz mutant Genetics. 🤜🏻🤛🏻🌱🌱🌱
Thank you grow diaries community for the 👇likes👇, follows, comments, and subscriptions on my YouTube channel👇.
❄️🌱🍻 Happy Growing 🌱🌱🌱
https://youtube.com/channel/UCAhN7yRzWLpcaRHhMIQ7X4g.


Likes
5
Share

@Chubbs
Follow
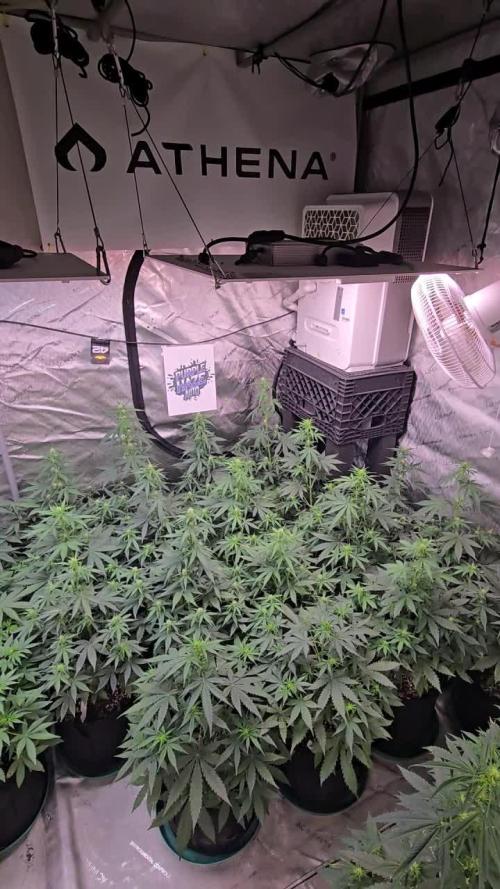
What up Fam. These girls are growing amazing. Now that I can control the temps a little better they've taken off with growth. Starting the flower period which we all no know what that means. The countdown is on. Over all Happy Growing.
Processing
Likes
25
Share


@EelGrows
Follow
Week 6 Summary: First off, Happy New Year!! Ciao 2018, may 2019 be filled with peace, love, joy and dank buds 😄😉
Day 36-39: Started off nice well this week, considering the amount of defoliation I did on day 35. Some more stretching going on here but not too much, except 4AM3 has a central shoot I couldn't find a spot to LST that just started to shoot right up lol. Starting to show some nice frost on Day 36 too. 4AM2 is already starting to plump up a bit, don't think will get much more stretch on that one, seems like it will probably harvest the least. I might have overdone the defoliation on it on Day 35 lol. 4AM2 is the one I decided to top for the hell of it anyway because it had a really wierd growth mutation. Still, with less main tops to produce it might be the best bud of them all 😅
Day 37-42: Day 37 is when I started seeing a deficiency I thought might have been magnesium on 4AM1. Pictures to show up top. Since their next feeding wasn't scheduled until day 42 I waited. Day 38 and it had spread a little on the same plant, and typical calmag deficiencies started slowly showing up on a few other plants(really tiny amounts). I posted on reddit and pretty much confirmed my suspiscion of a calmag deficiency. Since I am watering twice a week, once with calmag ph'd to 6.8-6,9 and once with blume nutes ph'd at 6.3-6,5. The calmag feeding was done on day 42( as scheduled at full strength this time so hopefully the problem will go away. 4AM2 hasn't been watered yet, pot didn't feel completely light yet(plus she had the most runoff last feed), will get her dose tomorrow.
P.S. Really starting to smell like sweet berries! Mmm.. 😍
On to week 7!


Likes
16
Share


@Chocolopeison
Follow
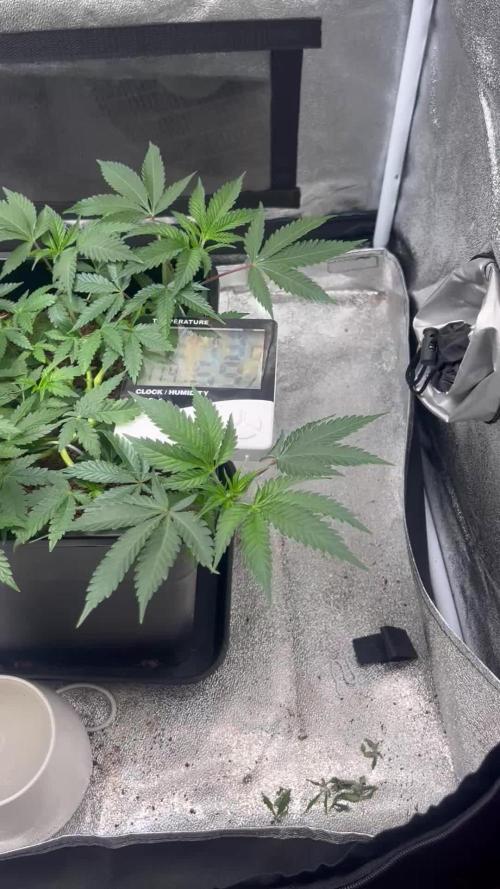
Estuvimos un poco desaparecido por andar un poco desmotivado pero aquí vamos nuevamente, las nenas van bastante bien en la semana 8 la cambiamos a maceta de 3.5L y aprovechamos de darle GREAT WHITE SHARK, la técnica que usamos es de amarrar el central ya que le hicimos supper cropping y apical a nuestro central, amarramos el apical que le hicimos super cropping y le dimos fuerza a varios brazos. Para ir controlando la altura de los brazos le hicimos poda a pical a los que estaban tomando más altura y así poder ir equiparando los brazos. La verdad que no se cuantos brazos tengo que sacar y aun me quedan unas 4 semanas para poder desocupar mi armario de floración y poder pasarlas a flora, así que intentaremos hacer una muy buena estructura antes de pasarlas a floración. La defoliación la aplico cada vez que saco foto ósea semanal y trato de ir manteniendo de a 4 nudos o 6 nudos
La alimentación se mantiene igual lo que si no se si lo dije pero:
Rhizotonic: Lo estoy usando solo en trasplantes y cuando hago alguna poda.
Cannazym: Lo estoy usando 1 vez por semana.
Orca y Myco Chum: Lo estoy usando 1 vez cada 1-2 semanas
Alimentación diaria: Calmag, silicia, supervit y canna coco a+b
Alimento a cada una con 250-350 cc de solución, 2 horas que encienden las luces y 2 horas antes de que se apaguen. Gracias a esta receta no eh tenido tanta variedad en mi runoff y las nenas se mantienen muy sanas.
Saludos




Likes
19
Share


@Ferinky
Follow
En esta actualización se incluyen 2 semanas ya que por trabajo me fue imposible añadir la semana anterior.
El día 15 de Agosto recibió la segunda pulverización de Bacillus Thuringiensis para prevenir el ataque de las orugas.
Sigo alternando riego de agua un día con riego de Ascophillum Nodosum al día siguiente. He dejado de regar con Cannazym.


Likes
21
Share


@gr3g4l
Follow
la semana empiezan mostrando un estado muy bonito y gozan de humidificador nuevo.
Primeras comprobaciones de temperatura y humedad con el humidificador al mínimo, como puede verse en la foto del dia antes, dia 15, apenas no ha cosumido nada de agua por lo que aumentaremos el caudal y tiempo en el temporizador analógico. Así aumentaremos también un poco más la humedad sin tantos altos y bajos
Pasados unos 5 dias volví a podar dejando únicamente un nudo por planta y un doblado de ramitas.
A los 21 dias volví a podar del primer nudo de cada rama, hojas y yemas.