


Likes
Comments
Share


@Creatorknbsland
Follow
Estão lindas essas meninas! Mais alguns dias e vão ter o grow so para elas! Mais 3 semanas de flora e de flora e boo!

Likes
Comments
Share


@SmithicusAlbertaCanada
Follow
Hey y'all - this is the exciting one for me, this year - I'm submitting the buds from these plants to the 4Plants Cannabis Cup in November, wish me luck! I'm in the amateur medical category, growing one of my favourite strains, it's exciting!
Hope you enjoy the video, I'm just a doofy guy growing some dope, hoping it's, um, dope!
Thanks for looking, let me know if you have any questions or comments 🙏

Likes
79
Share


@DogDoctorOfficial
Follow
Greetings, fellow cultivators! Welcome to the Week 7 Report on our magnificent Epsilon F1, where the journey of green greatness continues to unfold with each passing day. Prepare yourselves for a detailed and immersive exploration of our botanical wonder as we delve deep into the heart of her flourishing beauty.
Let's begin with a momentous decision: the Day 21 Flower Defoliation. With careful consideration and a keen eye for detail, I embarked on this transformative journey, gently removing select fan leaves to allow for increased light penetration and airflow. It's like giving our Epsilon F1 a botanical makeover, revealing her true splendor beneath the foliage canopy. This strategic pruning ensures that every bud site receives the attention it deserves, setting the stage for a bountiful harvest of epic proportions.
But that's not all! As we bid farewell to the defoliation process, it's time to release all the bindings and restraints that were used to guide and train our green goddess throughout her growth journey. With a sense of liberation and pride, I untangle each tie, allowing our Epsilon F1 to stretch her leafy limbs and reach for the heavens. It's like setting a bird free from its cage, unleashing her full potential to soar to new heights of botanical glory.
Now, let's talk about the environment. The TrolMaster controls have been instrumental in maintaining the perfect climate for our Epsilon F1's growth and development. From temperature and humidity to light and CO2 levels, these precision instruments ensure that our green queen receives the optimal conditions for flourishing. It's like conducting a symphony of growth, orchestrating each element to harmonize in perfect unity.
And of course, we cannot forget the nourishment that sustains our botanical masterpiece. The Aptus Holland nutrients continue to be the lifeblood of our grow space, providing a balanced diet of essential macro and micronutrients. From the Micromix Soil to the Substrate Buffer Powder and All-in-One Pellet, each component plays a vital role in nurturing our plant to perfection.
But let us not overlook the unsung heroes behind the scenes. Shout-outs to Royal Queen Seeds for bestowing upon us the genetic marvel that is the Epsilon F1, a testament to their dedication to excellence in breeding. To Aptus Holland, our main sponsor, whose unwavering support and innovative nutrients have propelled our grow to new heights of success. To TrolMaster, for providing the tools that empower us to create the optimal growing environment for our plants. And to Grow Diaries, the platform and community that fosters collaboration, knowledge-sharing, and camaraderie among growers worldwide.
As we bid adieu to Week 7, let us revel in the glory of our Epsilon F1's progress and look forward with anticipation to the weeks ahead. Happy growing, dear readers, and may your gardens be forever green!
Genetics -Epsilon F1 @rqs_esp @royalqueenseedssp @rqsglobal
Food - @aptusholland @aptus_world @aptus_es @aptus_portugal @aptusbrasil @aptusplanttechaus @aptus_thailand @aptusplanttechnz @aptususa_official
LES @lumatekeu
Controls - @trolmaster.eu @trolmaster.agro @trolmaster.support
As always thank you all for stopping by, for the love and for it all , this journey of mine wold just not be the same without you guys, the love and support is very much appreciated and i fell honored and blessed with you all in my life
With true love comes happiness , Always believe in your self and always do things expecting nothing and with an open heart , be a giver the universe will give back to you in ways you could not even imagine so
#aptus #aptusplanttech #aptusgang #aptusfamily #aptustrueplantscience #inbalancewithnature #trueplantscience #rqs #ApoloMission #MoonHarvestAdventure #playwithlego #lego #legotime #legovideo #tothemoonandback
More info and complete updates from all my adventures can be found Link in the profile description
Friendly reminder all you see here is pure research and for educational purposes only
Growers Love To you All

Likes
33
Share


@420DeepGrow
Follow
Gracias al equipo de Sweet Seeds, Marshydro, XpertNutrients y Trolmaster sin ellos esto no sería posible.
💐🍁 Sweet Mandarine Zkittlez F1 FV :
Genética feminizada y fotodependiente de floración ultrarrápida. Primera generación filial (F1) resultante del cruce entre un clon élite de Zkittlez (muy potente y resinoso, con un marcado aroma tipo Sour Diesel cítrico, entre naranja y mandarina) y nuestra Sweet Mimosa XL Auto (SWS94) que también tiene tonos aromáticos cítricos entre naranja y mandarina.
El resultado del cruce es una vigorosa variedad híbrida fotodependiente muy resinosa, potente y aromática.
El aroma de esta variedad es delicioso, con tonos Sour Diesel muy especiados, tonos de naranja y mango, fondo amaderado y lejanas pinceladas frescas como de pino o hierba recién cortada.
Algunos individuos pueden mostrar flores y hojas con tonos púrpuras y rojizos al final de la floración.
El efecto es enérgico, alegre y estimulante de la concentración y la creatividad.
💡TS-3000 + TS-1000: se usaran dos de las lámparas de la serie TS de Marshydro, para cubrir todas las necesidades de las plantas durante el ciclo de cultivo, uso las dos lámparas en floracion para llegar a toda la carpa de 1.50 x 1.50 x 1.80.
https://marshydro.eu/products/mars-hydro-ts-3000-led-grow-light/
🏠 : Marshydro 1.50 x 1.50 x 1.80, carpa 100% estanca con ventanas laterales para llegar a todos los lugares durante el grow
https://marshydro.eu/products/diy-150x150x200cm-grow-tent-kit
🌬️💨 Marshydro 6inch + filtro carbon para evitar olores indeseables.
https://marshydro.eu/products/ifresh-smart-6inch-filter-kits/
💻 Trolmaster Tent-X TCS-1 como controlador de luz, optimiza tu cultivo con la última tecnología del mercado, desde donde puedes controlar todos los parametros.
https://www.trolmaster.com/Products/Details/TCS-1.
🍣🍦🌴 Xpert Nutrients es una empresa especializada en la producción y comercialización de fertilizantes líquidos y tierras, que garantizan excelentes cosechas y un crecimiento activo para sus plantas durante todas las fases de cultivo.
Consigue aqui tus Nutrientes:
https://xpertnutrients.com/es/shop/
📆 Semana 2:
Gran primera semana, ella ha dado un gran estiron estos días, si sigue así será una gran cosecha.
Esta semana se practica defoliacion, poda de ramas bajas y se le agrega Sticky Fingers
La carpa está ocupada al 100%, sigue una floracion explosiva gracias a @Marshydro y @Xpertnutrients y @Trolmaster con esta gran genética 💪.
Potencia de la lámpara: 70%

Likes
47
Share


@Lady_NugWitch
Follow
Topped these girls and repotted into final resting places. Lol. Happy growing!!

Likes
1
Share


@MOTB666
Follow
Been pretty busy lately but these girls just keep at it. I did go several days with out topping them off this last week, probably only had a gallon left of water in thier buckets when I switched to transition. Only problems is a little bit of light burn and maybe a little bit of pest damage on one of them.

Likes
42
Share


@GanjaReaper
Follow
The plant in front is still looking ugly as always haha, the buds are small, they develope really slowly, the leafs look like they never had any (N)itrogen lol,
had this from the start. Whatever I did about it, it never changed into a better plant. Some people talk about bad genetics, but lets keep that in between.
I'm already glad these are indica's and kushes, so they can stand the cold better then a sativa kind. Sativas would already been full of budrot, molts and stopped flowering.
However, the plant behind it goes really well with the colds, as expected it even got nice collors, Most of the times color will show at colder climates.
I used to trick my inside plants into bud discoloration but the outside weather did it for me.
I gave them less nutrients, because i want them to get it from the soil( old nutrients) and from the leafs. Because of this, the leafs have now many signs of deficiency/discoloration.
They really look like other plants/trees in the autumn.
It was a wise choice of me to keep adding enzymen because when it gets colder, many enzymatic proceses are slowed down or even stopped.
Therefore my plants kept drinking, flowering.
This was the end of week 7 of flowering.
Might havest them at the end of week 8, but lets see how it goes.
9 weeks of flowering would be my maximum but I'm 80% sure i will harvest them at the end of week 8.
So again, they gained beautifull colors( the pictures are ugly, will make better ones next week, they look better in real), bigger size buds and now even got decent flowers instead of pistels with leafs like most outside grows LOL.


Likes
57
Share


@BudBoutique
Follow
Welcome to Bud Boutique Grow Diary - really appreciate all your love and support :)
Dont forget to check out my other current grows!
🗓️ This Week:
- Day 52: the end is near
- Day 53: Trichomes check from #1 and #2 - looking super good almost all cloudy, a few amber and clear. perfect point to chop
- Day 54: this one is finished, let's chop them both #1 & #2 !! ✂️✂️✂️
- both phenos got still super purple beautiful leaves
- now its time to dry inside the tent at about 60%rh and less than 20°C/68°F trying to get it even lower for the next 10-14 days
Thank you for still staying with me 💚
___________________________________________
--- 🌱 Strain (Sponsor) 🌱 ---
🏷️ PEACH GIRL by Art Genetix
https://www.artgenetix.world/product-page/peach-girl
--- 🥗 Nutrients and Feeding (Sponsor) - (APTUS Ambassador) ---
🍸 APTUS: full nutrient schedule extreme
-- Regulator, N-Boost, P-Boost, CaMg-Boost, K-Boost, Allin1 Liquid, Startbooster, Topbooster, Enzym+ every feeding
-- Fulvic-Blast, NutriSpray as Foliar each once a week
🔗 https://aptus-holland.com/
--- ♻️ Grow Control (Sponsor) ---
TROLMASTER: TENT-X + LM14 Light Adapter to dim/sunrise/sunset lights + Temp & rH Sensor all remote on App
🔗 https://www.trolmaster.eu/
--- 🚿 PetraGrow (Sponsor) ---
CannaFogger Foliar Spray
🔗 https://www.petratools.com/product/petragrow-cannafogger-atomizer-new-mini-fogger
--- 🏭 Grow Setup ---
💡LUMATEK Zeus Pro 600
* 🏠🌿 Indoor: Homebox 120x120x200cm (4x4)
* 📐🌀 PrimaKlima exhausting Fan 1180m3/h (running on 60-80%)
* 🌀 Can Light Filter 800m3/h & 1x Fanbox 1x Dyson fan for Air circulation
🔗 https://lumatek-lighting.com/zeus-600w-pro-29/
🔗 https://primaklima.com/de/shop/ventilatoren-de/ec-ventilatoren/pk160ec-tc/
🔗 https://canfilters.com/products/filters/
All Likes and comments are highly appreciated!!!
👨🌾 don't forget to check out my Instagram for daily educational content: budboutiquee
- Bud Boutique


Likes
6
Share


@mk420
Follow
49 days from planting seed.
All 4 plants are now flowering
The runt has grown a little this week and is now flowering, I am starting to think that it could be a different strain? look at the difference in appearance compared to the others. It is now 17 inch. looks more like an indica strain?
The other three are looking good, 2 measure at 30 inch and the third is slightly behind at just under 26 inch. All three look healthy. lots of flowers appearing.
No changes to my setup this week other than moving my light up a few inches, starting to run out of head room in my short tent, will have to consider moving the fan and filter outside my tent if they get any taller.
No rhizotonic in my reservoir now but I have increased my A & B to 3ml per litre.


Processing
Likes
14
Share


@CommanderCannabis
Follow
(12-8)Roots are growing. Emily is increasing height everyday. My humidity is really low (low 30's) so I have ordered a small humidifier to put in the A.B.L.E. Grow Chamber. Music selection includes Nirvana, Lou Reed, Joy Division, Fugazi and Led Zepplin. will keep my pH between 5.8 and 6. will also post end of week photos.
(12-9) Added small humidifier to the chamber. It raises the humidity by @ 15% which is OK but I need more humidity for my clone these first weeks. Have ordered a larger humidifier and hopefully that will get me in the high 60's. I'm around 45% at the moment with the small humidifier.
(12-10) The large humidifier did the trick. Got humidity up to 70% and I also installed a drip ring around the top of the container so hopefully that will help the roots grow better.

Likes
24
Share


@FlynnRyder
Follow
What is up you sexy displays of humanness? It's week something lol.. 9 I think. I always forget if a week is passed then counted or vice versa lol. The plants look waaaaay better from the first time I flowered. I think the environmental controls like the AC and the light distance are finally all getting locked in. I could be messing up nutrients but based on what I see I'm not burning or underfeeding to my knowledge. I'm praying for that last fattening week for these things to bulk up because I'm pretty sure they have maybeeeeee 2 weeks then a 3-day flush. Yall are the experts though so feel free to weigh in. Especially with the plants looking all over the place. Ill bust out the electronic microscope for some trichome pics next week closer towards harvest time. I keep reading it's a long flower and they still have a lot of white pistons. Plants are hella icier though compared to the first run, they look stickier, and overall I'm feeling more accomplished. I can't tell if I'm leagues away from pulling 1 lb per plant. Now the right light...... ugh.. idk why but I was trying to get my damn BN link dual timer programmed bc I have the closet in there still vegging and once I plugged everything in that right light had half the board go out again. This happened a while back and after I've checked all the connections it just randomly came back on one day and I have not questioned it over the months. Kinda pissed I cant have 1 smooth day but that's life I guess haha. oh weird question but my rooms are completely sealed. they don't really have ducting or new air pumping in. Could the plants be suffocating themselves getting that big and flowering in a closed room? I've heard the air you breathe is more than enough most time and I don't want to burn unnecessary money but If they are logically just not getting enough Co2 to transpire then.. ya.. you get my point lol. Oh and I scratched the pk 13/14 bc i felt like I was pushing my luck with it only recommended for 1 week and also it's about the end of my knowledge so I figured cutting something extra was the safe bet. the leaves are all dark too
Likes
40
Share


@Bread_n_Buds
Follow
What an adventure guys, we got to the end without even realizing it, as a famous Italian politician would say "they didn't see me coming", the F1 Hybrids can play this trick, they get to the end without you even realizing it.
They are damned, indeed blessedly faster, it is the flower that forms more quickly, it goes from hairs, to small buds, to mature buds in a truly record time. One plant finished in 59 days and the other in 65, and we are not talking about little grass produced, we are talking about at least 100 grams but also something more.
I tell you guys, try these F1s from Zamnesia, they are a rocket, as I was saying above of course you have to grow in ideal conditions or you have to try to get close to them, don't think of keeping the humidity at full blast during flowering and having good results. Don't think of overwatering and overfeeding and having good results. The plant must be observed, kept balanced and it is not easy at all. If you keep this balance, look at the color of the leaves and pay attention to the basic parameters, you will really harvest a lot of weed. Then if you want to grow as it comes, be careful, these plants are IDEAL FOR BEGINNERS. There is no better way to get easy, good and fast results than growing an F1 of Zamnesia.
The resin is 10 and praise, my gloves were full of charas from gloves in both harvests and smoked it is divine.
They were both harvested with the pistils more or less at 70% - 75% and the trichomes mixed: some amber, mostly cloudy and some transparent. Read the explanation of Zamnesia on instagram the best I have ever read if you want clarifications on the moment of harvest. My advice is NOT to let the plant go too far, maturity is fine but then the THC decays and even the Sativas become with physical effects. Therefore more mature on indicas and even a little less on sativas.
I can't wait to vape it.
Plagron's gruel gave us a lot of strength and vigor now we are simply in flsuh with Canna's product // Strain Description // If you were looking for a reliable, versatile and accessible strain, here it is. Blue Cheese F1 Automatic by Zamnesia Seeds uses F1 genetics to produce uniform, rewarding and easy-to-grow plants. This strain stays small, so you will have no problem finding a place to grow it. After just 10 weeks from seed, you can enjoy tasty buds with relaxing effects.
- Strain — Get a seed of this fantastic strain - https://www.zamnesia.io/it/10673-zamnesia-seeds-blue-cheese-f1-automatic.html
- Fully organic soil and fertilizers --- https://plagron.com buy at www.zamnesia.io
- Growbox and ventilation system --- https://www.secretjardin.com/
- Light — P2000 - https://www.viparspectra.com
- Music and sound --- I made my girls listen to 432hz frequencies and black music from www.radionula.com
- Z --- You can find these seeds, much more from the world of cannabis, mushrooms and an incredible series of accessories and gadgets on the reference site not only mine but of many growers
---- https://www.zamnesia.com

Likes
19
Share


@LittleBigTrees
Follow
Stretching has slowed right down , buds are growing . I'll pull fan leaves as I go to allow light through to the bud sites


Likes
8
Share


@Drpepper13
Follow
My medium starts to gather salt because of too much nutrients and it affects the plant, i washed it the last two waterings and I hope it’ll get better :)

Likes
2
Share

@3rnest
Follow
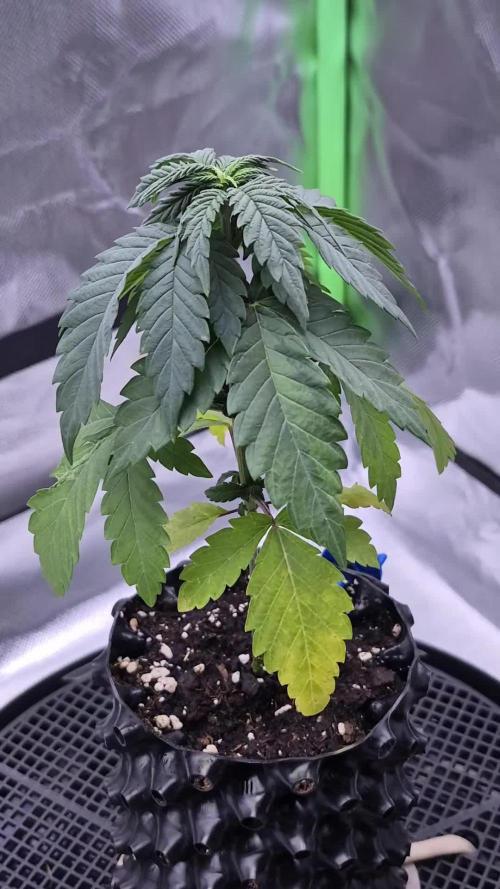
Bis jetzt ist die Pflanze sehr pflegeleicht und wächst einsam im GrowZelt weiter.
Likes
2
Share

@AbroCadabro
Follow
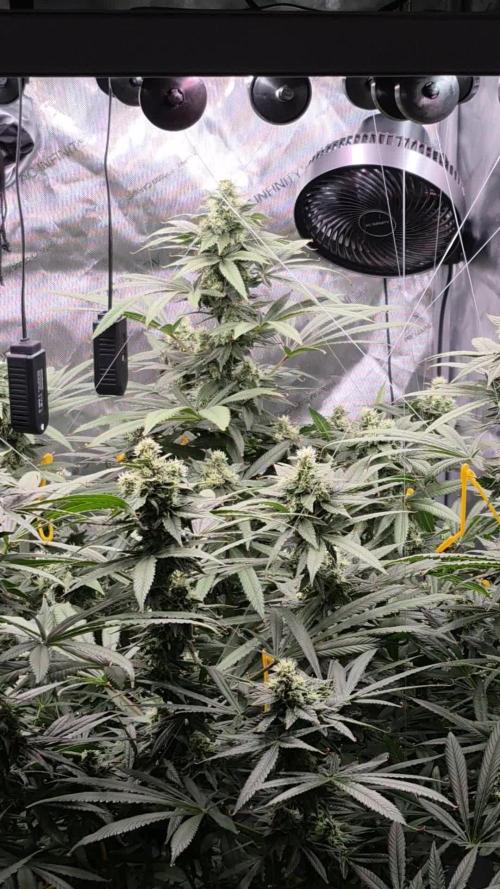
I started adding liquid KoolBloom to my reservoir at the start of week 6 after the switch to 12/12. The buds are starting to fill out. Looks like maybe another 2-3 weeks to finish.


Likes
9
Share


@JohnnyGrower
Follow
Día 14 comenzando la 3ra semana de vida, todas tienen un buen desarrollo, solo hay 1 que presenta una coloración distinta y una morfología diferente a las demás, probablemente sea solo un fenotipo distinto, además plante una nueva semilla en la maceta que estaba vacía

Likes
54
Share


@Rasta_Faraev
Follow
Привет, мои дорогие друзья. Все хорошо у халкберри, отметила круглую дату в 50 дней. Одуваны опухают вовсю и они покрыли весь куст своими огромными стигмами, ожидаю от неё серьёзного результата. А я ей в этом помогу. Спасибо за ваше внимание. Я надеюсь, что Халкберри будет лидером этого забега, она младшая, а потому и забота о ней чуть большая😄👍🏻
28.10.21. Халкберри 53 дня от рождения. Цифры ппм и пш дренажа показали, что девчонка начала активно кушать на цветение. Все как по учебнику. Отличная салышка👍🏻