


Likes
Comments
Share


@Tweak
Follow
Got the screen on her late last week, now it’s a waiting game. She’s growing really fast for only being 5 weeks old. Let’s grow baby!

Likes
7
Share


@Reaper
Follow
good plants for hydro grows they dont stretch too much, buds need support because of the weight at the end. i run in a little calmag issue because i went overboard with the bloombooster around week 5. this caused a lockout top leaves got effected by this other then that i had a huge yield.


Likes
9
Share


Likes
3
Share


@midEastern
Follow
LOW STRESS TRAINING - try it
it works on almost any strain ,keeps plant height controlled,bushy and promotes more shoots exposed to light.
Another good advise :
monitor your plant everyday and watch closely under leaves for any small bugs,as long as you monitor and its in small scales - no problem to control
best thing to do is gently and patiently squeeze 'em between fingers ,not harming the leaves. very effective against spreading ,aphids,mites,thrips.
also, using natural neem oil 1% mixed in 6ph water - spraying (only vegging - NOT IN BLOOM PHASE) on leaves and bottom every 3 days during after-sun hours. - organic solution for this problem as well - neem oil stops the bugs from reproducing and slow them up

Likes
24
Share


@Horticulturehobbyists
Follow
Today is day 23 of flower. So I've been chasing a minor P-K deficiency. The plants are happy and healthy and are just feeding heavy at the moment. Well over and above any recommended servings with respect to the dry amendments and water soluble P-K inputs. As with any grow regardless of what you're using for inputs (organic amendments/salt based bottle feeding/crop salts/etc....) the recommended feed rates are never anything more than a baseline. So to remedy the deficiency I added the Flower 2 at 1.5 times the reccomended dosage (3 grams per liter of water) and a little over twice the dosage of Gaia Green 2-8-4 Power Bloom dry amendments (250ml per 7 gallon pot). I also fed a mung bean/barley seed sprout tea as well as a compost tea (2/3 of a cup of each seed). The feed rates will stay well above recommended servings for the Flower 2 but the 250ml addition of the 2-8-4 would be considered a large addition for a single serving so I will give the plants 5-7 days to see how they react to dry amendments before top amending again at any rate (you cant burn your plants with organic inputs but you can still suffer nutrient lockout so you need to be mindful and patient when feeding heavy.)
On day 19 of flower I did a large pruning/defoliation/lollipopping of the plants. Both from the top of the pot to the bottom of the first layer of trellis removing everything. I also cleaned the plants out from above the first layer of trellis netting to the top of the plant. As I waited to clean up the bottom third of the plants until my typical strip day in flower (day 18-21 depending on strain and flowering times, these are 9 week strains which is why the strip falls in the day 18-21 range, if they were 8 week finishers the leaf strip would take place somewhere between days 14-16). When running multiple layers of trellis netting it's best to prune/lollipop everything below the first layer of netting about 7-10 days before the flip. Odds are your lights wont penetrate that far down the plant so these areas of the plant typically only produce what's commonly known as larf. I'm running new lights so I decided I'd wait until the big strip I always do in flower. This was grower error. I know better and wont make this mistake again. Its unnecessary stress added during flower that could've been prevented. As I decided to wait to clean out the bottoms I didnt prune the plants as aggressively as I normally would (I adopted Grand Master Levels leaf strip practices years ago, check him out on IG or YouTube if you want to see what that looks like).
The week went smoothly with no major issues to report. The seasons are changing here so were getting rain, damp wet snow, and have very humid conditions outside. As a result this affects the atmosphere in my grow room but not enough to cause concern.
A little less than 6 weeks until the chop!

Likes
1
Share

@MrMaabra
Follow
German:
Ich hatte mit der Keimung zu Beginn Schwierigkeiten und Zeit verloren, da ich immer nur ein Samen genutzt hatte. Erst mit dem dritten von vieren hat es dann geklappt.
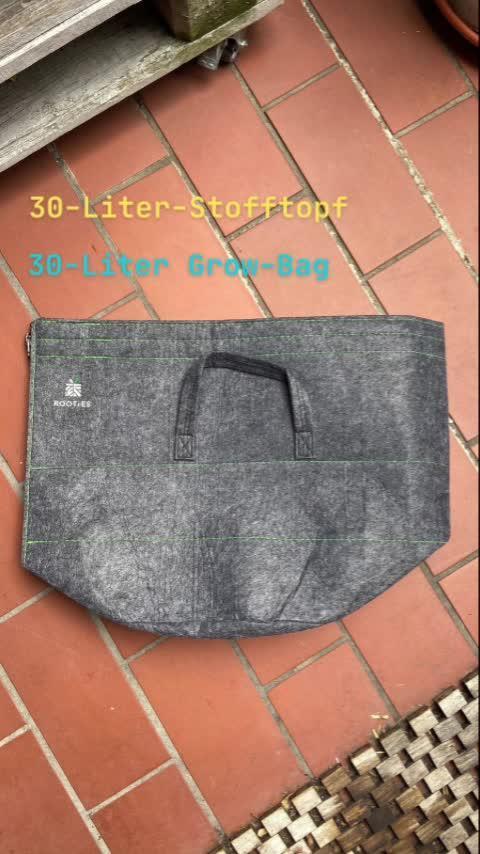
In der ersten Woche habe ich parallel zum Keimen meinen 30-Liter-Stofftopf mit Living Soil vorbereitet. Als Mulchschicht verwende ich unbehandeltes Kleintierstroh. Zu Beginn wird das Living Soil von Sonnenerde mit 15% des Topfvolumens angegossen, ohne, dass ein Drain (überschüssiges Gießwasser) entsteht. Das wäre eine Anzeichen, dass zu viel gegossen wurde und wertvolle Mikroorganismen und Nährstoffe aus der Erde gespült werden und das wollen wir nicht.
Für die beste Kontrolle der Bodenfeuchtigkeit nutze ich von Blumat einen digitalen Feuchtigkeitsmesser. Idealbereich liegt zwischen 80-130. Diesen Wert werde ich im Laufe des Runs noch erklären.
Parallel lasse ich einen Samen der Mandarin Punch FEM im Wasserglas Keimen — an einem dunklen, warmen Ort. Bei mir ist das in einem Küchenschrank. Nach drei Tagen ist der Samen aufgepoppt und kam in ein kleines Anzuchthäuschen mit ungedüngten Kokos-Tabletts, mit dem Ziel, nach einer Woche und guter Durchwurzelung direkt in den Finaltopf umzuziehen.
Im Video bereite ich den Topf vor.
__________
Englisch:
I struggled with germination at the start and lost some time because I was only popping one seed at a time. It finally worked out with the third out of four seeds.
During week 1, while waiting for germination, I prepared my 30-liter fabric pot with living soil. For the mulch layer, I’m using untreated small animal straw. To start, the Sonnenerde living soil is pre-watered with 15% of the total pot volume. I made sure to get zero runoff, as drainage would mean overwatering — which washes out valuable microorganisms and nutrients, and we definitely don't want that.
For optimal soil moisture control, I’m using a Blumat digital moisture meter. The sweet spot is between 80 and 130. I’ll explain what this value means later in this run.
Meanwhile, I’m germinating a Mandarin Punch FEM seed in a glass of water, placed in a dark, warm kitchen cabinet. After three days, the seed cracked open and went straight into a small humidity crib using unamended coco coir pellets. The plan is to let it establish a solid root system over the next week before transplanting it directly into its final pot.
Check out the video to see how I prepare the pot!


Likes
100
Share


Likes
14
Share


@nine666
Follow
Everything has been growing great this week!
These autos sure do grow fast! but did have a slight issue with the Fast buds BlackBerry getting a little bit too top heavy so I moved her closer to the light.
The video above is from day 13 and the Honey Peach CBD from SweetSeeds that is in the back left pot was about 5/6 days old

Likes
Comments
Share

@DogDoctorOfficial
Follow
💙 Project Blue Tent – Week 4
Blue Waffle F1 – Pheno B (Folder 13B)
Hello everyone, and welcome back to another update from Project Blue Tent!
For anyone joining us for the first time, this project follows four individual Blue Waffle F1 plants from Zamnesia, each documented in its own diary from seed to harvest. Although they all live inside the exact same environment, receive the same nutrition, grow under the same lights and experience the same conditions every single day, every plant is allowed to tell her own story.
That's one of the things I love most about growing from seed.
We're not simply growing four plants.
We're discovering four different personalities.
Everything inside this tent is built around the Zamnesia ecosystem, while the ladies are growing in Plagron Premium Coco Growbags and being fed exclusively with the Plagron Hydro nutrient line.
Today it's time to spend some quality time with Blue Waffle F1 – Plant B.
⸻
🌱 Week Four – Small Plant, Big Potential
This week felt like another important milestone for Plant B.
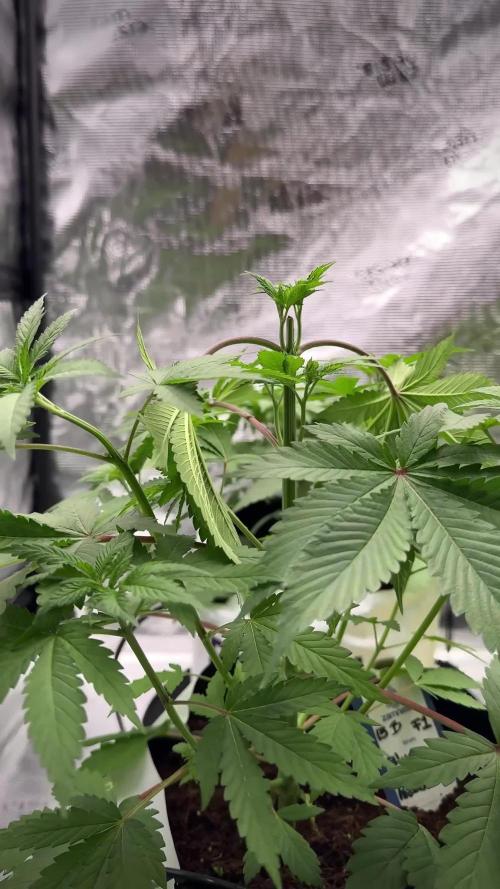
While she remains slightly more compact than her sister, she's developing exactly the way I hoped she would. Her internodal spacing stays beautifully tight, the side branches continue to stack evenly around the main stem, and the overall structure is incredibly symmetrical.
Rather than stretching upwards, she's investing her energy into building a strong foundation first.
Personally, I love seeing this type of growth.
Plants like these often become a dream to train later on because they're naturally dense, balanced and eager to fill every available space once they're encouraged to branch out.
The stem continues to thicken nicely, while subtle purple pigmentation is becoming more noticeable on the petioles and main branches, adding another little touch of personality to this phenotype.
⸻
🌡️ The Blue Tent Environment
One of the biggest goals with Project Blue Tent is maintaining consistency.
By keeping every environmental factor as stable as possible, the differences we observe come primarily from the plants themselves rather than changing conditions.
This week's average environmental conditions were:
• 🌡️ Day Temperature: 27°C
• 🌙 Night Temperature: 25°C
• 💧 Relative Humidity: 67%
• ⚗️ pH: 5.8
• ⚡ EC: 1.88 mS/cm
• 💨 CO₂: approximately 450 ppm
• 💡 Light Schedule: 18/6
• ☀️ PPFD: approximately 350
The Zamnesia Phytonaut LED continues providing a beautiful, even light distribution across the entire canopy while the Grow Environment Controller keeps everything running smoothly throughout the day.
Stable conditions allow the plants to focus on one thing...
Growing.
⸻
🥥 Feeding Update – Learning Coco One Week at a Time
One thing that really caught my attention this week was the overall leaf colour.
Just like her sister, Plant B remains incredibly healthy, but she's showing a lighter shade of green than I personally like to see.
Fortunately, plants are excellent communicators.
Before deficiencies become serious, they often give subtle hints that they're ready for a little more nutrition, and I believe that's exactly what these ladies were telling me.
Rather than waiting for problems to develop, I decided to make a gradual adjustment.
The feeding schedule is now:
• Plagron Hydro A — 1.8 ml/L
• Plagron Hydro B — 1.8 ml/L
• Plagron Hydro Roots — 1 ml/L
I also introduced a small amount of Plagron pH Min to help keep the reservoir perfectly stable over longer periods.
One thing that has genuinely impressed me throughout this grow is just how stable the Plagron Hydro line has been.
Once the reservoir is mixed and dialled in, the pH barely moves throughout the entire week. Occasionally it may require the smallest correction, but compared to what I expected when starting coco, the stability has honestly been outstanding.
Coming from years of growing in living soil, I'm really enjoying learning how responsive and predictable coco can be when small adjustments are made instead of large corrections.
Growing really is one continuous learning experience.
⸻
✂️ Topping Day – Building Tomorrow's Canopy
This week also marked Plant B's first High Stress Training session.
She received her very first topping.
Unlike Low Stress Training, where branches are gently bent into position, topping intentionally removes the plant's main growing tip to interrupt apical dominance.
By doing this, the plant redirects energy into the side branches instead of focusing almost exclusively on one central leader.
Many growers choose to top much earlier, sometimes above the second or third node.
Personally, I prefer allowing the plant to develop a little longer before making that first cut.
Waiting gives me a stronger stem, additional secondary branches and, most importantly, many more growing tips to work with later.
My goal isn't simply to create two tops.
My goal is to build the framework that will eventually fill an entire SCROG net.
Everything we're doing today is preparing these plants for the weeks ahead.
Because topping is considered High Stress Training, timing is important.
I only perform it on vigorous, actively growing plants that are showing strong health.
Although the foliage is still a lighter green than I'd ideally like, Plant B's posture, growth rate and overall vigour clearly showed she was more than ready for the procedure.
The cut itself was made using my Zamnesia Pruning Scissors, giving a clean, precise cut with minimal tissue damage.
Sometimes the smallest tools make the biggest difference.
⸻
🌿 Blue Waffle F1 – Plant B
The more time I spend watching this phenotype, the more I appreciate her personality.
She's compact.
She's balanced.
She's methodical.
Rather than racing upwards, she seems determined to build a solid foundation first.
Every branch appears evenly spaced, the stem continues gaining strength, and even after topping she looks completely unfazed.
It's always fascinating how two sister plants can respond so similarly while still expressing their own unique character.
Plant B feels like the quiet achiever.
She's simply getting on with the job.
⸻
👀 Looking Ahead
Next week should be a very exciting one.
With the feeding now increased and the topping behind her, I'll be watching closely to see how quickly the two new leaders begin taking over.
I'm expecting the canopy to start opening naturally as the side branches accelerate and the overall structure becomes wider.
Over the coming weeks we'll continue shaping these ladies, preparing them for the SCROG while allowing each phenotype to reveal more of its own personality.
The adventure is only just beginning.
⸻
💙 Thank You
A huge thank you goes to Zamnesia for making Project Blue Tent possible, from these fantastic Blue Waffle F1 genetics to the complete ecosystem surrounding this grow.
A heartfelt thank you as well to Plagron for providing the Premium Coco Growbags together with the Hydro nutrient line that continues teaching me something new every single week.
Thank you to GrowDiaries for giving growers from around the world a place to document their journeys, learn from one another and build such an incredible community.
And finally...
Thank you to every single person following along.
Whether you've been here since day one, recently discovered these diaries, leave comments every week, quietly observe from the background or simply enjoy watching these plants develop, your support truly means a lot.
I hope you're all having an amazing week, and I can't wait to show you how these beautiful ladies continue evolving in the next update.
Until then...
Growers Love, happy growing, and I'll see you all next week. 🌱💙
P.S. One thing I love about documenting every single step is that these diaries become more than simple grow logs. Hopefully someone who has never topped a plant before can look at this week's photos, understand the process, see exactly where the cut was made, and feel a little more confident when the time comes to do it themselves. If these updates help even one grower become more confident with their own garden, then they've already achieved something special. 💙🌱
Likes
2
Share


@CuriosityWebster
Follow
Good plant overall, wish it was a bigger plant because bud structure is very nice
Had a little bit of spider mites but took care of it quickly, overall handled the heat very well and this one had no bud rot
Will run this stain again since I have some more seeds, hoping for a bigger phenotype next time :)

Likes
16
Share


@DreamIT
Follow
-Sponsored by:
🎭ZAMNESIA SEEDS🎭-💡VIPARSPECTRA💡-💐GREEN BUZZ LIQUIDS💐-🛠️WEDRYER🛠️
8/7 After several days of Growdiaries making it difficult for me to write and respond to comments, I found that I can still update the journals. I apologize to everyone for the non-replies but I have replaced the main email and the email to confirm the account never arrives, and Growdiaries' customer service seems to be non-existent.
10/7 everything is going well, nothing special to add🤘🦄
12/7 all good, things are going great
__________________________________________
Personal advertising (contains affiliate links)
__________________________________________
🦄Zamnesia boasts the most complete and accurate site where you can find everything related to cannabis and the "psychedelic" world. Autoflowering, feminized seeds, mushrooms, salvia divinorum, afrodisiacim of everything, and more! ( no affiliate link)
✅https://bit.ly/Zamnesiaseeds
__________________________________________
Did you know that Green Buzz Liquids fertilizers are 100% vegan? A complete line of products ready to give the best to each of your plants! Visit the site and see my journals to see how they work 🦄
🤯 And with the code "dreami t" you will immediately receive a 15% discount on your purchases
✅https: //bit.ly/GreenBuzzLiquidsPro
__________________________________________
👀 Are you looking for a good lamp to start with? 👀
🌞Viparspectra has something more than the others, take a look at their site.
⏩ Use "GDVIP" for an extra discount or "DREAMIT3" for an extra 5 %% discount
👀 Search for it on Amazon
✅Amazon USA: https://amzn.to/30xSTVq
✅Amazon Canada: https://amzn.to/38udUVe
✅Viparspectra UE: bit.ly/ViparspectraUE
✅Viparspectra USA: bit.ly/ViparspectraUS
______________________________________________
🌈 Tired of blowing on your weed hoping it dries quickly? Check out the Wedryer website! You will find a well-made accessory that will help your weed dry in just 8-10 days without the annoying risk of finding mold or other annoyances! (no affiliate links)
✅https: //bit.ly/Wedryer_
______________________________________________
📷🥇Follow the best photos on Instagram 🥇📷
https://www.instagram.com/dreamit420/
Backup
https://www.instagram.com/dreamit4200/
🔻🔻Leave a comment with your opinion if you pass by here🔻🔻
🤟🦄💚 Thank you and good growth 💚🦄🤟
Likes
8
Share


@Kirsten
Follow
23.2.25:
I watered with approximately 1.5 ltrs per plant. I mix 6.5ltrs of dechlorinated water PH'd to 6.4. This time, I only added Ecothrive Biosys to the water because I have just top dressed the soil.
Adding anything extra right now would probably be overkill and result in toxicity from too many available nutrients.
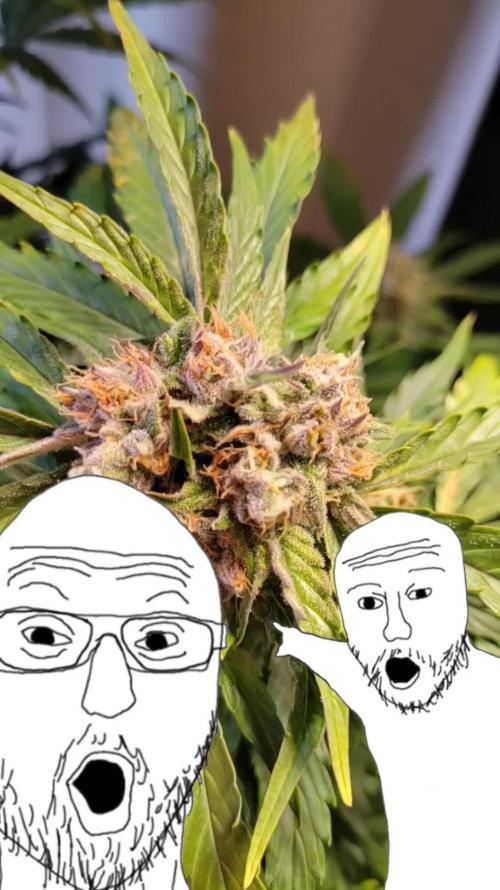
I defoliated minimally mostly Do-sì-dos, Watermelon, and Pink Mist. Due to the scrog net, it's about all I can reach 😅
I've moved the plants to increase space for Gorilla Cookies 🍪 and Bubble

Likes
3
Share


@UnicornSparklehorn
Follow
She's growing better now and starting to fill up. I was away so I gave her a decent watering and she spent the week unattended. Fortunately she didn't need attention during this period. I topped her just before I left.

Likes
2
Share

@mjumbo
Follow
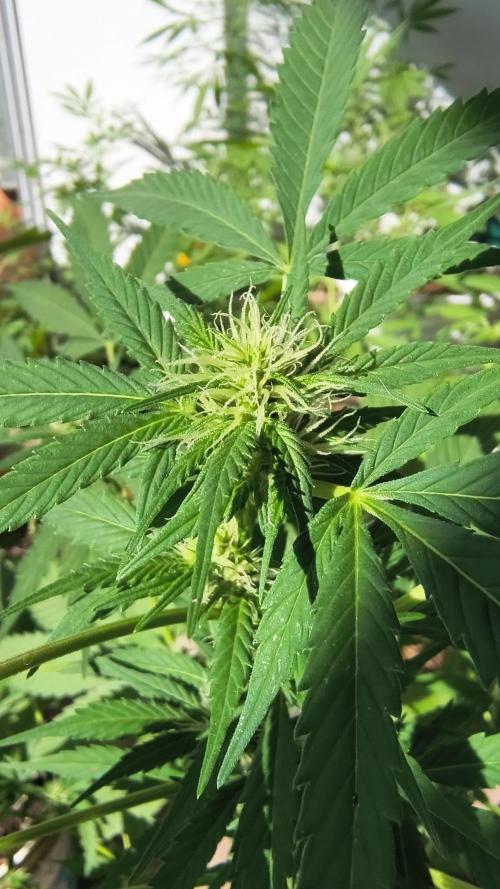
I have moved to new pots two of the plants that already start Blooming. hope they do not stress to much.
Also have applied bio neem for plague protección.


Likes
74
Share


@Ferenc
Follow
Day 64, 22nd of November 2021:
Hi there! Here we go..... so basically pistils are appearing stronger this is the 2nd weeks since they started producing pre flowers.
The plants getting a bit light might be some air circulation problem? However they look good and of course closer to the end the gettin' older so the leaves also die.
Set up and timing is the same since flower season started.
ViparSpectra XS2000 is on full power which is 240W so 100% capacity.
Ventilation: 12 hours period when the lamp is on it switches 1 hour on and after one hour off mostly to keep the temperature and of course because of fresh air flow. When the lamp is off it switches on in every 2 hours for 15 min at the same time with the extraction fan.
The extraction fan is on 12 hours when the lamp is, and then it switches on in every 2 hours for 30 min.
That's all a bit more water for them from today also. Humidity quite the same approx 50%, temperature as well approx 26-27 Celsius.
Fertilization remains the same since last week, the BioBizz family raised up to be 2ml/L each so it is like 2ml/L of BioGrow, 2ml/L of BioBloom, 2ml/L of TopMax... see the ratio above.
The schedule of the fertilization has not changed happnes 2x a week except epsom salt just 1x a week.


Likes
25
Share


@pifflestikkz
Follow
Day 79
17/09/24 Tuesday
Feed today using de-chlorinated tap water pH 6.
Seeing good developments, buds forming nicely, divines are smaller denser structures but the buds are not lacking!
Damn I'm surprised by 2L pots.
Day 81
19/09/24 Thursday
De-chlorinated tap water pH 6 only today.
Day 83
21/09/24 Saturday
Another feed to push this week they seem to be handling it 💚. Fattening up on the buds now and pistils starting to mature

Likes
18
Share


@Pokan187
Follow
This week went by well, I will start checking the trichomes on the Runtz at the end of this week. It should be ready for harvest in the next 2 to 3 weeks
The G13 is still smelling like magic, looking majestic.
The GDP buds are starting to put on weight
