


Likes
Comments
Share


@Poppetnewbie
Follow
Not a lot has changed in the 1 week period but they are still alive 😄 so for my 1st im chuffed that I might be chuffing on my own little ladies thanks all

Likes
51
Share


@Corwinism
Follow
WEEK 8 (04/18/2021 - 04/24/2021)
Day 59: 04/18/2021
Defoliated some growth from each plant before I installed my custom-built SCRoG net made of: pvc piping, drywall screws, and jute twine for the netting. It’s slightly smaller than the tent, 41”x41” with a second level for another net. It fits perfectly, leaving plenty of room to work around the edges and move the fan around if needed.
Immediately after defoliation and installing the net, I watered using ½ strength Botanicare Hydroguard. Watering was different. I used a battery-powered liquid transfer pump to help water the plants a little faster and more efficiently. Also helps to reach the plants I can’t access as easily in the corner.
I am unable to test/collect any of the runoff at the moment since installing the net, which wouldn’t be an issue by itself, but my saucers are just barely large enough to fit the base of the 5 gallon pots into. I have no way of sticking a pH pen or TDS meter in the runoff. They simply won't fit between the pot and the saucer.
This is extremely unfortunate, as I am now unable to monitor the ppm of the soil with each watering. Will have to pick up some larger saucers soon or think of another solution.
-------------------------------------------------------------------------------------------------------------------------------------------
Day 61: 04/20/2021
‘Tis the season to be medicated. Happy Holidaze!
-------------------------------------------------------------------------------------------------------------------------------------------
Day 62: 04/21/2021
Upping the amount of water going into the pots this watering. Previously I was doing 1 gallon of water per 5 gallon pot. I’m increasing the amount of water to 1.5 gallons. Hopefully that will produce enough runoff for taking measurements. It’s going to be a painfully difficult task to take readings but I really need to know what the condition of the soil is right now. Will not be using any nutrients this time considering the runoff was kind of high when I fed on 4/10. This seems a little risky though since it has been 11 days since a nutrient feed, but I’d rather not burn the plants by blindly adding nutrients. Will return. Hopefully with measurements.
(some amount of time later)
Tap water: 245ppm, 6.1 pH (9 gallons)
pH Down: 30ml
JB#1 - 2730ppm, 7.0 pH
JB#2 - 2290ppm, (pH pen died again on this plant)
AP#1 - 2380ppm, 6.9 pH
AP#2 - 3610ppm (seems extremely high), 7.0 pH
GC#1 - 2320ppm, 6.9 pH
GC#2 - 2340ppm, 7.1 pH
I don’t know what was up with the measurements on the AP#2. The saucers the pots are sitting in are a little small so I think the ppm might have been reading high because the bottom of the fabric pot was sitting in the runoff. Maybe I’m just saying that to reassure myself. Either way, the 3000+ ppm seemed very off.
-------------------------------------------------------------------------------------------------------------------------------------------
Day 66: 04/24/2021
Defoliation + weaving/securing branches through SCRoG.
I'm not 100% sure that the SCRoG was the most optimal technique of choice given the very limited space within the grow tent. Also, I almost feel like I installed the screen a little late. Maybe not? Either way, I have read about them and the potential of increased yields, which got me excited enough to build one to try out for myself. I was aware going into it that there would be some difficulties using a SCRoG. I can no longer move my pots around is the main thing. Not being able to move the pots around has increased the difficulty factor of watering/feeding. I now have to access 3 different sides of the tent to get all 6 plants. I've clipped all the ties holding the branches down from previous LST sessions. There was just no way I was going to spend hours weaving in and out of all the ties trying to water each plant while also dealing with the difficulties of a SCRoG obstructing the work space. That would also wreck my poor back.
From here, things are going to get real exciting. Tomorrow (04/25) I am rescheduling the light cycle to 12/12 to initiate flowering. Another 60-70 days to go, growing buds and packing on trichomes. With that said, I'm excited to have made it through my very first full vegetative cycle. I've definitely made my fair share of mistakes, as expected, but as long as I keep learning from them future harvest will only continue to increase in quality and yield. Thank you for stopping by and checking out the diary this week! All your kind words and encouragement are fuel. Until next time! 🙏


Likes
2
Share

@eldruida_lamota
Follow
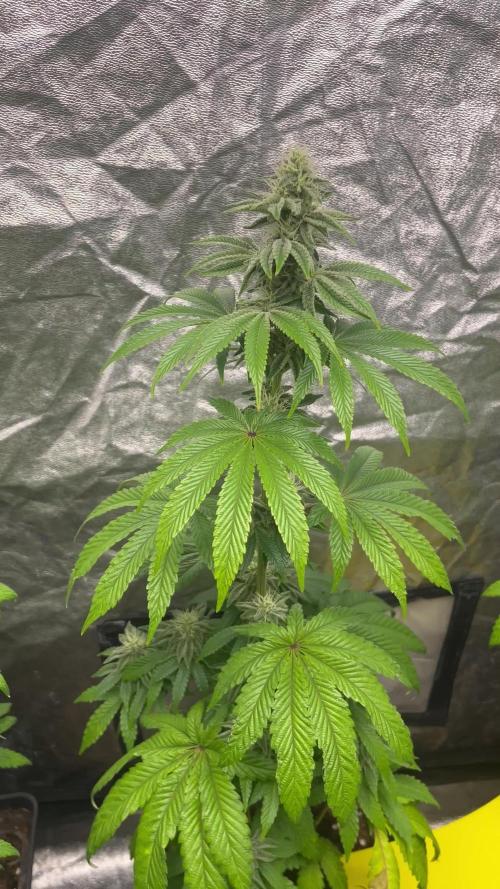
Que pasa familia, vamos con la quinta semana de floración de estas Barcelona Puff feminizadas de Seedstockers.
Vamos al lío ,se trasplantaron en macetas de 7 litros definitivamente.
El ph se controla en 6.0 , la temperatura la tenemos entre 25/21 grados y la humedad ronda el 50%.
El ciclo de floración puse 12h de luz, el foco está al 80% de potencia.
De momento van creciendo a buen ritmo y tienen un buen color, la flor ya empezó a formarse y a tricomar, por el momento bien.
Comentar de nuevo el estrés hídrico a sido superado de momento todo bien.
Agradecer a Agrobeta por el envío del kit gold series para la temporada 🙏.
- os dejo por aquí un CÓDIGO: Eldruida
Descuento para la tienda de MARS HYDRO.
https://www.mars-hydro.com
Hasta aquí todo, Buenos humos 💨💨💨


Likes
5
Share


@alafmalaf
Follow
Pruned and started ferts this week. 0 sign of insects, we are good, for now....
Likes
4
Share

@DogDoctorOfficial
Follow
💙 Project Blue Tent – Week 5
Blue Waffle F1 – Pheno B (Folder 13B)
Hello everyone, and welcome back to another chapter of Project Blue Tent.
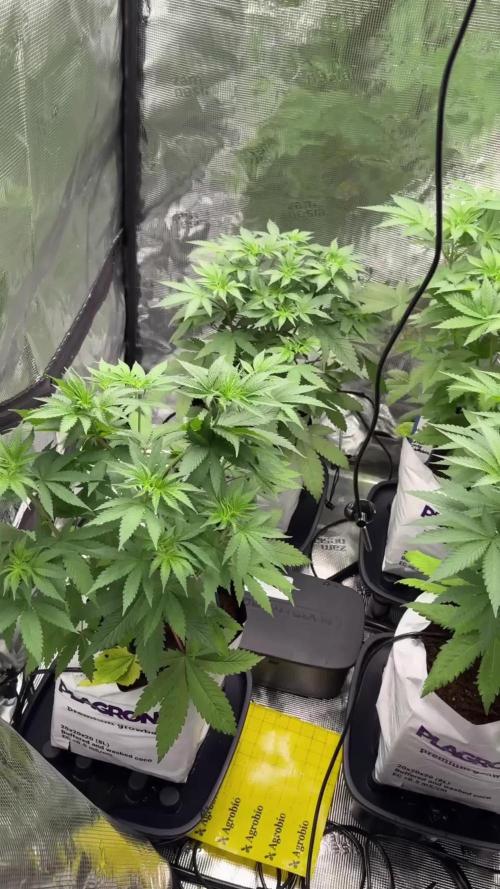
For anyone discovering these diaries for the first time, this project follows four individual Blue Waffle F1 plants from Zamnesia from seed to harvest. Every plant grows inside the exact same environment, under the same lighting, receives the same nutrition and follows the same schedule.
The only variable...
The genetics.
Watching each phenotype develop its own personality while removing as many environmental variables as possible is exactly what makes this project so fascinating.
Today we're checking in with Plant B.
🌱 Week Five – Finding Her Rhythm
If last week was about recovery after topping, this week was all about momentum.
Plant B responded beautifully to the cut, quickly redirecting her energy into the new leading shoots while the lower branches accelerated their own growth.
She's still carrying that compact structure I mentioned previously, but she's beginning to spread out much more naturally now. The canopy is becoming wider, the internodal spacing remains wonderfully tight, and every branch seems determined to compete for the top.
One thing that continues to impress me is how symmetrical she is becoming.
She almost looks like she planned every branch herself.
The stem has thickened considerably over the past week, giving me confidence that she'll comfortably support the heavy flowers later in the grow.
🌡️ Blue Tent Environment
Consistency continues to be the biggest priority inside the Blue Tent.
This week's average conditions were:
• 🌡️ Day Temperature: 30°C
• 🌙 Night Temperature: 25°C
• 💧 Relative Humidity: 58%
• ⚗️ pH: 5.8
• ⚡ EC: 1.92 mS/cm
• 💨 CO₂: 450 ppm
• 💡 Light Schedule: 18/6
• 💧 Irrigation: 1.2 litres per plant per day
Although daytime temperatures climbed slightly this week, the plants continued growing vigorously with no signs of stress, demonstrating just how resilient healthy plants become when the root zone remains stable.
🥥 Feeding & Irrigation
One of the biggest differences between this project and my previous organic soil grows is the irrigation strategy.
Because coco doesn't store nutrients the same way soil does, the plants are fed little and often rather than receiving larger irrigations every few days.
Each plant now receives approximately 1.2 litres of nutrient solution every day through the automatic Mars Hydro drip irrigation system.
A drip irrigation system slowly delivers nutrient solution directly onto the growing medium through small emitters positioned at each plant. Rather than watering by hand, every irrigation is delivered evenly and consistently, ensuring every plant receives exactly the same amount.
Once the nutrient solution has travelled through the coco, the excess runoff drains away through the automatic drainage system beneath each grow bag.
This is just as important as the irrigation itself.
Removing runoff prevents old nutrient solution from accumulating around the roots, helping maintain a healthier and more stable root environment while dramatically reducing the daily workload.
As someone who has spent years hand-watering plants, I genuinely appreciate how much time this system saves while improving consistency at the same time.
The current feeding schedule is:
• Plagron Hydro A — 1.9 ml/L
• Plagron Hydro B — 1.9 ml/L
• Plagron Hydro Roots — 1 ml/L
The slight increase from last week continues producing exactly the response I was hoping for, with richer colour and strong, healthy new growth.
🕸️ Preparing the SCROG
This week also marked another exciting milestone.
The SCROG net officially entered the grow.
SCROG stands for Screen Of Green.
Rather than allowing each branch to grow vertically on its own, a horizontal net is placed above the canopy. As branches grow through the openings they're gently guided sideways, encouraging the plant to spread across the entire growing area.
Instead of producing one dominant cola, the plant develops dozens of equally exposed flowering sites.
The result is a flatter canopy, more efficient light distribution and, hopefully, a much larger overall harvest.
At this stage the net isn't there to hold flowers.
It's there to guide the architecture of the plant.
Over the coming weeks I'll continue weaving each branch through the net one square at a time, allowing the canopy to fill naturally before flowering begins.
Watching this process unfold is honestly one of my favourite parts of growing.
🌿 Blue Waffle F1 – Plant B
Plant B continues living up to the personality she's been developing since the beginning.
Calm.
Balanced.
Methodical.
She isn't trying to be the tallest plant in the tent.Instead she's quietly building an incredibly organised structure that should become a fantastic SCROG candidate over the next few weeks.
Sometimes the plants that grow the slowest early on end up delivering the biggest surprises later.
I'm very curious to see whether she's one of them.
👀 Looking Ahead
Next week should be all about training.
With the SCROG now installed and both new leaders growing strongly after topping, the real canopy shaping begins.
From here onwards the objective changes completely.
We're no longer trying to grow taller plants.
We're trying to grow wider ones.
Every branch will now be guided with one simple goal...
To create an even canopy capable of making the absolute most of every photon produced by the Zamnesia Phytonaut LED.
The adventure is becoming even more exciting.
💙 Thank You
A huge thank you goes to Zamnesia for making Project Blue Tent possible, from these incredible Blue Waffle F1 genetics to the complete ecosystem surrounding this grow.
A heartfelt thank you to Plagron for providing the Premium Coco Growbags together with the Hydro nutrient line that continues making my transition into coco both enjoyable and educational.
A special thank you to Mars Hydro for the automatic drip irrigation and drainage system that has become an essential part of this project. Although this isn't a sponsored product, it's one of those pieces of equipment that simply works. It has brought consistency, cleanliness and peace of mind to the grow room while allowing me to spend more time with the plants and less time managing runoff.
Thank you to GrowDiaries for giving growers from all around the world a place to document their journeys, learn from one another and build such an incredible community.
And finally...
Thank you to every single person reading these updates.
Whether you've been here since the first seed cracked, recently discovered Project Blue Tent, leave comments every week, quietly follow along, or simply enjoy the photographs, every visit, every conversation, every question and every word of encouragement helps make this journey even more rewarding.
I hope you're all having an amazing week, and I can't wait to share the next chapter of this adventure with you.
Until then...
Growers Love, happy growing, and I'll see you all next week. 🌱💙

Likes
3
Share

@ChubbyBudBros
Follow
-
Day 70
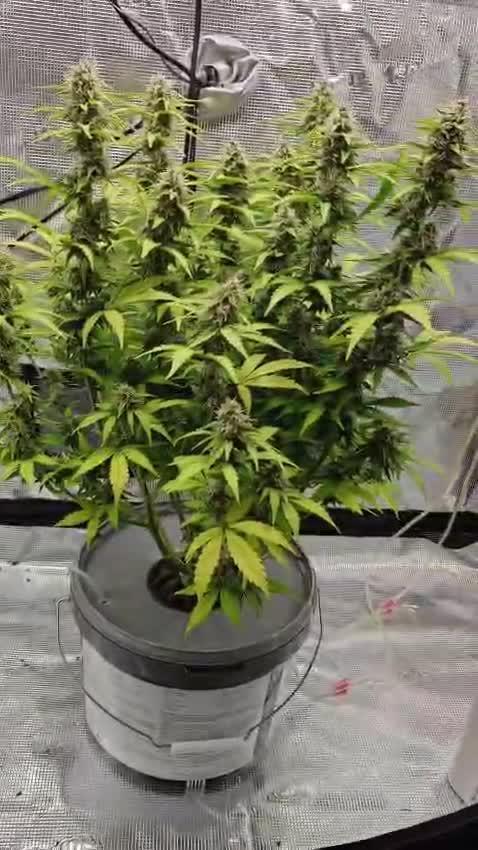
Did a reservoir change today. Seems like she will need at least 3-4 weeks more with how the buds seem like they have quite a bit to go. But very happy with her so far!
Day 71
She drunk a lot less today for the first time in a while., didn't have to top up the water but did have to bring pH back down from 6.6 to 6.1.
Also did quite a defoliation of leaves that were starting to be completely yellow.
Day 72
Aaaand today she drank almost the whole reservoir lol. Had to top her up completely with some 6.1 pH water.
Day 73
Still drinking a lot of water, but the pH stayed at 6.0. I guess this means she is starting to eat less nutrients now.
Day 74
Interesting, pH stayed at 6.0 again. She also seemed to have drunk a lot less today as I barely had to top up the water.
Day 75
pH only dropped to 5.9 today, barely any water gone again. Interesting that she seems to have stopped drinking a lot already while I feel that the flowers still have a lot of bulking up to do. Also did a bigger defoliation of the yellowing leaves, an amazing citrussy smell fills the air when I defoliate.

Likes
1
Share


Likes
12
Share


@ChitownCannaChica
Follow
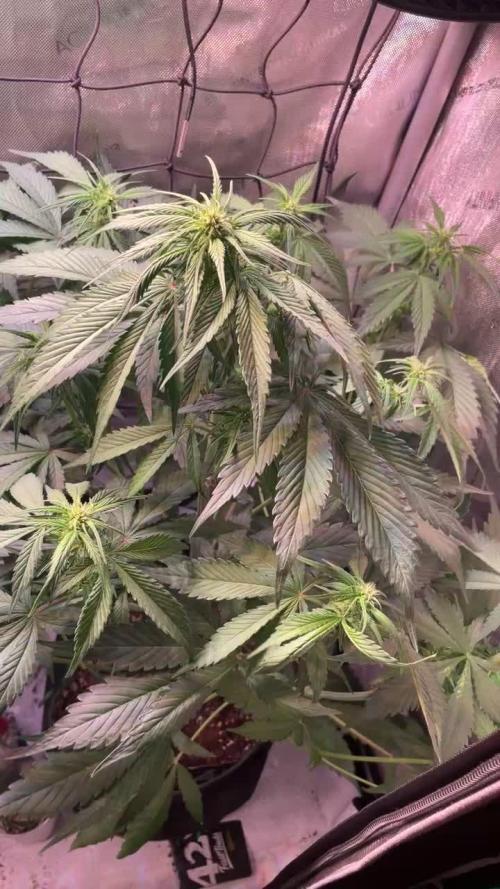
What a beauty! I love this plant! Getting super frosty, easy to grow, and fast! Really fast compared to my regular photos! Have to say I’m impressed! Just did some defoliation and top dressed with some kelp. ✌️🏻💚


Likes
28
Share


@m0use
Follow
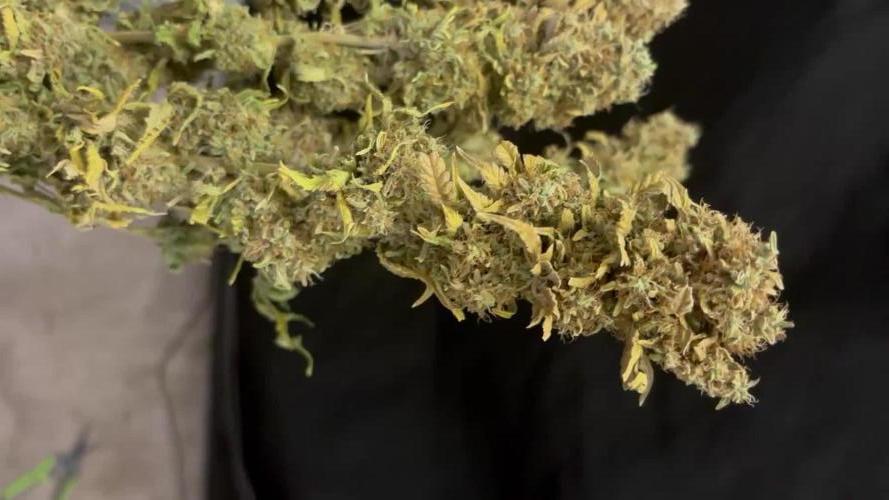
SPONSORED DIARY===SPONSORED DIARY===SPONSORED DIARY
So I was grossly overfeeding these little ones and just did not have the time to correct it. I went back and looked at my runoff and it was quite high. maxing out my TDS meter. I flushed em all with lots of liquid and now they all apear to be finishing up majority of the pistils where browning and whatnot.
Will let me got for another week or so I think and no more feed just water. There is still some stuff remaining in the soil I got it down to 0.8ec from 4.0+
This grow has suffered some loss from it all but that's ok it was just for shits and giggles and the buds it producing are still nice looking.
I also took the saved pollen out of the fridge from my Dinamed CBD Kush Auto Breeding Project - DCKABP lol, and I pollinated one branch on this plant. I marked it with a little red string to see if it would work or not. This was done last week when I missed its weekly entry. and to my surprise I now have a few swollen calyx on my GDP plant. I have no idea how fertile the pollen was as I mixed a lot of it with dried cornstarch and it seemed to do the trick for saving it. Now that I know this I will try this method again in the future and try and freeze the pollen for longer storage times.
SPONSORED DIARY===SPONSORED DIARY===SPONSORED DIARY
Big shout out to @SpiderFarmer for supplying the 2x2x5 Grow tent and The SF1000 100w LED light.
I will be uploading all relevant photos of the products in the next week when they arrive, maybe do a little unboxing video. Who knows.
A 2nd big shout out to Dr.Seeds for supplying the 3x5pac of seeds I will only be featuring two of the three strains in two separate diaries.
You the users will get to decide what ones I grow. I have setup a Grow Question on each diary to vote for your strain of choice for that diary.
https://growdiaries.com/grow-questions/47600-drseeds-1-vote-what-i-grow "Diary #1"
https://growdiaries.com/grow-questions/47600-drseeds-1-vote-what-i-grow "Diary #2"
Cast your vote for each diary.
Thought I would add in the relevant links if you wanted to read up on any of the products that will be officially featured in this grow.
https://www.spider-farmer.com/
https://growdiaries.com/grow-lights/spider-farmer (+) https://www.spider-farmer.com/products/sf-1000-led-grow-light/
https://growdiaries.com/grow-tents/spider-farmer (+) https://www.spider-farmer.com/products/sf-2-x2-indoor-grow-tent-hydroponic-home-plant-reflective-aluminum-oxford-cloth/
https://drseeds.net/
https://growdiaries.com/seedbank/dr-seeds
(+)
https://drseeds.net/product/granddaddy-purple-autoflowering-cannabis-seeds/ (+) https://growdiaries.com/seedbank/dr-seeds/granddaddy-purple [Photoperiod not Autoflowering]
https://drseeds.net/product/60-day-wonder-autoflowering-cannabis-seeds/ (+) https://growdiaries.com/seedbank/dr-seeds/60-day-wonder-autoflowering

Likes
7
Share


@Onlygrow99
Follow
Bien pues ya tenemos en marcha el 2º seguimiento del perfil...
Son 6 white truffles, 6 Apple&Bazzokies de GBSTRAINS y 5 GG4 de GBSEEDS que se empezaron a germinar el 15 de mayo por la tarde sobre las 19:00
Todas nutridas con BOOM nutrients jejeje
Todas las semanas iremos viendo los cambios y la evolución, los riegos y las flores que vendrán :)
El 16 de mayo del 23 sobre las 07:00 de la mañana pase las semillas del vaso con agua, a los tapers con servilleta. Ahí estuvieron 24 horas mas haciendo un total de 36 horas germinando para después,
pasarlas a las macetas de 1 litro.
22/05/23 actualizado, meto unas fotos mas de como van las semillas después de 7 días desde que se empezaron a germinar en el vaso de agua.
A día 22/05/23 llevamos 7 días desde que se empezaron a germinar.
ACTUALIZACION DE ESTADO:
30/05/23 Subo unas fotos después de 8 días.
Llevamos 15 días desde que se empezó a germinar las semillas en vaso de agua.
A partir de aquí, empiezo a contar semanas de crecimiento.
Trasplantaremos a maceta definitivas de 7L dentro de una semana o 2.

Likes
12
Share


@Mysterdo420
Follow
Hello tomorrow gonna start week 13 one from those is almost reaady to chop it is a Tropicana Cookies i start to flush last week today it was second time with pure water 1.5l ,probably i make one more flush this week and į thinking to strat to dry in next weekend other gonna be Orange Sherbet and Gorilla Cookies will see this week and maybe i start to flush those in next week or after 2 weeks time will show , about Purple Lemonade she gona be a latest ladie one week with nutr ant rest for flushig gonna be something like that in my opinion have nice evening and happy Growing
Likes
15
Share


@MG2009
Follow
👍
10/15/2020
It's been 3 weeks since last update so 33 weeks got 2 weeks I think ? Feed some
4-9-3 happy frog 3 tbls and 3 tbls of (DE). 3 weeks left at most.
10/16/2020
There is some nasty weather on the way so I am going to bring her in for the finish going to get out a scope tonight and have a good look at her. But I think two weeks left, also will be under a 11-14 cycle till done.
Her mother plant thrived under this light and microclimate.
Ps.
She's expected to be (FLOWERING!)
10-12 week strain
So calyx swelling soon🙏 I almost forgot, she smells like Juicy Fruit gum. Smoked something similar in the 1980's and been searching ever since! Hope she tastes as good as she smells
10/26/2020
Its been 9 weeks and 4 days since start of flower buds are getting harder everyday maybe a week to go.
10/29/2020
10 weeks on the nose. Just water,water and water this week took some branches 2 weeks ago very good for no cure just dried, but With a good trim, and cure should improve over the next couple weeks.
Harvest may come this week but we will see🙏
Likes
22
Share

@TrickzGrowz
Follow
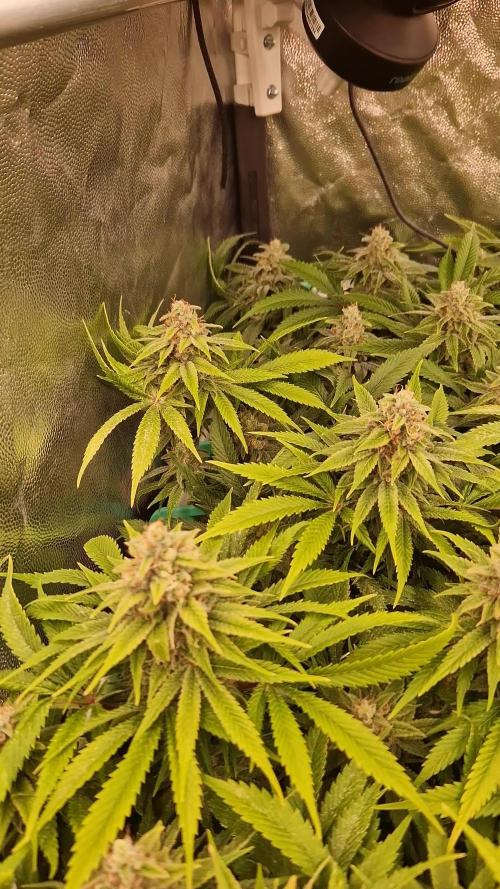
Es geht in die Endphase. Letzte Woche dachte ich mir noch... mhh so dick werden die Buds bei der Lemon Mandarin jetzt auch nicht... aber langsam holt sie mit der Blütenbildung auf!
Likes
15
Share


@OrganikTek
Follow
Good weather is Back.
Gave them some epson salt to bring black cream colours out.
Black Cream is now turning red and fatning buds. Shes yellowing dont now if its light stress(her lst is 27/28 and ppfd about 600 and i event gave her so much CO2 now) colors changing or senescense.
Bomberry think shes reduce grow rate abd dont know why.
Wedding cake Jumped and its taking over the scrog net
Couskush growing good some wilting caused by fan. Shes the smallest and at her hight her LST its on the lower edge.
Chears BrotherHood

Likes
5
Share


@CelticSmokey88
Follow
Promoting Mars hydro fc3000 honeslty everyone whouses this light will tell you how deadly it is I germinate my seeds in the soil u this ligjt and have 100% success rate
Processing
Likes
7
Share


@Kushizlez
Follow
Day 70-77
(Day 71) Not exactly sure why but node spacing on bbb 6&7 is super tight still. Their stems are also harder and less bendy, almost like they’re root bound.
Bbb #5 in my veg tent is looking bizarre and I’m at a loss for what to do. I’ve been looking up and asking around about the leaf crinkle and no one seems to know what’s wrong. Trashing a pheno of this would hurt. It could be a keeper too as I don’t think the problem is genetic. It’s definitely root bound but that doesn’t cause contorted new growth like that. I’ve concluded that it’s my dense soil coupled with root bound issues, overwatering and high RH.
(Day 72) Later tonight I’m going to give bbb 5 a bath tub flush until it’s reading 200ppms, drain it well and then transplant into a 3g pot with lightly amended soil. I’m also going to give it a light defoliation. I don’t mind stressing the shit out of this plant right now because I won’t be flipping for another week at least. With the small container it will run out of amended nutes mid flower so I will hit it with a few synthetic feedings around then to test out the smokabilty and taste compared to organic nutrients.
I might as well give the rest a good defoliation on the rest of the plants too. I will try to get most of what is under the trellis.
(Day 73) I definitely defoliated #7 waaay too much. Since it’s tucked away in the corner and a really bushy plant I can’t train it as well as the others. I cut most of the sucker branches and the majority of the lower fans. This should prevent the need to defoliate at all until week 3 of flower.
(Day 74) I’ve been reading that higher temperatures with a high RH can affect growth big time. It could be what’s causing all the crinkling and twisting. And now that the plants are in very late veg they could probably benefit from a lower RH. When I was running my temps around 74-78F and 70% RH I was in the perfect range. Now that I’m around 82-86F with the same 70% RH that could be what’s causing it. Hotter air holds more moisture than cooler air and proper vpd at 84F is around 75-80%. I’m going to turn up the speed on my carbon filter and set my controller to 75%. If I don’t see a difference or it gets worse I will drop to 65 and go from there.
(Day 76) I finally got the lights raised up another 4 inches or so. It’s not much but it should help reduce the intensity and stretch the nodes more.
I’m starting to think the super tight node spacing and droopy/contorted growth has more to do with something I’ve been reading about called ‘soil compaction’. Apparently farmers often deal with compacted soil in fields from running tractors over it all day. When I potted the plants I gave them a good little jiggle to compact the soil down further so I could fit a bit more in the container. I think this could be the culprit as they don’t seem to be drying out evenly. Even the plants in my other room are not drying out like they should and it’s probably from compacting too. With the addition of rock dust and dry amendments the soil can become sandy/clay like and retain a lot more moisture. Wish I would have added a few more liters of perlite and packed the soil a bit looser. Either way I need to get this problem sorted ASAP before I get root rot.
Earlier in the season when I overwatered, I stuck a fish tank air pump into the soil and it aerated the soil enough to prevent overwatering. The only reason I discontinued it is because it didn’t have much effect in the 1.7g pots. I just ordered a 36w 6 way fish tank pump that is way more powerful. It was 50 bucks and I’m willing to take a gamble on it. It seems to be my only option at the moment because I can’t just repot. Worst case scenario I can use it for brewing compost teas if it doesn’t work. I’m not sure how well this will work in a giant fabric pot but it’s worth a shot. I’ve heard of people supplementing additional air into raised garden beds with great results.
I’m picking off some of the new auxiliary branches to try and widen the node spacing. Growth is definitely slow and stunted but no signs of deficiencies.
I just thought of another theory on the node spacing... and the more I think about it, the more I think it’s the mystery problem. I’ve been foliar spraying with 1-1-1 VeloKelp at pretty high concentrations 2-3 times per week. I have heard in passing that kelp and seaweed can somehow reduce stretch. A quick google search reveals that Ascophyllum Nodosum Seaweed and other marine algae extracts contain large amounts of hormones and auxins that reduce plant height and stretch. *facepalm*
Guess I’ll stop that for the rest of the cycle. As far as I know there is nothing I can really do but wait for the plant to use up all those excess hormones and nutes. The recent 0-0-15 seaweed extract and 1-0-3 kelp meal I bought is derived from the same kind as the velokelp. I guess I won’t use it again until week 3 or 4 in flower. Tight nodes are very useful in flower but aren’t desirable at all in when trying to scrog in veg. Especially when they’re like a half inch apart. It slows the shit out of a grow. Vietnamese and biker gangs in my area used to grow SOG style and use a synthetic PGR hormone (meant for bonsai trees) called ‘paclobutrazol’ that would make the weed rock hard dense so they wouldn’t have to pay people as much to trim it. I’ve heard that in recent years they have made the switch to using kelp extracts because paclo is getting harder find and is not meant for food crops let alone smokeable crops. I’m ashamed of it but I have smoked pounds of PGR weed long before I knew what a PGR was. 🤷♂️
(Day 77) One more theory. Ever since raising up the plants up onto that shelf the root zone is probably significantly warmer and the bottom of the pot (where most of the roots are) drys out way quicker. It’s possible that the warmer root zone could not be holding dissolved oxygen at the proper rate resulting in that over/underwatered look. Or it could be that I’m not watering enough at once to reach the bottom of the pot where the roots are and it’s indeed under watered. I’m going to water in a gallon when I get my new air pump and see if that makes any positive change. If I see the new air pump making a difference, I will flip on the 21st of April. If I don’t see a difference, I will carefully untangle the plants from the scrog net and remove the shelf. That extra foot should make a massive difference with ppfd and will cool down the roots significantly too. I’m thinking about grabbing a simple soil/compost thermometer to check the temp of the medium. Better safe than sorry.
Rough week. Hopefully everything get smoothed out in the next little while before I flip.
Likes
2
Share


@smokeycropping
Follow
- LAS PLANTAS SIGUEN CON EL MISMO PLAN NUTRICIONAL
- NO SE VEN CARENCIAS NI EXCESOS
- el hps de 600 MANTIENE MI AMBIENTE SIN MAYORES INCONVENIENTES
-NO SE VEN PLAGAS NI MAYORES PROBLEMAS
