




Likes
13
Share


@Drawer
Follow
A sad week, I found bud rot and had to take my plants out and do a big check and remove all dense underdeveloped growth.
It will be a pretty big hit on the yield I guess but the most important thing is learning and that I did.
The bud rot could spread due to my RH being 65/70 at nights and it used to be +80 before, + bad airflow.
I got new fans in the tent and my dehumidifier was ordered already but its not in yet.
On the other side, the plants are looking pretty damn good, they smell amazing
and 3 of the 4 plants is getting a very dense nug structure.

Likes
4
Share


@m0use
Follow
***Sponsored Grow*** = Medic || https://medicgrow.com || Grow = ***Sponsored Grow***
Breaking into my last stock of Dinafem seeds before they all age out, this one is something I have been looking forward to. Part of their Dinamed lineup consisting of all pure cbd strains. This is based off their classic award winning Dinamed lineup, its a mix of dinamed cbd plus and dinamed cbd autoflower. The CBD plus has a increased terpene profile and slightly higher levels of CBD vs their regular dinamed cbd. Granted the original Dinamed CBD is award winning. Maybe this one would have won some awards as well if the company did not abruptly get shut down.
As of now I've scarified the seed, soaked in water for 20hr then moved to paper towel till a 1mm or less tap root was showing then planted in the medium.
This grow has a lot of new things happening. its my first attempt at indoor growing using dry crystal fertilizers, the brand of nutrients I'm using is Lotus. It was also a gift from another user @SanderanderS as shipping to them would have been astronomical for the stuff they wanted. I have noticed some weird things like boated packaging, off gassing and weird consistency with the nutrient line up so far and been in contact with the reps online about it, They said everything is normal and not to worry.
Another new thing with this grow is how it will be grown under the new LED's by Medic Grow. They will be under MINI-SUN 2 240W LED grow lights using their V1 Spectrum, Its good from seed to harvest. You can find more information about this in the foot note.
Just going to wait for another week till It pops up and will update as follows. Watered in with PH of 6.2 and a EC of 0.6 or 340ppm 500 scale.
This is part of a 5 part diary in conjunction with medic grow led lights, in the beginning it was to be 6 plants but one of the selected strains died out and its replacement/backup seeds also failed. Sorry to say Humboldt Seeds Raspberry Diesel was a big flop all 3 seed did not meet my expectations, really wanted to try that one it looked nice. Can add that to the failed 4 seeds of Seedsman Cookies Chill :(
***Sponsored Grow***
Official Website: https://medicgrow.com/
Facebook:
https://www.facebook.com/medicgrowled
Twitter:
https://twitter.com/medicgrow
Instagram:
https://www.instagram.com/medicgrow420/
YouTube:
https://www.youtube.com/channel/UCNmiY4F9z94u-8eGj7R1CSQ
Growdiaries:
https://growdiaries.com/grower/medicgrowled
https://growdiaries.com/grow-lights/medic-grow

Likes
4
Share

@DogDoctorOfficial
Follow
💙 Project Blue Tent – Week 10
🥒 Pickle Lemon Haze F1 – Pheno B
🌸 The Week Where We Let Her Shine
Hello everyone, and welcome back to another chapter of Project Blue Tent! 💙🌱
And this week...
I'm going to start by saying something that has become increasingly obvious while watching this project develop:
These girls are incredible.
😂💙
Not because they're doing something completely different from each other.
Actually...
quite the opposite.
They're becoming remarkably similar.
Same room.
Same environment.
Same lighting.
Same irrigation.
Same nutrition.
Same training philosophy.
Same major interventions.
And now, as we reach this stage of flowering...
they almost look like copies of each other.
And that is fascinating.
Today we're putting the spotlight back on Pickle Lemon Haze F1 – Pheno B.
And honestly?
She's looking absolutely beautiful.
🌿 WEEK TEN – NOTHING TO FIX
After the amount of work we did during the previous weeks, this week was refreshingly simple.
We didn't perform another major defoliation.
We didn't change the structure.
We didn't move branches around.
We didn't install another SCROG.
We didn't start chasing the canopy.
We didn't try to force anything.
We simply watched.
And that's because there really isn't anything screaming at us for attention.
Pickle Lemon Haze Pheno B is approximately 145 cm tall.
She's healthy.
She's vigorous.
She's flowering.
She's supported.
And she's settling beautifully into the structure we created for her.
Sometimes...
doing nothing is actually doing something.
😂🌱
🌸 LOOKING AT THE RESULTS OF THE PREVIOUS WEEKS
This is the part of the project I find particularly satisfying.
During the previous weeks, we were constantly making decisions.
The girls stretched.
We ran out of vertical space.
The LEDs needed to be raised.
The carbon filter and extractor were moved outside the tent.
The canopy became extremely dense.
We performed a deep defoliation.
We installed the second SCROG.
We added additional airflow underneath the canopy.
We adjusted the nutrition.
There was a lot happening.
But now?
We get to watch those decisions play out.
And Pickle Lemon Haze Pheno B is giving us a very nice answer.
She's standing there with a beautifully organized flowering structure.
The branches are visible.
The canopy is open.
The flowers are developing.
The support system is in place.
The airflow is moving.
And the plant looks comfortable.
That's what we wanted.
🌿 THE DEFOILIATION IS NOW IN THE REAR-VIEW MIRROR
One of the biggest things I'm watching this week is how beautifully the plant has settled after the heavy defoliation.
At the time, the room looked completely different.
We had an enormous amount of vegetative material.
The plants had stretched aggressively.
The interior of the canopy was extremely dense.
So we opened everything up.
Not because leaves are bad.
Quite the opposite.
Leaves are essential.
But the structure had become so crowded that we needed to manage the density and make the flowering architecture more functional.
And now...
we're seeing the result.
The plant has had time to recover.
The remaining foliage is doing its job.
The flowering sites are much easier to see.
Air can move through the structure.
And the entire plant feels more organized.
That's the beautiful part.
The intervention is finished.
Now the plant gets to tell us what it thought about it.
And so far?
I like the answer.
💡 LUMIFLORA – LIGHTING THE LOWER CANOPY
The biggest new addition to the setup is still the LumiFlora under-canopy light.
We're now running the **LumiFlora 150W full-spectrum fixture**, with additional emphasis toward the red portion of the spectrum.
And with these girls becoming this large, it makes perfect sense to explore supplemental lighting underneath the canopy.
The main Phytonaut LEDs continue providing the primary light from above.
But with a plant this tall and this developed, the lower portions naturally receive less direct light.
So instead of constantly removing more foliage to try to expose every single flowering site to the overhead fixtures, we're taking another approach.
We're bringing supplemental light to the lower canopy.
The LumiFlora is there to complement the overhead lighting.
Not replace it.
Not compete with it.
Simply add another layer of light where the structure naturally creates more shade.
And now...
we watch.
🌸
I'm particularly interested in seeing how the lower flowering areas develop over the coming weeks.
That's one of the reasons I love documenting these experiments.
We make a change.
Then we wait for the plant to answer.
🕸️ THE SECOND SCROG IS RIGHT WHERE WE WANT IT
The second SCROG remains in place and, just like the rest of the setup, we're not touching it unnecessarily.
It has already done what we wanted.
The first SCROG helped us organize the vegetative canopy.
The second SCROG is now there to provide additional support as flowering continues.
With Pheno B reaching approximately 145 cm, she's built a substantial framework.
As those flowers continue gaining weight, having that extra support available becomes increasingly useful.
We're not trying to reshape her anymore.
We're not trying to force branches into new positions.
The structure is established.
Now we support it.
And then we let her do her thing.
🥒💙
🌬️ AIRFLOW – KEEPING EVERYTHING MOVING
The airflow system also remains unchanged.
We have airflow working through different levels of the canopy, with the additional Zamnesia clip fan underneath helping move air through the lower portion of the plant.
That becomes particularly interesting now that the LumiFlora has been introduced.
We're adding light underneath the canopy, so naturally we want to make sure the lower portion of the room continues to have good air movement as well.
The goal isn't to create a hurricane.
😂
It's simply to avoid stagnant pockets of air inside a very mature flowering structure.
The canopy is open.
The air is moving.
The extraction system is outside the tent.
And the room feels much more balanced than it did a few weeks ago.
NUTRITION – CONSISTENCY IS KING
The nutrition remains exactly where the plants are telling us they want it.
We're continuing with the PLAGRON Hydro program:
PLAGRON Hydro A — 2.2 ml/L
PLAGRON Hydro B — 2.2 ml/L
🌱 PLAGRON Hydro Roots — 1 ml/L
🌸 PLAGRON Power Buds — 1 ml/L
pH adjusted as required
Current EC is approximately 2.49 mS/cm.
And again...
we aren't changing things just for the sake of changing them.
The plants are happy.
They're consuming.
They're flowering.
They're maintaining beautiful foliage.
So we're staying consistent.
This is something I've always enjoyed about working with plants:
They tell you when they're comfortable.
You just have to pay attention.
Don't feed a number.
Watch the plant.
🌸💙
🥒 PHENO B – LOOKING MORE AND MORE LIKE HER SISTERS
Here's the really fascinating part.
Pickle Lemon Haze Pheno B is beginning to look remarkably similar to the other girls in the tent.
And that's something I find genuinely interesting.
These are individual plants.
They're being documented separately.
We're watching their individual personalities develop.
And yet...
under the exact same environmental conditions...
they're showing an incredible amount of uniformity.
The same general height.
The same aggressive vegetative development.
The same flowering transition.
The same response to the structural work.
The same need for support.
The same beautiful recovery after defoliation.
It's almost like looking at several versions of the same plant.
😂💙
Of course, there will still be phenotype differences.
That's what we're here to discover.
But right now?
The uniformity is impressive.
And that's making me even more curious about what happens as they mature.
🔬 SAME ENVIRONMENT – LETTING GENETICS SPEAK
This is exactly why Project Blue Tent is so interesting to me.
We're keeping so many variables consistent.
Same tent.
Same lighting.
Same irrigation.
Same nutrition.
Same environmental conditions.
Same general training.
And then we watch.
The more consistent the environment remains, the more interesting the individual differences become.
Or, in this case...
the lack of obvious differences.
😂
The Pickle Lemon Haze F1 girls are behaving remarkably similarly.
And that's giving us a very interesting picture of how these genetics are expressing themselves in this particular environment.
But we're not jumping to conclusions yet.
We're still early enough in the flowering development that the final differences may become much more obvious later.
So...
we watch.
🌿 THE PLANT DOESN'T NEED US TO CONSTANTLY TOUCH IT
One of the biggest lessons from this stage of the grow is knowing when to step back.
There is always something a grower can do.
You can remove another leaf.
Move another branch.
Change another setting.
Adjust another number.
Add another product.
But that doesn't mean you should.
😂
At this point, Pheno B looks like she doesn't need another intervention.
She needs stability.
She needs time.
She needs light.
She needs nutrition.
She needs airflow.
And then...
she needs to be left alone to do what plants do.
Grow.
Flower.
Develop.
Finish.
And that's exactly what we're doing.
💡 FROM OVERHEAD LIGHT TO A COMPLETE LIGHTING ENVIRONMENT
The introduction of LumiFlora is also changing how I'm thinking about the lighting inside this tent.
Previously, the main story was always the overhead LEDs.
How high are they?
How far from the canopy?
How much stretch?
How much vertical room?
Now we've added another dimension.
We're thinking about the plant in three dimensions.
Light from above.
Supplemental light underneath.
A canopy occupying the space between.
And that's particularly interesting with plants that have become this large.
The LumiFlora 150W full-spectrum fixture gives us another tool to explore how supplemental lower-canopy lighting can fit into the overall system.
We're not expecting miracles.
We're not claiming it will automatically transform the plants.
We're simply giving the lower canopy another source of light...
and watching.
That's what this whole project is about.
Observation.
Experimentation.
Documentation.
🌸 CURRENT GROW CONDITIONS
🌸 Flowering: Week 10
📏 Height: approximately 145 cm
💡 Light schedule: 12/12
☀️ Day temperature: 27°C
🌙 Night temperature: 27°C
💧 Relative humidity: 61%
⚗️ pH: 6.0
⚡ EC: approximately 2.49 mS/cm
🌡️ Solution temperature: 24°C
🌱 Substrate temperature: 24°C
🌬️ CO₂: approximately 666 ppm
💦 Watering: approximately 1.6 L per plant / 24h
? Pot size: 8 L
💡 LumiFlora Under-Canopy: 150W Full Spectrum
The room is stable.
The plants are stable.
And that's exactly what we want right now.
🔭 WHAT I'M WATCHING NOW
At this point, the questions have changed.
I'm no longer asking:
"How do we control the stretch?"
We've already dealt with that.
I'm no longer asking:
"How do we fit them into the tent?"
We've created the space.
I'm no longer asking:
"How do we open the canopy?"
We've already done that.
Now I'm asking:
How quickly will the flowers develop?
How will the lower canopy respond to the LumiFlora?
How will the second SCROG perform as the flowers gain weight?
Will the Pickle Lemon Haze phenotypes continue looking this similar?
And finally...
what are these girls going to look like when maturity really starts showing?
Those are much more exciting questions.
😂💙
🌸 LET THEM WORK
This week is really about one thing:
Let them work.
We've already spent weeks building these plants.
We've created the structure.
We've managed the canopy.
We've opened the room.
We've improved airflow.
We've raised the lights.
We've added support.
We've adjusted nutrition.
We've now introduced supplemental under-canopy lighting.
There isn't much more I want to manipulate right now.
I want to see what the plants do with everything we've given them.
And Pheno B is making that decision very easy.
She's looking fantastic.
🥒💙
🌸 FINAL THOUGHTS – THE QUIET WEEKS ARE SOMETIMES THE BEST ONES
This week might not have been dramatic.
There was no major training session.
No emergency.
No broken branch.
No big room rearrangement.
No massive intervention.
And honestly?
That's wonderful.
😂
Because sometimes the best grow updates are the ones where you can simply stand back and say:
"Look at her."
And that's exactly how I feel looking at Pickle Lemon Haze Pheno B.
She's standing there at approximately 145 cm.
She's healthy.
She's vigorous.
She's flowering.
The canopy is open.
The branches are supported.
The airflow is moving.
The nutrition is consistent.
The overhead lighting is doing its job.
And now the LumiFlora is giving the lower canopy another source of full-spectrum light.
Everything we've done over the previous weeks is now becoming visible.
This is the payoff phase.
Not the harvest yet.
Not the finish line.
But the point where all those earlier decisions start becoming the plant we're looking at today.
And that's incredibly satisfying.
💙🌸🥒
The most fascinating part?
She looks remarkably similar to her sisters.
Four girls.
One room.
Same environment.
And somehow...
they're developing like they're reading the same instruction manual.
😂
Maybe that's the beauty of these F1 genetics.
Maybe it's simply the environment.
Maybe we'll see more differences later.
That's exactly why we're documenting everything.
We don't need to decide the story today.
The plants will tell us.
And Pickle Lemon Haze Pheno B?
She's telling us she's very happy.
So we're listening.
We're keeping everything stable.
We're giving her the light, nutrition, support and airflow she needs.
And we're stepping back.
Now let's see what the future has waiting for this beautiful girl.
🌸🥒💙
🙏 A HUGE THANK YOU
A huge thank you once again to Zamnesia for making Project Blue Tent possible and for giving us the opportunity to explore these beautiful Pickle Lemon Haze F1 genetics phenotype by phenotype.
Thank you to PLAGRON for the Hydro nutrient line supporting these vigorous girls throughout this incredible flowering journey.
A massive thank you to Zamnesia for the Phytonaut LED lighting, curved scissors and clip fans that have become such important parts of this project.
Thank you to Mars Hydro for the automatic drip irrigation and drainage system that keeps these girls consistently supplied throughout their very thirsty journey.
And a special thank you to LumiFlora for the 150W full-spectrum under-canopy light that we're now introducing into the setup to explore supplemental lighting underneath this beautiful flowering canopy.
And of course, thank you to GrowDiaries for giving us the platform to document this entire adventure.
Most importantly...
thank you to everyone following Project Blue Tent. 💙
This week was quiet.
But sometimes quiet is exactly what you want.
The plants are doing beautifully.
The room is stable.
The structure is established.
The support is ready.
The lighting is working from above and below.
The nutrition is consistent.
And now...
we wait.
Four plants.
One environment.
Different phenotypes.
And an increasingly fascinating amount of similarity between them.
😂💙
Let's see what the future has in store.
For now, Pickle Lemon Haze Pheno B is exactly where I want her to be.
Healthy.
Happy.
Supported.
Flowering.
And shining.
🥒🌸💙
Until next week...
Less intervention.
More observation.
More flowers.
And hopefully...
a little more of that beautiful Pickle Lemon Haze F1 magic.
Growers Love, happy growing, and take care everyone! 🌱💙
Likes
Comments
Share

@GoodTimesOrganics
Follow
Hi liebe Community and Welcome back! 💚
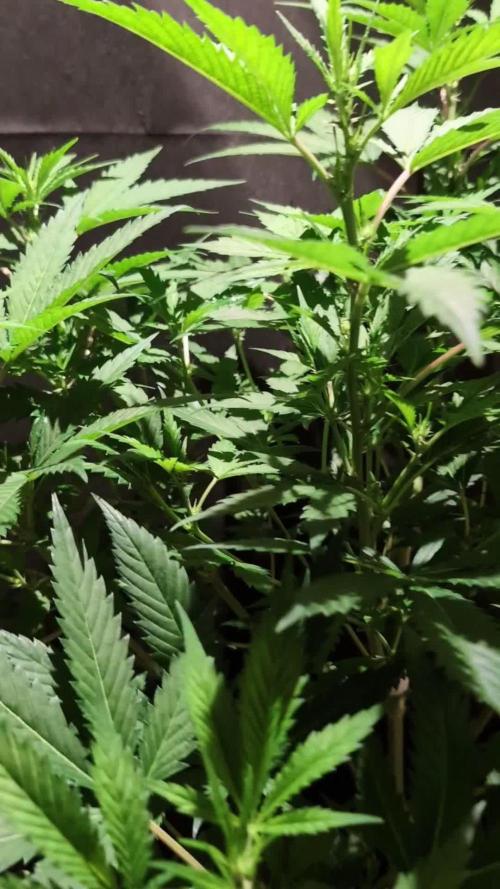
Der zweite Strain von Good Times Genetics. Entwickelt sich wunderprächtig und es sind sehr schöne große und Breitgefächerte Blätter zu erkennen. Ein schönes Wuchsbild verreint mit einer starken Indica Dominanz.
Nach der ersten Blütenwoche entwickeln sich allmählich die Blütentriebe und die ersten Stigmen sind sichtbar.
Also Düngerkomponenten kam das Greenhouse Feeding BioBloom und der entsprechende Enhancer zum Einsatz.
Der Stängelabrieb duftet schon stark nach säuerlichen, dieselartigen Nuancen, mit einen etwas GMO typischen Aroma.
Bei diesem Pheno tritt der Diesel Geruch jedoch besonders hervor.
Die Wachstumsbedingungen im Growzelt sind aufgrund der trockenen Heizungsluft zwar gut aber schon sehr trocken:
———————
🌞 Temp: 22°C
🌚 Temp: 20 °C
💨 RH: 38%
VPD: 1,33 kPa
😎PPFD: 830 mqm
———————
Stay Tuned! 💚
Likes
35
Share


@valiotoro
Follow
Hello everyone 😎
Week 9 of flower for the Gorilla Cookies auto from Fast Buds 💥🍪
She grew fast with a beautiful green color,for the nutrient 4ml/L terra bloom & 1ml/L power buds & Green sensation 1ml/L from Plagron
Weight is coming 🦍
Now only plain water💧all the top buds are ready for harvest
Amazing smell of citrus & nuts🍋🌰
Spider Farmer SE-7000 100%
Have a nice day 😋

Likes
2
Share


@Natrona
Follow
Tropicanna Poison XL Auto
W4F2
7/20-26
The hot weather returned with humidity and days of scattered thunderstorms. I fertilized once this week with I49 and top dressed with worm castings since I saw some yellow leaves near the bottom. Thankfully with all the rain we’ve had this month she doesn’t show any deficiencies or bud or root rot. I fertilized with I49 grow 1 tbsp/gal & 2 tbsp I49 Flower.
With the extreme heat and rain, my auto Tropicanna Poison XL Auto had a huge stretch a full 7 inches this week and now at 22 inches tall. There are no nutrient deficiencies and demonstrates resistance to fungal diseases.
Thank you all for your continued support and encouragement. Your likes and comments motivate me to keep sharing my journey. Let’s continue to learn to grow together!
Stay green, growers love 💚🌿
💫Natrona💫

Likes
3
Share

@Rare_Terps_5280
Follow
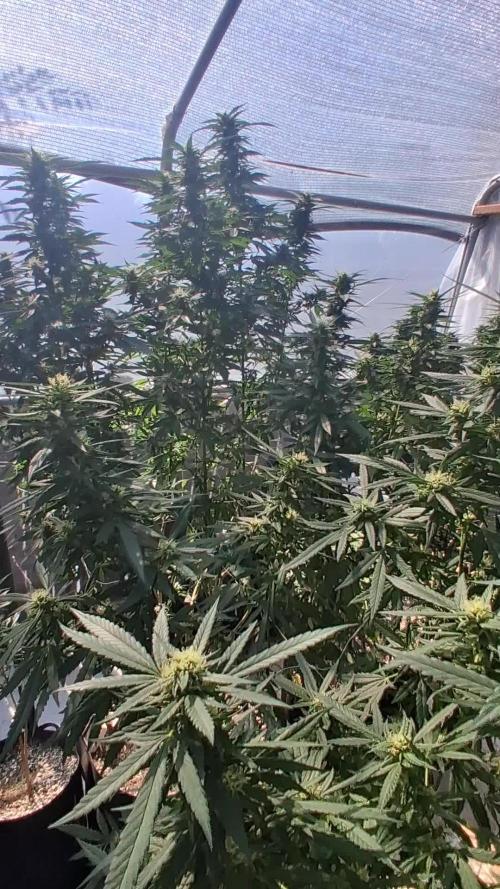
As you can see this gals lookin fine! Shes stacked and packing on the weight nicely. Out of four plants shes the best in terp profile and triciome production by far. Very dense and packed bud structure is fully filling in. Great strain for colors and hoping for beautiful fades to start happening next few weeks. Gonna be sweet.👌

Likes
5
Share


@DivineBuds420
Follow
Update – Frisian Dew Trim Hash
Ich habe den Trim aus diesem Outdoor-Run mit der Eiswasser-Methode zu Bubble Hash verarbeitet, inspiriert von Frenchy Cannoli.
Das Material war nicht besonders gut – viele größere Blätter mit wenig bis kein Harz – trotzdem ist gut was rausgekommen.
Der Großteil kam aus den 73 und 25 Micron Bags, in 120/160 war kaum etwas.
Mit längeren Waschgängen wäre evtl. noch mehr gegangen, aber nach ein paar Stunden hat es mir gereicht.
Ich habe das Material getrocknet und zu kleinen "Temple Balls" gepresst.
Update – Frisian Dew Trim Hash
I processed the trim from this outdoor run into bubble hash using the ice water method, inspired by Frenchy Cannoli.
The material wasn’t great – quite a few larger leaves with little to no resin – but still yielded a decent amount.
Most of it came from the 73 and 25 micron bags, while 120/160 had very little.
Could’ve probably pushed it further with longer washes, but after a few hours I called it.
I dried the material and pressed it into small “temple balls.”


Likes
27
Share


@R_Dank
Follow
10 days into flower with the first taste of bloom! Happy with how things are going.. don’t know why my videos won’t play

Likes
1
Share


@Randomjcb
Follow
14 oz dry weight ish think it was 393g’s didnt weigh it for 14days was a stunning plant to grow nice mellow stoned defo happy with it and one i would recommend if u want big yield’s

Likes
9
Share


@Prototype0181
Follow
Stretch phase is over😁 and the bunch are happy. I gave em a serious defol and lollipop on day 11 of flower. Next week i'm gonna introduce em to Canna Terra Flores🌺
Stay elevated growmies👍

Likes
70
Share


@Black_Magic
Follow
Gelato got good yield about 30 g per plant
Got some problems with mold on gelato
Because the form of the buds , could not handle it
Some colas are over 30 cm
Don’t like the creamy taste ( banana was better)
It’s definitely day stuff
Density 7 out of 10 fluffy0

Likes
5
Share


@Silvadragon
Follow
Hello everyone hope you staying cool
Cause the weather is over 100 degree and everything is drying and dying. We really need some rain! Anyone with the heat wave I trying keep this gals water up. The biggest one drink water like no tomorrow, well both of them. I give them a tea liquid compost 3.11.11 of organic fertilizers. Just to keep up with the flowering stages she using up a lot nutritions and I’m glad that I was on top of my game with these outdoors grow. Not bad for novice first timer. My family love them. I’m keep in the sun as thst will help with resins production and the bees are doing a fine job pollen them.


Likes
16
Share


@TechDCo
Follow
24/01/2024
Spread her out! Time for the show.
Welcome to my "Barrel Of Laughs" look what shes grown in lol
25/01/2024
Lights on and moved the pot to the left side of the tent, then sorted out the canopy with the scrog! Fed her with extra seaweed to the mix. Unfortunately, she got burnt. I made the mistake of moving the light too close, overfeeding, and overusing 12% food-grade hydrogen peroxide.
Conclusion: Well, onwards and upwards! I need to sort this out. Since I used hydrogen peroxide, flushing is a bad idea. I don't want to reactivate what's settled in the leaves and soil until it's no longer active. I removed all the badly damaged leaves, likening it to a necessary amputation, but luckily I'm at the early stages of flower. I'll keep a close eye on her.
25/01/2024 Mid-day
Not looking good; the new growth is the same after the flush.
25/01/2024
Lights out! Can't believe I spoiled the grow, but she'll hopefully recover. The lights, particularly the sk600 and Cropmaster, are too intense and powerful. I'm wiring up a dimmer switch to reduce it to 420 watts. The Cropmaster will be removed until maturity as having over 1000 watts of LED in a small tent is too much.
26/01/2024
Mid-day Check Time! She's looking a lot better. Taking photos is a good calf workout and lower back exercise when shooting at 0.6x at 12m. There are positives to all the negative occurrences during the growing, raising, and breeding of these plants. Weed can inspire creativity, debate, contemplation, and intelligence. It's important to focus on the positive aspects these plants can bring.
26/01/2024
Temps are more normal now since removing the Cropmaster, which was very powerful.
Sleepy time: 24-25°C; Daytime: 27-28°C.
27/01/2024
In recovery and doing well. Bright moon tonight.
Mid-Day: She's now ready for the full tilt. I've slowly guided the colas out and all the branches looked similar in size, which is why she's ready to grow straight up. There will be a beautiful green screen underneath! I'll coin this technique 'The SpaceProvider' as it maximizes the canopy and undergrowth space. It took me two hours to sort this tonight, and she will straighten up properly in three days.
The dimmer didn't work due to incorrect volts, but I managed to reduce the light to 10% today by tapping its relay wires.
Mid-day: Looking a bit better. I sorted a few branches out to rearrange and ensure they will grow straight. There are definitely no free radicals left in this plant, and the fresh new growth is a positive sign.
24/01/2024
Preparing for upcoming growth spurt during flowering phase.
25/01/2024
Adjusted the scrog to accommodate the impending growth spurt. Allowing the plant to stretch freely. Will need to reposition a few colas as needed but expecting smooth sailing from here onward.
Late-day temperature check: 27-28°C.
26/01/2024
Daytime temperature inside the tent remains in the 27-28°C range, similar to pre-Cropmaster lighting. Planning to implement the Cropmaster light closer to the bloom phase as we have a way to go. Committed to only guiding the upward growth and not interfering with the flowers. Each bud requires a leaf for optimal growth. Embracing a playful wordplay: "I will need to leave the flowers alone, just a little friendly play of words."
I'm looking through the window, the window to your heart!
https://www.youtube.com/watch?v=1nw_ob4IeOo
27/01/2024
That was a lot of supercropping today, my goodness! Even my thumb and index fingers are aching now, but hey, thumbs up for a job well done; I'll store that in my mental index book to reminisce about later when it's all over to click through! Peaceful mind 🧠, at least the canopy will be flat, unlike my occasionally bouncy head - Slowly walks quietly away to Mediate.
It looks like it'll add an extra week to the harvest date. Instead of the 8th of February, we're looking at the 15th to 17th of February for when she'll be ready, but you just can't predict with Hazes; they seem to need like 13 weeks at times. I mean, March for harvest 😆. I'm no comedian, but everyone seems to be laughing at me now. Sometimes, we have to poke fun at ourselves; it's good for the spirit 👏 🙌 ✨"
"I've got two extractor fans set up, one bringing in clean air and the other pushing it out. Yesterday I noticed that the extractor out fan was off before bed, due to the weight of the cables pulling it loose. The kettle lead must have come loose, but it's all sorted now."
"I know what you might be thinking; he's going to get popcorn nugs by fussing and stressing the plant in the early stages of flowering. I did mention in the article that there might be a little risk, with a pun about nuggets. Honestly, I believe I'll still yield 1lb just because of the light and growing technique used, and the extended time in long veg."
I accomplished what i stated using this DIY Budmaster GoD 9 250w for the vegetative stage and 450w for flowering, drawing only 320w wall power, achieving a yield of 11 ounces. Conversely, the SK600 draws 610 watts from the wall. If I can avoid further mistakes and ensure proper feeding during maturity, I anticipate a minimum of 18 ounces. With over 80 colas, the close proximity to the light, and abundant breathing space, I've developed a unique growing technique which I've dubbed "The Space Provider," due to its ability to ensure every corner of the tent is utilized for cola growth. As a shorter version, I've considered naming it "SpaceyPro." 🤔
Bring in the reflective mylar mat for under her!
*_______________*_____________*_______________*
#A Brief Article Summary of This Week's Discussions & Disasters!
______________________________________________
Title: From Defoliation Disaster to Cannabis Cultivation Wisdom: A Cannabis Grower's Saga
So, there I was, thinking of performing a routine defoliation on my prized Forgotten Haze Cakes, a 100% sativa strain with a long flowering period from Terpzy Mutant genetics and feminized seeds. Little did I know that this seemingly simple task would unleash a comedy of errors, leading me to discover the vital importance of precision in organic cannabis cultivation.
As I lovingly tended to my plants, I reached for some hydrogen peroxide - 12% food-grade, of course - to keep everything clean and healthy. After all, research has taught me that using hydrogen peroxide can be beneficial in preventing root diseases and promoting healthy root growth. However, in a classic case of good intentions gone haywire, my well-meaning application ended up in a rather unexpected chemical reaction. Who knew that bacteria from my hands and a bit too much light would turn my peaceful grow operation into a psychedelic mishap?
As I gazed in bewilderment at the unexpected brown shading on the leaves, I couldn't help but laugh at the absurdity of the situation. It was as if my plants had suddenly developed a rebellious streak and decided to rebel against my well-intentioned care. I mean, really, who needs a science experiment when you have cannabis plants with their own flair for drama?
Unraveling the aftermath of this defoliation debacle, I realized that beneath the chaos lay a valuable lesson in the art of cannabis cultivation. Precision, my friends, is the secret ingredient. It's all about applying the proper measurements and foreseeing the potential consequences before diving headfirst into the world of organic plant growing.
Now, about using hydrogen peroxide on cannabis plants, it's crucial to dilute it properly. A popular recommendation is to prepare a solution of 3% hydrogen peroxide mixed with water in a 1:5 ratio for watering your plants. This provides the benefits of oxygenation at the root zone without harming the plants. Timing is also essential; it's typically recommended to administer the hydrogen peroxide solution during the watering schedule, ensuring that the roots receive adequate oxygenation for healthy growth.
Following this incident, I delved deeper into my research, seeking advice from seasoned growers and multiple reputable sources. The experience instilled in me the importance of thorough investigation and informed decision-making when it comes to plant care. I learned that even the most well-intentioned actions can have surprising outcomes, but with extensive research and knowledge, one can minimize the chances of such mishaps.
To complement the hydrogen peroxide, I also learned the benefits of diatomaceous earth, natural and effective pest control and soil amendment. After researching extensively, I discovered that applying a thin layer of diatomaceous earth to the soil surface helps deter pests like aphids, mites, and other unwanted visitors while promoting healthy root development. To apply diatomaceous earth, lightly dust it around the base of the plants and on the soil surface, taking care to avoid excessive buildup.
As I embraced the twists and turns of this growing process, I couldn't help but ponder the amusing parallels between cannabis cultivation and life itself. We all aim and miss at times, but it's all part of the growth process - mind the pun. Just as in cultivating cannabis, it's essential to adapt, learn from our experiences, and continually strive for improvement.
In the midst of all the chaos, amidst the pre-flowering stage of my beloved Forgotten Haze Cakes, I found myself inadvertently learning the intricate needs of my plants. And what a wild journey it has been! I can't help but see the humor in it all. After all, every mishap has its own little nugget of wisdom, right?
Now, armed with this newfound insight, I plan to pass on this treasure trove of knowledge to fellow growers and those venturing into the enchanting world of cannabis cultivation. Precision, chemical reaction unpredictability, and the foresight to foresee potential consequences - these are the valuable gems I've gathered from this unpredictable turn of events.
So, to all the aspiring cannabis cultivators out there, remember - every mishap holds a lesson. Embrace the unexpected, learn from your plants, and be ready for a surprise twist in your grow. Who knows, it might just turn your next gaffe into a hilarious story to share with your fellow cannabis enthusiasts!
In the end, what started as a defoliation disaster has blossomed into a valuable experience, reminding me that even in the wildest of mishaps, there's a silver lining or, should I say, a luscious green lining?
In the aftermath of the hydrogen peroxide mishap, a deeper understanding of the science behind its effects on the plants unfolded. Hydrogen peroxide, often used as a root boost and cleaner during or after feeds, should be approached cautiously in organic cultivation. When used inappropriately, it can have unintended and adverse effects on the delicate ecosystem of the cannabis garden.
The chemical composition of hydrogen peroxide causes it to act as an oxidizer, releasing oxygen upon degradation. This reaction can be beneficial in certain contexts, such as in soil aeriation, but if incorrectly applied, it can result in detrimental outcomes. During the mishap, the hydrogen peroxide inadvertently reacted with micro metals in the diatomaceous earth, which was being used as animal food grade. This led to an unexpected chain reaction, causing the release of free radicals and a bleaching effect on the plants' leaves.
Additionally, the application of hydrogen peroxide resulted in the burning of bacteria present on and within the leaf veins. This process, similar to the effect of light burn, contributed to the browning and twisting of the leaves. When leaves are exposed to excessive light or heat, they can become brown and subsequently twist up, exhibiting signs of distress. These combined effects not only altered the aesthetic appearance of the plants but also had a profound impact on their nutrient uptake, as I had elaborated upon earlier in the article.
The intricate interplay of chemical reactions and biological processes within the cannabis garden underscores the necessity for precision and comprehensive knowledge in organic cultivation practices. It is a compelling reminder that every action, every component introduced to the garden, must be carefully considered for its potential consequences. The delicate balance of life within the ecosystem demands an astute understanding of the science behind each element employed in cultivation practices.
This incident, though initially wrought with challenges, has ultimately deepened my comprehension of the nuanced relationship between the cannabis plants and their environment. It underscores the profound interconnectedness of the elements at play within the garden and serves as a testament to the resilience and adaptability of the cannabis plants.
Thanks for reading 📚
______________________________________________
"A picture is worth a thousand words, so here is a thousand pictures! For the Future readers looking back on this grow 👀" - more Mental Pictures for my Dubconscious Mind 📸
______________________________________________
28/01/2024
"Anyway, this is it! I might need to remove some colas because there's just way too many in this 2x4 space. She'll need air circulation to grow big colas. I'll assess the colas as I start eliminating them in early flower. For now, she gets to recover and heal from the stress, snapping, and poisoning! Low light levels for a few days. Staying within 10.0DLI to prevent stretching. She'll be sprouting new pistils 🔫 next week.
29/01/2024
Mid-day: just a peek!
Temps up to 29c.
Should be 👍 👌
''In The Centre Of The Maze, is the One Mother Connected too it all!
That one mother that's connected to everything, in the centre of everything; like an old mob boss!"
Or look at it like
"The Queen Cola' City with her soldier's beside her leading them into battle"
29/01/2024
I had funny sparks for a very interesting idea for product lines.
"The Adams Family Tree!
Crazy Genetics from TerpyZ! " - coined it 😉 😜
Mid-day: She's looking swell this evening, took a window photo like I promised myself. She's springing back to life.
Onwards and upwards from this vertigo abruptness 🙌
'
- The Stalker's Of SteMetil Prochlorperazine's
The stalkers of SteMetil Prochlorperazine are here,
to take the die off Elijah.
Peck till I'm full, till the red dye stained blood orange is beneath her..
Having practiced for quite a while pouring my thoughts round here,
whinnin' is my main feature.
Loosing the hatched, despite scoring life backwards.
Conquering our spectacule life fears.
Under the hues of the Technical Sky Mirrors.
As we gaze at the Mirrors, complementing the Maze which it infigures:
The image behind this Window becomes clearer when you smear the vintage velvet.
While the Brown Orange slowly fades and vanishes its hell-pit!
New found knowledge is helpin',
To Ground that hair-spin, that's looking all alone on this barreled mountain!
A mountain formed in that of mistakes
They just kept on mountin'
Time to send them of on a horse and mounted,
Over To a distant land,
leaving behind her banishments'.
Down to a 4inch scissors for cuttin' these
Mother Fu#kers,
taste of my own inner medicine.
I debated waiting a little longer
to flower her Forgotten cake
then be over yarnda',
I wipe the slate clean, this is over steering
But she turned Queer
like the average human being
A beautiful layer of green resembling spears,
Soon we'll be seeing,
Will replace with flowers displaying such splendor and grace.
Not brittle and dark and full of hate.
A couple dropped off' and died
What a fate!
She seems spineless, her name is Mindless,
'The Queen Sophie' with such Sativa Elegance.
She's round like the 'Galaxy of Spheres', and the Atom Elements.
She's the round Table of Relevance that we can't comprehend;
It's like we stumbled and dove headfirst into a well of mints.
She possesses stable genetics for intelligent plant development;
She's the last sound you hear before passing out until next year.
Release all your fears,
She'll help you journey back through the years.
What's her name??
- 'The Queen Sophie'
"Is that God?
Or just me looking back on myself or not?
I herd these sheep like ''Houghton heard a WHOOoo?''
.
30/01/2024
Sorted out the colas and arranged them freely as they grow naturally.
One or two haven't fully healed from supercroping the other day, tied them up for support.
Took off the main ties holding the stems back. Will keep a close eye on her pull on the Scrog during week 11.
She's in her finally state now, ready to grow and bloom.
Few of the flowers are showing signs of fresh new pistils.
''Crash & Sonic:
Did a Dashing, Smashing Job Cleaning up''
Applied a fresh layer of top soil and 4 Litres of Distilled Water with Hydrogen Peroxide 1:5.
Did a Spray Feed with Aloe Pro Natural Nutes 1;5.
30/01/2024
Mid-day: Spread her out more and re arranged again. I need to leave this plant alone.
I will prefect this growing technique, I see a few mistakes I made on guiding her, rushed it a little.
Can't wait to see the back-end of this plant though, lol. All the mistakes are my fault, not the plant's obviously, but you know how it goes in the garden. Little voice: "I'm taking stock of all the errors and looking to learn from them. I know I've made some missteps with my organic soil and feeding schedule, and it's time to address these issues before my next attempt"
I think the timing of my feeding schedule and letting the soil dry out has been off, which may have led to the proliferation of bad bacteria in the soil. Additionally, I suspect that the wire I've been using may be causing the plant to react negatively, resulting in what looks like a poison-induced response on her stalks and stems. I've also noticed some open wounds from overdone supercropping on my part.
Researching on Cannabis Organic Soil Making:
After some research, I've found that making quality organic soil for cannabis cultivation requires a deep understanding of soil composition, nutrient cycles, and microbial activity. Using organic compost is essential to provide the right blend of nutrients and beneficial microorganisms to support the plant's growth. By making my own organic compost, I can ensure that it's free from any harmful contaminants and tailored to the specific needs of cannabis plants.
Furthermore, I've learned that the soil needs to be well-aerated to ensure proper drainage and air circulation for the roots. This is important for maintaining a healthy microbial population in the soil, which facilitates nutrient uptake and overall plant health. It seems that my soil may have become compacted and lacking proper aeration, which could be contributing to the issues I've been experiencing.
According to my research, the feeding schedule for cannabis plants is crucial, especially when working with organic soil. I've realized that I need to be more attentive to the timing and frequency of feeding to prevent the soil from drying out excessively, as this can disrupt the balance of beneficial microorganisms. From what I've read, trying to maintain a consistent moisture level in the soil is key to ensuring the well-being of these microorganisms, which in turn supports the health of the plants.
Concerning the use of wire, I've come to understand that certain materials can have negative effects on plants. In my case, it seems that the wire I've been using may be leaching harmful substances into the soil, resulting in the plant's adverse reaction. I'll need to look for alternative methods for supporting the plants to avoid any further issues.
Dealing with a Sensitive Haze Strain:
I've also discovered that the Haze strain I've chosen to grow can be quite sensitive to its environment and feeding regimen. This can make it more prone to reacting negatively to any irregularities or contaminants in the soil. I've definitely underestimated the level of care and attention this strain requires, especially when it comes to feeding. This is a valuable lesson to keep in mind for my future growing endeavors.
Moving Forward:
Taking this step back and doing the research has shed a lot of light on the mistakes I may have made. Going forward, I plan to make necessary adjustments to my approach. Firstly, I'm going to focus on creating a high-quality organic compost to ensure that the soil is rich in beneficial microbes and free from any harmful substances. I'll pay close attention to the moisture levels and aeration of the soil, as well as refining my feeding schedule to better suit the needs of the sensitive Haze strain. In addition, I'll seek out alternatives to the wire support I've been using, to eliminate any potential sources of contamination for the plant.
In conclusion, I'm encouraged by the opportunity to learn from these challenges and improve my growing techniques. As frustrating as it can be to face setbacks, I believe that overcoming them will ultimately make me a better grower. I'm looking forward to applying these insights and making the necessary changes in my approach to achieve better results in the futurE.
31/01/2024
Midnight for the plant time:
I've lowered temps: 21c at night,
24C Daytime: should help will healing and recovery.
I'll be checking in again next week – hopefully!
See you all then!
Let's go!"
___________________________________
1. Why did the Forgotten Haze Cake weed stalk get arrested?
Because it was caught "joint-handed" trying to high-tail it out of the garden!
2. What did the Forgotten Haze Cake weed stalk say to its friends at the party?
"I may be a little stemmy, but I'm still the life of the bud!"
3. How do you describe a Forgotten Haze Cake weed stalk in a suit?
"Distinguished, with a hint of earthy undertones and a subtle note of sophistication!"
4. What does forgotten Haze Cake say' when santa stop delivering her presents due to bad weather?
"I guess when Santa stopped delivering presents, Forgotten Haze Cake thought,
- 'Well, if Rudolph isn't real, he should have at least hired a fog light specialist that foggy hazey Christmas Eve!'
"Distinguished, with a hint of earthy undertones and a subtle note of sophistication!"
I hope these jokes bring a smile to your face as you read through this diary of 😠madness!
https://youtu.be/ZttOQlqgiGA

Likes
16
Share


@Dabking
Follow
Buds fattening up. Looking to be at least a 4-7 ounce dry weight harvest .
Likes
21
Share


@CanadianFillmore
Follow
Welcome growfessors to another episode of growfessor theatre! 👽🌳💚
Tonight from the 4x4 the ladies move into week 7 and they get a change in nutrients. Out with Big Bud coco & sensizym, in with Overdrive.
Removed dead & dying leaves from each lady, added a support stake in Mandarin dreams & LSD, they was leaning hard!
Thanks for stopping by growfessors 👽🌳💚


Likes
11
Share


@GREENPHOENIX6262
Follow
*Week 3 Flower - 09/10*
Blimburn Apple Fritter - Seedsman Genetics Critical+2.0
Healthy - 0 signs on of deficiencies
Most fan leaves have been stripped; - Lighter defoliation - Aggressive LST on main colas
*Week 3 Flower Mid-week update 09/13*
Approximately 3 inch increase in Height on both plants - Critical+2.0 - Seedsman Genetics - Blumburn Apple Fritter
1 Gallon increase on water feed (Nutes included)
Budsite density has increased.
Light defoliation
*End of week recap 09/16* (Week 3 Flower)
BlimBurn - Apple Fritter - 47 Inches - Flowering processing accordingly - 0 deficiencies
Seedsman Genetics - Critical+2.0 - 46 Inches - Flowering processing accordingly - 0 deficiencies
Increased water feed (2.5 gallons every day +Nutes)
*SEE UPDATE END OF WEEK VIDEO RECAP*


