
Processing
Likes
Comments
Share


@BigBaby420
Follow
Completely guessing at her actual height at this point because I tied her down and am planning to let her complete her grow like this. I’ve gotten my canopy pretty even. Also top dressed with a little natures organic this week.


Likes
21
Share


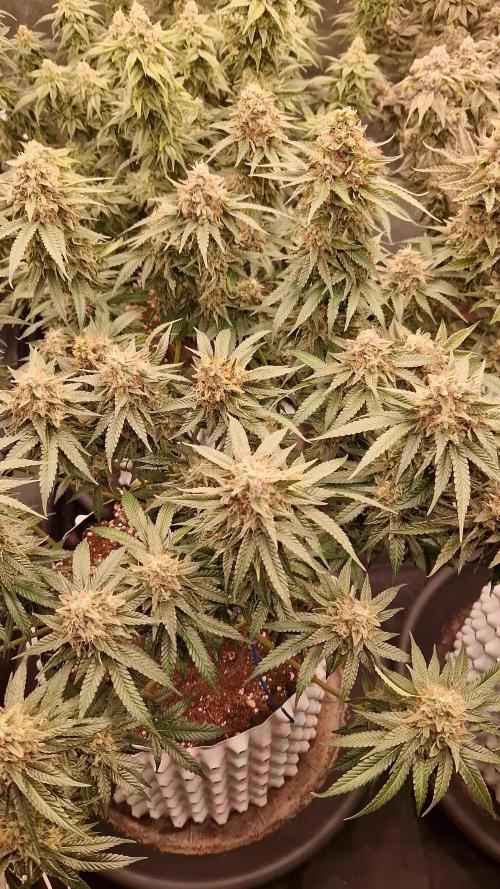
@indoorontario
Follow
She's really showing those burn marks from a couple of weeks ago now and is looking pretty well aged because of it. It's unfortunate but she's still fine even though I'm sure she would be absolutely beautiful if I hadn't have burned her. The buds look great and very frosty at this point, some are cloudy now and I'm sure it will only be another week or two before she is done. I will start flushing very soon more than likely.

Likes
26
Share

@TrickzGrowz
Follow
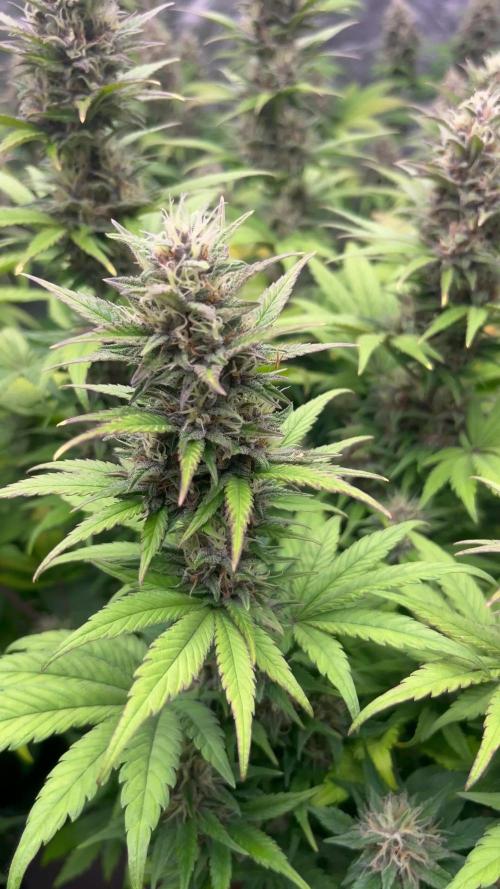
Servus Moin!
Die Buds entwickeln sich langsam richtig aus. Sie sind aber jetzt schon riesig und richtig fest.
Super klebrig und mega süß im Geruch.

Likes
2
Share


@MistaOC
Follow
25.05. 🌿 Day 25 – Stretching Begins!
The plants have noticeably stretched since the last update — a clear sign that they’re moving deeper into the vegetative phase. The vertical growth is picking up pace, but they’re still looking strong and well-balanced.
Despite the rapid upward growth, structure remains solid, with thick stems and healthy leaf development. The 19L pots and BioGrow feeding seem to be doing their job — no signs of deficiencies or stress.
Light distance and environment are being carefully managed to control the stretch and keep the plants from getting too lanky. So far, they’re adapting really well.
💪 Overall: they’re thriving!
——————————————————————
27.05.
Likes
3
Share


@stonedkoala
Follow
4/17 dropped seeds in distilled water for 12 hours
4/18 transferred to paper towel in plastic container on heat mat in darkness
4/19 tap root sprouts, transfer to rapid rooter in dome on heat mat with light 2 feet away, veg/blue light @ ~40% (~13,700 lux) slowly raising every several days
4/21 seeds sprouts
Temp: ~70-76
Humidity: ~80-90%
Likes
2
Share


@LittleBigTrees
Follow
Still feeding really heavily , stretch has stopped and the swelling has begun .
The smell is changing and really nice fruit and pungent smell, trichome production is good.
20% discount on zamnesia :
ZAMMIGD2023
Likes
2
Share


@ChillOSki
Follow
October is ending and her days are numbered. I can’t tell if it’s a potassium deficiency or just the fade so I gave one final tea. I’m loving the purple hues on this particular phenotype. Pests have reduced drastically when u spray off the plant with plain water in the early morning sun at least once a week. Chopped on September 30th.This has been a great run and I can’t wait to grow this cultivar again.

Likes
69
Share


@Crazyweedpt
Follow
(The numbers of this harvest are from a single plant) I ended REAL ORGANIC and let plants dry by themselves on their pots outside the tent and gradually day after day i was picking and selecting dry buds from the branches 2 smoke m all! This particular diary gave me a sense of adventure, and a lot of fun, i´ll always remenber that made my quareentine a lot easier to live, by that time i felt i was prepared even for the end of the times if it comes to that 😂

Likes
36
Share


@Salokin
Follow
Hi growmies,
unfortunately I skipped a day checking on the reservoir and the plant must have consumed a lot more water than expected, probably due to the heat we are experiencing where I live, since I realized tip burn getting worse everywhere I checked the ec, which was close to 3 😳, topped up with RO water right away and this seems to have stopped it. Other than that I don’t think it bothered the plant too much either, as she keeps on swelling bigger and bigger. A&B fertilizer was reduced already and once, either next week or the one after I’ll start flushing, depending on the stage of ripening.

Likes
101
Share


@Mrs_Larimar
Follow
Saturday, Feb.20th
After final training, and recovering,
Girls went into a larger Growspace called "big Floweringtent"
its a 4x4 Growtent, and soon some Companions will be added.
Girls are sitting into final Pots ( 11l), filled with My Soilmix
amended with "Living Organics" and EASY BOOST ORGANIC NUTRITION
waterings with Benefical stuff from Green Buzz Liquids
So we had a busy Day Yesterday in setting up the Tent
that means lots of cleaning transplanting and so on
Thank you A.R. for Setting up the Tent 😘
Processing
Likes
10
Share


@BodyByVio
Follow
This week I Supercrop all the plants and spred them out over both lights. One more week of Veg and they are ready to explode
Check me out on Instagram @growmorestressless


Likes
42
Share


@Ukfarmer420
Follow
So this week i will be repotting the ladys in 5gal fabric pots with clay pebbles and a mix of biobizz light mix soil and all mix soil. I will be starting to use 4ml/1l of water of biobizz roots.
I'm thinking of doing a 6 week veg on these ladys as I will be doing a 9 plant auto run in the 4x4.
Happy growing guys.


Likes
7
Share

@Ziocannabis
Follow
Sono stato via 10 giorni ed ecco il risultato affidando a una persona il compito di bagnare! Mai più in vita mia lascio a qualcuno di fiducia, ma che vaffanculo non gli frega un benemerito cazzo!!!!
Ora speriamo di riuscire a recuperare perché sicuro. Ph sbagliato, bagnate in modo scomposto e il risultato è una merda! Tutte foglie ingiallite e cime poco corpose!!
Auguri e buona fortuna a me!!
Likes
7
Share


@Adam22
Follow
Day 28 week 4 of flower plants looking good I dropped a 3L water bottle on a string which snapped a whole branch from the bottom 😳 on right plant 😭
Likes
22
Share


@Slobasian
Follow
Love every plant each one is growing differently stacking different even the visual difference of one strain growin two different ways combined smells of diesel, pez candy and lemons


Likes
14
Share


@9LittleGrow
Follow
Today is day 38 of vege and I’m gonna let them another 1 more week and then they will go to Flowering stage. In three of these, 91 Octane is massive and the second is Banana Daddy but Sugar Cane is also growing healthy and happy cuz she make more branches.


Processing
Likes
2
Share


