
Likes
Comments
Share


@GrowerGaz
Follow
This week they had more water and more knf soil soak , Including fish amino acid , lacto basilicas, WSK, WCAP , OHN .
Bud booster this week probably bac bloom stimulatior.


Likes
Comments
Share


@Aussiegreenthumb82
Follow
Really starting to frost up and beautiful smells ranging from sweet earth to danky dank. Struggling 2 keep humidity down and had 2 cut a small amount of mold from Finnish frost:( added trays of moisture crystals 2 combat but need a dehumidifier.

Processing
Likes
27
Share


@MissFlowerPower420
Follow
Struggle with temps again blummin UK weather lolol ,
She looking happy tho so all's good 😄
Peace to all you fine herbalists 🕊️🕊️🕊️
Likes
3
Share

@AestheticGenetix
Follow
Look at how freaking big this plant is. Added cal mag. Added Dr earth flower girl and Dr earth 222. Added some more leaves and branches from lollipopping and defoliation. Earthboxes are dope but this is an absolute monster of a plant for this small of a space. I want to add another and fill my tent with 2 plants like this
Likes
39
Share


@valiotoro
Follow
Hello everyone 👋
Last week for the Auto Cinderella Jack from Dutch Passion ❤️🔥
Plain water💧
I will harvest in 2-3 times first the top buds
Amazing smell of citrus & pine 🍋🌲
The buds are easy to trim,very fat & sticky 🤩
2-3 plants left then finitooo 👌
Have a wonderful day 😎

Likes
1
Share

@Ninjabuds
Follow
Cereal milk is one of the smaller plants to start. It has really small leaves at the moment. I think it’s a little wary to tell how this one will grow
It’s day 41 from seed and all of the plants are really thriving
Likes
10
Share


@Diegobike
Follow
Hoy la niña hermosa pasa a un maceto más grande donde podrá expandir todas sus raíces al maximo

Likes
21
Share


@Dunk_Junk
Follow
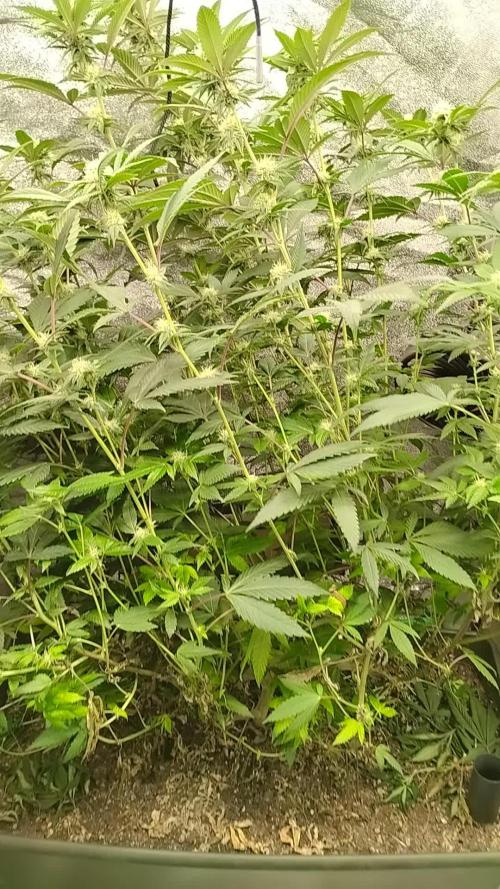
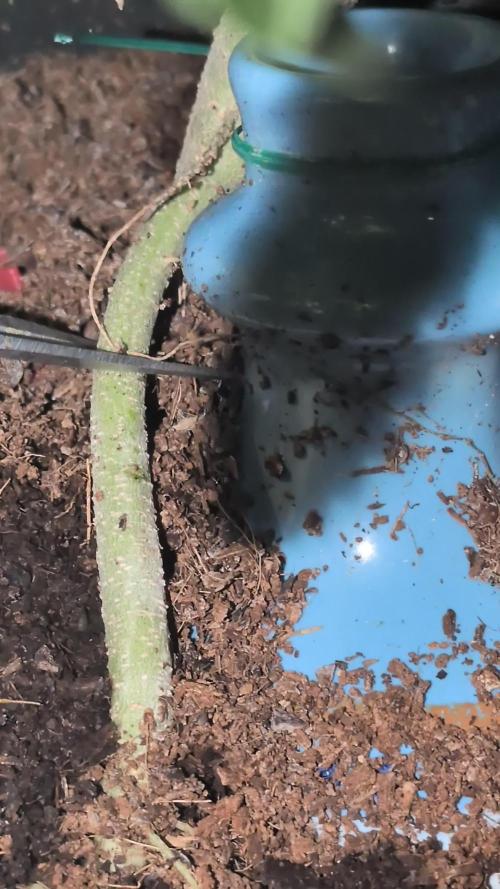
10cm vertical growth this week!
She's bushed out loads too.
Look at her stem. I'm trying some 'HST' if that's what its called? During last week I have crushed the stalk with pliers. Trying to crush and damage the outer 'skin' while leaving the core intact. The plant has already reacted by thickening/strengthening the stalk considerably. I am hoping to stress the plant to ultimately attain a bigger yield. But, as I have no idea what I'm doing, lets see where this journey takes me.
Also, only bottom watering from now on too.........
Likes
8
Share


@TightNugs
Follow
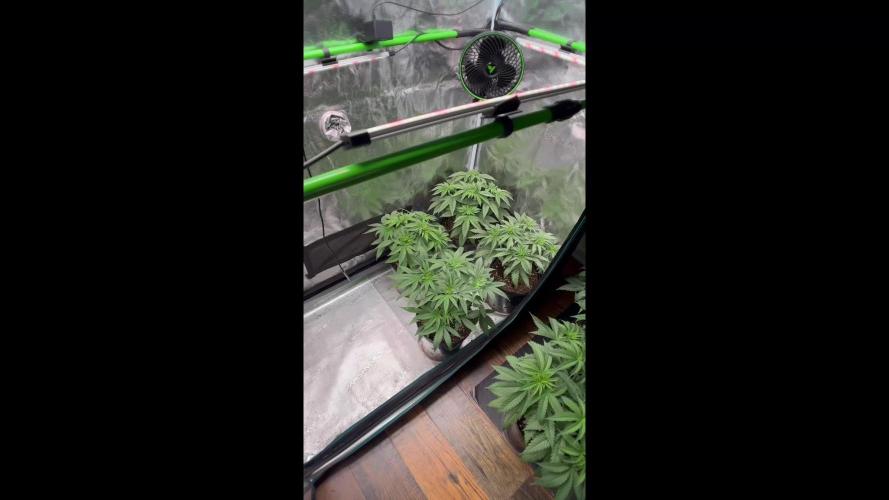
Moved under the big light and big res,responded well with good growth.
Scrog soon with plenty of defoilation to catch up on.
First preflowers 2 days ago so stretch imminent.
Happy growing Nugz 🤞🏴🍁
🍁🍁🍁
Breeder-custom photoperiod
🍁🍁🍁
Light-Voost VST 120 veg,VST 240 flowering
https://voost.com/
7.5%DISCOUNT over £200 Code-TightNugs
🍁🍁🍁
Seedbanks-garden of green,Expert seeds
https://gardenofgreenseedbank.com/
Likes
70
Share


@MrJones
Follow
Sky Walker
~~~~~INDOOR~~~~~
DAY 141 Above Dirt
💬SUNDAY 01.13.24 - So this is the update that I did not have time to do over the weekend, the girls are bouncing back from the hard time I put them through last week, and the flowers are starting to chunk up along with more foliage, however, there will be no more defoliation until we are close to completion, for now, its just water, and wait, allowing the Gaia Green to do its thing, the light is at 100% and the girls love it.
~~~~~~~~~~~~~~~
🌱Sky Walker
👨🌾🏽Sativa Jones
🌤️@Medicgrow420
SeedBank Seeds
📝@gaiagreenorganics
📝Bokashi Biochar
~~~~~~~~~~~~~~~
📝 Skywalker OG Strain is a top-shelf Indica dominant hybrid. It is a cross of Original Amsterdam Blueberry, OG Kush, and the indica strain Mazar from Afghanistan, and is best known for its super potent effects and sky-high THC levels.
Likes
3
Share


@Ninjabuds
Follow
Bag seed threw a few pollen sacs I think I was successful of pollinating a few spots on the other
I wish they didn't make me do this to get a smileI wish they didn't make me do this to get a smileI wish they didn't make me do this to get a smileI wish they didn't make me do this to get a smileI wish they didn't make me do this to get a smileI wish they didn't make me do this to get a smileI wish they didn't make me do this to get a smileI wish they didn't make me do this to get a smileI wish they didn't make me do this to get a smileI wish they didn't make me do this to get a smileI wish they didn't make me do this to get a smileI wish they didn't make me do this to get a smile
Likes
4
Share


@Brentb2607
Follow
10 days of darkness during the flush begins. Had great results with Wanda and her genetics. Blessed for a first grow. Cut Wanda down at the end of the week. She’s now drying. I will be giving a thorough review for my harvest diary. Excited to share what I’ve experienced and learned from this grow.

Likes
Comments
Share


Likes
68
Share

@wolfvb
Follow
✂️ Harvest Day is Here! + BIG NEWS & Giveaway! 🚀🐺
GrowFam, we finally made it to the finish line! 🌱?
After weeks of TLC, it's time to chop this broccoli head. I am incredibly proud of how this run turned out. The buds are looking frosty, dense, incredibly terpy, and I couldn't have asked for a smoother ride this time around.
But as we all know, the hardest part of any grow is what comes next: the dry and cure.
Usually, my setup involves hanging a drying rack near the tent, or drying right inside the tent if it happens to be empty. But for this harvest, things are going to be a little different… and a lot cooler. 😎
I am super hyped to announce that I have officially been selected as a #DryRocketTester! My test unit literally just arrived, perfectly timed for this harvest. I’m going to be drying this entire run in the DryRocket and taking you all along for the ride. Expect a full review and step-by-step updates on how it handles the terps!
Now, for the BEST part: 🎁 GIVEAWAY TIME!
Recently, I won 3rd place in the DryRocket Photo Contest, and they hooked me up with a 50€ voucher for their shop. Since I already have my hands on the tester unit, I am giving this 50€ voucher directly to YOU guys!
👉 Head over to my Instagram @wolfvb.growdiaries to enter the giveaway and snag that 50€ voucher!
🔥 BONUS: If you don't want to wait for the giveaway and want to upgrade your drying game right now, the awesome team at DryRocket hooked our community up. You can use my personal code wolfvb30 at checkout to get 30€ OFF your own DryRocket! (Code is valid until May 31st!)
Thank you all for following along on this diary. I'll be updating the dry weights and final smoke report soon. Let me know what you think of the harvest in the comments, and don't forget to check out the giveaway on IG!
Keep growing, Pack! 🐺🌿💨

Likes
13
Share


@HinduGod
Follow
WOW LOOK AT DAT!! DAT TRAINING IS VERY VERY GOOD!!!! CLOUD GOD SHOWED UP DIS WEEK IT WAS VERY VERY CLOUDY!!! DAT CLOUD GOD BROUGHT ALONG SOME DRIZZLE TO FEED DA PLANT!!!! SUN GOD WILL BE SHOWING UP VERY VERY SOON!!! PLANT IS LOOKING VERY VERY HEALTHY!!!!!😎
PLEASE COME AGAIN!!!!!

Likes
44
Share


@Belverde
Follow
Hello Gelato lovers 🍦🌱
Welcome
Finally, after a month and a few weeks from the harwest , I'm able to post and show you how my flowers are become..
Really lovley plant with beautiful flowers 💮🏵️🌸
Awesome trichomes production 🤩
And the aroma is so tasty🍦🍧
Especially because she comes from an organic grow 😎⬆️🔝
And also because I personally think to do a very precis and accurate work post harwest
But however I will not be here again to explain how I currently practice the drying, manicure and final care process..
You can always find it in the "GELATO lover's" section, but from a another cultivar 😉👉
Anyway
This strain in the beginnig she was very slow in grow
And, during the pass from 18/6 to 12/12 , she wasn't stretch much
But in the end she has becomes a very beauty little plants and super nice GELATO smell🍦🌱
I'm always titubant to say the taste of some strains are very like a food , about fruity it's more easy🙌
But this flowers right now are very deliciousnes in tasty and smell
Very sticky too , but probably not much like you think after have see the pictures🤔
And the effect it's almost very easy , great for all day , you are almost focused but relaxed in the same time 👌👌
You can do everything
Also the eyes aren't red
(and that's maybe it my only real problem sometimes with herb 😁)
And the terpenes experyence create the perfect balance
Bouquet effect💐
Great work by breeder 👌🙏
Respect 🤝👊💪
In the end of the pictures I have posted the video of the ash test , but I usually enjoy the flowers using vaporaizers 😎🚀
And that's all guys
If you maybe want more info about this grow cycle I have reported everything week by week in the most accurate way I can : 1:
Thanks everybody for stopping by here all this weeks or just now 😉
Thanks Royal Queen Seeds for this nice strain 💯👌: 1:: 1:🏆
And like as always big thanks to Grow Diaries for this space of art 🎨🙏👊
Ciao✌️
🇮🇹
BONUS
If you like too see , for almost her entire life cycle , she share the space with other girls that you can find in the links here below 👇👇👇
https://growdiaries.com/diaries/46286-barney-039-s-farm-dos-si-dos-33-grow-journal-by-fun-clouds
This..
https://growdiaries.com/diaries/46282-barney-039-s-farm-blue-gelato-41-grow-journal-by-fun-clouds
And another one..
https://growdiaries.com/diaries/48209-barney-039-s-farm-dos-si-dos-33-grow-journal-by-funclouds
😉


Likes
8
Share


@Hydrostyle
Follow
Hi there
This babyes from FastBuds are amazing,for my first grow in hydro.
They recuperate after to much wather!
This sixshooter looks very nice and strong
Likes
2
Share

@Ninjabuds
Follow
Poor Skunk Apple really is the runt of the litter. I think we can blame my rookie mistake of giving it a gallon of water that was way too strong. It's been struggling to recover ever since. Hopefully this little guy will catch up eventually, but I'm not gonna hold my breath.
Well, another year has come and gone. Yesterday was New Year's Eve, and I want to wish all of you a happy and healthy 2025. May this year bring you all the things you've been wishing for. Let's make this the best year yet!
I can't believe how much my plants have grown during this stretch! It's like they've been on some serious plant steroids. They've all at least doubled in size, some of them even more. I have a hard time with overwatering, especially now that it's harder to let them dry out. I just don't know if I'm damaging the roots with all this growth.
Likes
14
Share


@JamieKnolliver
Follow
Gebe ihr noch eine Woche Zeit um das Zelt besser auszufüllen und noch einige Triebe mehr zu entwickeln bevor ich sie dann endlich in die Blöte schicke.
Alle unteren Blätter und Triebe wurden entfernt. Auch ‚Lollipopping‘ genannt.
Bis jetzt wurde sie mit 300 Watt gedimmt beleuchtet.
