


Likes
Comments
Share


@BudXs
Follow
Fuck a cbd
Thc leaves me
feeling like a king
And my life is easy
Take more for me than for u to please me
So breathe easy
Hang up your jacket, kick off your custom yeezy's
2020 gonna squeeze ye, so keep the target easy
Get urself a boardgame, get yourself parcheesi


Likes
3
Share

@TRPHAUS089
Follow
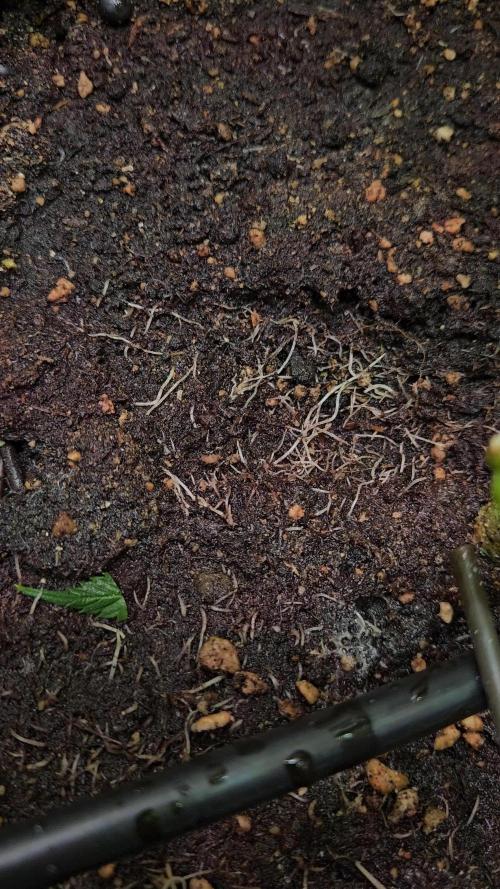
Defoiled, added a second net. Enhancer and npk booster also added every 2 weeks


Likes
18
Share


@Motaybongs
Follow
Recovering week of 3 plants after nutrient deficiencies. Self note: don’t play around with new brand of nutrients. Switching biobizz calmag (basically water) to camgboost from aptus.
Foliar feed camagboost 5ml/lt ph 5.8 to recover from calcium and magnesium deficiency which created other problems, specially plant #4.
Changing to an organo-mineral grow with aptus.
Will use just base nutrients from bio bizz (giving away calmag from bio bizz to a friend 😃) and booster exclusively from aptus.
Planning to switch to flower as soon I see full recovery; probably end of the week or beginning of next week.
Auto pot system has been turn on after 20 days of potting.

Likes
59
Share


@DogDoctorOfficial
Follow
hi guys so here is my update on my Amsterdam Amnesia Haze from Dutch Passion clones . It's been growing really well, and I'm so excited to see it filling up the SCROG net like crazy. I think using the net has been a real game-changer for my grow. It's really helped to even out the canopy and ensure that all of the buds are getting plenty of light.
As far as my nutritional regimen goes, I've been sticking with my trusty Aptus Holland Regulator, CAMG Boost, and Enzym Plus. I swear by these products - they really seem to be helping my plants thrive. The Regulator has been especially useful, as it seems to be keeping the plants healthy and happy even when they're under stress. And the CAMG Boost has been doing a great job of preventing any deficiencies and ensuring that the plants are getting enough of the nutrients they need to grow strong and healthy.
Finally, I wanted to talk a little bit about Enzym Plus. This is one of my favorite products because it's just so effective at breaking down all of the dead plant matter and organic material in my soil. It really seems to be making a big difference in terms of nutrient uptake and overall plant health.
Anyway, I just wanted to share my thoughts with you and let you know how things are going. I'm really loving this grow and I'm so excited to see what the final will look like! Thanks for chatting with me about it, i love it <3 <3 <3
As always thank you all for stopping by, for the love and for it all , this journey of mine wold just not be the same without you guys, the love and support is very much appreciated and i fell honored and blessed with you all in my life <3<3<3
#aptus #aptusplanttech #aptusgang #aptusfamily #aptustrueplantscience #inbalancewithnature #trueplantscience #dogdoctorofficial #growerslove
With true love comes happiness <3<3<3 Always believe in your self and always do things expecting nothing and with an open heart , be a giver and the universe will give back to you in ways you could not even imagine so <3<3<3
<3 Friendly reminder all you see here is pure research and for educational purposes only <3
<3<3<3 Growers Love To you All <3<3<3


Likes
10
Share


@asstonmartian
Follow
The trics have arrived :D Super frosty for a few of these ladies. The smell is not quite as strong as it was a few weeks ago... but they glands are sticky and the aroma is very distinct. Still fending off minor PM on one of the plants. It'll rear it's head through harvest. I got a proper fan to help keep airflow appropriate. I realize i was under aired for the majority of the grow with only having one small dinky pole fan that didn't even oscillate. I also got a microscope to start checking trics. THe hairs were mostly turning at this point and trics were predominately clear.
Over the past week, it was becoming apparent that the three outdoor plants were going to need some additional help if they were to reach fruition prior to temps getting too low. There were a few nights with 45 degrees and I began to start planning to bring them indoors. My plan was to having them in the same room albeit not in the same tent, for about a week to make sure no pets or disesases came in with them. They turned out OK so I moved them back home in the tent with the others and cranked the power to 100%.
Likes
18
Share


@rockbo47
Follow
SUMMARY: Switched up to Mid Bloom strength nutes this week. I have also started adding 1 tablespoon of organic blackstrap molasses per every 5L. Though some argue this is purely for use in soil to feed the bacteria there is argument that it also acts as a bloom booster due to its active ingredients. She is fattening up nicely though not many tops and so I need density from these.
DAY 51
------
Sunday 21st February 11:30
I made 5L of early bloom nutes at a pH of 5.8 and 5L of mid bloom nutes at a pH of 5.6, both made with tap water.
Sunday 21st February 18:30
I fed the NL 1.2L of early bloom nutes which produced roughly 300ml runoff (25%).
DAY 52
------
Monday 22nd February 11:45
I made 5L of mid bloom nutes with rain water at a pH of 5.9. I am adding half a tablespoon of molasses to every 5L now by adding just enough boiling water to liquify the molasses and then pour it into the feed.
Monday 22nd February 18:30
I fed the NL 1.4L of early bloom nutes with molasses which produced roughly 335ml runoff (24%). [22°C/55%]
DAY 53
------
Tuesday 23rd February 18:30
I fed the NL 1.4L of early bloom nutes which produced roughly 400ml runoff (29%).
With the dehumidifier set to 50% RH it seems to keep it at around 50% RH though the temps between 25-30°C. If I turn the dehumidifier off the RH climbs to 60-64%. Removing more leaves will lower the humidity and I do pluck the odd one every day that is blocking light (I rotate the plants daily 25° per day to ensure all sides get a fair share of light). [25°C/50%]
DAY 54
------
Wednesday 24th February 18:30
I fed her 1.4L of early bloom nutes with molasses which produced 200ml runoff (10%). The temps have risen to 30°C due to the dehumidifier. It is currently set to 50% RH which keeps the temps around 28-30°C and the RH at around 38-40%. I have increased the setting to 65% to see if that helps lower the temp and increase the RH up to 45-50%. [30°C/40%]
DAY 55
------
Thursday 25th February 11:30
I made 10L of mid bloom nutes with rainwater and molasses (level tablespoon per 5L). 5L at a pH of 5.9 and 5L at a pH of 5.8
Thursday 25th February 18:30
I fed the NL 1.6L of mid bloom nutes which produced roughly 610ml runoff (38%%). [22°C/55%]
DAY 56
------
Friday 26th February 11:30
I made 10L of mid bloom nutes with rainwater and molasses (level tablespoon per 5L). 5L at a pH of 6.0 and 5L at a pH of 5.6.
Friday 26th February 18:30
I fed the NL 1.4L of mid bloom nutes which produced roughly 420ml runoff (30%). [22°C/55%]
DAY 57
------
Saturday 27th February 18:30
I fed the NL 1.4L of mid bloom nutes which produced roughly 410ml runoff (29%). [22°C/55%]
Likes
31
Share


@Tackle123
Follow
It is 8 weeks in now . This colas are packing up some weights , but i'm not so happy about the density of the bud , they seem very airy to me .This might happen because the pheno looks so Sativa dominant .
Everything seems fine but i still can't really wrap my head around the nute burn . I tried lowering my nute concentration ( 800 ppm ) but she doesn't seem to be happy anyways . The ppm in the reservoir
still kicks up as high as 1800ppm and the ph drops to 5.3 - 5.5 .
So this week i flushed her and going to feed her at 500ppm .
This is so weird because she is so huge i thought she would appreciate lots of feeding but she hates the nute. She continue drinking 3-4 L of water per day but as i stated the ppm in the reservoir is so high , so i can conclude that she doesn't want to take in the food i'm feeding to her .
I don't see crazy amount of trichomes but i wouldn't complain since this is my first grow . The trichs are turning more milky and some of the colas hairs are browning .I expect her to be flowering for at least 2 - 3 weeks before harvesting .
Likes
8
Share

@CheeRz
Follow
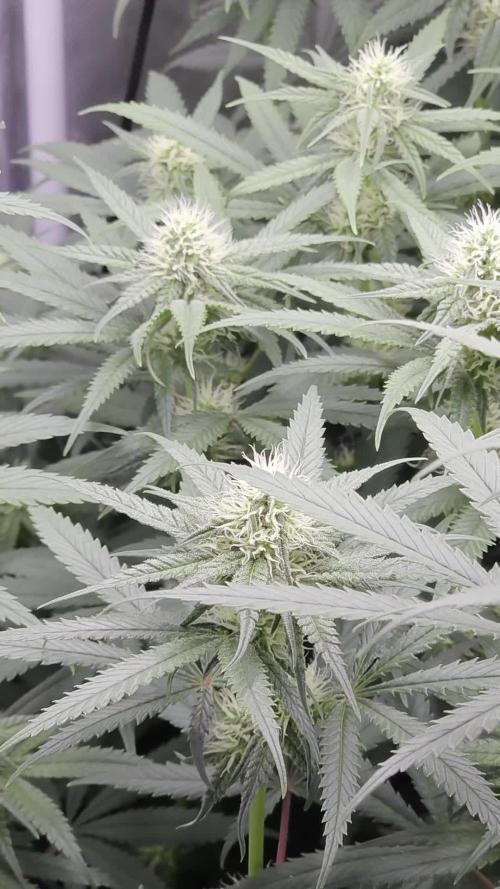
FLOWER WEEK 5: Big Bang | Divine Seeds 💥
🌱 FLOWERING PROGRESS
The Big Bang is hitting her absolute prime mid-bloom phase this week! 💥 The flower production has taken over completely, and the colas are swelling at a notable rate. The canopy is holding its uniform structure above the Scrog line, and the stacking is looking tight and intense. 📈
Trichome development has accelerated massively over the past few days, coating the main bud clusters and surrounding sugar leaves in a frosty layer of resin. The pistils are incredibly dense and long, forming thick, hairy white crowns on every single top. Overall plant vitality is outstanding as she continues to channel all her internal resources into maximizing bud volume and flower density. 🕸️✨
💧 NUTRIENT FEEDING & WATERING
I’ve dialed up the organic nutrition line to match her peak-flowering hunger, pushing the main sugars, bio-stimulators, and energy enzymes to maximum levels. ⚡
Current Feeding Schedule (per Liter):
Bio-Bloom: 3.0 ml/l
Bio-Heaven: 4.0 ml/l
Acti-Vera: 4.0 ml/l
Bio-Grow: 1.0 ml/l
Top-Max: 1.0 ml/l
Calmag: 1.0 ml/l
Parameters:
pH: 6.5
Relative Humidity (RH): 59.0% 💧
Temperature: 30.0 °C 🌡️
VPD: ~1.73 kPa
CO2: 675 ppm 💨
💭 GROWER'S NOTE
👀 Status Report: Things are heating up in the tent! With temperatures hitting 30°C and a matching 59% RH, the VPD has pushed up to around 1.73 kPa. This high-performance climate means the Big Bang is transpiring at full speed. By upgrading the diet to 3 ml/l Bio-Bloom and boosting both Bio-Heaven and Acti-Vera to 4 ml/l, I'm giving her the massive energy reserves she needs to process nutrients at this high transpiration rate. Luckily, this solid Divine Seeds phenotype handles the summer-like conditions like an absolute tank. The buds are noticeably packing on frost and thickness daily. Keeping the airflow high and pushing hard through peak bloom! 🚀🌱✨


Likes
57
Share


@TheBudWhisperer
Follow
Week 7 of flower in the books and we’ve had to adjust to the height issues in an attempt to salvage what we can of the largest mains on the cheese. Really should’ve done this 2 weeks ago and while it’d be preferable not to supercrop this late in flower - there really wasn’t a choice. It was done early in the week and the plant is none the worse for wear. On the whole, the nute burn issue has been rectified and while the damage isn’t massive, it’s still really obvious. For all the above reasons, We’re really not going to get that late flower look with this plant. Kinda sad there. Otherwise, the plants have begun to colour up and were quickly coming in to the harvest window. At this rate it looks like the gorilla cookies and cherry Bomb will go off first, with the cheese to follow and the lemon haze last. The GC is absolutely covered in trichs. We expect a great finish for this one. She’s unlike any pheno I’ve seen on here - ducksfooted with a pineapple shape to her heads but again, got it where it counts. The cherry Bomb is similar but also true to her description - huge cherry diesel scent coming off this plant. She’s chunky and sticky too so very pleased she’s made something of herself. The lemon haze is developing And rounding out slower. Trich production is moderate and I suspect she’s got a week longer than the rest. We’re getting there - maybe a week to 10 days. Almost time for jazz hands👍😎.
Background/Repetitive Nonsense
The strain line up on this grow is look’n quite saucy 😈. We’ve got 2 FB strains this time around - Gorilla Cookies (seems we always have some GSC cross in the works). Mainly because the colours look stellar and remind me of a sugar breathe we did last year that was 🔥. The other FB is their original Cheese strain... because we already smoked all our cheese... and we really like our cheese...😉. Emerald triangle was kind enough to include a freebie of Lemon Haze. Wasn’t really big on the list but we haven’t done a haze strain to write home about yet so worth a go👍. The last is a Cherry auto from Bomb seeds that we’ve been trying to get to for months. Let’s just hope that she’s not a dud like the last bean.
The new digs for this run are courtesy MarsHydro👊. Their 2x4 single grow tent, paired with a shiny new 240w QB courtesy ViparSpectra.
These folks were kind enough to discuss a collaboration and as a result, here we are to test out the gear with an inaugural run of autos. Each week, we’ll try to expand on some of the benefits of each, as well as any limiting factors or considerations that need attention when pondering purchase.
Already I can say that both are high quality products in terms of overall craftsmanship.
MarsHydro 2x4 Grow Tent:
Excellent construction in terms of durability. Reinforced stitching on the zippers and corners ensures zero tearing. Conveniently placed screen vents and intake/exhaust ports. The ceiling exhaust port only exists on the right side. Perfect for me but not great if you’re running exhaust from the top on the left side (left side wall port makes up for this however). The aluminum frame is rigid enough to support the weight of the lights and accessories. Once you have some weight in the tent, she’s go’n nowhere and you can assemble and break it down in record time if moving or stashing the grow op.
Only limiting factors I’ve noticed is that temp. Control will be an issue for a tent. It just doesn’t have the same insulating ability as a wood cabinet or other permanent enclosed space. No worries, this is offset by a small desktop heater and keeps the environment exactly where desired. The other issue was a production problem - the ceiling vent was accidentally stitched into the corner seams on the assembly line. Again, no real issue - just pulled it out with no damage or fraying to the tent or port👍.
Website link here:
https://www.mars-hydro.com/grow-tent/buy-mars-hydro-grow-tent-24x48x70-2-x-4-cabinet-closet-grow-box-upgraded-diamond-1680d-mylar-for-sale
ViparSpectra 240w Quantum Board:
This thing is sleek and slick in terms of design. Closest comparable to it that I’ve seen would be spiderfarmers line of qbs. They feature the same top-o-the-line components and roughly similar spectrums. Where VS takes the advantage is in the convenience of the dimmer nob which is easily accessible and works great at 50% with no strobing👍. The heat sink is also larger which contributes to lower temps. That’s not a good thing in my case but beneficial for most folks.
I can already say that this will be a great fixture through all stages of growth. Where I know this light will excel will be in the veg. Stage for sure. Dimming function gives seedlings a much better chance of success with the ability to use lower lighting levels early on and the coverage area on a 240w is great. The average grower will find this panel suitable and fitting to their needs in a 2x4 grow space although I’d suggest 2 units if going any larger than that. The total output in this space equates to about 30w/sq.ft. Which is a decent amount of coverage based on power vs. Growprint. Ideal for veg. Certainly but, in flower - I tend to run closer to 50-60w/sq.ft to achieve higher yields. Again, similar fixtures have performed admirably in the past and while this wouldn’t be considered an “entry-level” fixture, I’d recommend that any grower new to the game not skimp on lighting and start with one of these. The price points are a great value for quality LED tech. These days, so there’s little reason to even consider a lesser fixture👍.
I have no detail on limiting factors for this light as yet but have heard that stock branded fixtures don’t necessarily incorporate enough red diodes. I’ve seen no issue myself but confess - I’m no lighting guru.
Website link:
https://www.viparspectra.com/collections/xs-series/products/xs-series-xs2000
***8% discount when using code: “ItBudWhisper”***
Happy to have you along for the ride if you made it this far through my opening rant!!😎🤟😎🤟😎


Likes
16
Share


@OutdoorRebelGenetics
Follow
Well started flush on out door cheese well greenhouse indoor only just preflowering off site so less pics like the gorilla frisan duck so yeah more pics this week peace ended up chopping cheese 2 as bud rot struck so got rid and got 11.3 grams wet from 1 so quite low yield mould resistances not the best not the most crystals I have seen nor the least it's a 2 out of 10 so far yeah staying at 2 as was fun to grow but yeil was disgraceful 1.6 g dried she had the cheese smell and taste but little vegy so going to cure the remainder try in 2 weeks utterly as for the rest can't wait frisan duck has like 70+branches so she's going to be a nice harvest no pre flower yet peace
Likes
34
Share


@Dunk_Junk
Follow
Day 105- her last day on earth. I thank her for what she is about to give us. I saw scattered amber trichomes so decided it was time.
I am very excited about this harvest. I think she is going to be top quality. Her flowers are dense, heavy and large 😍
What a pleasure she has been this far. Give her plenty of light, a big pot, don't overdo it on the nutrients and this is what she gives me. I didn't even train her at all! The wires are to support her branches before they snapped off due to weight.

Likes
5
Share


@Ensign420
Follow
Greetings fellow growers 🖖 and welcome to my first grow ever. This adventure actually started several months ago when I decided to stop buying flower from dispensaries and just grow my own bud. How hard can it be!?
This is actually my second seed of this strain. The first bean sadly died due to over watering (sorry girl, RIP). I was literally watering the cube to the point where water was dripping from the bottom, then heavily sprayed the humidity dome and tray with the vents completely closed. Everyday. Multiple times. I never let the dome or try dry out. So after about 8 days of not sprouting, there was a funky smell of rot. So that was that.
Later I learned that rockwool retains a lot of water and can easily drown seeds. So a wet/dry cycle is best for rockwool germination.
So even after hours of researching and digging through forums and tutorial videos, I was still under prepared for this journey. Did not consider how delicate the germination phase is. Oh well. Lesson learned. Reset and try again!
I hope everyone is safe and stoned during this corona crisis. Just like everyone else in the world, I want this pandemic to be over with. But in the meantime, let's grow some weed! 🖖
[START OF WEEK 01]
Day 01 - Monday - 08/03/20 - Total Days: 001
-----------------------------------
- [0830]: Light Schedule: 24Hrs/0
--- Soaked cube in 5.5 PH water for 10 min. Did not shake water out.
--- NO NUTES! Only PH'd down to control the PH levels.
--- Did not use the default hole (way too deep).
--- Flipped cube upside down and made a shallow hole for the seed (less than 0.25" deep).
--- Placed seed in and pinched hole close. No additional water added.
--- Sprayed the tray and dome with straight water (5.5 PH).
--- Vents are cracked opened a for ventilation (about 1/4 opened each).
--- Distance between the light and tray was 53"
--- AC was set to 80 °F
--- Exhaust fan was set to 86 °F
--- Room average temp was at 85 °F
--- Dome humidity was at 85-99% when sprayed.
--- Allowing to completely dry before respraying.
- [2200]: Dome and tray were completely dry! Sprayed only tray and dome with more water.
Day 02 - Tuesday - 08/04/20 - Total Days: 002
-----------------------------------
- [0845]: Sprayed dome and tray in the morning. Everything was dry.
--- Hoping for the best!
- [2130]: Everything was dry again, so sprayed dome and tray at night along with a light spray on the cube.
Day 03 - Wednesday - 08/05/20 - Total Days: 003
-----------------------------------
- [0830]: Everything was dry again. Resprayed dome and tray. Slightly sprayed cube.
- [2125]: Hooo damn!! She popped! Am little stub is visible! Resprayed dome and tray again.
--- Still going 24/0 for lights.
- [+0033]: Just checked up on her and I swear she grew a bit taller! Getting excited!
Day 04 - Thursday - 08/06/20 - Total Days: 004
-----------------------------------
- [0845]: Wow! Went from a little stub to fully sprouted overnight! Everything was pretty dry again so resprayed dome and tray.
- [2200]: Tap root is visible! Over 1" long too! Just resprayed dome and tray again.
-- Going to prep for hydroton transplant tomorrow!
Day 05 - Friday - 08/07/20 - Total Days: 005
-----------------------------------
- [0930]: She keeps growing!
-- Added a bit of CalMag to the spray bottle (8 drops to 650ml of distilled water). Resprayed dome and tray. Water was at a 5.4 PH with 141 PPM.
- [1045]: Prepped the bubble bucket with 4.5gal of water. Water is high enough to reach about 0.25" above the bottom of the net pot.
--- Added 3 drops of Superthrive
--- Added 3.5ml of CaliMagic
--- Added 2ml Hydroguard
--- Then PH'd down to 5.6
--- Solution Strengh: 120 PPM
--- Water chiller is set to 20 °C
- [1100]: Transplant time!
--- Filled the net basket 1/3 with hydroton. When placed in the bucket, air bubbles are not visible, but are slightly below the surface (slight digging will reveal the water/bubbles below).
--- Removed plastic on rockwool cube and placed in basket, then filled around and covered with hydroton. Making sure to block any light from passing through the net pot and into the nutrient solution.
--- Covered with a half-bottle dome sprayed with the CalMag water from earlier.
--- Hoping for the best!
- [1300]: Raised Bucket 5" higher. Now light distance is 48" to top of bucket.
- [1820]: Lowered tent exhaust temp to 76 °F
--- Lowered AC to 75 °F
--- Raised bucket even higher so light distance is 30" to top of bucket.
- [2300]: Looking good!
--- Sprayed dome and surrounding hydroton with more CalMag water.
--- Attached timer to light! So new 18 Hrs On/6 Hrs Off light schedule.
--- Lights On: [1600] (4pm)
--- Lights Off: [+1000] (10am the next day)
--- Decided to go with lights on during the evening/night and off during the later mornings/afternoon (the hottest part of the day) to see if temps can be controlled better.
--- Please survive girl!
Day 06 - Saturday - 08/08/20 - Total Days: 006
-----------------------------------
- [0800]: Everything was dry. Resprayed hydroton and dome.
- [2000]: Here first night cycle seemed to go well! Get'n taller!
--- Dry again. Removed the dome.
--- PH went up to 6.5 so PH'd down to 5.7
--- Ran the top feed drip ring for a bout a minute to wet the hydroton and rockwool with the nutient solution.
---Too scared to leave the top feed on 24hrs (I don't want over water her and cause dampening-off). Will let dry before re-watering.
- [2100]: After closer inspection, I think she's looking a bit yellow.
--- Decided to add a bit of grow nutes to the bubbler solution.
--- Added 2ml of Sensi Grow A
--- Added 2ml of Sensi Grow B
--- Solution strength after adding more nutes: 176 PPM
--- PH went up to 6
--- I hope that the extra chelating properties of the 'PH Perfect' solution is enough of a buffer for proper nutrient uptake.
Day 07 - Sunday - 08/09/20 - Total Days: 007
-----------------------------------
- [0800]: Water dropped a bit (mostly due to evaporation) so solution strength was at 190.
--- Checked PH again. Was still at 6, so PH'd down to 5.4
--- Ran the top feed for a minute to wet the hydroton a bit.
- [0915]: Since she's looking perky but still a bit yellow. So decided to up the nutrient concentration even more before lights out.
--- Added 2ml more of Sensi Grow A
--- Added 2ml more of Sensi Grow B
--- Solution strength after adding more nutes: 199 PPM
--- PH went up to 5.8
- [1700]: Checked nutrients.
--- PH: 5.9
--- Solution strength: 202 PPM
--- Added 4ml of Voodoo Juice
--- Added 4ml of B-52
--- PH after adding more nutes: 5.9
--- Solution strength after adding more nutes: 238 PPM
- [2130]: Decided to make a new foliar spray to address the continued yellowing.
--- Started with 500ml of distilled water.
--- Added 3 drops of CaliMagic
--- Added 3 drops of Sensi Grow A
--- Added 3 drops of Sensi Grow B
--- Added 3 drops of B-52
--- Added 1 drop of Superthrive
--- Solution strength: 164 PPM
--- PH was at 5.9 and did not adjust.
--- Gave her one spray.
--- Also sprayed the surrounding hydroton.
[END OF WEEK 01]

Likes
65
Share


@Dendegrow
Follow
Week 4 update! 🌱 Week 3 is done, and the ladies are now three weeks into their flowering phase. So far, everything has gone really well. However, one bud and the plants in the front showed slight signs of potassium overfertilization, which likely caused a calcium uptake issue and led to minor necrosis.
No worries, though – today I completely flushed the entire system and replaced it with a fresh solution. With this reset, everything should be back on track 💪💧.
On top of that, I decided to bring out an old Cree& Osram LED lamp as a booster. This will provide the two smaller front plants with more light intensity so they can metabolize the higher nutrient levels more effectively 💡🌿.
Everything is looking great so far! Stay tuned, follow along, and let’s see how this journey continues 🌺📸.
Woche 4-Update! 🌱 Woche 3 ist geschafft, und die Ladies sind jetzt drei Wochen in der Blütephase. Bis jetzt lief alles super. Eine Bud und die Pflanzen vorne zeigten jedoch leichte Anzeichen von Kalium-Überdüngung, was wahrscheinlich zu einer Kalzium-Aufnahmehemmung geführt und leichte Nekrosen verursacht hat.
Kein Grund zur Sorge – heute habe ich das komplette System gründlich durchgespült und die Lösung durch eine frische ersetzt. Mit diesem Reset sollte jetzt wieder alles reibungslos laufen 💪💧.
Außerdem habe ich beschlossen, eine alte Cree& Osram LED-Lampe als Booster herauszuholen. Damit bekommen die beiden kleineren Pflanzen vorne eine stärkere Lichtintensität, damit sie die höheren Nährstoffwerte besser verstoffwechseln können 💡🌿.
Es sieht alles richtig gut aus! Bleibt dran, folgt mir, und lasst uns schauen, wie sich die Reise weiterentwickelt 🌺📸.

Likes
5
Share

@GreenEldritchGardens
Follow
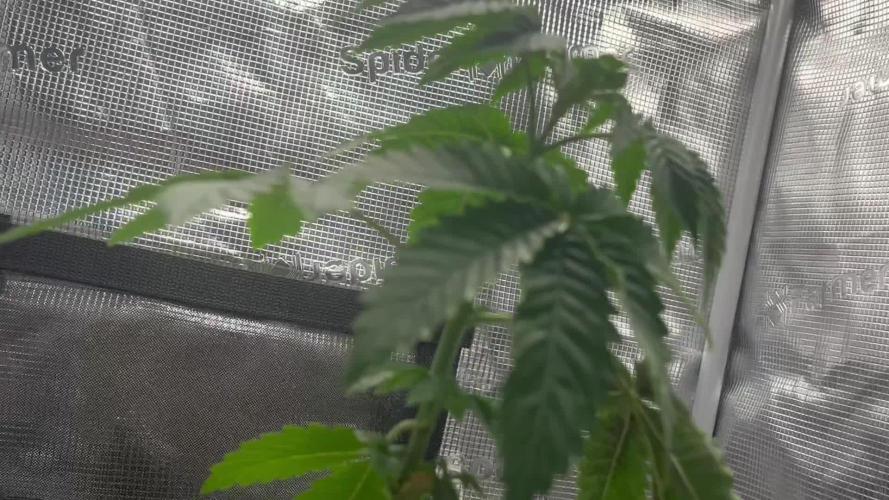
The Black Orchard was desperate to have more place for its roots! She is healthy and growing fine but last 2 days she received not much water and was in not happy.
Now she will have a couple of weeks to grow and prepare for the last transplant before flower 🌹

Likes
11
Share


@Leonweed10
Follow
Ultima semana consumiendo sus reservas....esperare a secar bien el sustrato después de el lavado de raíces y se vendra la cocecha!


Likes
35
Share


@MS2845
Follow
day 50 going well i think but i got one leaf dying is that normal?
Day 53 need help I don't know what's going on
