Processing
Likes
Comments
Share
03/08/20 cambie el fotoperiodo a 12 horas. Empieza lo bueno
Likes
24
Share
And here we are! CHOP DAY! This strain has been impressive and smells like a bag of oranges! Oh so lovely! This girl packed on the weight. Several branches are hanging and has caused some side branching to separate from the main stalk(my fault for cutting the scrog net). Will definitely be growing this strain again!
Likes
21
Share
@gr3g4l
Follow
esta semana seguimos doblando y podando alguna que otra ramita . Al parecer la nº1 ,la Triploide (tres ramas mismo nudo), que pasó a ser diploide (dos ramas mismo nudo) después de podar el primer apical parece ser que ha vuelto a Triploide y esto podria dificultar las otras dos ramas que van más avanzadas por lo que me decidí por cortar y así que siga diploide. A los 40 dias volví a podar los segundos nudos de cada rama dejándolas ahora si listas para pasar a floración en un par o tres de dias. más un agarre de las ramas a las macetas y así ir deshaciéndome de los dobladores , estos estan quedando pequeños. A los 41 dias me dió por cambiar de posición la nº2 y ponerla en el lugar de la nº1, la triploide. La nº2 está creciendo algo más vigorosa que las otras dos y la nº1 va por el camino de quedarse algo más enana. La nº3 seria un intermedio.
Likes
10
Share
🌸 Pink Rosay Auto by Zamnesia | Pheno A | Week 10 💗 Small Frame. Massive Flower Power. Still Absolutely Beautiful. Welcome back to another chapter of the 8×8 Adventure! 🌱💚 And this girl... She's still shining. Actually, I think I'm becoming a little bit obsessed with her. 😂💗 Because every time I look at Pink Rosay Pheno A, I have the same thought: "I wish they were all this easy." Not because the other girls aren't beautiful. They are. I love every single one of them for different reasons. But this girl? She's just... easy. Easy to manage. Easy to move. Easy to photograph. Easy to inspect. Easy to care for. She doesn't take up much space. She doesn't demand much attention. She doesn't try to take over the room. And yet somehow... she's carrying an absolutely ridiculous amount of flower for the space she occupies. Small frame. Big personality. Lots of buds. Lots of density. Lots of beauty. And at Week 10? She's still doing exactly what she's been doing from the beginning. Shining. 💗✨ 🌱 The 8×8 Adventure — Same Room, Different Stories For anyone finding this diary for the first time, welcome to the 8×8 Adventure. The concept is simple: Give twelve different plants essentially the same opportunity... and let them show us what they're capable of. Same room. Same general environmental strategy. Same 12/12 lighting schedule. Same irrigation philosophy. Same nutritional program. Same lighting ecosystem. Same grower. But different genetics. Different phenotypes. Different architectures. Different personalities. And Pink Rosay Pheno A has definitely developed one of my favourite personalities in the room. She's compact. She's dense. She's productive. She's beautiful. And she doesn't seem interested in making my life difficult. 😂💗 Honestly... I'll take that. 💗 I Really Love This Plant I think it's time to admit it. I really love this plant. There. I said it. 😂 There's something incredibly satisfying about a plant like this. You don't have to constantly work around her. You don't have to fight for access. You don't have to figure out how to move a giant structure without bumping into everything around it. You can simply pick her up, move her where you need her, inspect her, photograph her and put her back. And then you look at what she's carrying... and suddenly you realize: This little girl is not playing around. She's compact, yes. But she's carrying a lot. A lot of flowers. A lot of density. A lot of developing weight. And a lot of personality. That's a combination I absolutely appreciate. 🌸 Small Plant. Huge Flower Presence. The height hasn't changed dramatically. She's still around 111 cm. And honestly? That's perfect. I don't need her to become taller. I don't need another metre of plant. I don't need her reaching for the ceiling. Because she's already using her available space incredibly well. Look at the flowering structure. Look at how much of her frame is dedicated to flowers. Look at the density. This is what makes her so interesting. She's not producing a huge amount of empty architecture around the flowers. She's compact. She's efficient with her space. And she's filling that space with beautiful developing flowers. It's almost like someone took a much larger plant and compressed it. 😂 And I absolutely love it. 🌿 Peculiar Is Beautiful One word keeps coming back to me with this girl: peculiar. And I mean that as a compliment. She's not generic. She doesn't look like every other plant in the room. She has her own proportions. Her own flower distribution. Her own architecture. Her own way of occupying space. And that's exactly the sort of thing I enjoy finding during an experiment like this. I like unique. I like unusual. I like plants that make me stop and look twice. Pink Rosay does that. And the more I watch her develop, the more I appreciate just how special her expression is. ❄️ The Density Keeps Building At Week 10, the flowers are becoming increasingly substantial. The developing buds have that wonderful compact appearance that has become one of her defining characteristics. The calyxes are stacking. The flowers are gaining density. The pistils are continuing their progression. And the resin is becoming increasingly apparent across the flowering structures. There is something particularly satisfying about seeing these flowers photographed at this stage. From a distance, you see a compact flowering plant. Get closer... and the story changes completely. Suddenly you're looking at layers of calyxes. Pistils. Sugar leaves. Resin. Textures. Tiny details everywhere. And because this plant is so compact, I can actually get around her easily enough to photograph all of those different angles. That's another little advantage of having a plant like this. She's basically a photographer's dream. 😂📸💗 📸 She Makes My Job Easy I think this deserves its own section. Because growing isn't only about what the plant produces. It's also about the relationship you develop with the plant while you're growing it. And Pink Rosay is simply... convenient. She's easy to reach. Easy to move. Easy to inspect. Easy to photograph. Easy to work around. She doesn't turn every little task into an engineering project. 😂 And when you're managing an entire 8×8 room full of different plants, those little things matter. Space matters. Accessibility matters. Being able to see what you're doing matters. Being able to get a camera into the right position matters. And this girl makes all of that incredibly straightforward. Then she rewards you with beautiful flowers. That's a pretty good deal. ✂️ No Need to Keep Touching Her The selective defoliation from the previous weeks has done its job. The plant has plenty of healthy foliage remaining. The flowering structure is visible. The canopy is manageable. And I'm not looking for reasons to take more leaves simply because we're now at Week 10. There's no prize for using the scissors more often. 😂 The goal is a healthy, functional plant. And Pink Rosay looks exactly like that. So we're letting her keep doing her thing. The leaves she has are working. The flowers are developing. The plant is progressing. There's no reason to manufacture intervention where none is needed. Sometimes the best cultivation decision is simply: leave her alone. And that's exactly what we're doing. 💡 Still Eating Photons The lighting environment remains consistent with the rest of the adventure. The Future of Grow Black Series LED continues providing the primary overhead lighting, while Lumiflora contributes additional light into the lower canopy. And Pink Rosay continues converting all of that available energy into exactly what we want to see: plant. Leaves. Branches. Flowers. Resin. Density. Development. It's another beautiful example of how twelve plants can share essentially the same environment while expressing themselves completely differently. Some turn that opportunity into height. Some into enormous branches. Some into sprawling canopies. Pink Rosay seems to have decided: "I'll just make every centimetre count." And honestly? I love that strategy. 💧 Feeding the Little Powerhouse The nutrition remains consistent with the flowering program used throughout the room: 🌸 Plagron Terra Bloom — 2.2 ml/L 🌱 Plagron Power Buds — 1 ml/L ✨ Plagron Green Sensation — 1 ml/L 🍯 Plagron Sugar Royal — 1 ml/L ⚗️ pH adjustment as required The current recorded solution strength remains around: EC: ~2.0 mS/cm with: pH: 6.0 Watering has increased slightly to approximately: 💧 1.4 L per plant / 24h And visually? She's happy. That's the important part. No need to complicate something that's working. We provide the water. We provide the nutrients. We provide the environment. And she does the rest. 🌡️ Week 10 Conditions Current recorded conditions: 🌸 Flowering: Week 10 📏 Height: 111 cm 💡 Light schedule: 12/12 🌡️ Day temperature: 29.9°C 🌙 Night temperature: 25°C 💧 Relative humidity: 60% ⚗️ pH: 6.0 ⚡ EC/TDS: ~2.0 mS/cm 🌡️ Solution temperature: 25°C 🌱 Substrate temperature: 26°C 🌬️ CO₂: 529 ppm ? Pot size: 15 L 💦 Watering: ~1.4 L per plant / 24h The environment remains stable. And stability is exactly what I want while this girl continues finishing her story. 🌸 A Lot of Flower in a Small Package This is probably the best way I can describe her right now. A lot of flower in a small package. 😂💗 She doesn't need a huge footprint. She doesn't need an enormous canopy. She doesn't need to stretch another fifty centimetres. She's already doing an excellent job with what she's got. And when I compare her to some of the enormous plants in the room, the difference is almost funny. There are girls that require two people to properly navigate around. Then there's Pink Rosay. "Excuse me, little lady." Pick her up. Move her. Photograph her. Inspect her. Done. 😂 And then you look again... How the hell are you carrying all of that? 🔬 This Is Exactly Why Phenotypes Are Fun Pink Rosay is another reminder that size isn't everything. If I judged plants only by height, I'd miss so much. Height doesn't tell me how efficiently the plant uses its space. It doesn't tell me how flowers are distributed. It doesn't tell me how dense those flowers become. It doesn't tell me how easy the plant is to manage. And it certainly doesn't tell me how much I might enjoy growing it. Pink Rosay has checked a lot of those boxes. She's compact. She's manageable. She's productive-looking. She's beautiful. She's peculiar. And she's fascinating. That's a pretty damn good phenotype. 📸 This Week's Gallery And of course... the camera loves her. The wider photographs show the compact architecture. The closer photographs reveal the flower density. Then you get into the really close shots... and it's just layers of detail. Flowers packed together. Pistils. Calyxes. Resin. Sugar leaves. Textures. And that unmistakable Pink Rosay structure. This is exactly why I enjoy macro photography so much. The plant can look completely different depending on how close you get. From across the room: small plant. From five centimetres away: holy shit, look at that flower. 😂💗 💗 One of My Favourites in the Room I know I've said it before. And I'll probably say it again. I love all these plants. Every single phenotype has something that makes me want to keep watching. But Pink Rosay Pheno A? She's definitely one of the girls I have developed a soft spot for. Maybe it's the compactness. Maybe it's the flower-to-plant ratio. Maybe it's how easy she is to work with. Maybe it's simply because she looks so damn good. Probably all of the above. And that's okay. Sometimes you grow a plant and somewhere along the way you realize: "Yeah... you're one of my favourites." That's this girl. 🔭 Looking Ahead And now I'm very curious to see what the next stage brings. She's already carrying substantial flower. She's already dense. She's already beautiful. But we're not writing the ending yet. There is still development ahead. More maturation. More resin. More density. More changes in the flowers. And eventually... the final version of Pink Rosay Pheno A will reveal herself. That's the part I love. You can look at a plant and think you already know what you're going to get. Then she spends another week surprising you. So let's not rush. Let's keep providing. Let's keep observing. Let's keep photographing. And let's see what this little powerhouse decides to do next. ✨ Final Thoughts — Let the Little Lady Shine Week 10. And I'm still looking at Pink Rosay thinking: "I wish every plant was this easy." 😂💗 Not because I want every plant to be the same. Absolutely not. The differences are the whole reason we're doing this adventure. But from a grower's perspective? A compact plant that doesn't demand much space... doesn't make every task complicated... is easy to move... easy to inspect... easy to photograph... easy to care for... and then carries a huge amount of beautiful flower? Yes please. I'll take more of those. 😂 She's small. But she's carrying a lot. A lot of buds. A lot of density. A lot of developing weight. A lot of resin. And an enormous amount of personality. She's peculiar. She's beautiful. She's manageable. She's productive. And she's become one of those plants that I genuinely enjoy spending time with. The ruler says: 111 cm. The plant says: "That's all I need." 😂💗 And you know what? She's right. She doesn't need to be bigger. She doesn't need to be taller. She doesn't need to occupy more space. She has already shown us that sometimes... less plant can mean more plant. And Pink Rosay Pheno A? She's proving that beautifully. So let's keep giving her what she needs. Water. Nutrition. Light. A stable environment. And a little bit of love. Then we'll step back... and let her do what she does best. Shine. 💗🌸❄️✨ 🙏 Thank You A huge thank you to GrowDiaries for giving us a place to document this 8×8 Adventure and share these different expressions week after week. Thank you to Zamnesia for the Pink Rosay genetics behind this beautiful little powerhouse. Thank you to Plagron for supporting the nutritional side of the journey. Thank you to Future of Grow LED for providing the main lighting driving the room. Thank you to Lumiflora for bringing the under-canopy lighting dimension into the experiment. Thank you to TrolMaster for helping maintain the environment behind the scenes. And, of course, thank you to everyone following along. Every comment. Every question. Every observation. Every photograph. Every week. It all becomes part of the story. And Pink Rosay Pheno A has certainly written one of my favourite chapters. She's not the tallest. She's not the biggest. She doesn't take up much space. She doesn't demand much attention. But look at her. Look at what she's carrying. A compact frame absolutely loaded with flowers. Dense. Beautiful. Peculiar. Easy to manage. Easy to love. And somehow becoming more impressive every single week. This little lady has absolutely earned her spotlight. So let's give it to her. 💗🌸✨ Small frame. Massive flower power. Keep shining, Pink Rosay. Growers Love & Happy Growing! 🌱💚🌸
Likes
23
Share
@Zuppler
Follow
🇩🇪🏆**Grow Report by Zuppler - Week 4 Flowering Phase** 👸🏼 Ayo, what’s good fam? Zuppler back at it with that Week 4 flowering update. The grow room is lit right now, and these ladies are showin' out. I ain’t change much this week – just raised the lights up a bit to give ‘em some more headspace and went ahead and snipped off a few more of them lower branches. Ain’t nobody got time for them popcorn buds, feel me? The canopy’s lookin’ tight, main colas gettin’ chunky, just how I like it. All that energy’s goin’ straight to the top, so we’re stackin' up some serious weight. And yo, that one plant up front on the left? She’s a real keeper, no doubt. She’s standin’ out like a queen, buds frosty as a winter morning in the Panhandle. I’m already knowin’ she’s gonna be the star of the show. Everything’s still on point – temps, humidity, and the girls are drinkin’ up that RO water and Advanced Nutrients like it’s a cold drink on a hot day. Ain’t no stressin', no deficiencies, just straight fire in the making. It’s all about lettin’ ‘em swell now, and I can already tell this harvest ‘bout to be a banger. That front-left queen’s gonna be a real standout. Zuppler signin’ off. Keep it lit, fam!
Likes
3
Share
Likes
29
Share
@Lazuli
Follow
She put on so much weight this week I flushed her and now feed with ripen untill next week Mid week 11: still cloudy trichomes Maybe i let her go a few more days after the ripen scedule
Processing
Likes
3
Share
Increased their food by a tad. Looked perfectly health raised to about 1900ppm. Again spider mites at it crawling up every leaf and creating a colony. I thought it was over until I sat there nearly every night finding the f*****s and rubbing the leaves with the spray. Defoliation was needed ASAP due to them stretching nicely. Started slowly from the bottom up. (repeated this process every 3-5 days.)
Likes
11
Share
They were outdoors and neglected for about 6 weeks before coming inside to finish , despite this they all yielded nice smelling frosty buds . Easy to grow and good quality flowers.
Likes
16
Share
10 weeks total for the first phenos and a bit more than 11 for the last one! I could have easily gotten double the projected yield on these had I not neglected them but whatever I pulled is rock hard, dusted in sugar and smells absolutely stupendous! You did it again FastBuds!
Likes
7
Share
@daRealOG
Follow
24/05/2024 lowered the rh to 50% made the silly mistake to overwater but a few days without watering and its like it never happened started watering less but more regularly 25/05/2024 Led on full blast, Rh at 50% but inside temp raised to 27º the plants seem to enjoy the environment 03/06/2024 added kelp meal to soil. 04/06/2024 defoliated and watered 2 days straight for the first time, the plants drank 2L each in one day. 05/06/2024 topped + LST 🤞🏻
Likes
25
Share
Senescence still progressing quicker than usual but no noticeable impact on buds yet. I just need her to stay strong for another 2 or 3 weeks. And suprise - got myself a couple of seeds without asking for it. Culprit could be stray pollen from one of the male Casamance Sativas that I kept alive for a little while longer (thought I had it separated well enough but hey…) OR this one got a little hermie and did it all by itself. Almost couldnt ask for more learning experience on my first photo run. Now lets hope I dont get more pollinated buds show up until harvest time.
Likes
8
Share
Wir sind in Woche 4 ! Konnte die vierte nicht auswählen ! Man sieht so sehr gut den Unterschied von 3 Woche auf 4 Woche. Im Video 2 sieht man sogar schon wie es langsam harzig wird an den zuckerblättern
Likes
20
Share
@clown420
Follow
Flush all this week and harvest for the end of this week. looking good I think but a few have learnt a few things while on this grow. excited for the next grow for sure but might need to hold off a bit to smoke and make use of all this good stuff :D Will update once all has dried and smoked up follow along for an update. Already sampled this week but wanna see how it goes dry.
Likes
14
Share
Likes
2
Share
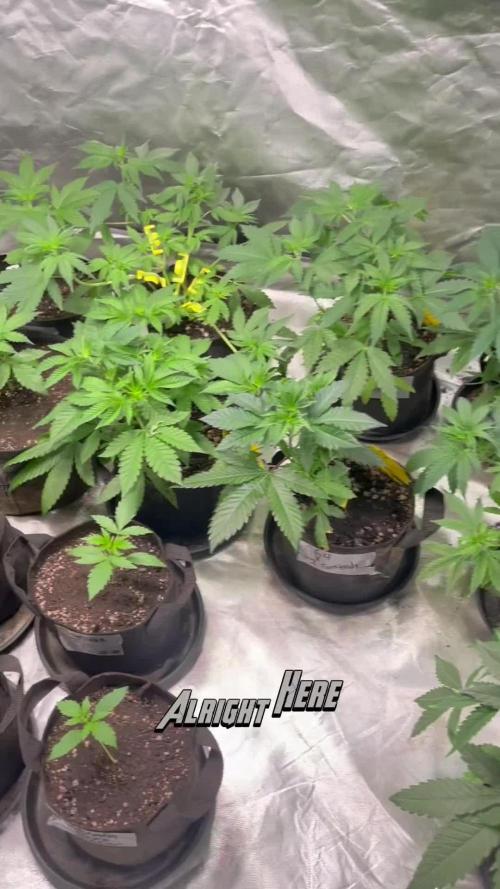
Transplanted to a 5 gallon pot half way through the week and heavily watered/fed for the next 2 days, then topped for the first time at the end of the week. I used to be so careful about topping plants but it doesn't really matter how heavy handed you are. Now it's about keeping the plants trained and the same height. 2 timelapses this week. Enjoy!
Likes
5
Share
@Antarctic
Follow
Week 14 (Plant Week 14) = Flower Week 5 Humidity management became more serious, so I installed a dehumidifier. I focused on keeping the tent dry and stable, so everything runs properly (less risk of mold). Defoliation continued gradually across Week 13 into Week 14: small cuts consistently over time instead of one heavy session. Today (end of Week 14) I did the final defoliation session. This is the last major trim; I’m not planning to remove more leaves going forward. Buds now have a stronger smell, and the resin is very sticky during handling. If you want it even tighter, here’s a one-paragraph version you can use as a caption: Caption version: “Flower Week 3–4: Started gradual defoliation and canopy control. Plants kept stretching longer than expected, so I added new tie-down points and continued LST. Reduced light to ~60% after heavier trimming to reduce stress. Humidity was high, so I installed a dehumidifier in Week 4 and focused on keeping the tent dry and stable. Today I finished the final defoliation; buds are now noticeably more aromatic and extremely sticky/resinous.”
Likes
14
Share
@SUMAN
Follow
Some yellowing leaves not sure if it's it's starting to fade or it's nutrient burn or a ph problem,...🤔I will figure it out...🙄
Likes
Comments
Share
@Ensign420
Follow
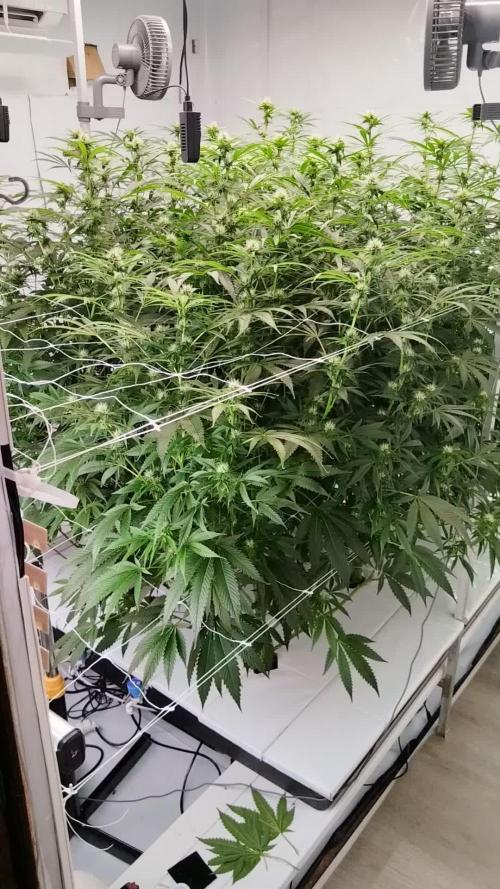
|»» LOG DISCLAIMER: Not intended as a grow guide. Grow log entries are usually posted 3 weeks later and are for my learning reference. ««| Introduction - Week 15 Summary - Ensign's log, stardate 17711.1, Been a great week in the garden! Wow the 4x4 tent is thriving and the canopy is full of tops! By the end of the week, all phenos have begun to show signs of flowering! Growth has continued to stretch so added the second scrog frame and netting. By the end of the week, the canopy has stretched through the second layer and looking green and healthy! In the veg tent, been tending to solo cup waterings as needed. Also up-potted Chill Out OG into a 3-gal pot (with BluMat watering). Took more veg cuttings and now have them in Coco Coins rooting and looking healthy! Onwards to next week! [START OF WEEK 15] ========================================================== ---------- [ 3x3 VEG TENT - GR7 / GR3 ] ---------- TKO #2 - WEEK 07 - Full Veg Gorilla Goat #1 - WEEK 07 - Full Veg Chill Out OG #3 - WEEK 04 - Full Veg Chill Out OG #2 - WEEK 00 - Transplant ---------- [ 4x4 MAIN TENT - GR30 ] ---------- Chill Out OG #2 - WEEK 15 - Full Bloom Wk1 TKO #2-2 - WEEK 09 - Full Bloom Wk1 Heady OG BX1 #1 - WEEK 11 - Full Bloom Wk1 02/09/26 → 02/15/26 [WEEK 15] This Week's Estimated Goals ---------------------------------------------------------------------------------------------- DLI: ~13 mol/m²/d PPFD: ~300 μmol/m²/s VPD: ~1.2 kPa This Week's Meter Readings & Averages ---------------------------------------------------------------------------------------------- Light On/Off: 16:00 - 10:00 | Wattage: ~386.3W [LV05] Distance From Canopy: ~[22”, 13”, 13”] Plant Height: ~[30”, 39”, 39”] Max Plant Height: ~52” [Lamp-to-Soil Distance] DLI: ~16.80 mol/m²/d PPFD: ~389 μmol/m²/s VPD: ~0.89 kPa Soil %: ~[47.9, 47.1, 43.3, 53.0, 48.3, 63.4, 47.1, 61.9, 48.6, 72.3] ========================================================== Day 01 - Monday - 02/09/26 - Total Days: 096 ----------------------------------- Daily Averages ~[+01:00] - Temps: 81.1°F [27.3°C] - Humidity: 74.4% - VPD: 0.92 kPa - Soil %: [48, 47, 44, 51, 49, 66, 48, 65, 50, 75] ----------------------------------- - [22:14]: Night check on the 4x4 tent. --- Garden is full of tops and the canopy is getting taller! --- Chill Out OG #2 is getting taller, but is staying shorter than Heady OG BX1 #1 and TKO #2. --- The under canopy is looking clean and all pots are clean and no signs of flooding. - [22:17]: Checked on the BluMat soil moisture sensors: ------ Chill Out OG #2 » 46mbars ------ Heady OG BX1 #1 » 42mbars ------ TKO #2 » 49mbars --------- Watering Range: [Too Wet] ~25mbars «| [Ideal Target] ~40-80mbars |» ~125mbars [Too Dry] --------- BluMat Max Values: [10mbars «||» 750mbars] - [22:24]: Checked the Ecowitt soil moisture sensor data: ------------------ [ 3x3 VEG TENT – GR7 / GR3 ] ---------------- ------ 45% - [CH01 » M1 » VBL – TKO #2] ------ 46% - [CH02 » M2 » VBR – Gorilla Goat #1] ------ 44% - [CH03 » M3 » VFL – Chill Out OG #3] ------ 51% - [CH04 » M4 » VFR – Dry Soil] ----------------- [ 4x4 MAIN TENT – GR30 ] --------------- ------ 49% - [CH05 » P1 » FLT – Chill Out OG #2] ------ 66% - [CH06 » P1 » FLB – Chill Out OG #2] ------ 47% - [CH07 » P2 » BLT – TKO #2-2] ------ 64% - [CH08 » P2 » BLB – TKO #2-2] ------ 51% - [CH09 » P3 » FRT – Heady OG BX1 #1] ------ 75% - [CH10 » P3 » FRB – Heady OG BX1 #1] --------- Veg: ~38%-45% | Flower: ~45%-55% --------- General: ~30% [Dry] «| ~45-60% [Moist] |» ~70% [Wet] - [22:27]: Checked the 3x3 veg tent. --- Wow the veg garden is blowing up with growth! --- All mothers and clones are perky and getting tall! Definitely need to top soon, but not today! --- A Chill Out OG #2 clones needs watering! - [22:33]: Here is the starting initial watering range: ------ Chill Out OG #2 » 267.3g → 301.0g --------- General Weight Range: [Dry] ~275g «| [Dryback] ~300g |» ~325g-400g [Wet] --- Been 2 days since the last watering. --- Took the starting weight before watering, ------ Chill Out OG #2 » 289.2g --- While on a scale, --- Evenly misted the top of the cup with RO water. --- Did not spray the top growth. --- Misted 10-20 sprays. Waited a moment, then misted again. --- Repeated this process until the cup weighted at least 300g. --- There was no runoff. - [22:44]: Took the saturated weight after watering, ------ Chill Out OG #2 » 390.7g --- Updated the wet weight and watering date. --- Placed the cup back into the tent. --- All veg clones in the propagation tray look great and no need to water! - [22:53]: Checked the humidifiers. --- Tanks are still full and no leaks found. Day 02 - Tuesday - 02/10/26 - Total Days: 097 ----------------------------------- Daily Averages ~[+01:00] - Temps: 81.0°F [27.2°C] - Humidity: 76.9% - VPD: 0.83 kPa - Soil %: [50, 47, 44, 51, 49, 64, 47, 63, 50, 74] ----------------------------------- - [21:06]: Night check on the 4x4 tent. --- Ca-Caw! Wow the garden soaring upwards with healthy tops! --- Heady OG and TKO are stretching up at equal heights and are almost tall enough to begin the second level or netting. Nice! --- Chill Out OG is chilling and staying squat, but looking perking! - [21:12]: Checked on the BluMat soil moisture sensors: ------ Chill Out OG #2 » 48mbars ------ Heady OG BX1 #1 » 44mbars ------ TKO #2 » 56mbars --------- Watering Range: [Too Wet] ~25mbars «| [Ideal Target] ~40-80mbars |» ~125mbars [Too Dry] --------- BluMat Max Values: [10mbars «||» 750mbars] - [21:16]: Checked the Ecowitt soil moisture sensor data: ------------------ [ 3x3 VEG TENT – GR7 / GR3 ] ---------------- ------ 47% - [CH01 » M1 » VBL – TKO #2] ------ 49% - [CH02 » M2 » VBR – Gorilla Goat #1] ------ 43% - [CH03 » M3 » VFL – Chill Out OG #3] ------ 51% - [CH04 » M4 » VFR – Dry Soil] ----------------- [ 4x4 MAIN TENT – GR30 ] --------------- ------ 48% - [CH05 » P1 » FLT – Chill Out OG #2] ------ 64% - [CH06 » P1 » FLB – Chill Out OG #2] ------ 47% - [CH07 » P2 » BLT – TKO #2-2] ------ 63% - [CH08 » P2 » BLB – TKO #2-2] ------ 51% - [CH09 » P3 » FRT – Heady OG BX1 #1] ------ 74% - [CH10 » P3 » FRB – Heady OG BX1 #1] --------- Veg: ~38%-45% | Flower: ~45%-55% --------- General: ~30% [Dry] «| ~45-60% [Moist] |» ~70% [Wet] - [21:21]: Checked the 3x3 veg tent. --- Woah! The veg garden is stretching upwards and has reached the grow light! --- Time to top! --- Also going to take more Gorilla Goat clones. Not too sure on the current one in the tray, so cutting a couple more just in case. - [21:33]: Filled a measuring cup with 2 cups of RO water. ------ Added 1/8tsp of Horticultural Aloe --- Mixed the solution and poured it straight into a clear solo cup. --- Made sure the PVC tube on the rig had the correct names marked. --- Placed the rig into the cup just above the aloe water. --- Okay! Time to take the cuttings! --- Using a pair of clean trimmers, - [22:05]: Topped and defoliated each mother plant. --- Removed a decent amount of growth (a good 7-8 inches of top growth). --- Mulched the trimmings. - [22:07]: Also cut several Gorilla Goat #1 clonal cuttings. --- Made sure to trim most of the branches leaving a top node or two. --- Did not cut any leaf fingers and made sure to cut the tip of the stalk (about 45-degree) before placing each cutting into the cup of aloe solution. - [22:09]: Placed the cup into the veg tent. --- Have the cup resting on top of the drip tray (front left pot). --- Okay! Let the soaking begin! - [22:10]: Decided to cull the Gorilla Goat #1-2 clone in the propagation tray. --- Mulched the entire cup. - [22:18]: Checked the humidifiers. --- Tanks are still full and no leaks found. Day 03 - Wednesday - 02/11/26 - Total Days: 098 ----------------------------------- Daily Averages ~[+01:00] - Temps: 81.7°F [27.6°C] - Humidity: 76.9% - VPD: 0.85 kPa - Soil %: [47, 47, 43, 50, 48, 64, 47, 62, 50, 74] ----------------------------------- - [16:09]: Evening check on the 3x3 veg tent. --- Veg garden is looking nice and clean! --- The growth is still recovering from the topping, but all mothers and clones look great! - [16:22]: Okay! Time to transplant Chill Out OG #2 into a 3-gal pot! --- The 3-gallon pot has been already pre-amended and prepped for a fresh transplant. --- Will also be installing the BluMat watering carrot before connecting it to the water source loop. - [16:46]: Took a 3-gallon pot out of the veg tent and set it on a drip tray. ------ Removed the drip tray and Ecowitt soil sensor. --- Loosened the soil and made a hole in the center of the pot. ------ Set a clear cup into the center of the pot. --- Tucked the sides of the cup in snug with the surrounding soil. --- Gently removed the clear cup from the fabric pot leaving a perfect hole. ------ Sprinkled 1/16tsp of Great White ------ Sprinkled 1/32tsp of Beauveria Bassiana Plus - [17:06]: Dusted the sides of the hole. --- Also sprinkled a bit around the top soil. --- Great! Time to transplant! --- Chill Out OG #2 weighed 291.2g and was watered 2 days ago. --- To loosen and unstick the rootball from the cup, I gently squeezed the sides before pressing the bottom upwards. - [17:14]: Once fully loosened, I simply Vulcan-gripped the base of the plant before flipping her upside down. --- Ooo yea! Nice pearly white roots! --- She’s more than ready for a larger pot! --- Did not break up the rootball. - [17:16]: Gently set her straight into the pre-inoculated hole. --- Pressed and evened out the top soil. - [17:22]: Using fresh BuildASoil Organic Straw Mulch, --- Covered the top soil with straw. - [17:35]: Then using a fully filled 5" BluMat watering carrot (pre-soaked and set to gold for gravity feed) along with a 5" drip ring, --- Placed the drip ring around the base of the plant. --- Then gently inserted the BluMat carrot into the soil near the drip ring's fill tube before connecting it with a 3mm connector. - [17:58]: Also set the Ecowitt soil sensor back. --- Placed the fabric pot back into the Veg tent. --- Shut off all flow-valves and made sure the (8mm) water source loop had no water pressure. --- Then cut the tubing and installed an RO valve-rig (with 3mm T-fitting). - [18:12]: Finally connected the watering carrot's 3mm fill tube to the valve-rig before turning all flow-valves back on. --- Ca-Caw! Done with the transplant! --- The soil moisture was pretty wet so decided to not water. --- Will continue to check and will water if needed. - [18:20]: Decided to also cull the extra Heady OG BX1 clones. --- Mulched the trimmings and soil. - [18:54]: Checked the Ecowitt soil moisture sensor data: ------------------ [ 3x3 VEG TENT – GR7 / GR3 ] ---------------- ------ 52% - [CH01 » M1 » VBL – TKO #2] ------ 50% - [CH02 » M2 » VBR – Gorilla Goat #1] ------ 43% - [CH03 » M3 » VFL – Chill Out OG #3] ------ 56% - [CH04 » M4 » VFR – Chill Out OG #2] ----------------- [ 4x4 MAIN TENT – GR30 ] --------------- ------ 48% - [CH05 » P1 » FLT – Chill Out OG #2] ------ 64% - [CH06 » P1 » FLB – Chill Out OG #2] ------ 47% - [CH07 » P2 » BLT – TKO #2-2] ------ 62% - [CH08 » P2 » BLB – TKO #2-2] ------ 51% - [CH09 » P3 » FRT – Heady OG BX1 #1] ------ 74% - [CH10 » P3 » FRB – Heady OG BX1 #1] --------- Veg: ~38%-45% | Flower: ~45%-55% --------- General: ~30% [Dry] «| ~45-60% [Moist] |» ~70% [Wet] --- Also updated the soil sensor names a bit. - [19:07]: Checked the 4x4 tent. --- Ooo yea! The garden is thriving and the canopy is still stretching upwards! --- All phenos are looking great and will need to set the second scrog frame layer soon. Nice! --- Not too sure if Chill Out OG will make it to the second netting, but she’s looking healthy and perky so not a big deal. --- Stoked that the under canopy is clean and looking healthy! - [19:17]: Checked on the BluMat soil moisture sensors: ------ Chill Out OG #2 » 51mbars ------ Heady OG BX1 #1 » 46mbars ------ TKO #2 » 53mbars --------- Watering Range: [Too Wet] ~25mbars «| [Ideal Target] ~40-80mbars |» ~125mbars [Too Dry] --------- BluMat Max Values: [10mbars «||» 750mbars] --- All veg clones and cuttings are looking great! --- Need to change the Gorilla Goat cutting’s aloe water out. Also a couple clones need watering. --- Filled a clear cup with fresh RO water (1.5cups). - [20:21]: Gently lifted the PVC rig out of the cup of aloe water and set it gently into the RO cup. --- Going to let these soak for another day before transplanting into Coco Coins for rooting. --- Two clones need watering! - [20:34]: Here are the starting initial watering ranges: ------ TKO #2-1 » 290.7g → 340.5g ------ Gorilla Goat #1-1 » 279.9g → 340.6g --------- General Weight Range: [Dry] ~275g «| [Dryback] ~300g |» ~325g-400g [Wet] --- Both cups were last watered 8 days ago. --- Took the starting weight of both clones before watering, ------ TKO #2-1 » 289.8g ------ Gorilla Goat #1-1 » 295.6g --- While on a scale, --- Evenly misted the top of both cups with RO water. --- Did not spray the top growth. --- Misted 10-20 sprays. Waited a moment, then misted again. --- Repeated this process until both cups weighted at least 300g. --- There was no runoff. - [21:06]: Took the saturated weight of both cups after watering, ------ TKO #2-1 » 355.5g ------ Gorilla Goat #1-1 » 355.4g --- Updated the wet weight and watering dates for both cups. --- Placed both cups back into the tent. - [21:36]: Checked the humidifiers. --- Tanks are still full and no leaks found. Day 04 - Thursday - 02/12/26 - Total Days: 099 ----------------------------------- Daily Averages ~[+01:00] - Temps: 81.5°F [27.5°C] - Humidity: 75.3% - VPD: 0.91 kPa - Soil %: [49, 48, 43, 56, 47, 63, 46, 62, 50, 73] ----------------------------------- - [16:01]: Evening check on the 3x3 veg tent. --- Veg garden is looking incredible and growth is recovering nicely! --- Also veg clones and cuttings are looking good! - [17:03]: Okay! Time to start the rooting process! --- Filled a measuring cup with 1.5 cups of RO water. ------ Added a pinch of Quillaja Saponaria Extract [60] ------ Added 1/64tsp of Horticultural Aloe ------ Added 1/32tsp of Mycrobe Complete --- Mixed the solution thoroughly. - [17:04]: Dropped 2 Coco Coins into the measuring cup. --- The coins immediately started to expand. ------ [» ~5 MINUTES LATER «] --- Placed each fully saturated Coco Coin into half-cut solo cups. - [17:25]: Using a squeeze bottle filled with Clonex, --- Gently filled each pre-made hole with Clonex rooting gel. - [17:38]: Time to plant the cuttings! --- Using a pair of clean trimmers, made a final 45° cut. --- Also stripped and scrapped some of the stem’s outer membrane. --- To help with planting, gave each Coco Coin a squeeze to loosen the coco. --- Made sure to insert each stem straight and snug with the tip about a 1/4 inch from the bottom of the Coco Coin. --- Also secured the stem by pinching and pressing in the top of the Coco Coin. --- Once each cutting was planted, - [18:11]: Placed each Coco Coin into the propagation dome’s tray. --- Made sure to keep each cutting properly tagged. --- Did not spray the top growth with any water, but did fill the bottom of the tray with RO water. --- As far as PPFD, --- At the lowest light intensity (and raised ~14 above the tray), the PPFD is around 42 μmol/m²/s which gives a DLI of 2.72 mol/m²/d under an 18/6 light cycle - [18:18]: Decide to cull TKO #2-2 along with the spare Gorilla Goat cutting. --- Going to mulch the trimmings, but going to add something more to the mulch pot. - [18:23]: Since I also make and drink my own F1 kombucha (helps to maintain healthy gut bacteria along with a great way to lose weight), I have a decent amount of spare scobys. --- Placed a few spare scoby pellicles into a plastic bin. --- Using scissors, chopped up the scoby pellicles into smaller chunks and added the soil and trimmings from the culled clone and cutting. --- Set the container aside. Will top dress the mulch bin in the main tent later. --- Might move the mulch bit to the front of the tent for the next cycle and am thinking about turning it into a potential worm bin. --- Anyways! - [18:41]: Checked the Ecowitt soil moisture sensor data: ------------------ [ 3x3 VEG TENT – GR7 / GR3 ] ---------------- ------ 49% - [CH01 » M1 » VBL – TKO #2] ------ 45% - [CH02 » M2 » VBR – Gorilla Goat #1] ------ 43% - [CH03 » M3 » VFL – Chill Out OG #3] ------ 55% - [CH04 » M4 » VFR – Dry Soil] ----------------- [ 4x4 MAIN TENT – GR30 ] --------------- ------ 47% - [CH05 » P1 » FLT – Chill Out OG #2] ------ 63% - [CH06 » P1 » FLB – Chill Out OG #2] ------ 46% - [CH07 » P2 » BLT – TKO #2-2] ------ 62% - [CH08 » P2 » BLB – TKO #2-2] ------ 50% - [CH09 » P3 » FRT – Heady OG BX1 #1] ------ 72% - [CH10 » P3 » FRB – Heady OG BX1 #1] --------- Veg: ~38%-45% | Flower: ~45%-55% --------- General: ~30% [Dry] «| ~45-60% [Moist] |» ~70% [Wet] - [19:05]: Checked the 4x4 tent. --- Ca-Caw! Let’s go ladies! Wow the garden is looking incredible! --- Growth is ramping up and the canopy is definitely in full stretch! --- The under canopy is looking clean and pots all look great! - [19:09]: Nice! All phenos are showing clear signs of bud crowning! --- Chill Out OG seems to be further along than the rest of the cultivars, flower has officially begun! --- Heady OG and TKO has slight signs of crowning, but will continue to stretch for a few more days. I think. --- Anyways! - [19:17]: Quickly checked on the RO reservoir and auto-watering system. --- Reservoir looked good and no leaks detected. - [20:14]: Took the kombucha top dressing from earlier and spread the mix top of the mulch bin (in the back right of the tent). --- Spread the top dressing out evenly. Since kombucha is naturally and acidic ferment, going to let the top dressing dry out a bit (smells great too). --- Will continue to add leaves and trimming on top after defoliation and toppings. - [20:21]: Okay time to build the second scrog frame layer and re-string the second level of netting! --- Prepped and built the PVC scrog frame outside of the tent. --- Using mason string, restrung the netting and double-looping each screw. --- Once the frame was fully assembled and re-strung, - [22:21]: Placed the PVC riser poles and installed the second scrog frame into the 4x4 tent. --- The first scrog layer is currently about 18.5" from the top soil. --- The second scrog layer is currently about 35" from the top soil. --- Done! - [22:59]: Checked the humidifiers. --- Tanks are still full and no leaks found. Day 05 - Friday - 02/13/26 - Total Days: 100 ----------------------------------- Daily Averages ~[+01:00] - Temps: 82.2°F [27.9°C] - Humidity: 75.7% - VPD: 0.91 kPa - Soil %: [46, 47, 43, 55, 47, 63, 46, 61, 48, 71] ----------------------------------- - [21:16]: Night check on the 4x4 tent. --- Wow the garden is raging with growth! --- The second layer is almost pretty much already full! --- Chill Out OG is chilling in between the netting and looking healthy with signs of bud crowning starting to swell up! --- Both Heady OG and TKO are also continuing to stretch with slight signs of crowning. Nice! --- Let’s go my girls! - [21:24]: Checked the Ecowitt soil moisture sensor data: ------------------ [ 3x3 VEG TENT – GR7 / GR3 ] ---------------- ------ 46% - [CH01 » M1 » VBL – TKO #2] ------ 50% - [CH02 » M2 » VBR – Gorilla Goat #1] ------ 43% - [CH03 » M3 » VFL – Chill Out OG #3] ------ 55% - [CH04 » M4 » VFR – Chill Out OG #2] ----------------- [ 4x4 MAIN TENT – GR30 ] --------------- ------ 47% - [CH05 » P1 » FLT – Chill Out OG #2] ------ 62% - [CH06 » P1 » FLB – Chill Out OG #2] ------ 46% - [CH07 » P2 » BLT – TKO #2-2] ------ 60% - [CH08 » P2 » BLB – TKO #2-2] ------ 48% - [CH09 » P3 » FRT – Heady OG BX1 #1] ------ 71% - [CH10 » P3 » FRB – Heady OG BX1 #1] --------- Veg: ~38%-45% | Flower: ~45%-55% --------- General: ~30% [Dry] «| ~45-60% [Moist] |» ~70% [Wet] - [21:26]: Checked the 3x3 veg tent. --- The veg garden is looking nice and perky with healthy growth! --- A Garlic Budder clone needs watering. Let’s go Ensign! - [21:37]: Here is the starting initial watering range: ------ Garlic Budder OG#1-1 » 299.1g → 340.6g --------- General Weight Range: [Dry] ~275g «| [Dryback] ~300g |» ~325g-400g [Wet] --- Been 8 days since the last watering. --- Took the starting weight before watering, ------ Garlic Budder OG#1-1 » 298.5g --- While on a scale, --- Evenly misted the top of the cup with RO water. --- Did not spray the top growth. --- Misted 10-20 sprays. Waited a moment, then misted again. --- Repeated this process until the cup weighted at least 300g. --- There was no runoff. - [21:43]: Took the saturated weight after watering, ------ Garlic Budder OG#1-1 » 355.6g --- Updated the wet weight and watering date. --- Placed the cup back into the tent. --- Gorilla Goat cuttings are looking great in the propagation tray! No need to spray or water. Great! - [22:04]: Checked the humidifiers. --- Tanks are still full and no leaks found. Day 06 - Saturday - 02/14/26 - Total Days: 101 ----------------------------------- Daily Averages ~[+01:00] - Temps: 80.9°F [27.2°C] - Humidity: 75.7% - VPD: 0.88 kPa - Soil %: [48, 47, 43, 54, 48, 62, 47, 60, 47, 70] ----------------------------------- - [19:01]: Night check on the 4x4 tent. --- Ooo yea! The garden is looking healthy and looking great! --- Ca-Caw! Heady OG is still raging upwards and stretching through the netting - [17:14]: Checked the Ecowitt soil moisture sensor data: ------------------ [ 3x3 VEG TENT – GR7 / GR3 ] ---------------- ------ 52% - [CH01 » M1 » VBL – TKO #2] ------ 50% - [CH02 » M2 » VBR – Gorilla Goat #1] ------ 43% - [CH03 » M3 » VFL – Chill Out OG #3] ------ 54% - [CH04 » M4 » VFR – Chill Out OG #2] ----------------- [ 4x4 MAIN TENT – GR30 ] --------------- ------ 46% - [CH05 » P1 » FLT – Chill Out OG #2] ------ 61% - [CH06 » P1 » FLB – Chill Out OG #2] ------ 46% - [CH07 » P2 » BLT – TKO #2-2] ------ 60% - [CH08 » P2 » BLB – TKO #2-2] ------ 47% - [CH09 » P3 » FRT – Heady OG BX1 #1] ------ 70% - [CH10 » P3 » FRB – Heady OG BX1 #1] --------- Veg: ~38%-45% | Flower: ~45%-55% --------- General: ~30% [Dry] «| ~45-60% [Moist] |» ~70% [Wet] - [19:18]: Checked the 3x3 veg tent. --- Veg garden is looking great and growth is healthy and green! --- A Garlic Budder clone needs watering! - [19:25]: Here is the starting initial watering range: ------ Garlic Budder OG#1-2 » 279.2g → 340.3g --------- General Weight Range: [Dry] ~275g «| [Dryback] ~300g |» ~325g-400g [Wet] --- Been 9 days since the last watering. --- Took the starting weight before watering, ------ Garlic Budder OG#1-2 » 297.3g --- While on a scale, --- Evenly misted the top of the cup with RO water. --- Did not spray the top growth. --- Misted 10-20 sprays. Waited a moment, then misted again. --- Repeated this process until the cup weighted at least 300g. --- There was no runoff. - [19:40]: Took the saturated weight after watering, ------ Garlic Budder OG#1-2 » 355.5g --- Updated the wet weight and watering date. --- Placed the cup back into the tent. - [20:01]: Checked the humidifiers. --- Tanks are still full and no leaks found. Day 07 - Sunday - 02/15/26 - Total Days: 102 ----------------------------------- Daily Averages ~[+01:00] - Temps: 80.8°F [27.1°C] - Humidity: 76.2% - VPD: 0.85 kPa - Soil %: [47, 47, 43, 54, 50, 62, 49, 60, 45, 69] ----------------------------------- - [19:04]: Night check on the 4x4 tent. --- Ooo yea! Let’s grow my ladies!! --- The canopy is packed with bud top crowns and the mid canopy (in between the netting) is getting really dense! --- Plan to do a deep defoliation soon, but going to let everything grow and stretch upwards for now. --- Grow strong my girls! - [19:11]: Checked on the BluMat soil moisture sensors: ------ Chill Out OG #2 » 38mbars ------ Heady OG BX1 #1 » 93mbars ------ TKO #2 » 43mbars --------- Watering Range: [Too Wet] ~25mbars «| [Ideal Target] ~40-80mbars |» ~125mbars [Too Dry] --------- BluMat Max Values: [10mbars «||» 750mbars] - [19:14]: Decided to make a slight adjustment to Heady OG’s watering carrot. --- Using the provided allen key, increased the water moisture by turning the BluMat’s tension cap slightly counter-clockwise. - [19:18]: Checked the Ecowitt soil moisture sensor data: ------------------ [ 3x3 VEG TENT – GR7 / GR3 ] ---------------- ------ 44% - [CH01 » M1 » VBL – TKO #2] ------ 47% - [CH02 » M2 » VBR – Gorilla Goat #1] ------ 43% - [CH03 » M3 » VFL – Chill Out OG #3] ------ 54% - [CH04 » M4 » VFR – Chill Out OG #2] ----------------- [ 4x4 MAIN TENT – GR30 ] --------------- ------ 51% - [CH05 » P1 » FLT – Chill Out OG #2] ------ 63% - [CH06 » P1 » FLB – Chill Out OG #2] ------ 50% - [CH07 » P2 » BLT – TKO #2-2] ------ 60% - [CH08 » P2 » BLB – TKO #2-2] ------ 45% - [CH09 » P3 » FRT – Heady OG BX1 #1] ------ 69% - [CH10 » P3 » FRB – Heady OG BX1 #1] --------- Veg: ~38%-45% | Flower: ~45%-55% --------- General: ~30% [Dry] «| ~45-60% [Moist] |» ~70% [Wet] - [19:22]: Checked the 3x3 veg tent. --- Veg garden is looking great and all top growth is green and perky! --- Clones are also looking good and don’t need watering. Nice! --- Gorilla Goat cutting in the propagation tray look green and healthy! --- Easy night in the veg garden! - [20:15]: Checked the humidifiers. --- Tanks are still full and no leaks found. --- Another grow week done! --- The main tent has begun to flower and the stretch has started to slow down for the most part. Almost time for a top dressing! --- Probably need to defoliate again soon. Just stoked that growth is all around healthier than ever! --- As for the veg garden, there’s work to be done and plan to overhaul the veg garden to be able to better preserve my current (and future) genetics. --- Anyways, onwards to next week Ensign! [END OF WEEK 15]
Likes
22
Share