


Processing
Likes
Comments
Share


@wheedtobeus420
Follow
So excited to start a Mephisto grow! I will update once they sprout out of the ground. I soaked them in Ph water for 12 -24 hours. I then put a paper towel in a zip lock and pour the ph water and seed in between paper towel. Put it in a dark warm closet on top of a heating pad on low and usually and wait until the babies pop. Once popped they go into the super soil i prep for them in a 5 gall cloth pot

Likes
5
Share

@Kocicak
Follow
Zdarec
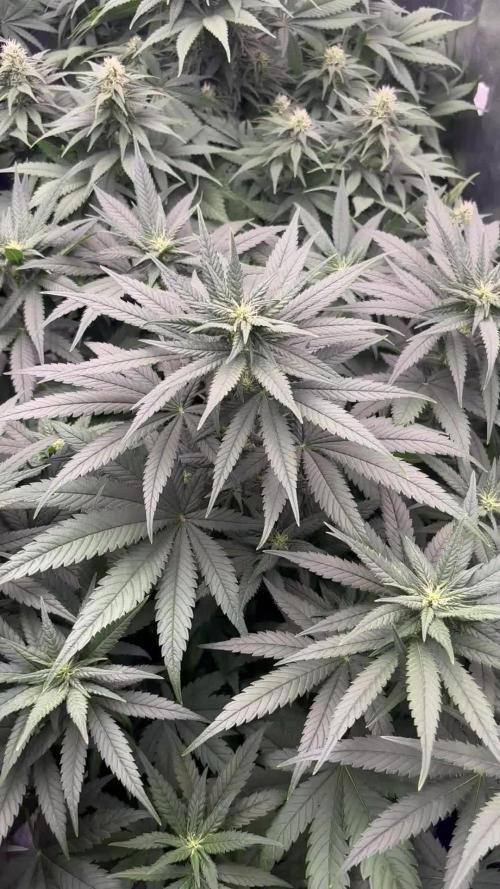
Začínáme 4 týden květu a holkám se vede dobře. 💪 Šest jich už je po defoliaci a zbývající tři půjdou na řadu zhruba za týden.
Krmení zatím nechávám beze změny, jen jsem zvedl PK na 2 ml/l a všem očividně chutná. 😁 Před defoliací ještě přidán Shogun Silicon v dávce 1 ml/l.
Díky a ať to roste😉
Likes
Comments
Share


Likes
45
Share


@masterofsmeagol
Follow
8/1 This wad the most fucked up morning ever. Didn't get much time with the girls. I was able to take a few pics when I got back amd a video this morning. Pillars are still around. I killed a couple but I probably should spray BT. I think we got rain last night. Bags are heavy. I defoliated a little bit more on the interior and found some small yellow leaves. Event horizon is still on point to flower first. I NEED to lst and add supports for flower bit I've got a lot of other things going on too. I'm going to TRY to spray BT tonight if weather permits and I should have the supports up this weekend. At least that's what I'm hoping.
8/2 Quickly watered as I had to fix a flat tire to get my wife to the doctor. Gave most a gallon but closer to 3/4 on one event horizon and the sherb pie. Half g for the 10 and I gave the 5 and the 50 a little water. I didn't give the 50 much. That holds water far longer. I'm glad I got it done. It was 90°+ and sunny all day. Earlier everything looked great. I think I'm gonna go check them and maybe add a few pictures.
WENT OVER AND FOUND THE EVENT HORIZON I GAVE A LUTTLE LESS WATER TO, IN THE BACK COMPLETELY DEOOPED OVER AND DRY. I QUICKLY WATERED A GALLON. I CHECKED THE OTHER PLANTS AND SAW A COUPLE THAT "MIGHT'VE STARTED DROOPING BUT WERE LIGHT SO I GAVE ALL THE GMO'S HALF A GALLON. I WATERED THE CONTAINER PLANTS AND THE ONE IN THE 50. BETTER SAFE THAN SORRY. THEY WERE SUPER LIGHT. SOME ARE SHOWING SOME HEAT STRESS BUT I DONT BLAME THEM WHEN ITS PUSHING 100° OUT. I HOPE THIS PLANT WILL PICK UP BUT ILL HAVE TO WAIT UNTIL MORNING TO SEE. I GOTTA GO EAT DINNER AND IT WAS IN ROUGH SHAPE. CANT BELIEVE THIS. ITS THE FURYHEST IN FLOWER TOO. INTERNET TOO SLOW TO UPLOAD
8/3 This morning it was "maineing" out. Basically like raining but more of an alternating mist. The event horizon that looked DEAD is completely recovered! I'm so stoked. I've had a really rough few days but at least I've still got my girls. After this little bit of rain I'll do the supports and a spray of BT for the pillars. I'm noticing more damage and I don't want them arpund when they can burrow into buds.
WENT BACK AT LIKE FIVE. THE 5 GAL WAS DROOPING AND THE 10 WAS DRY AF. OTHERS WERE ALSO LIGHT. I USED 5 GALLONS ON THE GARDEN AS SOME STILL "LOOKED GOOD" BUT WERE DUSTY AND DRY. I ONLY GAVE THE GMO IN THE 30 A HALF GALLON. DIDNT WATER THE ECENT HORIZON IN THE BACK AND THE GMO IN THE FRONT BY THE DOOR ASXTHE LOOKED GOOD AND STILL HAD SOME WEIGHT TO THEM. THIS WAS ANOTHER DAY IN THE 90s THAT WAS SUPPOSED TO HAVE RAINED. LUCKILY IVE GOT THAT INTUITION AND I CAN CHECK. CAMS HELP WITH THAT BUT ITS BEST TO CHECK A FEW TIMES A DAY IN WEATHER LIKE THIS. FAR TO HOT TO SPRAY ANYTHING.
8/4 Chose not to water as we were supposed to get an inch of rain, then a half in and now it says .1in. I'm going to go over and check on the garden and see what they look like. I took pictures but I'll have to wait to upload them.
WENT BACK OVER IN THE AFTERNOON AROUND 2ISH. GMO IN THE FRONT WAS DROOPY. WATERED THAT A GALLON AND IT WAS UP BY THE TIME I LEFT. THE GMO ON THE END (MY CANARY) WAS SUPER LIGHT SO SHE GOT A GALLON. THE EVENT HORIZON I DIDNT WATER YESTERDAY GOT ABOUT 3/4 OF A GALLON AND I WATERED THE ONE IN THE 10 1/2 GALLON. SHOWERS ARE IN THE FORECAST AND EVERYTHING ELSE LOOKED PRETTY GOOD AND WASNT DEAD LIGHT. AS OF 3 EVERYTHING IS GOOD. I IMAGINE ILL PROBABLY NEED TO WATER SOMETHING TOMORROW. IT SUCKS HAVING TO DO THIS SEPERATELY BUT SOMETIMES THATS HOW IT GOES. I DONT EXPECT THESE 90 TEMPS WILL CONTINUE. ALSO NOTICING SOME FADING AS THEY TURN TO FLOWER. DEF NEED NUTES. AND ONCE THE TEMPS GO DOWN I NEED TO SPRAY EITHER BT OR SPINOSID.
8/5 It Rained last night so I didn't need to water. Everything was nice and heavy. Beautiful day today. Hopfully I can do an app of bt tonight. Weather man needs to get things right. It says we got .005in last night but I heard it and it was way more than that. This is a tiny town.
WENT BACK OVER AND FED. EVERYTHING GOT 1.75 PINTS. THE 10 GOT HALF THAT. THE FIVE A LITTLE LESS. I DEFINATELY NEED TO SPRAY FOR PILLARS. I ALSO HAVE A BIT OF DEFOLIATING ON A COUPLE PLANTS THAT I NEED TO DO. USUALLY I'VE LOST TONS OF LEAVES BY NOW. I JUST NEED TO IMPROVE AIRFLOW. THE TRELLIS WILL HELP WITH THAT PLUS SUPPORT. I THINK I MAY BE ABLE TO SPRAY PISSIBLY TONIGHT (DEPENDING ON WEATHER) AND SUPPORTS AND DEFOLIATION THE NEXT FEW DAYS.

Likes
Comments
Share

@all_about_420
Follow
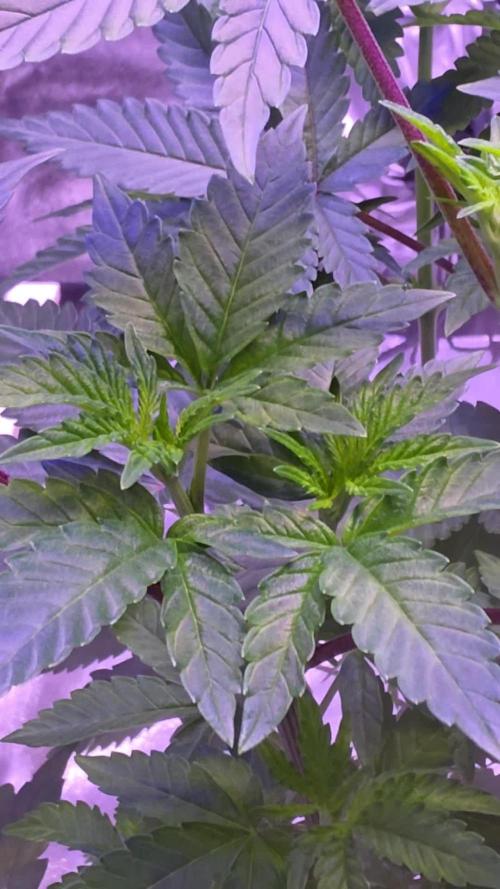
Die Transformation ist spektakulär: In der siebten Vegetationswoche steht die Booberry Cookies RBX absolut makellos im Saft. Wenn man den bisherigen Verlauf bedenkt – vom zögerlichen Start über das Urlaubs-Drama bis hin zu den intensiven Trainingseinheiten –, hat sich die Genetik zu einem echten Prachtexemplar entwickelt. Nach dem zweiten Topping aus der Vorwoche hat die Dame exakt so reagiert, wie man es sich als Grower wünscht. Mitte der Woche zeigte sich bereits eine hervorragend ausbalancierte Struktur mit kräftigen Triebachsen und kurzen Internodien. Zum Ende der Woche hin hat der Ethos-Spross die Blattmasse nochmals extrem verdichtet. Die Fächerblätter präsentieren ein sattes, tiefes Grün und strotzen nur so vor Vitalität. Das Advanced Nutrients Schema schlägt weiterhin perfekt an, und Mangelerscheinungen oder Überdüngungszeichen sind absolut kein Thema. Durch das perfekte Zusammenspiel aus LST und den zwei Toppings ist eine extrem homogene, buschige Basis entstanden. Besser könnte die Grundlage für die kommenden Schritte kaum sein!

Likes
25
Share


@XperencdGmanXG
Follow
took all the branches of these 2 and used LST to move them out from the main stalk just like you were putting up an artificial Christmas tree. Shit these 2 girls are smelling sweet and dank and are stacking so large now. Can't wait to see how this one smokes.

Likes
5
Share


@OntarioAutoGrower
Follow
03.03.23: Started in glass of water in a dark warm area for 17 hours when the seeds sank.
03.04.23: Then put them in a damp paper towel for 24/48 hrs in a dark warm area. Checking on them to keep them from drying up.
03.05.23: Seed taproots were 3/4 inches and were ready to go into the pots. I then poked a small hole into the soil with my finger and carefully put the seeds in and gently covered them with dirt. Then sprayed a little water onto them and then covered them with a dome to keep them humid. Now we wait until they pop out of the ground.

Likes
4
Share


@Ferenc
Follow
Week 10: 20/4 light schedule, 150 mp water per plant 2x, no fertilization anymore. Day 65: Next week Tueasday/beggining week 11/ we need to harvest because they will come from the council to check the house😂 Well, the previous one finished in 69 days, but I think they won't be properly ready by next week. I tried it and made me high anyways. I would give at least 2 weeks more to be done. Tomorrow I will check the trichomes with magnifying glass. They are beautiful stinky girls. Flowers are getting thicker and pistils are getting brownish. Day 66: I checked the trichomes with magnifying glass and it will be ready by next Tuesday. 7 days left with this day. They are beautiful just check in the video (Day 66).
Day 67: It is crazy the last 3 days was so hot here in London. Today was 38 degrees!!!!!! Poor plants even with ventilation it goes up to 30-31 degrees. Well, it is alright because direct ventilation goes on so they won't be cooked. 😓😛 Day 70: It is the last day when they receive water and they just get once and half of the daily intake. 2 days before harvest I will not water them. Harvest day is on Tuesday 30th of July when they are 72 days old. I have checked the trichomes all good they are matured nicely cloudy so now it is very strong. They are very stinky girls 😋 Day 71: No more water for them..... Tomorrow is harvest day!!!!!😋

Likes
22
Share


@CanarianGrow92
Follow
Week 2 and nice and green, we just gave some more organic nutrients like palm tree ash and some guanokalong powder, for the moment its seems to be all good, in 2 weeks I'll be adding some sugars and some more PK

Likes
35
Share


@Master_weeda
Follow
Bonjour à tous les padawans et les maîtres jedis
Pour cette semaine je prévoit de pratiquer comme technique spéciale le LST et juste un arrosage.
Pour cela comme à mon habitude j'attend le cinquième noeud ou que je juge la plante robuste.
Je profite que cette semaine qui va être relativement calme pour faire un LST appliqué et vous faire un rappel de ce qui est pour moi la meilleure technique pour arroser une autofloraison et la façon dont je pratique le LST.
En suivant ces quelques simples conseils vous obtiendrez un résultat optimal tout au long de votre culture :
Le cannabis est une plante qui n’aime pas recevoir un léger arrosage en continu. Il est impératif de l’arroser en grosse quantité, puis d’attendre que la terre soit bien sèche avant d’arroser à nouveau!
Pour calculer la quantité d’eau nécessaire à chaque plante, suivez cette règle :
Le volume d’eau à donner lors de chaque arrosage doit représenter au moins environ un quart du volume du pot !!
Exemples :
pour un pot d’1L, donnez 0,25L d’eau à chaque arrosage pour un pot de 4L, donnez 1L d’eau à chaque arrosage pour un pot de 12L, donnez 3L d’eau à chaque arrosage pour un pot de 30L, donnez 7,5L d’eau à chaque arrosage !etc…
Pour donner un tel volume d’eau, il est souvent nécessaire d’arroser en deux (voir trois) fois, lentement et uniformément sur toute la surface. Disposez de bonnes coupelles sous les pots, celles ci se rempliront d’eau qui remontera dans le pot par capillarité en moins d’une journée. Il est également très important d’utiliser un bon terreau de qualité, avec une bonne capacité de rétention d’eau mais qui assure également un bon drainage (celui ci doit contenir de la perlite, et/ou de la coco, etc..)
Il vous faut alors maintenant attendre quelques jours en sous-pesant régulièrement les pot avec vos bras. Quand ils seront redevenus très légers, vous pourrez arroser à nouveau !!
En effet, comme l’eau pèse beaucoup plus lourd que la terre, un pot gorgé d’eau pèse plusieurs fois le poids d’un pot d’une plante prête à être arrosée. Avec un peu d’entraînement, vous apprendrez donc très rapidement à sous-peser vos pots pour savoir quand une plante a soif.
C’est une technique à la fois très facile et très efficace, et qui peut être appliquée à toutes les plantes en pots !
En arrosant de cette façon, en général vous devrez arroser vos plantes tous les 3 à 6 jours.
Pour cette semaine 3 au jour 17 ma plante fais 12 centimètres et son cinquième noeud apparaît je décide donc de pratiquer un LST sur ma plante.
Pour ce j'utilise du fil de fer galvanisé que je plante directement dans le substrat en faisant attention de ne pas endommagé les racines car n'oublions pas que ce qui pousse dessus pousse aussi dessous.
Jour 17 je pulvérise du une solution composé d'une cuillère à café de savon noir mou dilué dans un litre d'eau en prévention d'éventuels nuisibles.
Je corrige mon LST suivant la pousse de ma plante ...
Pour ma par c'est la manière dont je procède. Comme promis petit rapel de:
Quand commencer à appliquer la technique LST
De nombreux cultivateurs commencent la manipulation dés que les plantes possèdent entre 3 et 6 nœuds ou une paire de feuilles. Durant cette première étape de la croissance, le tronc encore flexible est pliable sans risque qu’il ne se casse, même si au fur et à mesure du développement de la plante il sera de plus en plus difficile de le plier. Nous pouvons continuer à guider la croissance des branches durant toute la culture, même durant la floraison, ce qui pour cette étape représente un grand avantage face à la taille, qui n’est pas du tout recommandé une fois que la formation des têtes commence, cela stressera en effet la plante, ce qui aura pour effet de retarder la récolte.
Comment appliquer la technique de guidage LST
Si nous sommes prudents, la flexibilité naturelle des fibres du cannabis permet de plier leur tronc et branches avec une relative facilitée, même durant la floraison des plantes.
En utilisant une corde fine, nous pouvons accrocher la pointe de la plante à la base du pot par exemple ou à un tuteur que nous aurons planté dans le substrat. Nous plierons le tronc avec précaution et nous le fixerons avec la corde, à partir de là, nous pouvons augmenter progressivement la tension de la corde, chaque jour un peu plus, jusqu’à obtenir la position souhaitée. Soyez attentif à la réaction de la plante, essayez de ne pas appliquer trop de pression sur la corde et rappelez-vous que la flexibilité des branches peut varier d’une plante à l’autre.
Pour obtenir de meilleurs résultats, il suffit de suivre quelques règles simples. Pour commencer, nous devons choisir une corde fine mais pas trop pour ne pas blesser les troncs au fur et à mesure qu’ils grandissent et qu’ils deviennent plus gros.
Nous pouvons utiliser des crochets en plastique souple ou de n’importe quelle autre matière flexible pour éviter d’endommager les plantes. Spécialement en intérieur, utiliser des cordons en plastique de couleur (voir les diaries de @Silky) est très pratique pour voir facilement les accroches et faciliter le travail au milieu du réseau formés par les cordes, les tuteurs, les mailles ou les supports que nous aurons dans la culture. Bien entendu, en culture extérieure et surtout en guerilla nous ferons juste le contraire et nous utiliserons des matériaux de couleur qui n’attirent pas l’attention pour que notre jardin reste discret.
Pour stresser les plantes au minimum, la mieux est de réaliser ces manipulations le soir ou juste après que les lampes en intérieur s’éteignent, ce qui leur permettra de se remettre durant la nuit. Normalement, le jour suivant nous pourrons observer comme les pointes des branches que nous avons pliées se dressent de nouveau vers le haut à la recherche d’une source de lumière.
Que la force soit avec vous


Likes
58
Share



Likes
40
Share

@Smoke_Jabat
Follow
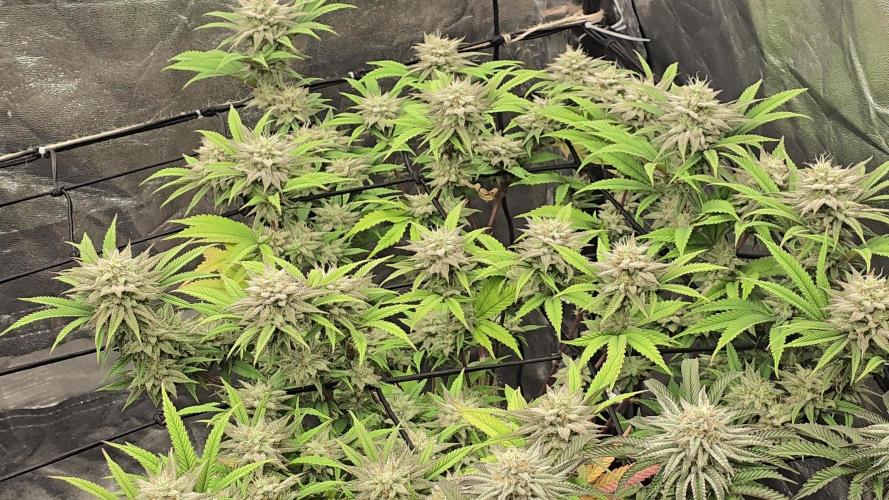
¡Sexta semana de floración! 🌺 estamos llegando al final.
Las plantas estan evolucionando favorablemente, los cogollos siguen engordando sin parar 📈 y el aroma cada día que pasa va en aumento. Los colores son una locura, ya llega el otoño 🍁.
Espero que disfrutéis del álbum!
Un saludo compañeros 🐗🌰


Processing
Likes
61
Share


@Verlido
Follow
Week 12 - Day 1 : Restday, Watered my plants 4 Liters per plant with nutrients, added Big Bud.
Week 12 - Day 2 : Pinches branches of subject 1,2 and 3.
Week 12 - Day 3 : Restday.
Week 12 - Day 4 : Restday, Watered my plants 4 Liters per plant.
Week 12 - Day 5 : Supercropped subjects 1,2 and 3. In my opinion, the canopy of 1,2, and 3 were growing vertically again so I wanted to make it more even, I tied them down to 2 nodes lower after bending the mainstem in a 90-degree angle.
Week 12 - Day 6 : Unknown information
Week 12 - Day 7 : Unknown information
Note : * = Changed watering schedule to giving 4 Liters per plant per day since day 3 during week 12, currently giving 6 liters a day per plant due to extreme temperature change. Might drop back to 5 Liters per plant per day depending on weather conditions.
Note : Haven't been giving nutrients to my plants since the beginning of week 12, will be giving nutrients again at the end of week 14. The plants are having 2 weeks of flushing and seeing if they are in need of nutrients or not.
Week 13 - Day 1 : Upscaled watering *
Week 13 - Day 2 : Unknown information
Week 13 - Day 3 : Water check, pinched lower branches
Week 13 - Day 4 : Unknown information
Week 13 - Day 5 : Temperature check, humidity check, pinched branches of subjects 1,2 and 3
Week 13 - Day 6 : Restday
Week 13 - Day 7 : Pinched branches from subjects 1,2 and 3.


Likes
23
Share


@Santica_Garden
Follow
Just another update for you guy's, also added abit extra on the video...... If it plays. Hope everyone is having a good week. Happy Growing & any questions just ask. 👍🏾🌱🌴💯😎
Likes
20
Share

@GREENPHOENIX6262
Follow
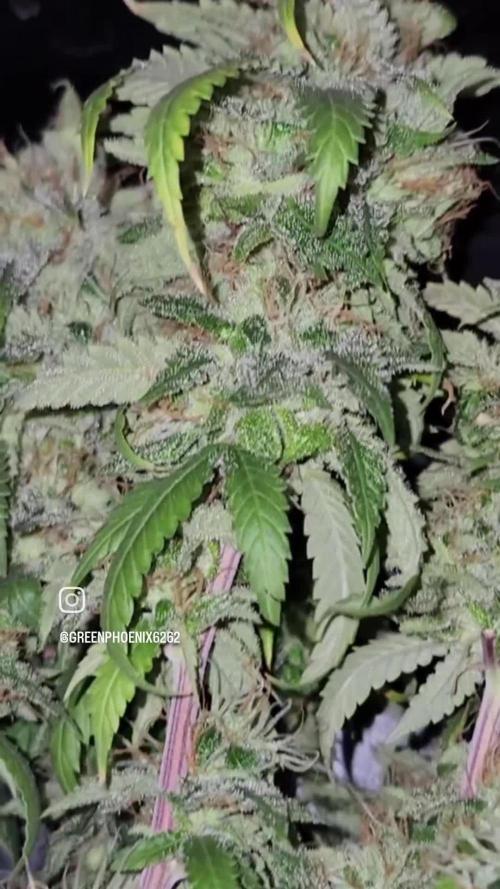
06/13 - Preparation's for cut down have begun - Currently in hour 26 in the 48 hour blackout cycle before cutting down - Gave them a lite defol trim to remove larger leaves - The plan is to run 60/60 for about 7 to 10 days or when branch's have snap without folding - They will dry in the 2x2 with a Exhale C02 bag a fan and exhaust to control temp and humidity - If everything goes as plans they will be clipped from the stem, trimmed and placed in cure bags in about 10 days.
06/14 - Chopped all 8 today - They are hanging in the 2x2 - Working on getting the temps lower then 75 degrees (F) but I can maintain a steady percentage with humidity of 65-69% consistently without a humidify - This harvest is the a yield harvest - My goal for this harvest was to work on my cloning program, Veg cycle and final product technique (Drying, trimming, curing etc) - I am hoping I can replicate the same results that I did with the mother in harvest and completely negating the hay smell after drying - Thus far all is proceeding accordingly. 😎😎😎😎😎

Likes
3
Share


@Andres
Follow
She is growing steong and healthy.. the winter its cloudy here and I am using cob led.

Likes
5
Share


@AgroCultiveta
Follow
Estuvo bastante bien, esto lo lleno con lo que recuerdo para que no borren este diario que es una suma de mis cultivos pasados. Saludos!


Likes
20
Share


@WeEdandGrowLover
Follow
The little growing really good,so helped her a bit adding some flowering nutrients,that she's welcoming strongly.so i did some defoliation,maybe change a bit the lst then let her grow before defoliating more later.
Oh,i started a New grow with 3 different seeds so you will see them on later pics surely 😏

Likes
10
Share


@TiRobotProds
Follow
Bonjours à tous, nous entamons les deux dernières semaines de rinçage pour ces dames. La gorilla sherbet 1 a été récolter.
