Likes
Comments
Share
Привет всем моим друзьям с разных уголков мира. Я надеюсь своим примером, я показываю вам, то что партизанское движение возможно даже на вражеской территории, оккупированной клептократами. Если вы следите за мной, то вы знаете, что у меня подготовлено несколько партизанских отрядов. У меня было 40 растений Амурского гиганта, который родился в Амурской области, который входит в состав Дальневосточного федерального округа моей страны. Эти растения идеальны для выращивания на всей территории России. Я выбрал 30 самых сильный растений, которые проявляли гены гигантизма и вывез их за город на природу. Для того, чтобы удачно перевезти и трансплантировать 30 растений мне потребовалось очень много усилий, я расскажу вам об этом по порядку. Сразу оговорюсь, что у меня был один помощник, который выполнял всю физическую работу. Одному такое такой объём работы за один день сделать практически невозможно. Если вы один то, вы должны разделить свою работу на большее количество этапов, иначе вам будет слишком сложно. 1. В общей сложности ушло около 425 литров субстрата. Я взял 250 литров земли для цветов, добавил туда 115 литров вермикулита и около 60 литров гумуса – остатки жизнедеятельности дождевых червей. 2. Самым важным составляющим моего субстрата был гидрогель. Он удерживает до одного литра воды в течение 3 недель, даже перемешав его с землёй. У меня было 35 литров гидрогеля. 3. Так же у меня было порядка 30 литров чистой воды, в которые я добавил корневые стимуляторы и активаторы метаболизма. 4. Так же у меня было с собой немного перлита и пеностекла, но мне не хватило этих материалов на все растения. Но вы так же можете их использовать. После этого я выкапывал ямки, засыпал туда субстрат и добавил гидрогель, после чего трансплантировал растения. Мы приехали на место днём, но проработали на нём до самой ночи, пока на улице не стемнело. Как только все растения были удачно трансплантированы, мы удачно покинуло место, не включая фонарей или фар. Сейчас мне предстоит пересадить за один раз более 56 растений и перевезти практически 1000литров субстрата. Это крайне рискованно, но у меня нет другого выбора, так как была плохая погода долгое время. Если вам интересно следить за приключениями травки в России, подписывайтесь на мои дневники.
Likes
26
Share
Day 36: "Hey everyone! Just a quick update: I removed a few more leaves here and there and did one last round of LST (low stress training). 🌿 The plants are looking great, and I'm going to let them recover now before sending them into the flowering stage. I'm really excited to see them start blooming in 2-3 weeks! Also, a quick update on our temperature issue: today, the temperature stayed below 26.8°C, which is great news! However, we still need to find a solution to keep the humidity levels up. Our 360 m³/h exhaust system isn't able to maintain the required humidity level. I've calculated that we need a humidifier that can evaporate 1800ml/h to maintain 60-70% humidity, which would help manage the temperature better. Does anyone have tips for a good humidifier or other methods to control the humidity and temperature? Any advice would be greatly appreciated! Day 37: Hey everyone! Tomorrow, we're planning to buy some Cal-Mag because we suspect the yellowing leaves might be due to a calcium-magnesium deficiency. We're also going to get a pH test kit to make sure everything is balanced properly. Do you think this is a good idea? Any tips or suggestions would be greatly appreciated! Day 38: Hey everyone! Quick update: it turns out the yellowing leaves were due to a nitrogen deficiency. We increased the fertilizer dosage today, so the plants should start looking better in 4 to 5 days. 🌿 Thanks for all the support and suggestions Day 39: Hey everyone! Another quick update: after increasing the fertilizer yesterday to address the nitrogen deficiency, it should take about 4 to 5 days for the yellow leaves to turn green again. 🌿 We're already seeing improvements! The plants have grown significantly and are developing a dense canopy once more. It's great to see them bouncing back so quickly! Day 41: "Hey everyone! Quick update: we've removed the bands we were using for LST (low stress training) and are now letting the plants grow freely. 🌿 We plan to keep them in the vegetative phase for about one more week before transitioning them to the flowering phase. Excited to see how they continue to develop!"
Likes
8
Share
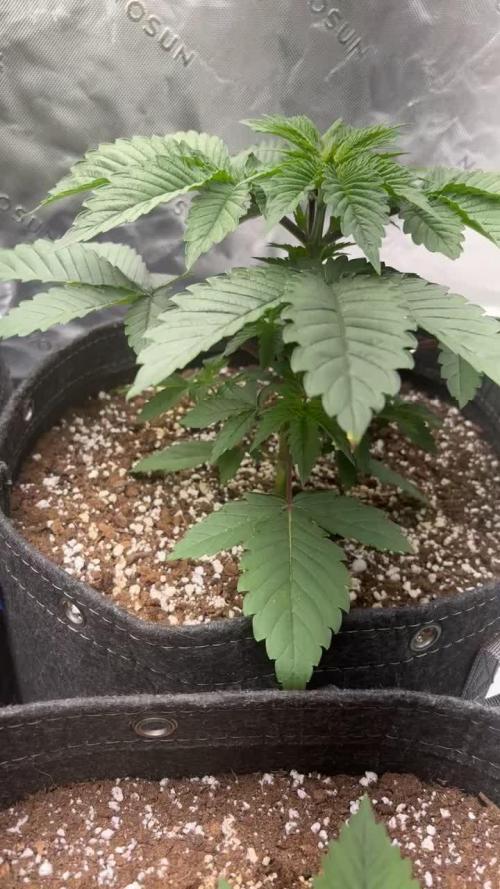
She's looking stunning on her 2nd week, very healthy, no issues at all, developing perfectly, let's see how she keeps developing, this is gonna be very funny! I'm gonma enjoy a lot training this ak 420 phenos from seedstockers!
Likes
62
Share
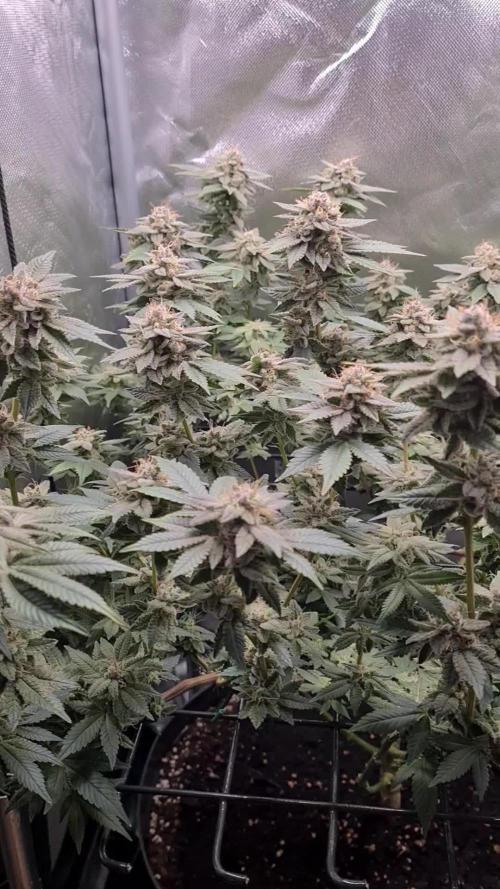
Esto a pasado de ser un indoor a una fruteria😅🤣 Todas las plantas estan engordando y producciendo una gran cantidad de tricomas. He sufrido de falta de calcio devido a los nuevos led de mars hydro que son tan cañeros que necesitan un aporte extra de calcio las plantas. La marca te avisa pero yo no lo vi🤦‍♂️ de todo se aprende. Aun asi las plantas no han sufrido mucho. Los colores son expectaculares y los olores como os digo son como cuando entras a la fruteria. Esta semana empezaremos con los quelatos y la ultima semana solo agua para sacar el sabor original sin nada de liquidos💯
Likes
170
Share
Bonjour à tous les padawans et maîtres jedis jour84 arrosage avec 25 centilitres d'eau ph6.3 Jour87 arrosage avec 30 centilitres d'eau ph6.3 Jour88 pratique de la techniques du tronc fendu (videos explicatives) et arrosage avec 20 centilitres d'eau ph6.3 COMMENT FENDRE LES TIGES DE VOTRE PLANT DE CANNABIS Pour fendre les tiges de votre plant de cannabis, il vous faudra : Une lame propre et aiguisée (une lame de cutter fonctionne bien) Un mètre ruban Une ficelle ou un adhésif pour marquer les coupures que vous ferez le long de la tige Un crayon, une baguette ou une brochette pour séparer la tige une fois fendue 1. Tout d'abord, commencez par mesurer la partie de la tige que vous allez fendre. Il faut faire une incision d'environ 10–20 cm juste sous la branche la plus basse de votre plant. Utilisez un ruban adhésif ou de la ficelle pour marquer le début et la fin de l'incision. 2. Ensuite, prenez votre lame et faites une incision en travers de la tige, en commençant par le haut. Attention à faire une coupe propre, jusqu'au centre de la tige. 3. Utilisez votre lame pour tailler en descendant vers le bas, jusqu'à la marque inférieure de la mesure que vous avez prise auparavant. Essayez de tailler aussi droit que possible. Une fois que vous avez atteint votre marque du bas, laissez la lame au centre de la tige, puis utilisez un crayon/baguette/brochette pour ouvrir la partie coupée, puis sortez votre lame. QUEL EST LE MEILLEUR MOMENT POUR FENDRE LES TIGES ? Il existe de nombreuses théories sur le meilleur moment pour passer votre tige au couteau, mais la plupart des cultivateurs suggèrent de le faire à la dernière semaine de floraison. Même si certains cultivateurs recommandent de le faire dans les 3 derniers jours avant la récolte, nous recommandons de le faire un peu plus tôt (7–10 jours avant la récolte). QUELS SONT LES RISQUES À FENDRE LES TIGES ? Fendre les tiges est une technique à stress élevé très agressive que nous ne recommandons qu'aux cultivateurs expérimentés. Nous ne recommandons également pas de fendre les tiges sur les variétés à autofloraison, car cela peut être bien trop intense pour elles. FENDRE LES TIGES, ÇA MARCHE VRAIMENT ? Il existe un solide ensemble de cultivateurs expérimentés qui déclarent que le fait de fendre les tiges peut produire de bons résultats. Malheureusement, peu de données qualitatives le prouvent. Cependant, il semble que la fente des tiges soit originaire des Pays-Bas, où elle est pratiquée par des cultivateurs néerlandais experts depuis les années 1970.
Likes
14
Share
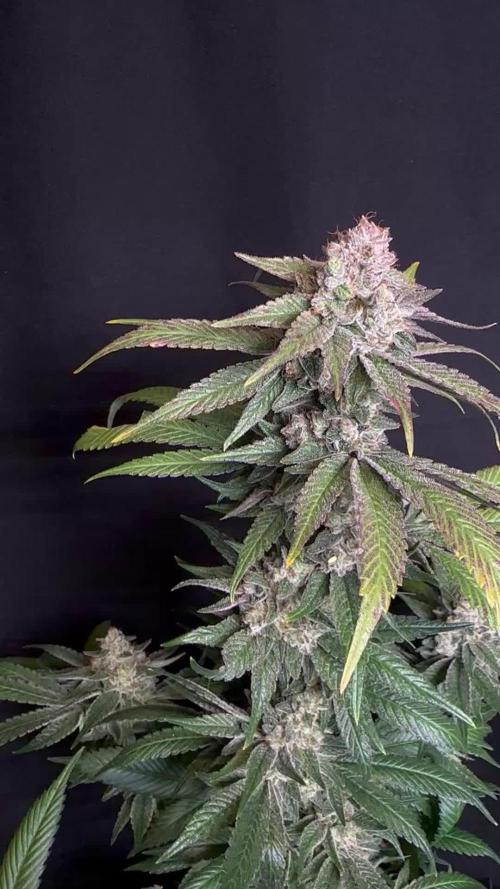
Too late with the ph issues on the 1 plant... Not 1 issue with the second plant. Either way they are both gorgeous girls!!!
Likes
7
Share
These girls just keep getting fatter! No complaints.
Likes
36
Share
@Salokin
Follow
Love Glookies, Glookies is loving the ScrOG ;) super vigorous plant, that handled and repaired more than a few broken branches amazingly. The pheno is awesome, with buds being light green with a ton of purple hues in them. A powerhouse that I can highly recommend. Took a bunch of clones so that I can grow her again right away. She is a stretcher so beware and factor that in when growing her.
Likes
32
Share
Gli strains hanno 88 giorni ho versato solo acqua con ph regolato I profumi dolci si fanno sentire una volta aperta la tenda Gli odori fruttati ti avvolgono immediatamente stanno raggiungendo la maturazione desiderata aspetto ancora qualche tricoma ambrato in piu per il taglio finale Le piante stanno scaricando tutti i sali minerali il run off è sceso a 0.6 di ec con un ph di 6.8 Sempre molto positivo e contento del risultato con fast bud
Likes
3
Share
@KalooNie
Follow
Same thing as the other weeks in flower, just keeping them trimmed and happy! First time using Advanced Nutrients with hydroponics and the plants are loving it so I'm pretty happy about that 👍 Hydroguard is still doing its job too, roots are super healthy and clean!
Likes
6
Share
@MG2009
Follow
05/16/2019 Got some nice lateral branches growing out nice clone material 4 - 6 clones at least, time to transplant and, one more week of veg and I'll make the 12 - 12 flip. I'm trying to upload video so you can see clone sites before, next I show after cuts and transplant.Thank you for dropping in
Likes
3
Share
@603grower
Follow
Haven’t been updating lucky this grow is on auto pilot. All I’ve done is use the vegbloom line and si until week 6. Everything is just about done I’m flushing now. The gorilla chem need another week she is still being fed. Going to harvest all hit her this week!
Likes
20
Share
Que pasa familia, actualizamos la semana de la farm cheese, la trasplantamos a su maceta definitiva, utilizamos sustrato Plagron. Ph controlado en 6,5 humedad algo baja pero pronto pasaremos a floración, temperatura ideal, el led hace si función y aparte no da calor. Los nutrientes los seguimos echando en dosis muy bajas para que no sobre fertilize. Hasta la semana que viene fumetillas.
Likes
31
Share
Esta semana he regado solo con oro negro 2ml x litro de agua y organic power 1ml x litro de agua el resto de la semana solo con agua, he medido las ppm y en el drenaje me ha dado 1040. Me preocupa un poco el color de los tallos de las hojas que están de color morado, pero solo a las de maceta, a la que esta en tierra la veo bien, es mas le he sacado las ramas bajas para que no gaste energía en criar esos coquitos que salen pequeños.
Likes
17
Share
28/12/20. inicio de semana, 64 cm de altura hoy se aplico un nutriente foliar marca mexicana Rootz kelper son un extracto algas y azucarez y se aplico por riego giga grow. este contiene guano de murcielago todo organico. 30/12/20. hoy se rego con forzasilicia un fertilizante organico de una marca mexicana muy buena en mi pais 01/01/21. hoy se aplico un nutriente foliar marca mexicana Rootz💪 kelper son un extracto algas y azucarez y se aplico por riego giga grow. este contiene guano de murcielago 03/01/21 cierre de semana 68 cm
Likes
6
Share
Nach dem Ich eine Woche mit Canna Flush und Osmose Wasser gespühlt hatte , habe ich Ihr kein Wasser mehr gegeben bis alle Blüten nach unten gehangen haben.. Da die Temperatur gerade recht hoch ist , habe ich die komplette Pflanze einfach aufgehängt, damit die Luftfeuchte langsamer entweichen kann.. Hatte diese Pflanze sozusagen als Test um zu sehen wie eine Automatik so wächst.. Hatte anfangs die ersten 4 Wochen auch nur eine 25 watt Lampe , dann 3 wochen lang 8 stunden 25 watt und dann 10 stunden 60 WattWatt und letzte 2 wochen 120 Watt , aber auch gedimmt auf 70 % Verbrauch Stromkosten 30 Tage 25 Watt 18 Stunden - 13,5 Kw 21 Tage 25 Watt 8 Stunden - 4,2 Kw 21 Tage 60 Watt 8 Stunden - 12,6 Kw 14 Tage 70 Watt 18 Stunden - 17,64 Kw Durchschnittlich mit Daylight zyklus 70 Tage lüfter 5 Watt 24 Stunden-8,5 Kw 70 Tage Abluft 15 Watt 24 Stunden- 25 Kw Verbrauch zusammen für den Grow ist 81,44 Kw Bei einen Kwh preis von 0,37 cent sind das insgesammt ausgaben von knapp 30 euros Und das Hydro system war nur ein 2 Liter kanister mit einen Aquarium Sprudelstein.
Likes
3
Share
@Chubbs
Follow
Week 6 update: What up Grow family. These testers are growing fast and strong. Where in week 6 now and the swelling and ripening of flowers are going amazing. Still feeding 500ml/16oz daily as I've found that's the sweet spot for 3gal fabric pots for these. I'd say these probably have about 2 weeks left until they'll be finished. All in all Happy Growing.
Likes
30
Share
@Blabina
Follow
👻👻👻 Reminder : 👻👻👻 So, I created the diary the 15th of september, I wrotte every previous informations on paper then on a word sheet. I reallized that I got everything to create a diary here, so I did it. I should maybe try to end this first grow without buying any fertilizer and keep going with my home made receips (taken from several sources and reading). I think I will do some fun experiments on a following diary. It is well known, dwarves don't run fast, so next batch will be 3 quick one from royal queen seeds, with smart pot and coco ideas i had. It will be fun an probably in 3-4 weeks (I plane to harvest my dwarves a little bit later around week 11, but I don't know, I have to check trichomes, they will give me the answer.)🙌💩So from week (8) we are in *LIVE* mode for this diary. Hello elves (you are the elves, you reading me). Smiles are allowed (this is unfair you smoke your plants so you have a strong adventage) while reading. Orcs are the pests and desease attacking the dwarves (the 3 plants)👻👻👻 👉 I've cut every branches, it was an amazing experience : My dwarves killed the orcs, they survived and escape from this AMAZING journey. They where really impossible to kill. They suffered from : Overwatering, over defoliation, nutrients burn, probably root rot, to much heat (more than 30 degree for some days), a too small pot... And they smell like : 😅😇😇😇 a wounderfull smell. I did all the "noob" mistakes basically but I learned so much. I started to feed them with home made nutrients and ended to use biobizz really at the end. I don't know what was the best for those dwarves but they made it. I will update this diary with a video and will give in 1-2 weeks the weight dry, I am really curious about it, I left really no branches, they are like ready to be in a jar. So: 👉 The famous 3/3 with amazing colors gave me : 38 gr. wet 👉 The famous 2/3 gave me : 34 gr. wet 👉 The famous 1/3 gave me : 30-31 gr. wet The harvest seems not amazing, I don't know how much weight I may loose by drying (I kept really only the heads). For a first grow, I am happy, because I simply made it. I know that it is now a growing experience, like those wounderfull amazing plants. And I learned a lot. Allready excited to launch a second harvest. A matter of time actually. It was fast, joyfull, stressfull, great to do it. SUMMARY : 😮 Why this diary name ? 😮 👉 Because when I descovered growdiaries.com 3-4 weeks before harvesting I was completly sure to fail and that my dwarves were gona die. 😁 😮 Is it the first time you have a kind of relationship with dwarves or plants like this ? 😮 👉 Hell yeah... I am totally a casual smoker and I never did this in my life before. I have to say that I started to have like a real relationship with those 3 dwarves, they start to miss me ( I just cuted them like 2-3 hours ago). 😞😢 😮 Did you enjoy to do that ? 😮 👉 Well... It will be definitly hard to don't do it again. Hopefully when seeds arrived at my home, they where not alone, 3 quick one are waiting to have a funz experience with me. The trick what started to be a small investment turned into buying more and more stuff (ph and ec meter etc...) So I want to use them more 😲😘😍 😮 Are you high right now ? 😮 👉 Absolutly not, I haven't smoke any weed for about 3-4 months maybe and I don't drink, I mean, I am naturally like this. 😕 😮 What about the elves ? 😮 👉 You mean the readers of this website who followed, liked, help me a lot with A TREMENDOUS AMOUNT OF GOOD ADVICES ? I love them ♥️☺️♥️ Thank to all the readers, growers, people taking care of this website and not giving any infos to the police, breeders for giving us the opportunity to do this, light crafters for giving us sun in a tent, tent builders, special potions crafters (who create amazing nutrients) specially those dedicated to the natural 100% products... I mean thank you to all elves. ♥️
Processing
Likes
2
Share
@Vet4weed
Follow
Taking it slow with the veg state to develop larger, stronger plants and it seems to be paying off. I've trimmed the lower leaves at least 3 times this week. I think I'm going to extend it out at least one more week before switching to flower state. Early in the week I switched from blue to purple to allow the branches to push through the screen more. Then mid-week blue, to rebuild the fan leaves, then back to purple once I rearranged everyone into their optimal positions for capturing light. I see a lot of potential for multiple colas. Each time I switched to purple, I raised the light up a few inches to help them stretch. As noted last week, lamp distance is being measured from top of net (not top of plant). I continue to add compost tea every Tuesday, which they love :-)