


Likes
Comments
Share


@BruceBlack
Follow
This week they started show va lot of yellow leaves, I was addind some more nutrients since I Think they can still fatten a bit more.
On some of them you can see there are some crunchy leaves , which bothers me a bit.. is it normal?
One of them is not drinking that much water lately so I'm just feeding it with water, hopefully I can harvest it within a week a or less, the rest of them are still drinking a lot so I'll keep feeding them with nutrients but with only 2ml/ Lt
Smell is super strong and even with the carbon filter the whole room smells like poison, hahaha, luckily i the rest of the house smell it's barely noticeable
Looking forward to harvest and finish everything, this last period is has been the toughest cuz I need to know when exactly to start the root wash

Likes
48
Share


@Northerngrowers
Follow
Gran genética cultivada de manera totalmente orgánica.
Sin grandes necesidades ni complicaciones en el cultivo, pero a tener en cuenta la poca tolerancia al exceso de nutrientes.
Buen desarrollo en crecimiento, gran ramificación con distancia internodal media.
Impresionante el cambio a color morado fuerte en las últimas semana de floración y gran cantidad de tricomas en las flores.
Fuerte aroma afutado y sabor dulce, con una buena pegada.
Totalmente recomendable.

Likes
1
Share

@Organic_bud21
Follow
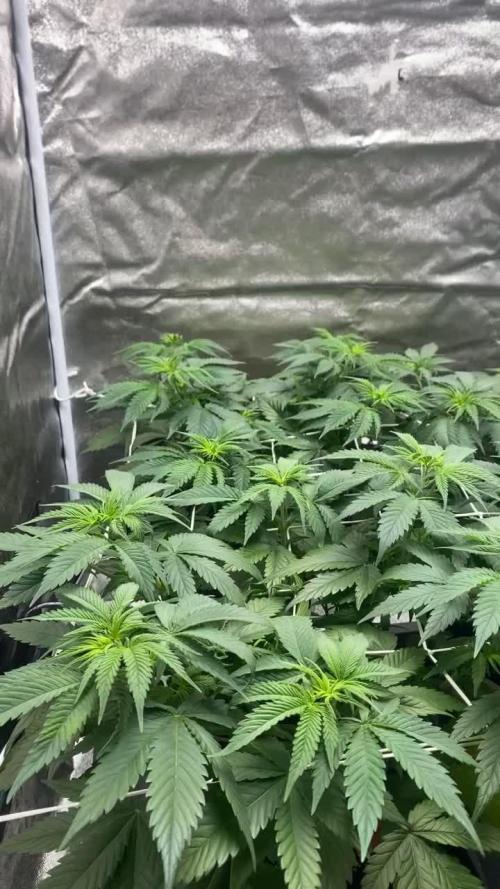
In der 7ten Woche wurde Entlaubt um auf die Blüte vorzubereiten. Leider etwas zu wenig, also war am nächsten Tag quasi schon alles wieder voll gewachsen :( Insgesamt lag das Problem in der zu langen Vegetation. Danach lag der Fokus weiter auf Erholung und dem gleichmäßigen ausfüllen des Blätterdachs. Den EC habe ich nach dem beschneiden auf 1,2 gehoben. Voodoo Juice war nach dem Schema dann erstmal raus. Also habe ich auch den Bakterien etwas zufuttern gegeben, damit nicht alle sterben und ich dachte die komplexen Kohlenhydrate und anderen Zusätze aus Bud Candy kommen der Pflanze auch jetzt vorallem nach dem entlauben zugute. Einen Tag nach der Entlaubung habe ich wieder Foliar B-52 ausgebracht mit Break Thru zusammen, um Stress abzubauen und schneller erholen zu lassen.

Likes
16
Share


@LittleBigTrees
Follow
I underestimated there food needs but am feeding more now, its also possible that my lights are too close as its the first time using led lights 🤔?
The plants are mainly all short apart from a danceworld and a kmi-S1 that seems taller than they normally are (there are 3 going two are short and one is twice there height) onto week 5
Happy New year 😎
Likes
16
Share


@Scoobiedoo
Follow
Day 50
400 ml plain rain - just drank up her nutes
Day 51
400ml plain rain - prob need to thin her out for flower - instead going to lst the leading stems in the centre - try and get some 2dary growth and control that stretch and then see which other stems make it to the party by end of week
Day 52
400ml plain rain
Defoliated heavily for preflower stretch - took out all fans of strong established stems and fans of totally weak sites which I fimmed. Fimmed a few under branches. Pulled the leading mainlines out again - there is so much stretch so very soft, can't tie down so rolled them and the central stems that are leading - just to get them to toughen up. Exposed many who might be something - left their fans on if they wanna try.
Then I decided I wanted to try the scrog idea I had and would you adam and eve it? It fit!
Gentlefolks - may I present "disability_scrog". I had this left over from when I was real ill, and just thought with my cargo net from the car ... anyway I don't know what I'm thinking LOL. It fits - didn't take too long either but after the pruning and looking after my mite infested 24hr grow - I will save the tying in for tomorrow, yaaaaaay 😏
Day 53
Well yesterdays' defoliation has resulted in lots of stems going for it, going to hold off on tying in. Getting a good idea of the shape now - won't be long.
400ml of 2:1000ml grow big, tiger bloom 1:1000ml calmag in pH adjusted rain water
Day 54
3:1000ml Big Bloom in 400ml plain rain
OK - this is not a full scrog - the mainlining and intensive training were done thinking this was an auto 😏 so it leaves me doing this stinking job again - I swear one day I will do a proper scrog with proper ties from start and everything but in the meantime....
I intensively fimmed everything at bottom including their fans - leaving stronger stems to get more air & light.
Under leading meristems, I left a few nodes and their fans for the general wellbeing of plant.
The mainlines are still tied to get more light to the remaining branches I hope will stretch.
As per usual I have two sap sucker leading stems that are screwing everything up - these are tucked and hoping won't hold up the rest from stretching.
We'll see over next week if I need to lower the net or release her ties and unspring the plant and retie her in final position
Day 55
Plain Rain 400ml
Day 56
I reckon one more day and will tie her in 😊
She had 3:1000ml Big Bloom 2:1000ml Tiger Bloom Grow Big 1:1000ml Calmag in 500ml plain rain [she was thirsty] - last of the Grow Big for her now - Bloom all the way 👍👊
Great week 😎


Likes
33
Share


@AshBrand
Follow
3/03/2021 - Seeds arrived - I let one seed soak in distilled water for 12 hours. Room temperature. The other seed will go straight into a moist paper towel tomorrow.
3/04/2021 - After 12 hours of soaking I moved the seed to a moist paper towel and put in a ziploc bag. I also started another Seedsman Blueberry seed (didn’t soak it as an experiment). I put the ziploc bags in a warm dark spot. I will check it in 24 hours.
3/5/2021 - The seed I let soak for 12 hours has started to root. I’m going to let the tap root get a little bigger before I transfer it to a rock wool cube. I will check the seeds in 6 hours. Well 6 hours later the non soaked seed broke open and exposed a small tap root. Tomorrow they should be ready for rock wool cubes.
3/6/2021 - Moved the seeds to rock wool cubes. We observed that the seed that did not soak, rather just placed into moist paper towels, had the first sprout. We made sure to put root down first with spout over the top of the rock wool.
3/7/2021 - Both seeds have sprouted and are in the humidity dome. They will continue to grow until I see roots.
3/8/2021 - The sprouts look great! We will let them grow until roots appear from the bottom of the cubes. The 3rd cube in the dome is another Seedsman Blueberry we will be growing as a mother plant for clones.
3/9/2021 - Not really much to report. They seem to have stopped stretching and are taking shape nicely. I will continue to keep them in the humidity dome until they root out of the bottom.
3/10/2021 - Today all 3 seedlings had roots showing in the rock wool. I transplanted each one into solo cups filled with Fox Farm Happy Frog. I noticed the cubes were soaked and over watered. The soil will dry it out and I will start feeding them Fox Farm Big Bloom.
Likes
2
Share

@Idiotproof420uk
Follow
2 x black apple hitchcock
1 x black hell
1 x choccolatto
To be put into a dwc 4 pot homemade 60+ltr each pot.
Also.
3 x kukulukan
1 x Indian kush
To be vegging while the others bloom ready for next run. After 8+ weeks of veg


Likes
8
Share


@pzwags420
Follow
On day 1 I adjusted the PH of my reservoir down to 6.1. On day 2 I adjusted the PH of the reservoir from 6.3 to 6.1. On day 3 the buds are really starting to bulk up and are putting out side flower clusters already in week 5. I adjusted the PH to 6.1. The goal is to coast from 6.1-6.3 then back to 6.1-6.3 ect. On day 4 things look good I scoped out the trichs and found some to be filing up with cannabinoids :) maybe she will be done in 7-8 weeks like the breeder says. On day 5 my reservoir temp got into the 80's because when the reservoir gets depleted it lowers the water level below the thermostat and I'm getting into the colder months so the cold air temperatures are causing the heater to heat when not needed. My temporary fix is to place the heater diagonally when the water level gets low and then when the water level drops a little more I will fill my reservoir back up fully so to keep the heaters thermostat running correctly. On day 6 I did another defoliation to improve light penetration and airflow in the canopy. I installed a new "Nano aquarium heater" this will be able to heat my reservoir without being affected by the water level in my reservoir. I also changed out my reservoir and adjusted the PH to 6.1. On day 7 the girls are looking and smelling great! I adjusted my reservoirs PH from 6.6 to 6.1. My Nano aquarium heater seems to do the job nothing out of the ordinary that I could tell after a night in the low 30's.
Likes
3
Share


@Purplepassion
Follow
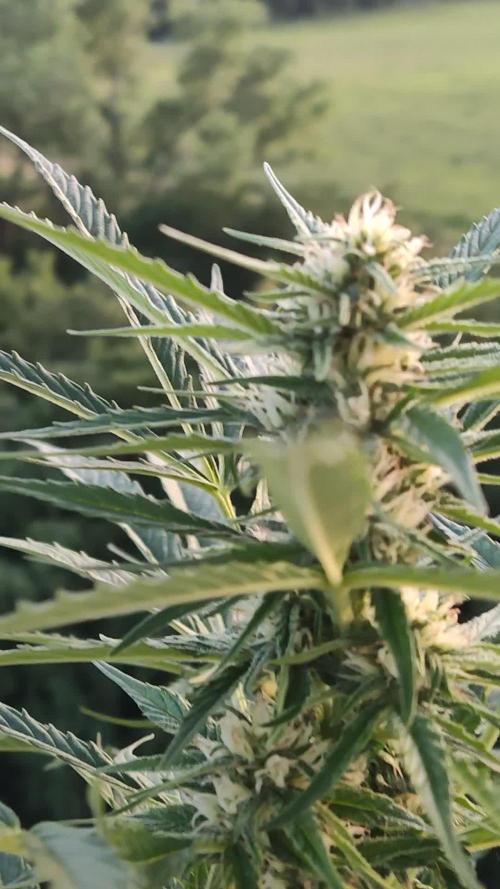
Last Last Day,after around 52 hours of dark I separated her and string her up 🔥 let's wait 8 - 14 days and have a look what's poppin.😁
Also I've got my First mutation, it's a boring one but at least nothing bad haha


Likes
6
Share


@Green_Dream
Follow
This has been one of the easiest grows I had so far.
The feeding was the key. Amending with a ‘Grow’ amendment(rich in Nitrogen) and supplement with Bloom liquid nutrients.
Watering as often as possible and using RO water.
Even though I had a pest invasion the girls did great.

Likes
18
Share


@Diips
Follow
Its starting to look more like a forest from each day that goes on. frost also starting to appear already and we are still early in flower ;)
d.66 all good in the hood, ill will try to pull those 2 who are very close to the light more back to the wall, so the lower stalks can get light and space
d.66 a little bit of bamboo and lst done without problems 🌞

Likes
13
Share


@Alpha_Green
Follow
Some of you may have wondered:
Why do I use CO2 at average 950 ppfd μmol/m2/s (moral flow)?
The answer is quite simple. Because of lack of space in some regions of my cultivation area, I simply cannot keep the ideal distance to my Sanlight high-performance lamp, due to some height growth of various strains. And so some of the main colas have ppfd values of 1250 μmol/m2/s and even more...
So this is how I manage to achieve and compensate for such high radiation levels even with a CO 2 balance. And I have to say, my strategy to avoid various light stress symptoms works just fabulously. In combination with CO 2 implementation, my babies are simply unbeatably insensitive to light. Thats it!
Beginning of 3rd week flowering:
Again feeding my babies by 36 hours fermented potions of Bio Tabs Kompost Tea PK-Booster (15 g pro Liter) and added:
5ml Orgatrex/Liter
1 Spoon of Bactrex
1 Spoon of Mycotrex
1 Spoon of Mycco-Vital
1 Spoon of Dynomyco
A little tip for those who are interested in small modifications that have a big difference or influence - on the result - effect - beauty - health - taste! Before adding microorganisms or beneficial bacteria or Mycorrizae and Trichodermas, please use oxygen-saturated water. On the one hand, unwanted chlorine gases evaporate and the small world of the microbiome becomes even faster and more rewarding in compost tea to sprout.
Last but not least for this week, I would like to introduce my reasons, why I prefer growing biologically and sustainably.
First of all, it’s something which suits very well in these times/days we are living now. Sustainability is a big need and task for our planet. 🌎 Nature means life. Our home, the air we breathe and everything that surrounds us. Not just today. Hopefully tomorrow as well.
Maybe I'm starting to protect our environment on a small scale, but maybe I can also make a big difference at all.
If you change the way you look at things, the things you look at change...
I thought about what’s the difference, between Mineral Feeding and Super Soil Feeding.
It’s very easy. Biologically Growing is a similar process than the natural soil activities out there in the lap of nature’s. So plants has to work and interact with the microorganisms and microbiomic communities in the soil. So the plants will never get lazy like the lazy ones of mineral feeding growers.
If you grow biologically, you will feed the soil first and the microorganisms will support every parameter next to your plant conditions. And that will generate an unbelievable spectrum of Terpenes and Trichomes you will never forget.
It’s the same comparison, when you daily visit McDonalds and you eat only fast food. How does your body and mind react on this shit for money?!?!
May I invite you to think about it…
See you next week dear Growmies! Have a nice Weekend and take care…
Peace out!
Addendum for Day 53:
At the moment we unfortunately have another winter onset here in Germany. This means that I am forced to take additional heating measures due to structural facts in order to be able to keep the temperatures constant. After all, just tonight the thermometer climbs again to -1 degree Celsius.
In addition, my exhaust air system runs out of my bedroom terrace and I therefore grow winter and summer with the patio door open. Well, sometimes I experience real weather-related challenges. But all in all, no problem...
"Where there's a will, there's a way."
Addendum to pouring out the fermented PK tea: I always administer half a liter of lukewarm aerated water with 3.5 ml of cannazyme per liter to each plant. This means that the "root machine" is not supplied with supplies unprepared and the nutrient solution can thus also be better distributed in the soil. Since I also work with cloth shoes, I spray them evenly moistened everywhere with water that is also warm before pouring them out from the outside. This has the advantage that the moisture stays where it should: in the pot!
... I did the math today ;-) We are still in week 7 until this Friday. And week 8 starts on Friday! OMG... still so much time yeahh!
Today my Fast Buds Sour Jealousy and Sweet Seeds Big Devil and Dark Devil Automatics arrived. I'm looking forward to it.
This time Fast Buds next Time Sweet Seeds. Love them too. Very beautiful genetics.
Today a review video of the beginning of week 3.
At the time of the pictures, I had minor signs of nitrogen excess. (Light peaks first at the crown of the roof and then slightly continuing to the middle section.) I then painstakingly racked my brains as to why this could be. I found that very slight dry spots had formed and therefore the root found small accumulations of nitrogen that caused its problems. But then, when I carefully homogeneously checked the moisture content in the substrate, the problem evaporated again. However, they had not shown any loss of growth rate during this time. Nevertheless, they developed as expected.
They Strawnanas had no problem with that.
In the end, I always have a hard time killing them. But I guess that's the way things go.
We live and die.
We come and go.
But it's not there yet. ;-)
Tomorrow is day 56.
Tomorrow’s updating day!
Can't wait to see their progress.
Have a good time and see you tomorrow… 🏽🕊️
🏽 ☮️🕊️


Likes
8
Share


@Growin_Ish
Follow
Day 50 overdue feeding and watering. 5g SimPro Bloom half gallon of 6.5PH spring water each.
I'll never choose this fertigation method again. So much easier to amend the medium then top dress every 30 days.
The plants seem normal for 50 days from seed, but not normal for a plant that is supposed to be harvest ready 60 days from seed. A few people here on GDs ran this strain way passed 60 days and maybe this is why. It's possible some phenotypes just take longer. No smell and no trichomes at this point. I would guess they need another 25 to 30 days to nug up.
Day 52 they are both praying but still cannibalizing themselves. 5g isn't enough. Considering a top dressing.
Day 54 - pulling 5 yellow leaves per day. This is not nutrient deficiency, these plants are fading. SMH I am behind pissed! Wasted 2 months of tent space and nutrients. I didn't do everything right, but the lesson for me is to stay away from fast strains. This is actually motivation to switch to photos. More forgiving of the small mistakes.
In this case I overwatered in early veg. I should have tossed them both then.
My preamendment ratios were off and I switched to water feeding during preflower. All of this has resulted in a plant that looks to be done in a week with marble sized fluffy buds that have zero trichomes and no smell. PISSED OFF!!!!!
I'm learning through my failure but it still sucks!
Day 55
Watered both with rain water, CalMag, and SimPro Bloom. I know CalMag isn't recommended in flower but I don't care about this bull crap plant anymore. I'm popping new beans and am gonna run these two as far as possible to see if I can get a decent top cola at least. Still pretty pissed.
Day 56
Pics show how they respond to watering. Sheryl is praying, Candace leaves are up, but not praying like Sheryl. The only smell on either is from a stem rub. No visible trichomes. Not when I even zoom in. So odd!
Day 58
Finally have some odor! These plants are growing like a regular auto-flower. I've been freaking out because the breeder says it's a fast strain (60 days). The lesson here is to always listen to the plant. Scrap the website crap and pay attention to pistils, leaves, and trichomes.
They look and smell good for day 58. The yellow leaves are likely due to me adopting an abbreviated / hybrid feed schedule to suit 60 day seed to harvest. The day 55 feeding was 6g of SimPro Bloom in 51oz of water and that seemed to hit the spot.
I need a good loupe so I can have a strong finish.
Day 61
Fed Candace 1tbl of Terp Tea with Azos & Mykos, plus Fish Sh!t. Half gallon of Spring water.
Bottom fed Sheryl Azos, mykos, & half tbls of SimPro Veg in 16oz of Spring water.
Likes
3
Share


Likes
10
Share


@StickyFingah420
Follow
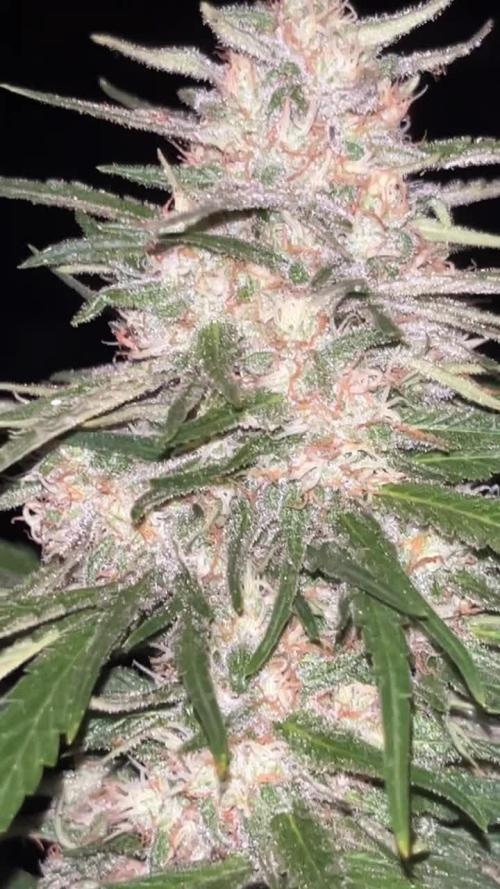
Planta hermosa, por problemas de respaldo no tengo sus fotos finales y es una pena :( pero puedo decirles que es una planta que rinde bien, entrega frutos de calidad y no es para nada exigente.
Likes
9
Share

@Gram_Solo
Follow
🙌
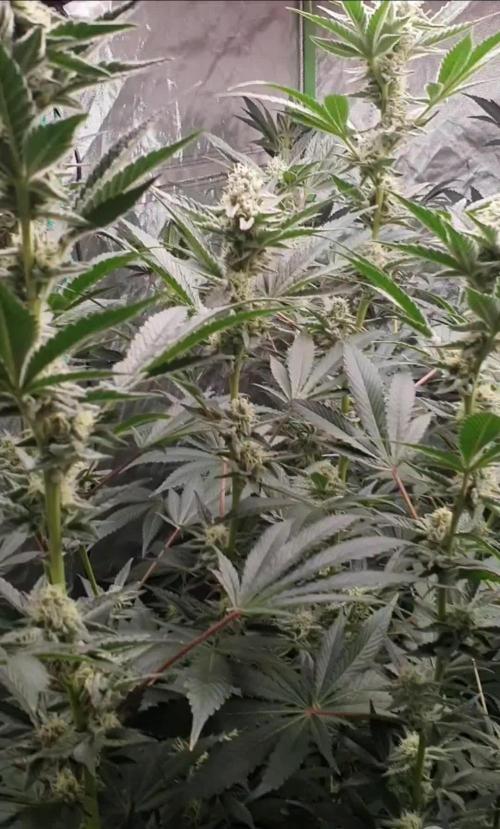
Added an extractor fan now so should be able to manage the heat a bit better. Light has been on 30-50% for 2 weeks now so could do with increasing for late flowering.
Co2 bags is what I need next as they can also help the plants deal with the heat.🔥🔥🔥
Think they are doing very well! Dark leaves I noticed so may lower nutes next feed. Ran out of big bud and candy but its on the way.
Likes
23
Share


@Gordy
Follow
Week 3(Bloom):
She has packed on a lot of pistils this week. Overall she’s looking really good. I think I’m under watering her. Last night and tonight when the light came on she looked pretty droopy. I’ve given her some more water today. Tomorrow when the light comes on I’ll give her a look and see. I did lift the plant to see if it was heavy or light, she was very light. Hopefully she snaps out of it.
I’m very happy with this girl. This week the growth wasn’t as rapid, this could be because of not enough water, not sure though. Starting to see a bit more vertical growth
Thanks for checking out the diary! 👊
