


Likes
Comments
Share


@Elguacho420
Follow
¡Buenos humos a todos! 🌿💨
Las plantas ya están en floración y han pegado un buen estirón desde la última actualización del diario. Esto se debe a varios factores, como el cambio de la fase de vegetación a floración, la adaptación de los nutrientes a esta nueva etapa y el aumento de la potencia de luz.
También hemos subido el riego a 500 ml por planta, ya que hemos visto que cada dos días necesitaban agua. En cuanto al pH, lo tenemos en 6.0 y, por el momento, parece que les va perfecto. Apenas sueltan excedente de agua, así que seguiremos pendientes de cómo evolucionan. 💧
Por ahora, no están dando ningún problema y estamos muy contentos con su evolución, sobre todo teniendo en cuenta cómo han ido creciendo desde que las pusimos. 😊
Esperamos que sigan así de bien y poder traeros nuevas noticias dentro de poco.
¡Un saludo y buena semana a todos! 💚🌱

Likes
3
Share


@Budz420
Follow
HST done at the end of the week, did cut some fan leaves and some topping and defoliation, 1 more week before sending them to flowering.

Likes
3
Share


@MicroHidroGrow
Follow
Día 08
Entramos en la segunda semana de flora. Hice la mudanza y tuve que cortar un poquito de raíces ya que se habían ido por los caños hasta el depósito. Las raices estan tan crecidas que no puedo ni levantar las plantas con su canasta. Así que no pude enrollarlas para meterlas en el caño otra vez. Incluso me encontré con que las raíces se metían por los tubos negros de goma que las riegan. Tuve que sacarlos y destaparlos.
En definitiva ayer hice un lavado preventivo con agua oxigenada para limpiar toda posibilidad de hongos en el sistema. Por ahora se las vé sanas y avanzando. Estoy esperando a que termine el estirón para hacer una poda de hojas. De todos modos voy a usar un tipo de poda que ya he hecho antes y me ha resultado muy bien. En lugar de cortar lad hojas de abajo, corto las hojas grandes de arriba, y de esa forma dejo una base de hojas en el medio de la planta, que alimentan a todas las ramas. Y así no tengo nada que tape la liz a las flores que quiera dejar. De esa mitad de planta para abajo, no qieda ninguna rama. Ya fui cortando algunas. Pero la semana que viene voy a hacer la poda más real. Me asusta un poco el tamaño de las raíces. No sé donde puede terminar esto.
Dia 12
Hoy hice una defoliación fuerte. Corté muchas hojas y ramas. Pero el corte que hice es un tipo de corte que ya he hecho antes con muy buenos resultados. Elijo una altura que suele ser entre el 2do y 3er nudo, y corto todas las hojas grandes de arriba, dejando sólo las hojas grandes del medio y abajo. Todos los ápices que dejo, estan por encima de ese nivel de hojas que dejo. Por debajo de eso nada. De esa forma la planta sigue recibiendo luz en todas las flores, y en las hojas abajo de ellas. Solamente me preocupa que se han juntado mucho las ramas principales de cada planta. Así que voy a tener que aplicar un LST intensivo cuando empiecen a engordar. Seguramente ahora empiecen a tomar menos agua, dado que con la cantidad de hojas que había antes, transpiraban mucho. Ahora será cuestión de ir vigilando el engorde y no fallar al momento de splicar nutrientes. Para la 3ra semana pienso empezar a sumar big bud a la mezcla que uso. Y mantener el bud blood, pero a mitad de dosis. Al final se volvieron tan tupidas, que no pude dejar una sin cortar hojas, dado que ya estábamos hablando de hojas abanico que atravezaban casi todo el indoor a lo ancho. Espero que pronto empiece la floración propiamente dicha
Likes
77
Share


@SooSan
Follow
3eme semaine de température trop hautes (30-35°)
Dans l'ordre:
1) Afghan Peach x Blue Monkey
2) Gelato Cake
3) Fast Critical Poison
4) Tropical Fuel
5) Hindu Kush
6) (Blueberry x Black Domina) X (Kosher Kush x Mk-Ultra)
7) Blueberry (Cut = 4g)
8) Herz OG (Cut = 5g)
9) (Blueberry x Black Domina) X (Kosher Kush x Mk-Ultra) (Cut)


Likes
33
Share


@Prof_Weed
Follow
Noch 1 Woche gebe ich der Pflanze, dann Flash Clean und Final Part von Terra Aquatica.
Alles läuft fantastisch, hatte bis dato keinerlei Probleme mit der Genetik, auf Dutch Passion ist halt Verlass!

Likes
4
Share


@YodaNameR
Follow
Topped the plants today, waited for the 4th set/8th leaf node to come in. Will probably be a day or two before I give it more nutes. Feeding schedule and products in week 1
Likes
1
Share


@Not_A_Farmer
Follow
Just starting vegetative stage as it looks like we made it through a week of seedling stage very nicely ! Watering about an ounce every 36 hours! In all these plants are like 10 days old. Keeping them in ac germ kit ppfd for smaller ones is 185 and other one is 200! Have added nothing just going with the original 75% promix ap with 25% worm castings! See you next week

Likes
2
Share

@xipo86
Follow
Day 63
Last week of feeding except for Lemon cherry cookies she has another 2 weeks of food. The smell of Lemon is very loud
Pound cake had a nutrient lockout... i fed her with only water for the last 3 times.. so i will feed her a bit now..
Northern lights are starting to mature... the buds dont look so big on photo... but they are fat and tight... hehehe

Likes
8
Share


@BLAZED
Follow
Week 16 (Harvest)
30-1 First day of darkness.
Temperature: 27.9 degrees (lights on) 18.8 degrees (lights off)
Humidity: 65% (highest) 48% (lowest)
31-1 Second day of darkness.
Temperature: 24.5 degrees (lights on) 19.5 degrees (lights off)
Humidity: 65% (highest) 50% (lowest)
1-2 Drying day 1
The Saparot is ready to be harvested!
Before chopping her down, i took a lot of pictures.
I was able to remove most of the soil to see the rootball.
I hang plant as a whole to have a slow dry.
The exhaust fan is on setting 4.
2-2 Drying day 2
Temperature: 19.1 to 17.5 degrees
Humidity: 62% to 57%
I changed the exhaust fan to setting 2 because setting 4 was a bit high in my opinion.
3-2 Drying day 3
Temperature: 19.9 to 18 degrees
Humidity: 62% to 59%
I changed the exhaust fan to setting 1, as someone told me that it was enough air movement for drying.
4-2 Drying day 4
Temperature: 19.8 to 18.5 degrees
Humidity: 62% to 59%
5-2 Drying day 5
Temperature: 19.9 to 18.8 degrees
Humidity: 62% to 59%
Today i checked on the drying plants and the buds are shrinking a bit, they are getting a little bit crispy on the outside aswell,
I hope they wont dry as fast, and i aim for a 12/14 day dry.
Cant find the temps for 6-2 to 2-13.
I do have a video when she was at the half of the dry process.
14-2
Trim day, yay!
She was easy to trim, the buds are nice and dense, and there was not a too high bud/leaf ratio!
She dried for 14 days.
End results:
Dried buds: 81 Grams.
Dried Trim: 18.5 Grams.
I am really surprised how good these genetics are! If you like CBD, i really suggest trying JYM Seeds out!
The Saparot smells very fruity almost like a fruity coctail. The buds are super dense, and very bag appealing.
After some months of curing the sweet fruity smell changed to a more sour smell, but still smells amazing!
To be honest, i cured her a bit poorly, burped too less, and because the buds are so compact she holds moisture better then normal, so she tastes harsh, but thats on me.
I have a pack of JYM's Sour Fruit aswell, so i will for sure try it out again! And my hope is already very high :D
Thanks for following my diary, and feel free to check my others out aswell!
See you at the next one!
Likes
30
Share


@Grower_Of_Persia
Follow
week intel:
we reached the peak of flowering stage and need to cause a little more e.c stress from this week so e.c stress is twice a week
i reduced the amount of Nitrogen and calcium and stopped feeding silicate in other hand i raised the amount of base nutrient and booster
short story version: more K & P - less N
stresses :
a little E.C stress around 1 and 1.2 twice a week from this week
feeding:
i feed them 3 times this week with this order :
day 1 : i feed them high with base nutrients(calcium & micros (half dose) + Bloom) about 566 ppm - 1.1 e.c to cause a little stress.
day 3 : i feed them low dose of Top-Max + B-52 around 392 ppm - 0.7 e.c to let them recover a little but not fully recover still a little stress will caused.
day 5 : i feed them high dose of Feeding Booster around 630 ppm - 1.2 e.c to cause e.c stress again
guide of the week :
e.c stress if done correctly is one of the very few ways to increase quality in all aspects ( color , aroma , taste , bud structure , resin contents ) but if you over do it , listen carefully brother : it can reduce quality in every aspect so always look for signs and never reach the red line


Processing
Likes
12
Share


@LockDownGrow
Follow
So I had absolutely no ill effect on the plants at at all moving from the green buzz veg feed too the house & garden soil a&b feeds,
I did not even given them a water only inbetween the two,
I also went straight in with 50% the recommended dose stated on the house & Gardens bottles this switched happened the day before week 5 none showed any signed of defects or deficiency intact they exploded into life over night and then every day after that, I have been using the green buzz fast buds as a folar spry appied too the leaves of the early flower formation after lights out,
They seemed too love that too and I also kept the note roots going in,
I also started too apply C-RESULT at the fullbl dose stated on the bottle,
The plants live this stuff if you have not tried it do it,
I am not sponcered by c-result I was given this by my local grow store,
It brings all the nutrients straight too the roots it states,
All I know is this stuff triggers the plants too suck the pots dry in 24 hours,
So make sure you have your feed bucket fully in order before adding this stuff as a mistake here could cost you,
But get it right and in 24 hours these little autos doubled in size,
It states too used week one of flower only and smells like a sewer lol
I have today day one of week 6
Started too add house & garden
Bud XL at half strength too increase next week and also I added there top shooter at 1ml per liter of water as 7 as I plan too removed all chemicals exactly as of day 1 of week 7 leaving me week 9 clean, I am training all the shooting tips too my scrog netting the best I can due too very limited space in the grow space,
And am praying for some of the promised purple leaves on the fast buds Web site, I did not too these this time,
I has on lemon pie this round that is 2 weeks behind the rest due too non germination but I am wondering if a staggered planting each plant exactly one week behind each other would give me a little more canapé space and the treat of harvesting a plant every week,
Using the skyline 1000 only
I did not too any of these autos
2 x strawberry cheese cake
2 x lemon pie
4 x fyah
Sounds like a plan too me,
Thanks for reading


Likes
3
Share


@Unculti_responsable
Follow
Esta semana fue muy productiva hicimos poda apical y de bajos ,trasplantamos a una maceta de 3 litros, se recupero muy bien y sigue creciendo hermosa , esta semana la vamos a dejar descansar y darle cariño para que siga creciendo sana , las semanas siguientes ya la vamos a ir entrenando con cropping y amarres vamos a ir viendo!!!

Likes
9
Share


@DRO420
Follow
Just started the 2 week flush before harvest. Flowers are getting fat, hairs have changed color . Now I just have to watch the trichomes .

Likes
91
Share


@CANNASIM
Follow
GENERAL COMMENT. WEEK 5 OF FLOWER.
Ok guys, this week ran ok for one girl and less for her sister, so i will go on details individually.
RQS STRESS KILLER AUTOMATIC COMMENT.
Beautiful girl getting bigger everyday, i’m very satisfied overall, she is fast and have lots of terpenes, and started heavy resin production. Super strong, absolutely no issue at all for now. I’m imagining to start flushing this week or the next will decide this days to come, but this grow will be max 12 weeks.
Not reading the runoff on this girl as everything is just amazing. Maybe will backbuild some colas to compare.
EC at 2.2, released a lot of N now, but still did a good feeding, it might be the last, or max one more before the flush.
Will be flushing with flawless finish in the last week.
Likes
18
Share


@TheCannaProphet
Follow
~ FASTBUDS TESTER #2204 ~
Well friends, here we go on another 'canna-venture' together!
The grow room has had a complete remodel and some upgrades done to it including brand spanking new 4x8 and 4x4 tents and a Trolmaster Hydro X controller along with a new Control Panel.
This tester strain is one of six tester strains that FastBuds has graciously provided me with and I'm looking forward to seeing what this girl has to offer when she's grown to her full potential!
One drawback of 'testers' is I have little to no information on it other than its number and that it's an autoflower... 🤪 But, it's ALWAYS a blast growing them for me because not knowing a lot allows me to just concentrate on the essentials: Light, Environment, Water, Nutrients and possibly a bit of LST... not complicated, just basics like keeping a constant temperature and RH in the tent at a level that gives a good VPD, watering when almost dry and maintaining proper light levels according to their stage of growth.
____________________________________________________________________________________________________________________________________________________________________________________________________________________________________________________________________________________________________________________________________________________________________________________________________________________________________________________
~THE SETUP~
~Initially seeds were lightly scuffed, then soaked for 3 hours in 78℉ distilled water after which they were transferred to moist paper towels laid out in a Jiffy Pellet plastic starter tray with lid. Underneath the tray was placed a Vivosun Heat Mat with Controller that was set to 78℉ where they stayed until their tap roots emerged.
~Planted into Jiffy Peat Pellets that were hydrated with distilled water warmed to 78℉ with a 7.0 ph.
~Once roots emerge from the Jiffy Pellet they're transferred to their fabric pots.
~Grown 100% organic in a 4g Gronest fabric pot and a 3g fabric pot by Wraxly filled with Mother Earth 70/30 Coco/Perlite medium and initially amended with Dr. Earth 4-4-4 / Earthworm Castings / Dr. Earth Flower Girl 3-9-4 and Coast of Maine Stonington Blend Organic Plant Food 5-2-4.
~19/5 light cycle for the entire run with supplemental UVA added during flower. Lights are controlled by a Trolmaster Hydro X controller set for a 15min Sunrise/Sunset simulation.
~Top dressing every 3-4 weeks with slow release dry amendments and Earthworm castings.
~Straight water ph'd @ 6.2-6.8 when needed and bi-weekly Compost Tea's.
____________________________________________________________________________________________________________________________________________________________________________________________________________________________________________________________________________________________________________________________________________________________________________________________________________________________________________________
Weekly Updates:
12/1- I soaked both seeds for 3 hours in 78℉ distilled water after which they were transferred to moist paper towels laid out in a Jiffy Pellet plastic starter tray with lid. Underneath the tray was placed a Vivosun Heat Mat with Controller that was set to 78℉ where they stayed until their tap roots emerged roughly 24 hours later.
12/3- Today their tap roots were about 1/2 to 3/4" so at 11 am I transferred them into Jiffy Peat Pellets that were hydrated with distilled water warmed to 78℉ with a 7.0 ph using a tine off of a plastic fork as a 'mini trowel' to make a hole in the pellet and to gently cover the tap root, leaving only the seed head slightly exposed. This method accomplishes most of the initial work the seed has to do by eliminating having to orientate itself, push it's root down and head up. By 10pm the #1 seed had her cotyledon leaves opened and the #2 isn't far behind!
12/5- Well this is the full Day One for the #2 FBT #2204 and the second day for her sister! I'll keep them in the covered/heated Jiffy tray until I see their roots beginning to emerge from the peat pellet, then I'll transfer them gently into their respective fabric pots. The #1 will be going into the 4g Gronest pot from FastBuds and the #2 will reside in a 3g pot by Wraxly, which I'm trying out for the first time.
12/7- Yesterday I checked the #1 tester and she had roots starting to emerge from her pellet so I transferred her into her 4g Gronest pot. After making a hole in the medium for the peat pellet, I coated the entire surface with Xtreme Gardening Mycos then placed the pellet in the hole and planted her in. Lastly, I watered her in with about 4oz of de-chlorinated water with 3ml/g of FishShit added which was then ph'd to 6.4 @ 75℉ after which I placed a humidome over her for 24hrs to ensure that the humidity stays constant.
The #2 tester is doing great and I'm confident that she should be ready to transfer into her fabric pot in the next couple of days!
😎💚 Thank you for checking out my passion in life! Please visit as often as you wish and I hope you enjoy this journey as much as I know I will! Grow Strong! 💪😎🤙
Likes
41
Share


@BOMbolenath
Follow
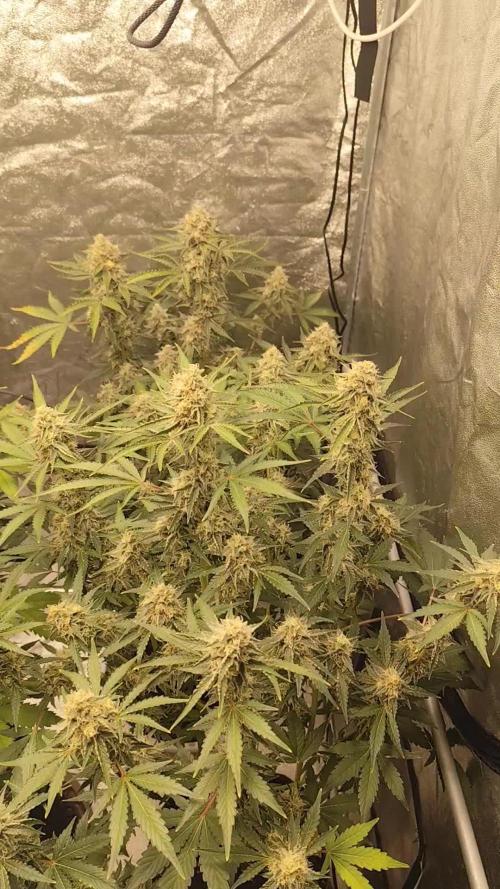
Already showing some flower buds. It's developing well. Did some hard defoliation. smells good


