


Likes
Comments
Share
@Organic710
Follow
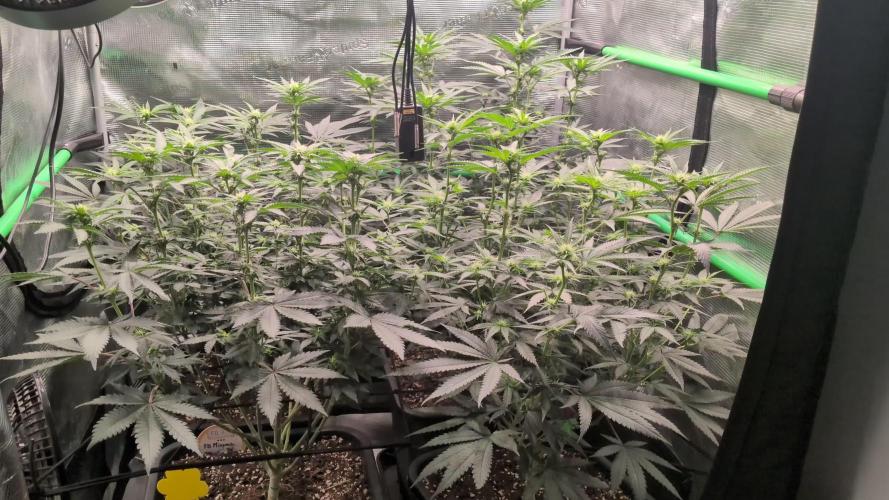
Week 2 is going well. I hoped for more stretch but they still have time. I'll do a good defole within the next week and remove anything taking from prime nuggets 🤣

Likes
4
Share

@MistaOC
Follow
31.03. D31
Settling into the system.
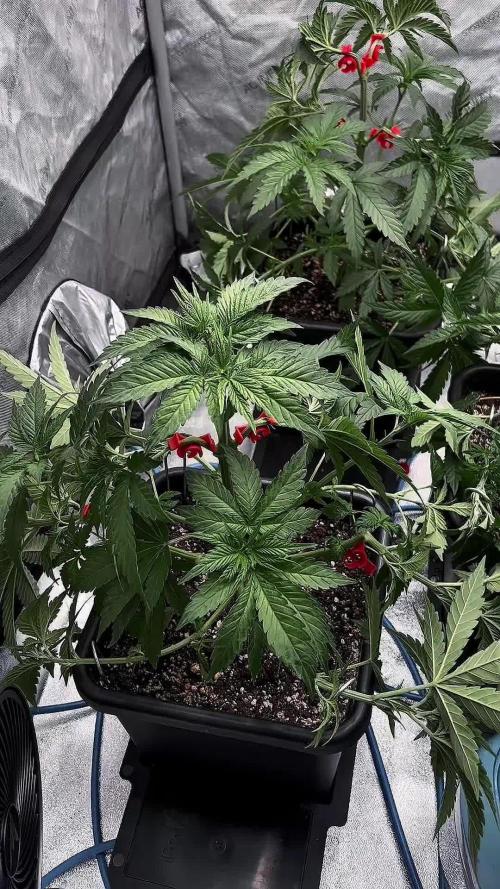
The plants are now fully established in the Autopot setup, which has been activated. Growth is starting to accelerate as the roots take advantage of the constant water supply.
All tops have been taken, and structure is beginning to form.
Some leaves showed slight signs of low humidity stress over the past days (around 30–35%), affecting transpiration and leading to a more compact growth pattern.
Humidity has now been stabilized at ~55%, and the plants are already responding positively.
A close eye is being kept on potential thrips activity — if confirmed, biological control (nematodes) will be applied early.
Overall, everything is on track.
Control the environment. The plants will follow
04.04. D35
Everything on track.
The plants are responding well and overall development is strong and consistent.
Today’s work focused on opening up the structure:
LST applied to spread the canopy and improve light penetration, along with light defoliation to clean up inner growth.
No complications so far.
Healthy growth.
Good response to training.
From here on, it’s all about shaping an even canopy and guiding the structure.
Steady progress.

Likes
12
Share


@Skunkiest_bender39
Follow
Der Harvest war erfolgreich, alle bis zum maximalen Ende stehen lassen. Alles gleichzeitig zu ernten war ein bisschen unentspannt, da der Indoorgrow gleichzeitig zum trocknen hängt! Dennoch mega glücklich!!! Jetzt beginnt das Aushärten, die meisten Behälter sind zwischen 67-73% bleiben aber noch 1-2Tage offen.☮️

Likes
Comments
Share


@andzzz
Follow
reduced height of lamp from 60 to 30cm to the plant and throttled it from 100% to 45%
added GH BioGrow with a mix of 1l coco soil to the pot.
topped between 4th and 5th internode and removed another two top leaves later that week

Likes
5
Share


@Growedbypepper
Follow
Es una planta pequeña relativamente debido al espacio que puedo manejar siempre vota. Tener plantas de tamaño más pequeño o mediano pero con muy buena producción espero pueda secarla y pasarla a tarros pronto


Likes
10
Share


@Rangaku
Follow
I fucked up , the timer had gone back to 18-6 from the 12-12 I had it on 3 weeks ago and I just caught on .. fuck !!
Not sure what will happen now if they will stretch again or potentially hermie … man I’m fkn stressed out
Critical XL is just on auto pilot flying along , feed her up and watch her go . Keeping up the defol and spreading her out , same same next week .

Processing
Likes
10
Share


@StarletBud21
Follow
Woop happy with how the grow is coming along had fun trimming the girls down shitting myself at the same time though😝 still on an 18/6 schedule as I didn’t want to over stress the plants following defoliation and scrog .
Scrog setting up wasn’t too bad hope I done it right 😅 the screen is slowly becoming very green haha .. I’ll keep looking around on the web to widen my knowledge but for now it seems all is good my plan is to switch to 12/12 starting week 6 and around this time I should look into adding bloom to feed the autos as I’m sure they’re in pre flower stage right now but if ever in doubt I shall ask
Some cool photos to look at as well
Happy growing ☠️


Likes
54
Share


@BudXs
Follow
Still growing, still healthy, flowers are here. I continue to scrog through the fence, and it looks as though the stretch is over. Some nice dark purple forming on the sugar leaves close to the flowers. Will let this one go till frost.
Thanks for looking


Likes
9
Share


@pifflestikkz
Follow
First of all, Big thank you to the Super Sativa Seed Club for allowing me to Compete in the autoflower contest and providing the seeds.
Day 1- Placed into water, leaving in warm dark place for 24-48hrs.
Day 2 - seed sank, now decided to place in paper towel, in a bag in the cupboard. Will wait 24 hrs for tap root to emerge and to 2-3cm this time.
Day 3- Tap root emerged about 1-2cm. I have transplanted to final 3gal fabric pot.
I have used, 60% canna terra pro plus, 30%perlite and 10% canna terra potting mix. The potting mix I use only as a transplant medium within its final container, just to allow around the seed a better chance for roots to develop as I found just using terrapro plus they struggle to establish because of how rich it is.
After planting I gave a light pH water only and covered with jug.
I find this helps retain humidity on the little seedlings.
Day 5 - seedling emerged from soil, a very happy, healthy seed to pop so far 😁✌️
Day 6- Showing fast growth for this little auto, she is definitely designed for a race 🤣 still only water pH balanced.

Likes
6
Share

@Riggity21
Follow
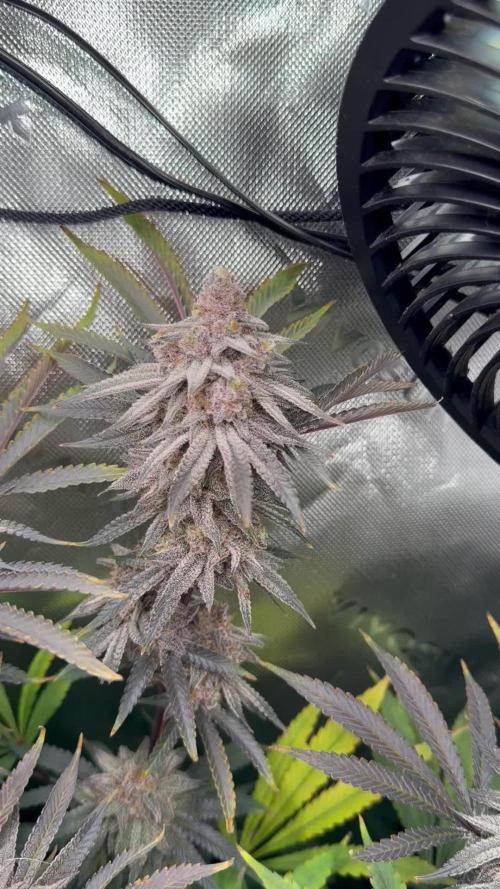
“Day 59 🌸 frost stacking heavy… colors coming in, pressure almost ready 😻
Likes
2
Share

@BLAZED
Follow
Week 3 (27-11 to 3-12)
What's good everyone?
We started this week off with removing the 2 bottom shoots.
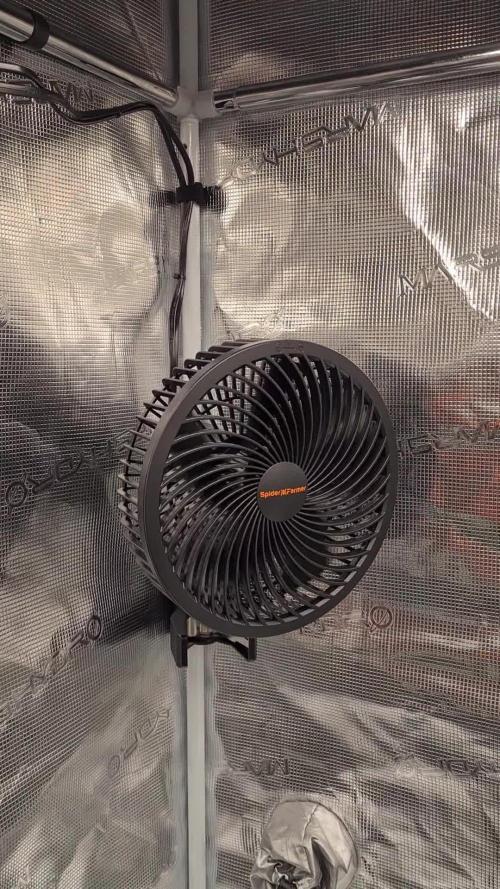
The next day Santa came early 😁 Got 2 new clip fans and the AC5 Power strip from Spider Farmer.
The power strip has 5 outlets you can control in the app, they can be turned on based on a time cycle, humidity or temps.
It comes with a sensor that monitors light, temperature, and humidity.
And a soil sensor that monitors soil moisture (VWC), temperature, and electrical conductivity (EC).
It also has a light adapter to connect 2 lights, that can be controlled in the app aswell.
The app shows the current VPD, i try to keep this around 1.0
In the middle of the week we topped her aswell.
The next day we increased the light intensity from 30% to 35%.
LUX: 13.000/13.500 to LUX: 15.000/15.500
This week's growing conditions were 17.9°C to 22.4°C with a humidity of 55.5% to 67.6% and watered 2 times with 0.5L.
See you next week!

Likes
38
Share


@Cariboo_OG
Follow
Utopia Haze is a rare heavily sativa dominant hybrid (90% sativa/10% indica) strain created through back crossing Brazilian Sativa strains. This tasty little bud took home 1st Place for Best Sativa in the 2008 High Times’ Cannabis Cup and for good reason – with its potent 18-22% average THC level and long lasting cerebral effects, Utopia Haze is one powerhouse smoke. The Utopia Haze high comes on soon after you finish your first toke, hitting you with a strong cerebral lift that infuses you with a sense of hazy relaxation.
Type: Feminised/Photoperiod
Cultivation: Indoor/Outdoor
Flowering Time (days): 70-75
Indoor Yield (g): Up to 650
Feminised Outdoor Harvest Month: October
Feminised Outdoor Harvest Month Week: 3rd-4th week
Aroma: Citrus, Woody, Pungent, Mint
Effect: Cerebral Lift, Hazy Relaxation, Sleepy
Welcome Everyone to the Final Entry of my Utopia Haze Grow !
There is so much to discuss ! I have been extremely busy as of late trying to get this Harvest together, but i am happy to have it here for you now !
I Seriously under estimated the amount of time, help from others, and my own necessary skills to pull this off.. and i still kind of screwed it up lol !
But its worth noting i have never actually done this before and trying to document it during....was extremely hard.
It is next to impossible to work an iPhone with rubber gloves on !
First I want to discuss everything step by step so before you jump straight into the comments on how the end product is so small in "quantity"
Rest assured i am happy with its"quality"...and thats all that matters to me because Life is a journey not a destination! and i have learned so much from this grow that I couldn't be any happy even if i messed some things up :)
But at the very least I hope you read through this entry in its entirety with an open mind and focus more on the process, rather than just the outcome!
I ran out of Ice & i was only able to wash three times..(normally I've heard you should go sometimes 5-6 washes)
Preparation is Key & things will be much better next round :)
Photos 1-22
These are pretty self explanatory but for those of you just tuning in now.. this is what happens to a very happy plant when you don't have the necessary tools to monitor key components of growing cannabis.. Ph, as well as EC levels play a very key role in the outcome of your grow lol that being said I was just able to save this plant by purchasing both tools but that doesn't mean the plant didn't suffer because of the prior events.. This was a Huge reason behind me choosing to turn this harvest into what i would consider
"Solventless Hash Rosin" from "Ice water extracted Bubble hash".
Pictures 23
The idea here is the process of using "fresh Frozen Cannabis" this has been discussed many a time online on such sites as instagram and here on grow diaries as well.. I personally have Never tried the process so i decided to try it out and make a judgement for myself..
Video 24
The Cannabis has now been in the freezer for 72 hours making it very well frozen.. as you can tell i struggled getting it all into the 25u Screen Wash Bag. One thing of note i would do differently is i will de-stem my next batch as i also believe this played a part in the amount of plant matter that escaped through the sieves.
Photo/Video's 25-28
The idea here is "ice water Seiving" & especially with the bags that I am using here that are only have screen material on the bottom portion of the bag it is very important to have spaces in-between the screens to allow the water to pass directly through the screens into the bottom bucket with the least amount of resistance.. because the hash is so extremely temperature dependant if it gets warm on the side of the bag.. it will stick there and not make it to the bottom to become use able product..
29
You do not need to use as much Ice as i used here lol... the idea is to keep everything very cold..i certainly achieved that but at the sacrifice of using so much that i ended up grinding product and producing "contaminants" but in the end they are just plant matter that i would be smoking when i rolled up my joint either way so.. I'm not super disappointed..
But it should be noted that what you want to achieve here is a Layering effect where you have the wash bag between two small layers of ice while the "water current" washes the Trichomes away allowing them to be separated by the screens setup below :)
Before Starting the machine you should allow some time (i.e.;10-12minutes pre soak to allow the product to become saturated) before the first cycle.
By video 32 I have just ran out of ice lol..
Video 33-34
Here I have a tip for you.. to separate the screens that you sieve through.. cut 5 gallon buckets to stretch them across nice and tight.. it'll make scooping your Bubble that much easier ! i learned this from the many "Frenchy" videos I have watched :)
Picture 35
Here in lays the problem for most people.. drying your hash without loosing vast amounts of "Terpenes" whilst also stay ever vigilant against mold !
Thanks to all those videos I've watched on youtube.. id like to think this was one of my most successful parts of this process..
Things to Note; Terpenes start to seriously evaporate at temperatures 68F or 20C
you need to stay as cold as possible whilst bringing the Relative Humidity in the space down into the 40-30% to stay away from that nasty mold !
I used my cold storage room in the basement.. with a dehumidifier running to keep the space at 45% RH & staying at a constant 15c.
All while spreading the hash as thin as possible across parchment paper, on top of the white screens with a fan moving air across both sides of the paper.
Pictures 36-38
These are some macros i took in the middle of my drying session I fell in love with the colour.
Yes i know the black spots are plant material but they will get caught when i bag the hash & squish the oil out.
Thing to Note; at this stage it is important to ensure you 'micro plane" the hash down as fine as you can whilst staying weary of the temperature... any "chunks" will hold pockets of moisture.. that lead to potential problems..ie; mold ...
Picture/Video 39-41
Successfully planed bubble hash ready to be bagged and Squished !
Picture 42
Ive decided to follow Pedro.. from Pedros Grow Room and double bag to be on the safe side so i don't have any blow outs.
So thats One 25u bag inside one 160u bag ! :)
Pictures 43
This is almost 3 grams of the bubble hash from above, already melting in the bag.. this is where i ran into trouble again lol things started getting to warm in the house and i was only able to get one of the three squish's i did on video :( things started getting sticky.
Picture 44
This is basically just a photo of the equipment I'm using; 3x5 LowTemp Cage in the frame I built myself, with a 20Ton bottle jack.
Something to note here is this is an older Lowtemp model with only a single heating zone which is which i have it closed here heating Both sides of the press :)
As well as the importance of having adequate pressure on your plates.. my rig is very overkill for the size of hash bags..lol
Video 45
Here is the lovely press video.. its didn't quite work the way i wanted either lol my directional folding wasn't quite tight enough for a big "drip" :)
&the Press was set to 65°c
Photo's 46-50 are pretty self explanatory :) I had a blow out.. but still managed to pull an 80% return from the hash once squished...& yes it tasted amazing :)
Was it worth it in the end... that could be debated.. for some..i understand..its not your thing, but for those of us that are interested in making our own concentrates.. free from Solvents...
I wouldn't make it any other way :)
If even ONE of you reading this diary finds it helpful to reference for ANYTHING.....even if its "what not to do" ill consider it a success !
Thanks again for tagging along on this garden adventure.. its been one heck of a journey !
Much Love from B.C. Canada,
Until Next time,
Cariboo
Likes
18
Share


@UnitedStrainsGermany
Follow
Diese Woche wurde die Apple Strudel defoliert und Pound Cake etwas weniger . Man merkt das die Pound Cake 2 Wochen weiter ist anhand der Blüten Bildung. Sagenhaft das Pound Cake auto nur Leitungswasser ohne PH bekommt wegen ihrem Dopesoil. Echt gamechanger !es macht mir so Spass. Heute 31.01.2025 wurden nightshoots von Pound cake auto hinzugefügt!!🤞🏼🤞🏼🧑🏼🌾🔥💚🧑🏼🌾
Likes
30
Share


@eurorack
Follow
A good week's growth, they are drinking more and I've started to feed, and I think they enjoyed the nutes as they clearly stretched over this last 24 hours.


Likes
6
Share

@GreenEldritchGardens
Follow
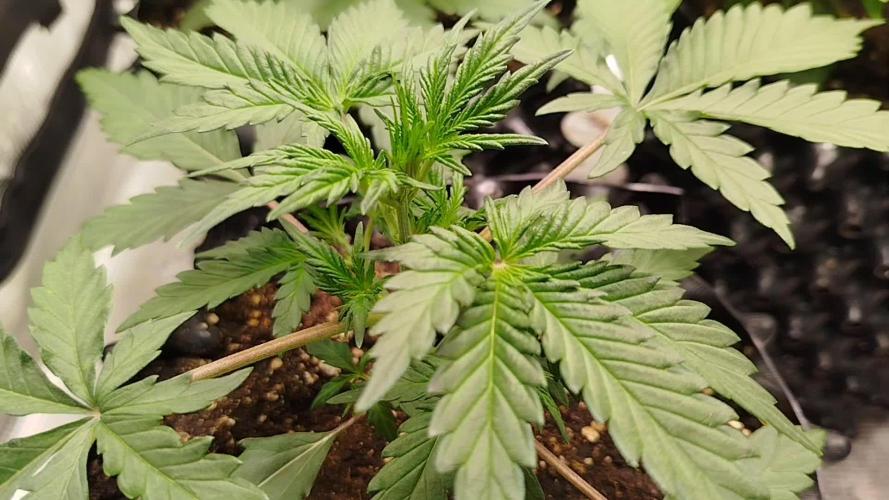
Very nice dark green with reddish stems, which seems to be a trait from gelatos to me, with amazing inter node spacing. No need for small defoliation or LST with a plant like that!


Likes
59
Share


@Jsammy09
Follow
8/12 (Day 56) - Well it’s a week and things are looking ok I suppose. Everything is staying in check and I’m feeding full strength and the plants seem to be handling it well. Drinking 4-5 gallons a day. I think the stretch is pretty much done so hopefully we can get some big juicy nugs to develop. These ladies are sooooo stick. I defoliate and 10 seconds later it’s like my hand is covered in stick glue, and the smell…sooo sweet. Like a tropical candy. Going to be doing probably one last big defoliation on these girls in the next day or two. I’m always plucking here and there to be honest. But seems to be ok. Thanks for looking!
8/13 (Day 57)- Did some very light defoliation on three of the plants, then the back right plant I ended up removing a ton of the lower growths and leaves. It needed it pretty bad I feel. She is a little behind the other plants but looking good none the less. Just going to continue to monitor and feed regulary.
8/14 (Day 58)- Started the morning with the flush and change of water and nutrients. Everything is looking good, going to leave them alone for a few days let the one plant recover and grow. All conditions are steady and constant.
8/15 (Day 59)- Just continuing to monitor and check for issues, feeding around a gallon or more every 4-5 hours. I am noticing more and more frosty goodness as the girls continue to develop!
As always tips and recommendations welcomed and appreciated.
Likes
3
Share

@deseed_uy
Follow
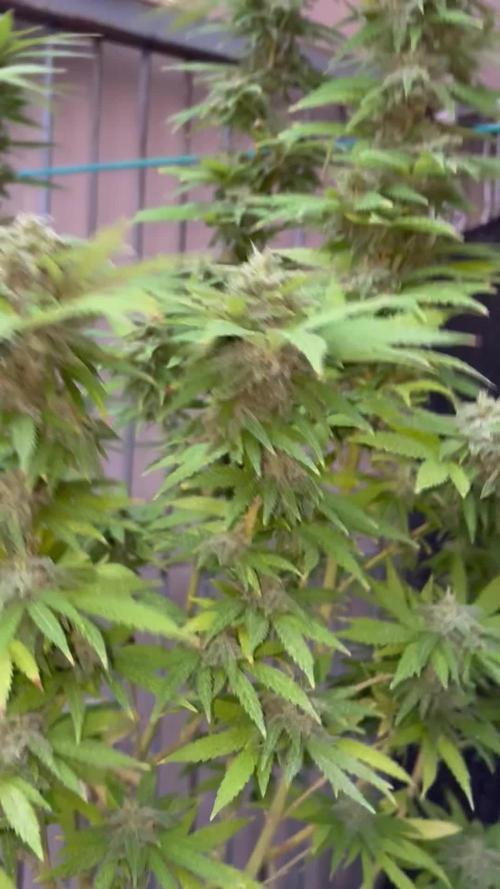
Espectacular esta gelato esta bañada en tricomas, en breves ya le toca cosecha porque no tengo techo y parece que se viene tormenta y calor no nos vamos a arriesgar con hongos