


Likes
Comments
Share


@SkunkyDog420
Follow
Hallo zusammen 🤙.
Sie wächst sehr schön und macht keine Probleme.

Processing
Likes
5
Share


@Josecortez420
Follow
Extremely surprised by the growth, I put it down to the right temperature & humidity levels as-well as the Canna Rhizotonic.

Processing
Likes
60
Share


@STAYINGONMYMAINCBATORUNTWO
Follow
They’re day 22 in flower now (3weeks) and looking beautiful and I’m getting some smells to the touch now and can say I think fft2 is amnesia/haze or lemon amz 🤷♂️🏽 (Opinion) but will have to wait for my final report to really comment! I measured them today (20/01/20) and 6 is 25” 5 is 23” 4 is 20” 3 is a moohoosive 27” 2 is shorter because of my accident but stands at 22” and 1 is 14” I tried to keep the space I have from overcrowding and seems to have worked so can’t wait for the final results as I only have to wait 3 more weeks to begin flushing fft5 but I’m thinking I may let her go over a week and then get to flush 1,3,5 and 6 at the same time. (Which is logical right?! 🤷♂️🏽 But I’ll be checking under my magnifier to see when to harvest though! But I’m hoping on a great finale!

Likes
52
Share


@Green_Claws
Follow
Welcome to the start of the Eternity Grow Cup.
So excited to have the opportunity to do this amazing contest..
So I'm growing sticky broccoli fem photoperiod from my Home Brew Living Soil
A bit of info on the strain
Sticky Broccoli exhibits characteristic indica traits.
Flavoursome buds: You’ll enjoy a smashing mix of floral, spicy, and sweet notes.
Superb yield potential: Plants are able to pump out generous yields when grown with care.
A treat for extract lovers: Buds are generously coated in resin, ideal for those who make extracts.
Our breeders love raising the bar when it comes to developing new strains, and their Sticky Broccoli is a perfect manifestation of this ethos. Marrying the productive Sticky Beast with the pungent Green Crack, we created a variety that's 90% indica dominant, loaded with flavour, and packing 23% THC. She also performs very well in the grow room. Growers love its rewarding yields and sensational bag appeal—buds are fragrant, vibrant, and shiny with resin. Tokers appreciate the seductive aromas, as well as intense effects that are felt almost instantly after taking a hit.
Growing Sticky Broccoli: Prepare Your Stash Jars
Demonstrating plenty of vigour from the get-go, Sticky Broccoli is very versatile and will thrive in an indoor or outdoor setup. Generous yields await, particularly if you have a few grows under your belt and know how to help plants reach their full potential. Sticky Broccoli grows to very manageable heights indoors, peaking at 120 cm. Outdoors, you can expect to see specimens achieve a more imposing stature of up to 220 cm. Give your plants love and care, and after 7–8 weeks of flowering indoors, you'll be looking at a harvest of up to 500 g/m². Under the sun, each Sticky Broccoli plant will yield up to a respectable 600 g in late September or early October.
Flavours and Effects That Make You Come Back for More
Dry and cure your precious flowers, and you're in for a mind-blowing experience. Sticky Broccoli is intensely fragrant and its flavours linger lazily on the tongue. Sweet, spicy, and floral notes come together harmoniously in this variety, making for an interesting and pleasant blend. For the most authentic flavour experience, vape the buds at a low temperature. When it comes to effects, Sticky Broccoli is quick to put its 23% THC content and suite of terpenes to work. A few hits give rise to a blissful, relaxing stone that lasts for hours. Though she's heavily indica dominant, Sticky Broccoli won't immediately put you to sleep after one toke.
Thanks for stopping by
Also thanks to the sponsors, Zamnesia/Plagron and of course Growdiaries for this fantastic platform to run it on...
🏺 THE SOIL CRAFT (Weekly Diary Tips)
Tip #1: The Mineral "Melt" (Chelation)...
Don't just top-dress Rock Dust dry. Mix 40g Rock Dust with 100ml LAB and 10g Jaggery in a jar for 24 hours before applying. The lactic acid "melts" the minerals, making the silica and trace elements bio-available to the roots instantly rather than waiting weeks for them to break down.
Peace and love ✌️💚.
See you next week


Likes
81
Share


@UnorthadoxDude
Follow
Transplanted to 40l container on week 4 day 1. Container has approx 30l in it.
Also added a photo of the setup for size reference.
Let me explain my thinking behind the repotting strategy. Firstly I should say that I am quite an old school kind of grower, although I've never grown cannabis before I have grown hundreds of other plants. Due to my experience with other plants, I understand the value of well planned and executed transplants, they can have an absolutely transformative effect upon root systems when done properly, as far as I know it's the main reason why they are done at all. It is fair to say I have never grown any auto-flowering plant indoors before, and I have read all about how you should not transplant autos, and all the good reasons why not. Ultimately though, as I am not called UnorthadoxDude for nothing, I believe that I can make it work with an auto, and get the benefit of improved root growth pattern, without delaying or interrupting the growth. I want to have my cake and eat it, as it were.
So the strategy is to avoid transplant shock, which admittedly I have already failed in the first unplanned transplant, but in my hopeful naivety I still believe I can make the second one work! I'm using coco, and I have had the larger pot prepared and have been watering and feeding them as well as the plant. If I am careful not to disturb the plant at all, and move the entire contents of the pot gently into the larger pot (which is exactly the same medium in broadly the same state), then I may be able to avoid shocking the plant and just let it crack on. We will find out in a few days! If it stops growing or slows at all then I failed, otherwise it worked!
A note about my use of organic nutes with coco. I have read a lot about coco and nutes and microbes and PH and TDS and what have you, and I know that the overwhelming majority of people believe that you can't or at least shouldn't use organic nutes with coco. The thing is, I like organic gardening, I prefer to cultivate a beneficial microbiota and keep it healthy. I recycle, and reuse all my compost except where a plant is diseased and this has worked well for me for a long time. I've never grown with coco before though, I always used soil. I wanted to gain the benefits of coco (better drainage, more air to roots, lighter, less inviting to pests, etc) - but I wanted to use a method of nutrition that I was already familiar with. I think I've mentioned that I am not called UnorthadoxDude for nothing, so I am using BioBizz and coco. By adding bacterial, mycorrhizal, and trichoderma inoculants and having the unplanted coco in the tent being fed and watered I hope to have cultivated a nice microbiota which will feed my plant. That's the theory. However just in case, I have a trick up my sleeve.
Now, I do not know if you are aware of this, but there is a fiery debate raging on the internet about using BioBizz organic nutes with coco for cannabis. Some people try it, most people shout it down, and I have not found much in the way of solid evidence of it being a good idea. Except one! I found a commercial grower that has used biobizz nutes, and he said that as long as you are using "Acti-Vera" you can use anything from the BioBizz organic range. Apparently the enzymes in the mix break down nutes chemically in a similar way to what the theoretically missing microbes do.
So I have ordered a bottle of that, and if my microbial cultivation attempts don't work out, I at least know I have a fallback that should work.
Those are my thoughts on it, let's see how it pans out.
Oh I should also probably point out that I am growing some companion plants, specifically alfalfa (nitrogen fixing), basil (improved flavour), and German Chamomile (increased essential oil production).
Update week 4 day 2 dropped PH to 5.8 after advice from a grow question. Look! It's carried on growing... maybe there was no transplant shock?
Update week 4 day 3: Growth continues, interveinal chlorosis lessening. Plant is pushing out node five at the moment.
Update week 4 day 4: Growth continues, interveinal chlorosis further lessening. Apologies for the poor quality photos for the last few days, I was lazy and didn't want to move everything out to photograph. Today I have done that and the pic is better. I am declaring the second transplant a complete success. I do not believe that plant was in any way shocked.
Update week 4 say 5: I think I've finally managed to overwater. Going to skip watering today.
Update week 4 day 6: Photo taken just before lights on hence wilting. Growth continues to accelerate. I believe the alfalfa has been raising the PH so I've removed it. Today I will flush through with PH lowered water and then fertigate. The colour is still too pale but the growth and overall look and feel of the plant screams to me that it's happy and about to explode.
Day 27.5 flushed with 30l of PH lowered water then fertigated with 5l.
Day 28: Height 12cm Width: 28cm Nodes: 6
Weekly growth data:
From 5cm Height to 12cm +140%
From 12cm Width to 28cm +133%
From 4 primary nodes to 6 +50%
Summary: Wow, wow. Wow. What else can I say. What a crazy week, amazing and unexpected given the problems. I am really excited to see what happens over the next seven days!!
It looks like it has quite severe chlorosis, but otherwise seems robust and is seriously stretching. Almost unbelievable growth. Pre-flowers appeared a few days ago, so I guess this was the final week of veg. Let's see how the first week of flowering stretch goes!
Update 7/2/23: My instincts about this plant on week 4 day 6 were absolutely correct, she was happy and, she was about to explode. Since my early attempts at transplanting, I practiced multiple times with Citronella (a photoperiod plant) and then I did it again with an auto (Polly) - this one went flawlessly and further demonstrates that you can transplant an auto without shocking it. Time will tell, because I can compare Polly to both Misty and Nesia both of whom were sown directly in their final pots.

Likes
72
Share


@BodyByVio
Follow
Day 65 : officially 1st day of flush . Changed the reservoir with fresh water and 1.2g/5 gallons of Yucca extract and 5ml/gallon of Cleanex from Botanicare .
Day 68- I did some defoliate. Few more days until harvest.


Likes
Comments
Share


@Herbaristus
Follow
Infelizmente a dark lemonade não está se desenvolvendo. mesmo solo, mesma luz... mas ela não vai. Já a santasemente está uma gigante, pretendo colher com 16 semanas.





Likes
21
Share


@420DeepGrow
Follow
Gracias al equipo de Kannabia Marshydro XpertNutrients y Trolmaster sin ellos esto no sería posible.
💐🍁 Amnesi K - Lemon:
La Amnesi-K Lemon es una semilla formada a partir de un trío de reyes, la Amnesia, la Lemon Skunk y la Jack Herer. Este matrimonio de tres dio lugar a una gran sativa que, con tonos dulces, terrosos y muy cítricos
🌻🚀 Consigue aqui tus semillas:
https://www.kannabia.com/es/semillas-marihuana-feminizadas/amnesi-k-lemon
💡TS-3000 + TS-1000: se usaran dos de las lámparas de la serie TS de Marshydro, para cubrir todas las necesidades de las plantas durante el ciclo de cultivo, uso las dos lámparas en floracion para llegar a toda la carpa de 1.50 x 1.50 x 1.80.
https://marshydro.eu/products/mars-hydro-ts-3000-led-grow-light/
🏠 : Marshydro 1.50 x 1.50 x 1.80, carpa 100% estanca con ventanas laterales para llegar a todos los lugares durante el grow
https://marshydro.eu/products/diy-150x150x200cm-grow-tent-kit
🌬️💨 Marshydro 6inch + filtro carbon para evitar olores indeseables.
https://marshydro.eu/products/ifresh-smart-6inch-filter-kits/
💻 Trolmaster Tent-X TCS-1 como controlador de luz, optimiza tu cultivo con la última tecnología del mercado, desde donde puedes controlar todos los parametros.
https://www.trolmaster.com/Products/Details/TCS-1
🍣🍦🌴 Xpert Nutrients es una empresa especializada en la producción y comercialización de fertilizantes líquidos y tierras, que garantizan excelentes cosechas y un crecimiento activo para sus plantas durante todas las fases de cultivo.
Consigue aqui tus Nutrientes:
https://xpertnutrients.com/es/productos/
📆 Semana 5:
Comienzan a formarse los cogollos, las hojas se llenan de resina cada dia y el olor es bastante fuerte. Parece que ha terminado de estirar. Practico una defoliación intensa para airear los futuros cogollos y dejar mas espacio en el cuarto de cultivo.
Agrupo de nuevo las macetas en su lugar optimo para asi rellenar por completo la carpa @marshydro.
Me quedé algo corto de nutrientes pero estoy muy contento con los resultados, cada vez le voy encontrando mas su punto optimo. Siempre es mejor quedarse corto que pasarse.

Likes
37
Share


@GrownwithLED
Follow
After germinating the seeds are transplanted into small pots with soil (see tutorial in VIDEO above). The soil is prepared with water mixed with a little bit of BIO NOVA Roots (0,5 ml/l), which aids the development of the seedling. Transplanting is very easy now, because they have grown a STRAIGHT tap-root while hanging during the SERIOUS' WAY of germination. This straight root allows for easy potting of the seeds. Simply make a little hole in the center of the soil with your pinky finger and carefully place the germinated seed with the white root pointing DOWNWARDS into the hole. Best is to lay it onto one side-wall of the hole with the seed shell right at the surface. Then I push the other side inwards and enclose the whole root with soil. At the end only the top of the seed-shell peeks out of the soil. IT IS VERY IMPORTANT to plant the seeds NOT TO DEEP into the soil. The seedling only needs extra strength to work itself upwards thru the soil and you run the risk of the soil drying out and the seed dying off. When you PLANT THE SEED VERY SHALLOW into the soil (=with the top of the seed-shell still peeking out) your seedling can grow out right away and you have a small plant already 24 hours after putting the seed into the soil.
The small seedling sometimes still has the seed-shell on its 'head', it normally falls off by itself, but sometimes you have to carefully help and take it off with your finger nails. Be careful to NOT clip of the seedling accidentally when you do this!
The seed-shall has an inner lining, which feeds the small seedling when it germinates. This inner lining sometimes gets tangled around the stem of the small seedling after the shell has fallen off. This little skin MUST be taken off the stem right away! Once it dries up, it gets hard and can strangulate the seedling around the stem. In order to avoid this, the skin must be taken off as soon as possible! I show it in the pics above and also made a video about taking off the inner lining of the seed.


Likes
6
Share


@DaedalusGrow
Follow
Noch ein bisschen dann schauen wir uns mal das ganze Mal in der Vergrößerung an👌✌️🤟🌱


Likes
178
Share


@NuggetPawn
Follow
Not much to report this week, strung up the yoyo’s on D60, stretch seems like it’s almost over, some of the colas at the back are a couple inches too close but I can’t really get at the back anymore (usual issue with my set up).
All bud sites are forming well, time to sit back and watch them bulk up over the next couple weeks 😎


Likes
6
Share

@AestheticGenetix
Follow
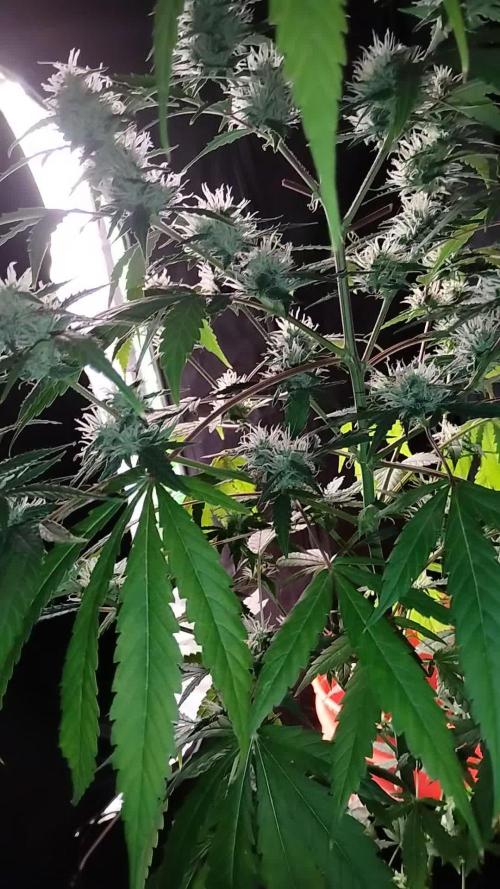
8/16/25 looks like she's gonna produce some chunky buds. Thick white trichomes everywhere on the plant. Seems like she would produce a decent yield

Likes
23
Share


@Zuppler
Follow
Grow Report by Zuppler - Week 3 Veg Phase
Ayy, what it do fam? Zuppler back on the check-in with that week 3 veg report, live from the capital. Yo, these girls ain’t playin’ no more – they really startin’ to stack up, lookin' thick in the canopy like they preppin' for somethin’ big. We still runnin’ that Advanced Nutrients like clockwork, straight through that RO water, keepin’ it pure as a Miami night breeze.
The nodes are gettin’ tight, leaves spreadin’ out nice and wide, takin’ all that light. I hit ‘em with a little scrog, just a lil’ bend here and there, makin’ sure that light hit every corner of the canopy. You already know I’m tryin’ to maximize that potential. Stems got that thick structure, and no signs of nute burn or nothin’. We’re talkin’ flawless execution, fam.
At this point, it’s just watchin’ ‘em fill out, keepin’ the environment dialed in and lettin’ ‘em do their thing. We’re settin’ the stage for a strong finish when we flip ‘em to flower.
Zuppler out, stay blessed.
Likes
19
Share


@A_Rolling_Stoner
Follow
All the plants show pistils and look hralthy except the one in the middle, probably taking it out if it doesnt get better.