


Likes
Comments
Share

@ElNass
Follow
Fruity Durban | Flowering Week 4 🌸
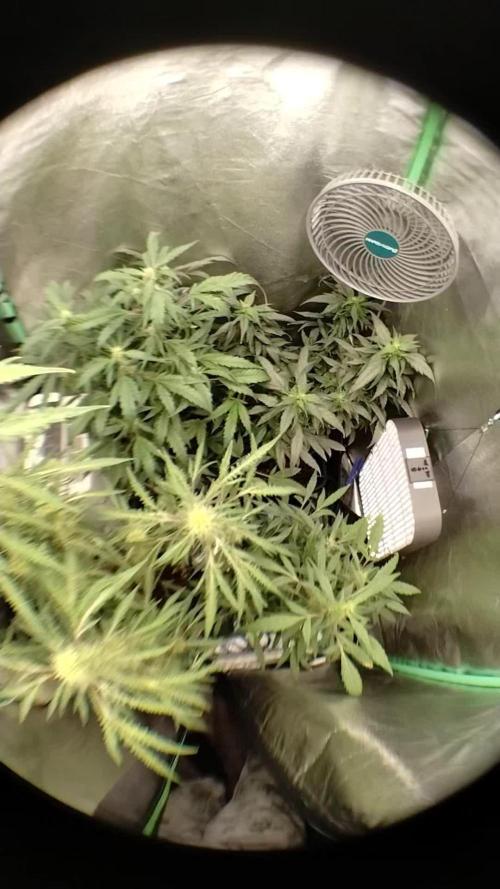
Week 4 is in the books and this lady is finally starting to show her true potential.
The stretch seems to be slowing down and the flowers are beginning to stack nicely along the branches. Bud sites are everywhere and the structure built during veg is now paying off, allowing good light penetration throughout the canopy.
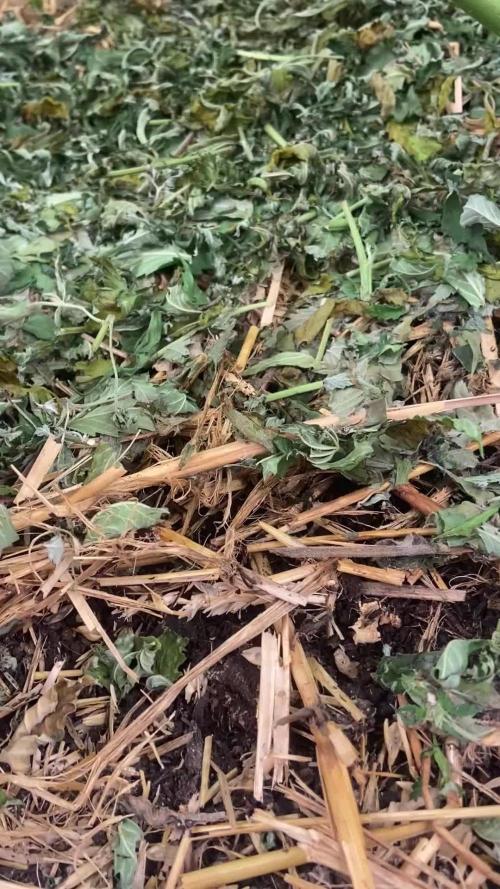
During this week I noticed the plant was looking a bit hungry. The leaves became noticeably lighter, so instead of preparing an enzyme tea, I decided to give her a fresh top dress to replenish the soil food web and provide some extra nutrition for the upcoming bulking phase.
One unexpected issue appeared during the week: my timer started malfunctioning. Every day it would randomly stop at 16:00, which obviously isn’t something you want during flowering. After troubleshooting the problem for a few days, I finally replaced it with a new unit and everything is now running smoothly again.
Despite that inconvenience, the Fruity Durban didn’t seem to miss a beat. Growth remained vigorous, flowers continued developing, and the first hints of frost are starting to appear on the sugar leaves.
The living soil bed is performing exactly as intended. The thick mulch layer is keeping moisture levels stable, the worms remain active, and the soil ecosystem seems healthy and resilient.
Looking ahead, the next couple of weeks should be the most exciting part of the cycle. Stretch is nearly over and now it’s time to focus on flower development, resin production, and hopefully the first real terpene expression.
Thanks for following along and see you next week! 💚



Likes
6
Share

@Josh91
Follow
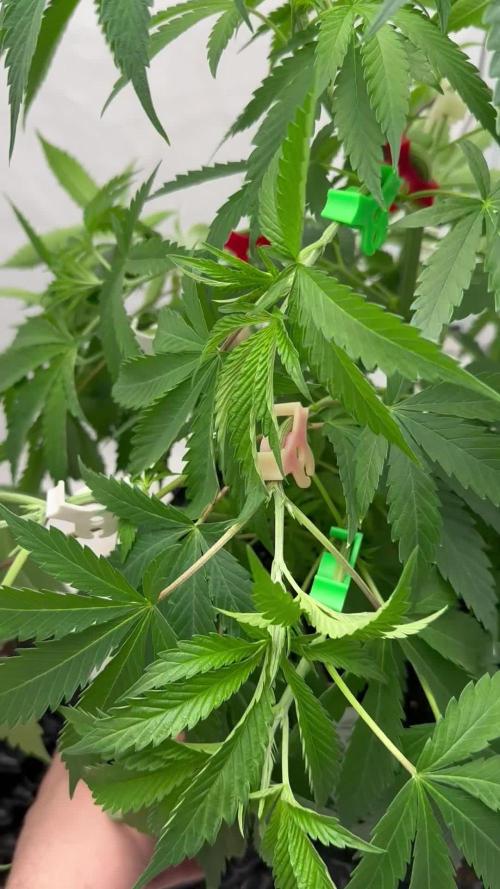
Good progress so far. I think I will go soon into flowering next week probably. Turning light on 50 % now 👀😅

Likes
19
Share


@Zonnetje
Follow
101 days after starting germination
Seems it's preparing a bit for flowering not totally sure though.
It grew a little from 150cm to 155cm.
It seems the side branches are growing the most at the moment.
Weather:
MON
8/26
33°/ 17°
actual temperatures
TUE
8/27
33°/ 19°
A thunderstorm in spots
WED
8/28
28°/ 17°
A strong thunderstorm
THU
8/29
24°/ 12°
Partly sunny; not as warm
FRI
8/30
23°/ 12°
Clouds and sun; pleasant
SAT
8/31
28°/ 14°
Clouds and sun; very warm
SUN
9/1
20°/ 10°
Clouds and sun; cooler

Likes
72
Share


@BodyByVio
Follow
The plant is drinking over 3 gallons of water every day. I’ve lowered the PPM’s to 600. Everything seems to be ok now. I will try to change the reservoir water every 5 days from now on.
She started to smell amazing! Very lemony 🍋
P.S. Lowerd the TDS to 550 PPM on day 46.
Also just realized that I stressed my plan with to much light. I moved the light at 13” and dimmed to 95% ... I will continue to dim it 2% every day...


Processing
Likes
4
Share


@Mr_nugs_lover_David
Follow
She's an organic beauty haha,I'm giving her all my love man I love this lady,she looks super healthy and strong,very green thanks to the lactobacillus liquid and all the bacteria and fulvic and humic acids of the bat guano and also the mycorrizae that contains florians living organics,she's a happy girl 😍 I suppercroped her so I could uncover a few young branches let's she how she keeps developing,hope you like my work guys peace ✌️ 💚 ❤️ 💛

Likes
12
Share


@Grow_Mary_Green
Follow
Hi meine lieben, 🤗
auch ich bin beim Eternity Cup 2026 dabei 🙌 und das auch noch mit einem neuem Grow Setup...😇
Bin das erste mal dabei und freue mich schon sehr darauf, aber bin auch das erstemal ziemlich nervös... drückt mir die grünen daumen, damit nichts schief geht.
Und ein Riesen Dankeschön an Plagron und Zamnesia
für dieses geniale Event 😍👊
_______________________________________________________________
Willkommen in der Keim-Phase meiner Sticky Broccoli 🥦!!!
Wie mein Ablauf in dieser Woche genau aussah, habe ich hier für uns Dokumentiert. Ich wünsche dir viel Spaß & Happy Growing 🌱🤗:
_______________________________________________________________
Ich starte den Keimprozess mit der Wasserglas Methode. Dafür nutze ich die Cannakan mit 50ml Wasserstoffperoxid 3% Lösung und 150ml Leitungswasse. Im Verhältnis 1:3
Nach den ersten 12 Stunden habe ich die Samen untergetaucht und nach insgesamt 36 Stunden ist er schön gekeimt und für die nächste Phase bereit. (Siehe Fotos👆)

Likes
6
Share


@JackSkellington
Follow
😫PRIMO OVERFERT SENZA AVER DATO NULLA ASSURDO...solo acqua e sono cariche scure ora sono palesemente in over...
procederò ancora per altri 10 giorni di acqua
il topping a funzionato bene da come si vede nel video ora faro riposare per 15 giorni e poi lancio in flow
14/05/2021
la jungla sembra crescere ora dovrò fare un pò di pulizia defogliare dalle foglie piu grandi e lollipoppare per bene....
sono solo un pauroso di togliere le foglie grandi (foglie primarie)
al momento zero fertilizzanti ancora troppo scure
18/05/2021
la sera del 18 a un giorno da un mese di vegetazione in growbox ho lollipoppato e potato i rami i inutili....
ho dovuto anche fare una rotazione di piante in quanto non sono uniformi nel crescere....
ho riempito il bidone da 30 litri e mi sono accorto che le baby ora bevono molto
pur troppo sono ancora in forte stress e overfert non capisco da cosa provenga in quanto non ho usato nei fertillizzzante....
vedremo oggi 21 come staranno ora posto le foto del 19 maggio giorno in cui fanno un mese e sono ancora 40cm aime qualcosa sta rallentando la crescita
e arrivato il filtro a carboni e pesessantissimo speriamo che la mia box lo regge

Processing
Likes
39
Share


@InnerCityGardens
Follow
This is the final week in Veg, just tucking the tips down to maintain an even canopy. Coming along nicely. #FloodAndDrain #RecycledSystem #PeyoteCookies #Cinderella99 #BlueGelato41 #GorillaZkittlez #BarneysFarm #HerbiesSeeds #FreeSeeds #GrowTent #MeizhiLED #Meizhi300 #CustomLED #UkGrown #TheUKGrowsToo #CannabisCommunity 🇬🇧

Likes
119
Share


@DogDoctorOfficial
Follow
I love growing and i love the GD community, we are like a big canna family and its a pleasure and an honor to be part of this all. Thank you all for being here , for growing and believing in this beautiful healing plant . Growers love to you all


Processing
Likes
20
Share


@LockDownGrow
Follow
So I had absolutely no ill effect on the plants at at all moving from the green buzz veg feed too the house & garden soil a&b feeds,
I did not even given them a water only inbetween the two,
I also went straight in with 50% the recommended dose stated on the house & Gardens bottles this switched happened the day before week 5 none showed any signed of defects or deficiency intact they exploded into life over night and then every day after that, I have been using the green buzz fast buds as a folar spry appied too the leaves of the early flower formation after lights out,
They seemed too love that too and I also kept the note roots going in,
I also started too apply C-RESULT at the fullbl dose stated on the bottle,
The plants live this stuff if you have not tried it do it,
I am not sponcered by c-result I was given this by my local grow store,
It brings all the nutrients straight too the roots it states,
All I know is this stuff triggers the plants too suck the pots dry in 24 hours,
So make sure you have your feed bucket fully in order before adding this stuff as a mistake here could cost you,
But get it right and in 24 hours these little autos doubled in size,
It states too used week one of flower only and smells like a sewer lol
I have today day one of week 6
Started too add house & garden
Bud XL at half strength too increase next week and also I added there top shooter at 1ml per liter of water as 7 as I plan too removed all chemicals exactly as of day 1 of week 7 leaving me week 9 clean, I am training all the shooting tips too my scrog netting the best I can due too very limited space in the grow space,
And am praying for some of the promised purple leaves on the fast buds Web site,
I has on lemon pie this round that is 2 weeks behind the rest due too non germination but I am wondering if a staggered planting each plant exactly one week behind each other would give me a little more canapé space and the treat of harvesting a plant every week,
Using the skyline 1000 only
I did not too any of these autos
2 x strawberry cheese cake
2 x lemon pie
4 x fyah
Sounds like a plan too me,
Thanks for reading

Likes
56
Share


@Prof_Weed
Follow
Heute startet die 12.Woche,morgen geht es für 2,5 Wochen nach Thailand..
Danach wird das Licht auf 12/12 umgestellt.
Musste extrem viele Blätter entfernen, schon das 2.Mal diese Woche..
Das 1m x 1m Zelt ist nun voll mit 1 Pflanze!!
Hat jetzt 67 cm Höhe und 1 m Breite, boom..
Licht wurde extrem hochgestellt auf 77cm Abstand, die Purple Lemonade von Fast Buds soll einfach keine Verbrennungen bekommen.
Das wird glaube ich ein Urwald wenn ich wieder zuhause bin.
Der Stamm hat 8cm Durchmesser, fette Genetik
Drückt mir die Daumen!
Peace!
Likes
20
Share


@Bertoxxulous
Follow
Hey folks, I'm finally back at it again. It took me a while for a couple of reasons:
1) I usually only grow in the winter.
2) I completely revamped my grow room after the issues I ran into with the last setup.
3) It took me a while to brainstorm exactly what I wanted to do.
I bought these seeds from D.C. Seeds and was very pleased with the experience. I'm very happy to give business to a fellow American and Veteran. I've only ever purchased seeds from the UK in the past and that experience has been "dodgy" to say the least (not the vendors fault, but the transit).
I've only ever grown photo's, but chose to go with all auto's moving forward. After calculating the intensity of my current light, with it being on a 20/4 rotation I'm very close to hitting 40 moles per day, at least directly under the light. It doesn't quite cover my 2' x 5' trellis. I'll eventually upgrade my light, but auto's should get me the best bang for my buck with this light. Also, I spent a pretty penny building this new grow room. The other obvious reason for growing auto's is their shorter seed to harvest time. I've got a small grow area, and never plan on expanding. Theoretically, auto's will allow me to produce the most out of my room.
A few things about my grow room:
1) I lined the whole closet with 1/2" plywood and put that piece of ply the air intake/outtake/power as the divider between each side of the closet
2) The grow room itself has ply on all wall surfaces so I could mount stuff to it and paint it
3) The other side of the closet is my storage/prep/power distribution/etc. area. Maybe I'll take a pic one of these days
4) My last grow my carbon filter/fan was venting into the other side of the closet. This created a headache for a number of reasons. I tapped a 4" hole through the floor and am now venting into my crawl space below the house.
5) I moved to bubbleponics to speed up my grows even more. I will be removing the drip system once the roots hit the water in the res.
6) The larger res. will hopefully make my life much easier. Late in the last grow I could only fit 3 gallons of water in the bucket and that sucker was pounding down at least a gallon a day. That required too much micro-managing for me (both ph and refills).
7) I no longer have a fixed trellis with chicken wire. The trellis is held in place by dowels that I can pull out by hand. The short sides of the trellis have hinges on the bottom, so I can fold it and pull it out easy-mode. Lastly, I'll be using string for the trellis so come harvest all I have to do is cut the string instead of dealing with trying not to destroy buds pulling them through chicken wire (it takes forever).
8) I built a light diffuser on the other side of the air intake
9) My res. is on a motorcycle lift I'm using a drill to move up and down
I have now started using Jack's as my primary nutes. They tell you the full break-down of each macro and micro nute, giving me more control and understanding. I think House & Garden is a good product, but when stuff goes bad it's more difficult to troubleshoot when you have no idea what each piece of their full lineup contains. I'm assuming it's kind of a proprietary type thing, which I understand, but knowledge is power. I am still using their Drip Clean (while the bubbler is going) and Roots Excelurator Silver, both excellent products. I'm still using Hydroguard, and will FOREVER. I'm a true believer now of why Hydroguard is necessary for any hydro application, IMO. I also purchased water soluble fulvic acid, but have decided not to use it for this grow....or at least while the bubbler is going (I'll elaborate below).
Ok...now that all that is out of the way....
I really wanted to use my well water instead of R/O to make my life easier. Soooo....I filled up my res., and put two seeds in the system immediately. Nothing happened after 1 1/2 weeks. I finally opened up the cubes and saw that the beans had popped, but it looked like maybe I drowned them, or they ddin't grow straight up or something. For round two, I didn't change the water out, and decided to soak the beans for 24 hours in R/O water first. I had the exact same problem. I'm still not really sure what happend, but I suspect it was the well water. My PPMs were sitting at ~500 with the well water, which was probably too spicy for the beans just starting. Also, my well water is questionable (even though it's at 165ppm), but I won't elaborate further....it's a long ass story and I've spent an absurd amount of money on it. Lastly, I did put the Fulvic acid in, and it was very messy. I really want to avoid having to clean my res. Once the roots get big it will be a real pain in the ass to clean. I'm leaning towards not using the Fulvic acid this grow just to see how things go.
I had 10 beans total of the Sour Apple and have already ruined 4. So here's hoping third times the charm.
So, I went back to my tried and true method:
0) R/O water for everything. Ditching the well water idea.
1) Soak beans in R/O water for 24 hours
2) Paper towel method between plates on a heating mat
3) Once the roots pop, I place them pointed down in the hole of the rockwool cube
4) Hand water once a day by dipping the cube in the pre-mix of 1/4 strength Jack's and everything else I've listed above. This put my PPMs at 300...a way more reasonable value for starts.
It's been exactly 7 days since I followed the above. It's probably hard to see but the cotyledons came up, and multiple roots have come out the bottom of the cubes....way faster than I've ever seen since I started growing. That means even though I'm doing my old process this already shaved at least a week off of when I'd normally put it in my bucket in the past.

Likes
2
Share

@hassehujasse
Follow
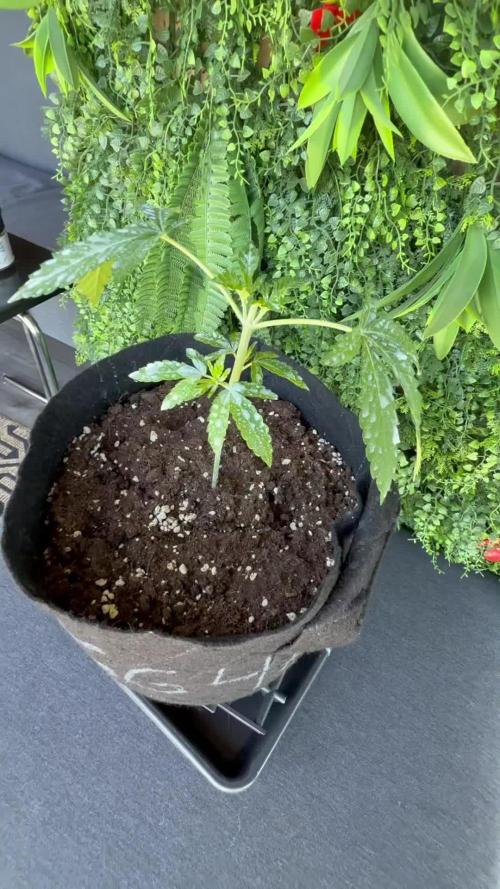
Growing outdoor- does it looks like indoor for most?
Third week began with feeding with cal mag and lets see how tall she goes
Processing
Likes
11
Share


@Ledbelieve
Follow
Another nice week of beautiful weather. Have been on total cruise control this week on a little water here and there. Did some topping and super cropping. Not much at all to report the fast buds are in full flower and doing well. Happy growing folks🤙🏻


Likes
Comments
Share


@Jbcultivates
Follow
Sticky and loud is all I can say! Hopefully whatever damage and burn I have doesn’t hurt my buds too much l! But otherwise they’re stacking up well! Couple more weeks to go!


