


Likes
Comments
Share

@PapaTerps
Follow
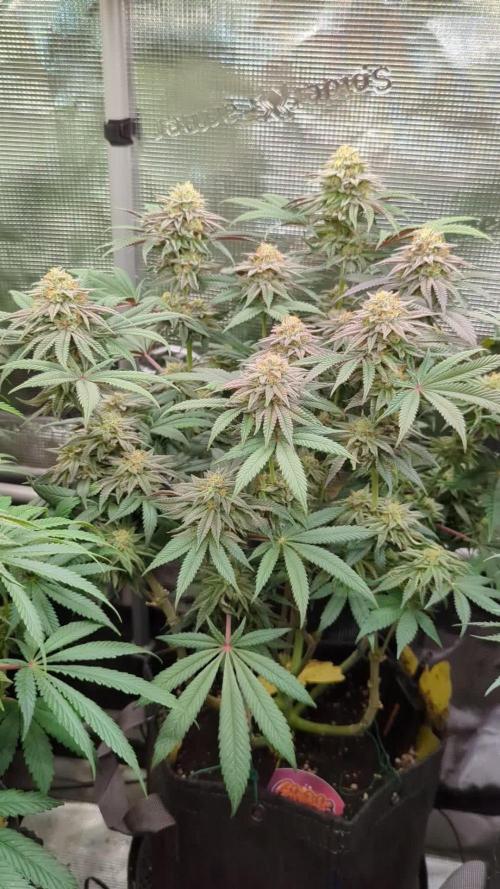
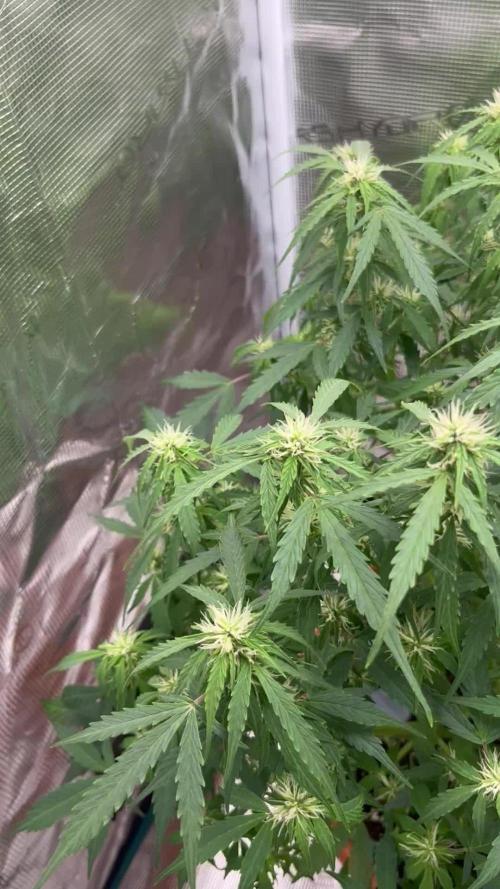
Grand Prixx - Wizard Trees
Day 106
🚿 Watered her every second day with 2L of RO tap water, with defined nutrients, mixed individually in order and then pH'd to 6.5
✂️ I removed a couple of sugar leaves from around the flower at the top canopy to improve light penetration, but other than that it's been smooth sailing 🤞🏻
🌸 She's at week 7 of bloom and she is looking absolutely spectacular with her big colourful flower with an aroma that is something out of this world!! Candy meets gas with a creamy finish 🙌🏻 We're maybe two or three weeks away from harvest and I cannot wait to get her down, dried and cured, because I can already tell that she's going to be very special!! 😍 For now she is still bulking, so she will get another week of regular feeding before I start to bring down her nutrients👍🏻

Likes
14
Share


@Bigbombbudz
Follow
Hey here we go again.. in the pics I explained how to clean the lava rocks but to make it easier I will put them here.
LAVA ROCK CLEANING.
1... fill sink with hot water and about a half bottle of hydrogen peroxide .
2 ...dump rocks into sink
3....shake out rocks from roots...I suggest you do this in another sink then add lava rock to other sink..it keeps from adding to many roots to water sink.
4....skim off all roots from top of water...now while the lava rocks sit in the water..clean the buckets.
5...take fitting from buckets and add to a cup filled with hydrogen peroxide let sit
6...clean buckets with hot water and hydrogen peroxide....dry bucket
7...take fittings out of cup clean off and clean inside fittings..then wash off and put back into buckets.
8... use a colander and add lava rock to it and run hot water over the lava rock as you move them around...then add warm..then cold water this will help make the roots brittle and easy to remove...shake off all water.
9...put rocks back into buckets
10 ...set room back up with all new lines...
Enjoy your grow, good luck, have fun
Smoke a fatty..see you next week
Help out a fellow grower.

Likes
7
Share


@Kushizlez
Follow
Day 84-91 (Day 3F-10F)
(Day 6F) I’m giving a final foliar spray of Velokelp tonight before I start to see buds develop.
Forgot to water today as I didn’t have any RO and bbb#1 was slumped and droopy. I decided to just water everything with tap water. I’ve been doing quite a bit of research on using city tap water with organics and it shouldn’t disturb the microbiology very much at all. And it will actually help smokability and ash color because of the extra CaCO3 in it. The higher 7.8 pH will also lockout heavy metals like aluminum as well.
(Day 7F) Plants look just fine and the pH fluctuation didn’t make any difference at all. I’m going to discontinue the use of RO water for the rest of my run and all subsequent runs.
(Day 8F) I’m defoliating small amounts of leaves and sucker branches but this thing is out of control. Every 12-18 hours I see noticeable growth. I want to do a heavy strip around day 21. Starting to see budlets and pistil clumps form! These plants don’t seem like huge stretchers but I’m still anticipating quite a jump in the next few weeks.
(Day 10F) Everything is looking just perfect. I’m surprised how fast these 10 gallon pots are drying out now. They go from soaked to light and airy within a few days. Hopefully I can make it the next 2 weeks without seeing any N or Mg deficiencies.
Likes
14
Share


@PlantGod
Follow
Excited to see the pistols keep coming and coming
I have such tight spacing that the buds will probably start connecting by the end of the week on the Royal Gorilla
Day 19- Tomorrow I will tie some branches down to open up the plants more. The LSD plants needs it the most!


Likes
9
Share


@Ryno1990
Follow
The strain came out amazing very purple an very dense didn't have a very strong smell but deff a nice one got 3 ounces after all said an done


Likes
15
Share


@PinkParrot
Follow
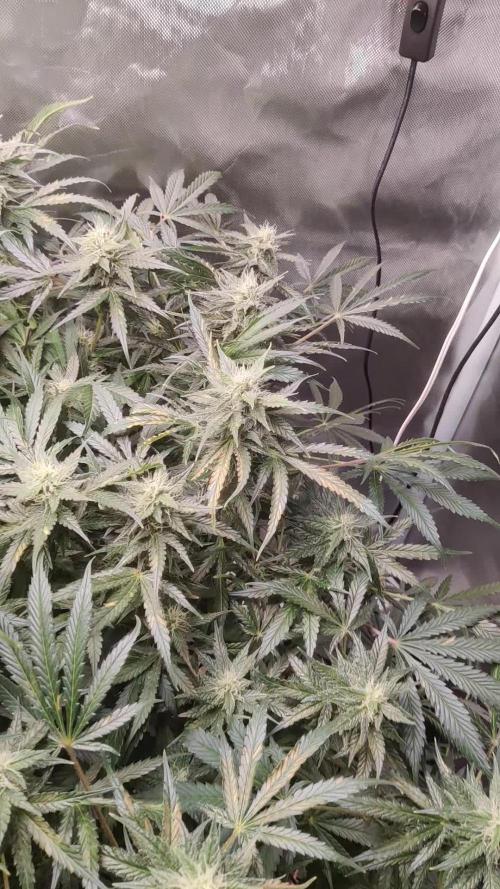
The free sample of Platinium nutrient look to be expired, crystallization of potassium.
It can be the source of K deficiency.
Dumping the "Grow" bottle, starting the bloom nutrients a little bit early to maintain the EC.
Unfortunately the "Bloom" bottle is crystallized to, now I use a mix of Platinium & Plagron to preserve the nutrition needed by the plants.
Why don't buy new bottles ? Because the next run will be full hydroponic, currently I'm just finishing the soil/coco nutrients.


Likes
Comments
Share


Likes
31
Share


@mikearon
Follow
The problem encountered during the growth :
- Water (at the beginning) too little pumps that didn’t propagate the water equally so I went for a bigger industrial pump that pumps equally in the whole tent.
- RC : Some problems with the humidity at the beginning but got sorted out when I got the de humidifier
- Babies almost died mid-grow, came in with the ultimate save of the day, one day later and it was over.
- Had a problem with the container that held the water as water was empty when I’d get back at the end of the week (during flowering mode) so I went with a 120L container which works just fine.
- Didn’t flush properly because I was in a rush


Likes
2
Share


@GhostBlvckPhant0m
Follow
“The Wock” 7 Weeks🤙🏾 Ladies are crushing its! I’ve for sure found 2 phenols I want to keep going based on structure and growth. The first was actually going to be a throw away. I didn’t like how lanky she was in her solocup stage. I instead topped her to slow down lateral grown and threw her in a 2 gallon bag to do her thing. She is now in a 7 gallon bag and has the best structure of them alll IMO. My 2nd pheno is a Tri-leaf mutation and it throws tops like no other! The perfect mother plant and is why I chose her as pheno #2. The 2 plants that were topped at the 5th node are bushing out more and more, just like it like it. There are 2 natural growing plants are doing great as well. They have nice bushing with one main cola. All plants will be defoliated 5 days before flip. The nose coming from these ladies is LOUD and I mean LOUD! Sour Candy and Burt Fuel! I’ll be taking cuts and flipping these ladies soon! Happy Growing PSGX Family! 🚀PSGX to the 🌕 #Phant0m
Likes
3
Share


@stonedkoala
Follow
- 3rd round of veg nutes; doubling last weeks and upping cal mag from 2.5 to 3
- Bucket has 3.75 gal of water in it
- First defoliation. Learned I should have cut more bottom leaves since I ended up doing that down the line anyway
- Trying to keep humidity between 55-65%
Likes
8
Share


@DogDoctorOfficial
Follow
💙 Project Blue Tent – Week 11
🥒 Pickle Lemon Haze F1 – Pheno A
🌸 When The Best Intervention Is No Intervention
Hello everyone, and welcome back to another chapter of Project Blue Tent! 💙🌱
And honestly...
I think this might be one of my favourite stages of the whole project.
Not because we're doing more.
Quite the opposite.
Because we're finally at the point where we don't need to.
😂
Pickle Lemon Haze F1 Pheno A is looking absolutely beautiful.
The structure is established.
The canopy is open.
The second SCROG is doing its job.
The irrigation is running beautifully.
The drainage system is working flawlessly.
The nutrition is consistent.
The under-canopy lighting is now part of the equation.
And the flowers?
Oh my God...
The frost levels across this tent are something else. 🌸❄️
So this week isn't about another big intervention.
It's about observation.
It's about appreciating what we've built.
And most importantly...
it's about letting this beautiful girl do what she knows how to do.
Grow.
Flower.
And shine.
💙🥒🌸
🌸 WEEK 11 – THE GIRL IS JUST DOING HER THING
Pickle Lemon Haze F1 Pheno A is still sitting at approximately 145 cm.
The stretch has settled.
The structure is established.
And now we're watching the flowers develop across the entire plant.
One of the things that continues to impress me is just how even everything looks.
The flowering sites are developing remarkably consistently.
The canopy is extremely even.
The bud formation is happening at very similar stages throughout the plant.
And the frost...
well...
the frost is absolutely beautiful.
😂❄️🌸
This is one of those moments where you walk into the tent and think:
"Okay...
I really like what I'm seeing."
And honestly, that's exactly where I want to be at this stage.
The major work has already been done.
Now the plant is showing us the result.
💡 THE UNDER-CANOPY LIGHTING GETS SERIOUS
Last week we introduced the first LumiFlora under-canopy light into the project.
This week, we decided to bring a second one into the game.
And looking at the size and density of this room...
it just made sense.
The main LEDs continue providing the primary light from above.
But these plants have developed a very substantial structure.
There are flowering sites throughout the middle and lower portions of the canopy that naturally receive less direct light from the fixtures above.
So instead of continuing to remove more foliage just to chase light penetration...
we're bringing supplemental light to the lower canopy.
And I really like what we've created.
But we didn't simply place the two bars side by side.
That would have been too easy.
😂
Instead, we decided to play a little.
The LumiFlora bars are approximately 1.20 metres long, with the central section around one metre, and because of that length we were able to arrange them in an X-cross configuration underneath the canopy.
From corner to corner.
And honestly?
It looks fantastic.
😂💡🌱
It's functional...
but it also looks really cool.
The two bars cross through the lower portion of the tent, creating a much more interesting distribution of supplemental light underneath the plants.
The idea remains simple:
Don't replace the overhead lighting.
Complement it.
Give the lower canopy another source of usable light.
And then...
watch what happens.
🌿 TWO LIGHTS. ONE EXPERIMENT.
This is one of the parts of Project Blue Tent that I really enjoy.
We're not simply installing equipment because it looks impressive.
We're introducing something because we have a reason for it.
The plants have become tall.
The canopy has become substantial.
The lower portions naturally receive less direct light.
So instead of fighting the structure...
we adapt the environment around it.
That's cultivation.
Observe.
Adapt.
Measure.
And then observe again.
And now that the second under-canopy light is installed...
I'm extremely curious to see what the lower flowering sites do with that additional light over the coming weeks.
That's the experiment.
And Pheno A gets to be part of it.
🕸️ THE SCROG IS DOING EXACTLY WHAT WE WANT
The SCROG structure is also looking fantastic.
The first net helped us build and distribute the canopy.
The second SCROG is now providing additional support as the flowering branches continue developing.
And at this point?
We're not really touching it.
That's intentional.
The structure has been created.
The branches are where we want them.
The flowering sites are developing.
And the support is there.
Now we let the plant use it.
This is another one of those moments where doing less can actually be doing more.
We don't need to constantly move branches.
We don't need to keep pulling everything around.
We don't need to keep opening something we've already opened.
The architecture is there.
Let her work.
✂️ DEFOlIATION – NOW WE WATCH THE RECOVERY
The major defoliation from the previous weeks has also become part of the story now.
When we performed that work, the difference was dramatic.
The plants went from extremely dense to much more open.
And now we're seeing the result.
The flowering sites are much easier to see.
Air movement through the plant is much better.
The branches are easier to follow.
And the plant has had time to recover and redirect her energy toward continued flowering.
This is exactly why I don't believe in constantly interfering with a plant.
There is a time to train.
There is a time to defoliate.
There is a time to support.
And there is a time to stop touching things.
We're at that last one now.
😂
The plant doesn't need us to keep proving that we have scissors.
She needs stability.
So stability is what she gets.
🌬️ AIRFLOW – TWO LEVELS, ONE HEALTHY CANOPY
The airflow setup is also continuing exactly as planned.
We have movement through the upper portion of the canopy and additional circulation underneath.
With the under-canopy lighting now running through the lower structure, maintaining good air movement down there becomes even more important.
The goal isn't to create a hurricane.
😂
It's about avoiding stagnant pockets and keeping air moving through the entire plant structure.
The canopy has opened beautifully.
The flowers are developing.
The lower lighting is now active.
And the air is moving.
That's exactly what I want to see.
💧 IRRIGATION & DRAINAGE – ZERO COMPLAINTS
And I have to give some love to the irrigation and drainage system this week.
Because honestly...
there is nothing to complain about.
😂
The irrigation is working beautifully.
The plants are drinking well.
The water distribution is consistent.
The drainage system is working absolutely spotless.
No drama.
No complaints.
Just doing its job.
And that's exactly what good equipment should do.
It should quietly do its job while we concentrate on the plants.
The girls are drinking.
They're developing.
And the system is keeping up with them perfectly.
I'm extremely happy with how this part of the project is performing.
⚗️ NUTRITION – SAME RECIPE, DIFFERENT EC
Interestingly, despite not changing the reservoir recipe, this week's EC came out slightly lower.
And honestly...
I don't have a definitive explanation for it.
😂
The recipe itself hasn't changed.
We're still running:
PLAGRON Hydro A — 2.2 ml/L
PLAGRON Hydro B — 2.2 ml/L
PLAGRON Hydro Roots — 1 ml/L
PLAGRON Power Buds — 1 ml/L
pH Plus — 0.03 ml/L
pH Min — 0.03 ml/L
pH adjusted as required
Yet the measured EC came out around 2.24 mS/cm instead of the approximately 2.49 mS/cm we saw previously.
My guess?
Possibly the rainwater source was simply a little softer this time.
But I'm not going to pretend I know exactly why.
Sometimes the numbers simply move.
😂
And that's another reason I like documenting everything.
We don't have to invent an explanation every time something changes.
We record it.
We observe the plants.
And we continue watching.
The important thing is that Pheno A looks happy.
She's drinking.
She's flowering.
She's building.
And visually...
she's absolutely loving life.
❄️ THE FROST LEVELS ARE INSANE
Now let's talk about the obvious.
The frost.
😂❄️
Seriously...
look at these flowers.
The amount of visible trichome development across the tent is absolutely beautiful.
And Pheno A is certainly not being shy about showing hers.
The flowers are developing with a heavy, frosty appearance, and the sugar leaves are absolutely covered.
This is one of those stages where photography becomes dangerous.
Because every time I take a close-up...
I end up staring at it for five minutes.
😂📸
The flower formation is progressing beautifully.
The structure is becoming more defined.
And the frost levels are getting better and better.
We're still not at the finish line.
But we're getting into that really exciting part of the journey where the flowers begin looking less like early flowering sites...
and more like proper flowers.
And I absolutely love it.
🌿 SAME TENT. SAME CONDITIONS. REMARKABLY SIMILAR PLANTS.
This is probably one of the most fascinating parts of the entire experiment.
All four girls are sharing the same tent.
Same reservoir.
Same irrigation.
Same lighting.
Same environmental conditions.
Same nutrition.
Same cultivation approach.
And when you look at them...
it's honestly incredible how similar they are becoming.
Very similar canopy development.
Very similar flowering stages.
Very similar bud formation.
Very similar frost levels.
And yet...
each plant still has her own personality.
That is what makes this project so interesting.
We're not comparing four completely isolated grows.
We're watching different cultivars experience essentially the same environment.
And the response is fascinating.
A LITTLE CULTIVAR LESSON
And since we're documenting this properly, I want to take a little moment to explain something I often mention in these diaries.
I like using the word:
"Cultivar."
You'll sometimes hear people call every plant a "genetic" or simply say "the genetics."
And I understand what they mean.
But technically, they're not quite the same thing.
Genetics refers to the genetic makeup and inherited characteristics of an organism.
A cultivar is a plant variety that has been selected and maintained through cultivation for particular characteristics.
So when we're talking about these F1 plants in this project, I prefer referring to them as cultivars rather than simply calling them "genetics."
And honestly...
if you already knew that?
Fantastic.
If you didn't?
Now you do.
😂🌱
There's never too much information when we're talking about cultivation.
I love learning.
And if something we mention here teaches somebody something new, even better.
That's another reason I enjoy documenting these projects.
We're growing plants...
but we're also learning from them.
🌸 PHENO A – HER OWN PERSONALITY
And although the four plants are looking remarkably similar right now, Pickle Lemon Haze Pheno A still has her own story.
She's been through the stretch.
She's been through the major canopy management.
She's been through the defoliation.
She's been through the SCROG.
She's been through the structural adjustments.
And now she's simply showing us what all of that work has created.
Her canopy is beautifully organized.
The flowering sites are developing evenly.
The frost is impressive.
And the plant is drinking beautifully.
She's not asking for another intervention.
She's asking for time.
So that's what we're giving her.
🌸 THE TOPPING AND CANOPY STRUCTURE
Looking closely at Pheno A, one of the things I really enjoy is seeing how well the topping and training have opened the plant.
The structure is no longer fighting itself.
The branches have space.
The flowering sites are exposed.
And the canopy has developed into a very even structure.
The work we did earlier in the project is now becoming visible in the flowering architecture.
This is the part of cultivation that makes all the earlier work worthwhile.
You train a plant weeks ago...
and then later you stand there looking at the flowering structure and realize:
"That's why we did it."
😂🌱
And Pheno A is showing that beautifully.
💙 NO UNNECESSARY INTERVENTION
So what are we actually doing this week?
Honestly?
Not much.
😂
And that's a good thing.
We're monitoring.
We're checking the environment.
We're watching irrigation.
We're checking drainage.
We're watching the flowers.
We're watching the frost.
We're observing the response to the under-canopy lighting.
We're maintaining the reservoir.
And we're letting the plant do the rest.
There's a temptation in cultivation to always do something.
Change something.
Adjust something.
Move something.
Cut something.
Add something.
But sometimes the best decision is:
Don't.
If everything is working...
don't fix it.
If the plant is healthy...
let her be healthy.
If the flowers are developing...
let them develop.
If the irrigation is working...
let it work.
If the drainage is spotless...
leave it alone.
😂💙
Observation is also part of cultivation.
🌡️ CURRENT BLUE TENT CONDITIONS
🌸 Flowering: Week 11
📏 Height: approximately 145 cm
💡 Light schedule: 12/12
☀️ Day temperature: 28°C
🌙 Night temperature: 27°C
💧 Relative humidity: 63%
⚗️ pH: 6.01
⚡ EC: approximately 2.24 mS/cm
🌡️ Solution temperature: 24.9°C
🌱 Substrate temperature: 24°C
💨 CO₂: approximately 666 ppm
? Pot size: 8 L
💦 Watering: approximately 1.6 L per plant / 24h
💡 Under-canopy lighting: LumiFlora 150W full-spectrum fixtures
💡 Under-canopy arrangement: X-cross configuration
🔬 SAME VARIABLES. DIFFERENT EXPRESSIONS.
One of the things I'm really looking forward to over the coming weeks is seeing whether these similarities continue.
Because right now...
it's impressive.
The plants are developing at remarkably similar stages.
The canopy is extremely even.
The flowers are forming beautifully.
The frost levels are high.
And yet, if you look closely enough, each cultivar still gives you little details that make her recognizable.
That's exactly what we wanted from Project Blue Tent.
A shared environment.
A consistent approach.
And individual plants telling their own stories.
🔭 LOOKING AHEAD – LET'S SEE WHAT THE FUTURE HAS FOR US
At this point, I'm genuinely excited to see where these girls take us.
We've built the structure.
We've managed the canopy.
We've supported the branches.
We've established the airflow.
We've got the irrigation and drainage working beautifully.
The under-canopy lighting is now in place.
The nutrition is consistent.
And the flowers are developing incredibly well.
Now...
we wait.
How much more will these flowers swell?
How much further will the frost develop?
How will the lower canopy respond to the supplemental lighting?
How much weight will those supported branches eventually carry?
And most importantly...
what will Pickle Lemon Haze Pheno A ultimately become?
Those are questions I don't need to answer today.
The plants will answer them for us.
And that's the beautiful part.
💙 FINAL THOUGHTS – LET THE PLANT SPEAK
Week 11.
And what a beautiful week.
There were no dramatic interventions.
No major restructuring.
No big defoliation.
No desperate attempts to control the plants.
Instead...
we watched.
We introduced a second LumiFlora under-canopy light.
We arranged the two long bars in an X-cross configuration underneath the canopy.
We kept the irrigation running.
We kept the drainage running.
We maintained the same reservoir recipe.
We observed the slightly lower EC.
We kept the airflow moving.
And we admired the flowers.
😂💙
And those flowers deserve some attention.
The bud formation is beautiful.
The canopy is incredibly even.
The frost levels are absolutely insane.
And Pheno A is looking healthier and happier by the week.
What's perhaps most impressive is how similar these plants are becoming under the same conditions.
Different cultivars...
same room...
same environment...
same reservoir...
and remarkably similar results.
That makes me even more curious about what we're going to see later in flowering.
Because if this level of consistency continues...
we could be looking at something very special.
But we're not going to rush it.
We're not going to force it.
We're not going to keep changing things simply because we can.
We've reached the stage where patience becomes the most important tool in the room.
So for now...
we watch.
We listen.
We measure.
We maintain.
And we let Pickle Lemon Haze F1 Pheno A do what she does best.
Grow.
Flower.
Frost up.
And shine.
💙🥒❄️🌸
The future is looking very, very interesting.
Let's see what this beautiful girl has waiting for us.
🙏 A HUGE THANK YOU
A huge thank you once again to Zamnesia for making Project Blue Tent possible and for giving us the opportunity to explore these beautiful Pickle Lemon Haze F1 cultivars individually.
Thank you to PLAGRON for the Hydro nutrient line supporting these vigorous girls throughout their flowering journey.
A massive thank you to Zamnesia for the Phytonaut LED lighting, curved scissors and clip fans that continue playing such important roles inside this project.
Thank you to Mars Hydro for the irrigation and drainage system that continues working flawlessly and keeping these girls consistently supplied.
And a special thank you to LumiFlora for the under-canopy lighting we're now using as another part of this experiment.
We're very curious to see how these supplemental lights influence the lower portions of the canopy as flowering progresses.
And of course...
thank you to GrowDiaries for giving us this platform to document everything.
The successes.
The mistakes.
The experiments.
The surprises.
And all the little lessons along the way.
And finally...
thank you to everyone following Project Blue Tent. 💙
Four plants.
One tent.
Shared conditions.
Shared reservoir.
Shared environment.
And somehow...
four individual personalities developing right in front of us.
Pickle Lemon Haze F1 Pheno A is looking absolutely beautiful.
The frost is there.
The flowers are forming.
The canopy is even.
The irrigation is working.
The drainage is spotless.
The lighting is in place.
And now...
we let her shine.
Until next week...
Keep growing.
Keep learning.
Keep observing.
And most importantly...
keep shining, beautiful girl. 💙🥒🌸❄️
Growers Love, happy growing, and take care everyone! 🌱💙
Likes
10
Share


@Willies_Organic_Gro
Follow
Just doing some leaf tucking and very light defoliation when needed.

Likes
81
Share


@UnorthadoxDude
Follow
Transplanted to 40l container on week 4 day 1. Container has approx 30l in it.
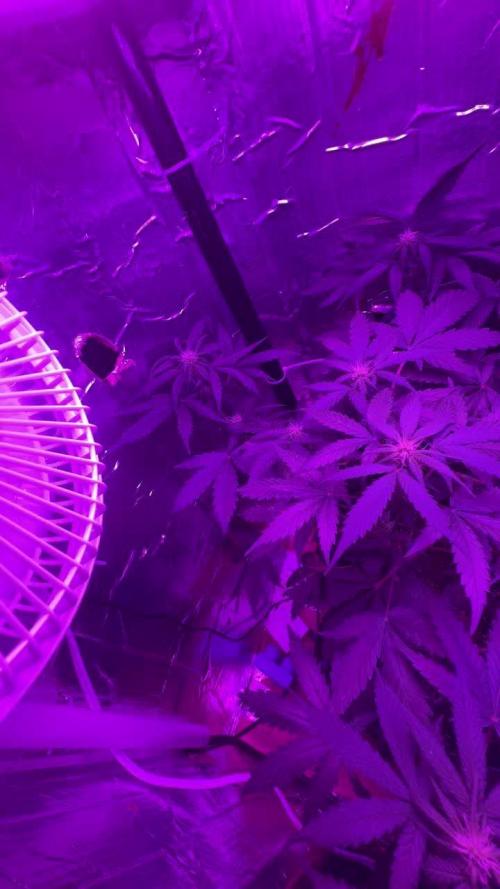
Also added a photo of the setup for size reference.
Let me explain my thinking behind the repotting strategy. Firstly I should say that I am quite an old school kind of grower, although I've never grown cannabis before I have grown hundreds of other plants. Due to my experience with other plants, I understand the value of well planned and executed transplants, they can have an absolutely transformative effect upon root systems when done properly, as far as I know it's the main reason why they are done at all. It is fair to say I have never grown any auto-flowering plant indoors before, and I have read all about how you should not transplant autos, and all the good reasons why not. Ultimately though, as I am not called UnorthadoxDude for nothing, I believe that I can make it work with an auto, and get the benefit of improved root growth pattern, without delaying or interrupting the growth. I want to have my cake and eat it, as it were.
So the strategy is to avoid transplant shock, which admittedly I have already failed in the first unplanned transplant, but in my hopeful naivety I still believe I can make the second one work! I'm using coco, and I have had the larger pot prepared and have been watering and feeding them as well as the plant. If I am careful not to disturb the plant at all, and move the entire contents of the pot gently into the larger pot (which is exactly the same medium in broadly the same state), then I may be able to avoid shocking the plant and just let it crack on. We will find out in a few days! If it stops growing or slows at all then I failed, otherwise it worked!
A note about my use of organic nutes with coco. I have read a lot about coco and nutes and microbes and PH and TDS and what have you, and I know that the overwhelming majority of people believe that you can't or at least shouldn't use organic nutes with coco. The thing is, I like organic gardening, I prefer to cultivate a beneficial microbiota and keep it healthy. I recycle, and reuse all my compost except where a plant is diseased and this has worked well for me for a long time. I've never grown with coco before though, I always used soil. I wanted to gain the benefits of coco (better drainage, more air to roots, lighter, less inviting to pests, etc) - but I wanted to use a method of nutrition that I was already familiar with. I think I've mentioned that I am not called UnorthadoxDude for nothing, so I am using BioBizz and coco. By adding bacterial, mycorrhizal, and trichoderma inoculants and having the unplanted coco in the tent being fed and watered I hope to have cultivated a nice microbiota which will feed my plant. That's the theory. However just in case, I have a trick up my sleeve.
Now, I do not know if you are aware of this, but there is a fiery debate raging on the internet about using BioBizz organic nutes with coco for cannabis. Some people try it, most people shout it down, and I have not found much in the way of solid evidence of it being a good idea. Except one! I found a commercial grower that has used biobizz nutes, and he said that as long as you are using "Acti-Vera" you can use anything from the BioBizz organic range. Apparently the enzymes in the mix break down nutes chemically in a similar way to what the theoretically missing microbes do.
So I have ordered a bottle of that, and if my microbial cultivation attempts don't work out, I at least know I have a fallback that should work.
Those are my thoughts on it, let's see how it pans out.
Oh I should also probably point out that I am growing some companion plants, specifically alfalfa (nitrogen fixing), basil (improved flavour), and German Chamomile (increased essential oil production).
Update week 4 day 2 dropped PH to 5.8 after advice from a grow question. Look! It's carried on growing... maybe there was no transplant shock?
Update week 4 day 3: Growth continues, interveinal chlorosis lessening. Plant is pushing out node five at the moment.
Update week 4 day 4: Growth continues, interveinal chlorosis further lessening. Apologies for the poor quality photos for the last few days, I was lazy and didn't want to move everything out to photograph. Today I have done that and the pic is better. I am declaring the second transplant a complete success. I do not believe that plant was in any way shocked.
Update week 4 say 5: I think I've finally managed to overwater. Going to skip watering today.
Update week 4 day 6: Photo taken just before lights on hence wilting. Growth continues to accelerate. I believe the alfalfa has been raising the PH so I've removed it. Today I will flush through with PH lowered water and then fertigate. The colour is still too pale but the growth and overall look and feel of the plant screams to me that it's happy and about to explode.
Day 27.5 flushed with 30l of PH lowered water then fertigated with 5l.
Day 28: Height 12cm Width: 28cm Nodes: 6
Weekly growth data:
From 5cm Height to 12cm +140%
From 12cm Width to 28cm +133%
From 4 primary nodes to 6 +50%
Summary: Wow, wow. Wow. What else can I say. What a crazy week, amazing and unexpected given the problems. I am really excited to see what happens over the next seven days!!
It looks like it has quite severe chlorosis, but otherwise seems robust and is seriously stretching. Almost unbelievable growth. Pre-flowers appeared a few days ago, so I guess this was the final week of veg. Let's see how the first week of flowering stretch goes!
Update 7/2/23: My instincts about this plant on week 4 day 6 were absolutely correct, she was happy and, she was about to explode. Since my early attempts at transplanting, I practiced multiple times with Citronella (a photoperiod plant) and then I did it again with an auto (Polly) - this one went flawlessly and further demonstrates that you can transplant an auto without shocking it. Time will tell, because I can compare Polly to both Misty and Nesia both of whom were sown directly in their final pots.


Likes
23
Share

@MyLittleGarden
Follow
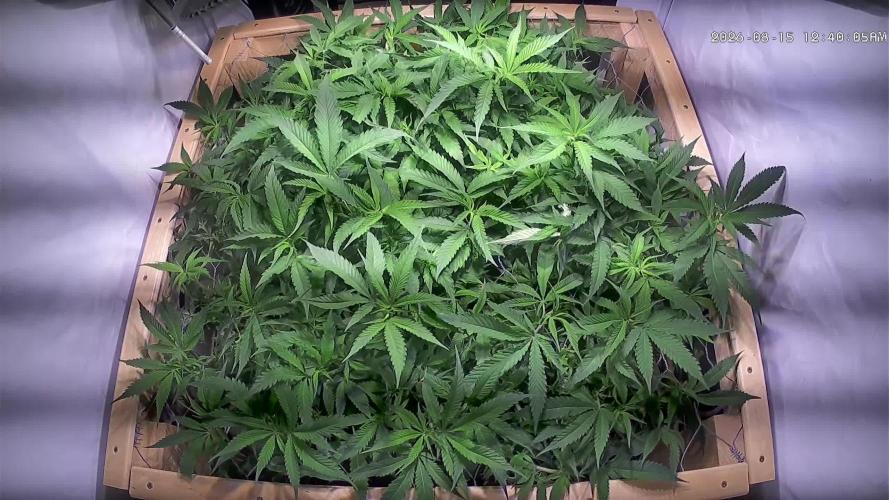
Blütewoche 1 - 14.08. – 21.08.2026
Diese Woche habe ich die Blüte eingeleitet und den Lichtzyklus auf 12/12 umgestellt. Gegossen wurde einmal mit ungefähr 9 Litern, ansonsten habe ich ihr erstmal Zeit gegeben, sich an den neuen Rhythmus zu gewöhnen.
Nach einer Woche zeigen sich jetzt die ersten weißen Blütenhärchen an den Triebansätzen. Außerdem habe noch einmal großzügig entlaubt und ein paar Triebe weiter unter dem SCROG-Netz verteilt.
Sie macht insgesamt einen sehr gesunden und vitalen Eindruck. Durch die Entlaubung wirkt sie zwar im Moment etwas kahl, dafür bekommen die zukünftigen Buds jetzt deutlich mehr Licht. Das Netz ist zwar noch nicht ganz so voll, wie ich es mir ursprünglich vorgestellt hatte, aber vielleicht schließt der Stretch die letzten Lücken noch.
Jetzt heißt es erstmal beobachten und sie machen lassen. Mit ihrer überwiegend sativadominierten Genetik dürfte das noch ein langer Grow werden.

Likes
6
Share

@Splint
Follow
Back with another update!
Trichomes have been forming on/around the buds this week and the smell has been growing in intensity. I’m really happy with this so far.
According to the given advice, I removed most of the leaves in the first 30% and only the most necessary ones that were resting directly on buds and shadowing them, additionally. Since then, the plant has taken on a darker greenish tone, that’s almost shimmering blue. :)
The stretch seems to be over as she only gained 4cm in length this week but that’s quite alright since I can’t pull the grow-light further up anymore anyways.
Even though I know that too much change in lighting can be stressful for her, I’ve changed the plan a bit to better fit my own schedule and to reduce the humidity. Let’s see how she likes it.

Likes
17
Share


@OGBestBudz
Follow
Banana purple punch and Strawberry gorilla autoflowers now soaking in water
Likes
3
Share


@Downunder90
Follow
🌿 Yo, Have You Seen This Grow? Gorilla Cookies FF by Fast Buds Is Looking Fire! 🔥
Man… Gorilla Cookies FF is lookin' like it’s about to go off. You ever smoke Gorilla Cookies? It’s like a sweet punch in the face — in the best way possible.
So check this — it's not your regular autoflower. This one’s Fast Flowering — a photoperiod strain that flips quick. 7 weeks of bloom and boom, you’re lookin' at frosty nugs with that dank cookie-diesel funk. Straight Fast Buds magic.
Genetics That Slap
This strain's a mashup of two absolute legends:
Gorilla Glue × Girl Scout Cookies
That means crazy resin production, chunky buds, and that earthy-sweet-gassy flavor combo that hits different. Like, we’re talking up to 29% THC. Yeah. That strong.
🌱 The Grow So Far (Weeks 1–3)
Organic soil in a 15L pot
300W HID light on 25% power
Perfect temps (23–25 °C) & humidity (~65%)
Bio feeding with Green House nutrients
Already transplanted — and she’s stretchin’ up nice
I checked the pics — she’s still a baby, but those leaves are lush. That deep green, wide fan leaf vibe… no signs of stress, no stretch too early. You can feel the potential just lookin’ at her.
📸 First Glance = Big Promise
Honestly, this one’s got that look. You know the look — when a plant’s just ready to explode into a frosty jungle. I’m tellin’ ya, if she keeps goin’ like this, we’re lookin’ at a full-on terp storm in a few weeks.

