


Likes
Comments
Share

@Psychopat_od_vedle
Follow
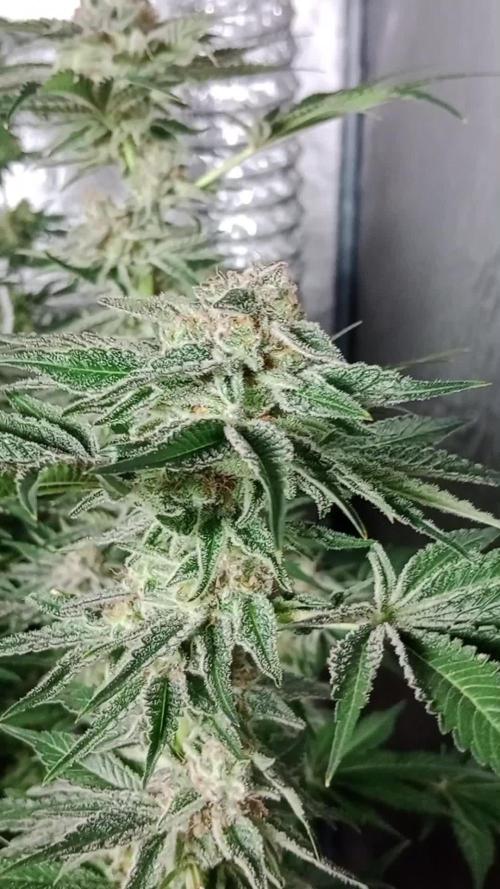
Zdravím bando,Den 63 chodím kolem jak mlsný kocour 🤤jen už čekám na správný čas.ješte to vidím na pár dnů.Jantar pořád nevidím 🧐


Likes
4
Share


@JoaKingAlfaro
Follow
Its 1/13/2023 10:30 pm and The White Og has been doing good this past week. She surfaced 4 days after being planted directly into soil and has stretched out quite a bit these past days. She stands a little above 3 inches at the moment. I have her under a 40 watt led light on the 18-6 schedule for her first two weeks as a seedling. Later on I will be moving her to her permanent home inside a grow box I created under the 400 w mh.

Likes
8
Share

@Weedprinzessin
Follow
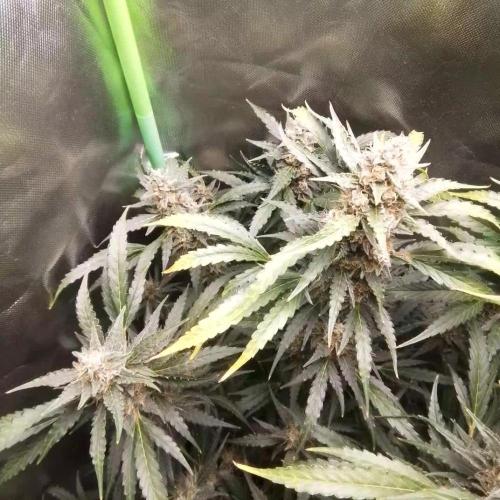
Ich bin mehr als zufrieden, freue mich schon auf die Ernte 😋
Sone frostigen Buds hatte ich bisher noch nie, vielen lieben Dank an Fast Buds 👌
Likes
4
Share

@DogDoctorOfficial
Follow
🥒 Project Blue Tent – Week 7
Pickle Lemon Haze F1 – Pheno B (Folder 14B)
Hello everyone, and welcome back to another chapter of Project Blue Tent! 💙🌱
If you're discovering this diary for the first time, welcome aboard!
Project Blue Tent follows four individual plants, each documented in its own dedicated diary from seed all the way to harvest. Every plant shares the exact same environment, lighting, irrigation, nutrition and training strategy, allowing us to observe how each phenotype develops its own personality while keeping the growing conditions as consistent as possible.
Today we're checking in with Pickle Lemon Haze F1 – Plant B.
And this week marks another important milestone.
The canopy is full.
The structure is ready.
And we're preparing these beautiful ladies for their transition into flowering.
────────────────────────
🌱 Week Seven – The Canopy Is Complete
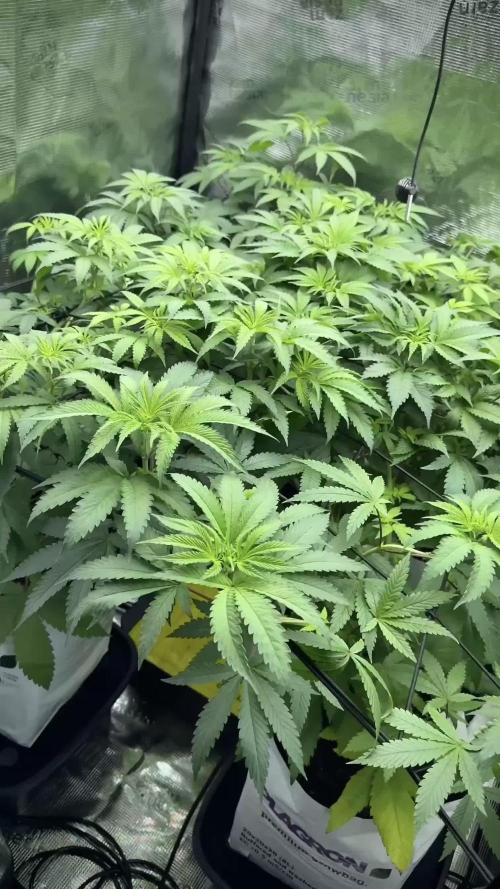
Looking across the Blue Tent this week, it's becoming increasingly difficult to distinguish the four plants from above.
The SCROG has done exactly what we wanted it to do.
Instead of four individual plants growing vertically, we now have one remarkably even canopy spreading across the available space.
Plant B has been particularly well suited to this process.
From the beginning, she's shown a natural tendency to grow outward rather than constantly trying to reach upward. Her compact structure, strong side branching and excellent response to training have allowed her to fill her section of the screen beautifully.
After lowering and tightening the SCROG net, all four plants are now sitting at approximately 60 cm.
At this point we're no longer trying to gain height.
We're managing the surface we've created.
Every branch has found its place.
Every available section of the screen has been used.
And now it's time to prepare that canopy for what comes next.
────────────────────────
🕸️ SCROG – From Training to Flowering
For anyone joining this diary without having followed the previous weeks, SCROG stands for Screen of Green.
The purpose of the screen is to guide branches horizontally instead of allowing a few dominant tops to grow significantly taller than everything around them.
As branches reach the screen, they're gently guided into neighbouring openings.
This spreads the future flowering sites across a wider area and creates a much more uniform canopy.
It's not about forcing the plant into an unnatural shape.
It's about taking the growth the plant is already producing and distributing it more efficiently across the available space.
And after several weeks of doing exactly that, the mission has essentially been completed.
The screen is full.
The canopy is even.
Now we move into the cleanup phase.
────────────────────────
✂️ Defoliation – Preparing the Plants for Flower
This week's biggest job is defoliation.
And because this technique is often misunderstood, it's worth explaining what we're actually doing.
Defoliation isn't about stripping a plant of every leaf.
Leaves are essential to the plant. They capture light and support photosynthesis, so removing healthy foliage without a reason isn't the objective.
Instead, we're performing a deliberate canopy cleanup.
After weeks of vigorous vegetative growth and SCROG training, the interior of the plants has become extremely dense.
Leaves overlap.
Branches cross through one another.
Some areas are heavily shaded.
And airflow through the middle of the canopy becomes increasingly important.
So we're selectively removing foliage from areas where the density has become excessive.
We're opening the interior.
Creating more space between branches.
Improving airflow.
Improving visibility.
And creating a cleaner structure for the flowering cycle.
The objective isn't:
"Remove as many leaves as possible."
It's:
"Remove what is no longer helping the structure we're trying to build."
That's a very important difference.
────────────────────────
🌬️ Why Defoliate Before the Flip?
Timing is everything.
A significant defoliation is a form of stress. Even when performed correctly, the plant needs some time to adjust to the loss of foliage and return to its normal growth rhythm.
That's why we're doing this before flowering, rather than waiting until we're already well into the bloom cycle.
Right now the plants are still running an 18/6 vegetative schedule.
They have time to recover.
We can perform the cleanup.
We can watch how they respond.
We can allow fresh growth to resume.
And then we can flip the lights once the plants have settled again.
I don't want to ask the plants to deal with a major cleanup at the same time they're dealing with the physiological transition into flowering.
Instead, we're following a simple sequence:
Build the canopy.
Fill the screen.
Clean the canopy.
Recover.
Flip.
The goal is to enter flowering with healthy plants and a well-organised structure.
────────────────────────
🌿 Pickle Lemon Haze F1 – Plant B
Plant B continues showing exactly the personality we've come to know throughout this project.
She's balanced.
She's compact.
She's incredibly branchy.
And she seems perfectly happy growing sideways.
While Plant A has always shown a little more vertical ambition, Plant B has naturally concentrated her energy into lateral growth and secondary branching.
That has made her particularly enjoyable to work with under the SCROG.
Her stems have continued thickening nicely, her internodal spacing remains compact, and her foliage has developed that rich green colour we've been looking for.
The recovery from topping is now nothing more than a memory.
She's completely moved on from that stage and has spent the last few weeks concentrating on building the framework that will eventually support her flowering sites.
Looking at her now, it's easy to see how much the plant has changed.
She's no longer simply a young vegetative plant.
She's become a properly structured little bush with a full section of the canopy to her name.
And now we're preparing her for the next chapter.
────────────────────────
🥥 Feeding – Staying With What Works
The nutrient recipe remains unchanged this week.
Current feeding:
• Plagron Hydro A — 1.9 ml/L
• Plagron Hydro B — 1.9 ml/L
• Plagron Hydro Roots — 1 ml/L
Current pH:
5.8
Current EC:
1.92 mS/cm
The plants continue showing excellent colour and vigorous growth, so I don't see a reason to change the recipe simply because we're approaching flowering.
Sometimes consistency is the better decision.
We'll see how the plants respond after defoliation, and depending on their recovery and appetite, we may increase the nutrient strength next week.
For now, however, they're telling me exactly what I want to hear.
Healthy colour.
Strong growth.
Good leaf posture.
And no obvious signs that they're asking for anything different.
So...
Nothing changes.
────────────────────────
💧 Drip Irrigation – Keeping the Roots Consistent
The Mars Hydro automatic drip irrigation and drainage system continues to perform beautifully.
Each plant is receiving approximately 1.2 litres of nutrient solution per 24 hours, delivered through the automated drip system.
The slow and consistent irrigation keeps the coco supplied with fresh nutrient solution while the automatic drainage system removes the resulting runoff.
This is particularly valuable in a project like this.
Four plants are sharing the same environment.
The same nutrient recipe.
The same lighting.
The same irrigation schedule.
That consistency helps us keep another major variable under control.
And as the plants become larger, the benefit becomes even more obvious.
The irrigation system simply keeps doing its job every day.
No rushing around with watering cans.
No trying to remember which plant received what.
Just consistent irrigation while I concentrate on observing the plants themselves.
It's one of those systems that doesn't necessarily demand attention when it's working properly.
And honestly...
That's exactly how I like it.
────────────────────────
🌡️ Blue Tent Environment
The environmental conditions have remained very stable as we approach the transition into flowering.
This week's average conditions were:
• 🌡️ Day Temperature: 28°C
• 🌙 Night Temperature: 25°C
• 💧 Relative Humidity: 65%
• 🥥 Substrate Temperature: 24°C
• 💦 Nutrient Solution Temperature: 18°C
• ⚗️ pH: 5.8
• ⚡ EC: 1.92 mS/cm
• 💨 CO₂: approximately 450 ppm
• 💡 Light Schedule: 18/6
• 💧 Irrigation: approximately 1.2 L/plant/24h
• ? Pot Size: 8 L
• 📏 Height: approximately 60 cm
At this stage, stability is more important than constantly changing numbers.
The plants are healthy.
The canopy is full.
The roots are receiving consistent irrigation.
And the current nutrient strength is producing beautiful growth.
So we're staying the course.
────────────────────────
🌿 A Full Canopy Means a Different Kind of Work
One of the interesting things about reaching this stage is that the work changes completely.
Earlier in the grow, the challenge was getting the plants to occupy the space.
Now the challenge is managing everything they've produced.
When the canopy was still developing, every new branch was welcome.
Now we have to start asking different questions.
Does this leaf contribute enough?
Is this area too crowded?
Can air move through here?
Is this branch getting enough light?
Is this part of the plant going to benefit from remaining in the canopy?
That's what good canopy management is really about.
It's not simply growing as much as possible.
It's deciding what growth deserves to remain part of the final structure.
And Plant B has given us plenty to work with.
────────────────────────
Recovery Before Flowering
Once the defoliation is complete, the most important thing we can do is give the plants time.
No unnecessary additional stress.
No rushing.
No immediately piling another major intervention on top of the first one.
The plants need time to rebalance after the cleanup.
We'll watch the new growth.
We'll monitor their posture and overall appearance.
We'll keep the environment stable.
And we'll let them recover.
Once they're settled again, we'll be ready to move forward.
This is why the timing of the defoliation matters so much.
We're not trying to make the plants do everything at once.
We're preparing them step by step.
────────────────────────
👀 Looking Ahead
The next few days should be particularly interesting.
The SCROG has been filled.
The canopy has been cleaned.
The plants now have room to breathe.
And we're approaching the moment we've been working toward for weeks.
The nutrient recipe will remain unchanged for now, although we may increase it once we see how the plants respond after defoliation.
The irrigation continues at approximately 1.2 litres per plant per day.
The environment remains stable.
And most importantly...
We're not rushing the flip.
We'll allow the plants to recover properly first.
Then, when they're ready...
We flower.
🌸
────────────────────────
💙 Thank You
A huge thank you to Zamnesia for making Project Blue Tent possible and for providing these outstanding Pickle Lemon Haze F1 genetics.
A heartfelt thank you to Plagron for the Premium Growbags and Hydro nutrient line that continue supporting this beautiful growth.
A special thank you to Phytonaut for the LED lighting helping us maintain such a consistent and beautifully structured canopy throughout the Blue Tent.
And a massive thank you to Mars Hydro for the automatic drip irrigation and drainage system that continues bringing consistency and simplicity to the daily routine.
Thank you to GrowDiaries for providing growers around the world with a place to document their journeys, exchange knowledge and inspire one another.
And finally...
Thank you to everyone following Project Blue Tent.
Whether you've been here since germination, recently discovered this diary, leave comments every week or simply enjoy watching these four sisters develop...
Your support genuinely means the world to me. 💙
Plant B has spent the last several weeks quietly building herself into one beautiful, compact and incredibly well-structured phenotype.
Now the canopy is ready.
The cleanup is complete.
All that's left is to give her time to recover...
And then see what she can do.
Until next time...
Growers Love, happy growing, and take care everyone! 🌱💙


Likes
8
Share


@Dr_Dougs_Dank
Follow
Smelling like sweet hard candy! Gonna give her a few more days to leech out a little bit and then cut it down. I can’t wait to try it out! It’s probably the nicest looking plant I’ve ever grown.


Processing
Likes
1
Share


@Mr_Maes
Follow
Very happy to be growing this one. It’s one of the newer strains from Buddha Seeds.

Likes
7
Share

@GERGrowDesigns
Follow
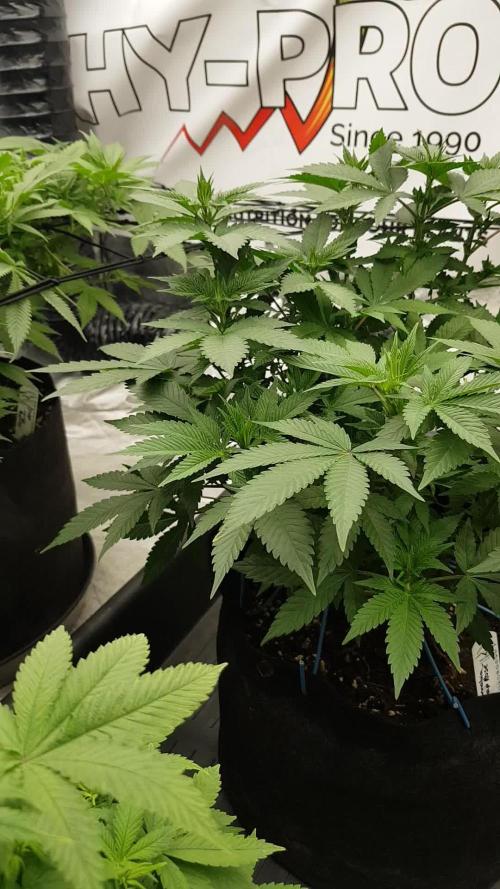
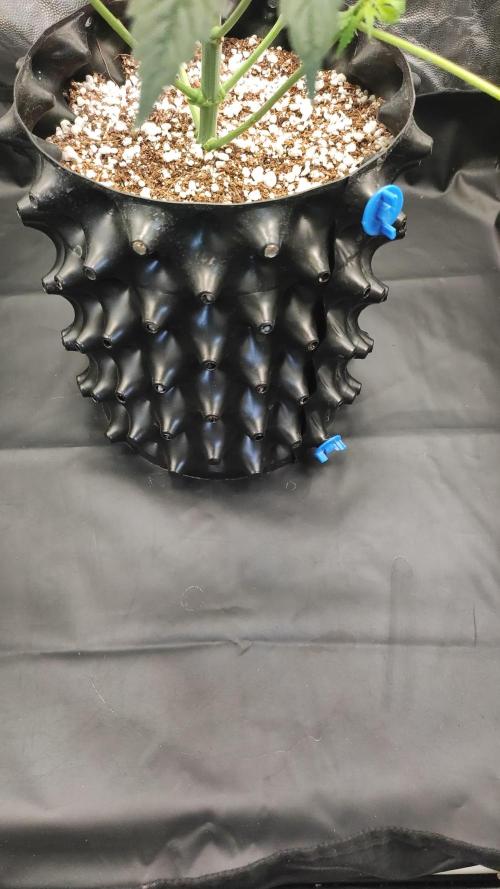
Welcome to Flower Week 1 of Kannabia Zoap Rosé
I'm excited to share my grow journey with you from my
Kannabia Seeds Project . It's going to be an incredible ride, full of learning, growing, and connecting with fellow growers from all around the world!
Check out Kannabia Seeds with my link [https://www.kannabia.com/de?ref=61966] and grab the germination device or the strains I used . Trust me – it’s worth it for sure !
Get another 20% Discount at all products using the code [GGD] at the checkout.
For this Project , I’ve chosen the Feminized Photo Strain Zoap Rosé :
Here’s what I’m working with:
• 🌱 Tent: 120x60x80
• 🧑🌾 Breeder Company: Kannabia Seeds
• 💧 Humidity Range: 60
• ⏳ Flowering Time: 56-63 Days
• Strain Info: 22%THC
• 🌡️ Temperature: 26
• 🍵 Pot Size: 20
• Nutrient Brand: Hy-Pro
• ⚡ Lights : 600W x 2
A huge thank you to Kannabia Seeds for allowing me to try my Best with this amazing collection from Photo Strains they managed to Sponsore . Big thanks for supporting the grower community worldwide! Your genetics and passion speak for themselves!
Let’s grow together – and don’t forget to stop by again to see the latest updates!
Happy growing!
Stay lifted and stay curious!
Peace & Buds!


Likes
13
Share


@GrowGuy97
Follow
Day 49 - Had to put the 3 Girl Scout cookies on a 12/12 light cycle to get them to switch to flower for some reason, first time I have had that happen with autos but all the plants are doing good, 2 of my strawberry pies are showing a little calmag deficiency but overall they are doing great and getting extremely frosty! Thanks for following & happy growing friends!✌️🏼🙏🏼🌱
Processing
Likes
29
Share


@Hasard
Follow
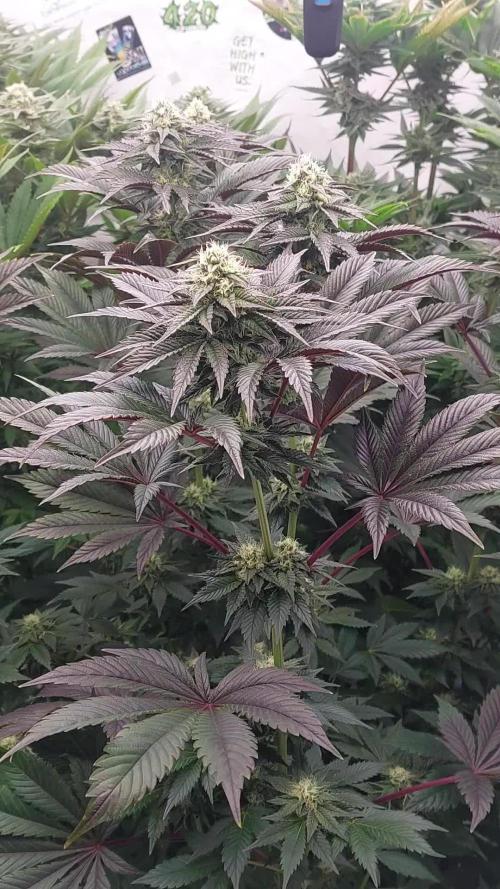
Hello Guys ! Hope you all are doing well during this beautiful summer. I am very happy to share pics and videos of this new flowering week 😁😎 The ladies are very strong and pretty despite these hot temperatures but I am very confident with the plants.
It doesn't smell so much for the moment.



Processing
Likes
5
Share


@Cultiv8or
Follow
First week of flowering !
Amnesia is being a classic sativa and stretching like a bitch already. Hopefully I can keep an even canopy
I only have 6-9 weeks of flowering until it’s too cold in Toronto on the balcony. I can go until end of September
I feed every nutes every 2 or 3rd day

Likes
6
Share


@GRONE
Follow
Feliz por el resultado empiezo a aplicar jabón potásico y aceite de nem de manera preventiva
Ordena de ramas con malla SCROG
Ajuste de altura de lámpara

Likes
12
Share


@StonedandSteady
Follow
AutoBlueberry 6th w/ 1st W/ Flower breed by #DivineSeeds #DivineSeedsSquad #DivineSeedsBreedingCompany
Starting to Flower and her Smells are already getting Stronger of Gasy Blueberries!
Origin:Afghani/Thai
Type:50% Indica/ 40% Sativa/ 10% Ruderalis
Flowering:56 days
THC:22%
Harvest:400-550 g/m2
Height:110-150 cm
They were Growing under the #Growatt600w and in my #TopoLite 24×24×48 Grow Tent but I've Upgraded and Updated it to my #OsreeQB100W I'm also using #TNBNaturals #TheEnhancer Co2 Despersal Canister and using thier Ph⬆️⬇️ for my Decolinated Tap Water!
Green and Growing Up Great! She's Growing into her 7th week of Flower! She's Growing in my special blend of ProMix potting mix, a 1/2 bag of Earthworm castings and 2 light handfuls of Diatomaceous Earth mixed Up well for before transplanted! Diatomaceous Earth: Diatomaceous earth is made from the fossilized remains of tiny, aquatic organisms called diatoms. Their skeletons are made of a natural substance called silica. WHAT IS DIATOMACEOUS EARTH?
In a nutshell, DE comes from the fossilised remains of small marine organisms called diatoms. Over a 30 million year period, these hard-shelled algae collected on the bottom of bodies of water, eventually forming into a type of sedimentary rock. Fast forwarding, it wasn’t until around 1836 that a German peasant Peter Kasten discovered the ivory-coloured, powdery substance while drilling a well in northern Germany. Ever since, the usefulness of DE for multiple purposes, including industrial and horticultural applications, has been well-reported. Just sprinkle some diatomaceous earth on top of your soil and watch mother nature's secret weapon work its magic.CONDITIONS THE SOIL
When it comes to growing cannabis, everyone strives to provide the best soil to grow the best plants—but there’s always a way to make it even better. Making the soil a better medium is called soil conditioning, which is exactly what diatomaceous earth does. It works by improving the retention of moisture in your potting soil, holding a large amount of fluid and drying at a rate that’s much slower. This natural soil additive also helps to retain nutrients and allows for better oxygenation of the substrate. NATURALLY CONTROLS PESTS
DE is an all-natural, safe-to-use substance that doesn’t harm the cannabis plant with toxic chemicals. The nature of diatomaceous earth makes it useful against most types of insect infestation you might be experiencing; and unlike chemical insecticides, insects can’t develop a resistance to the effects of DE. So once they’re gone, they’re gone for good. DE is an abrasive. and when used as an insecticide, it gradually scrapes away an insect’s exoskeleton, absorbs the fluids, and dehydrates insects and other critters to eventual death. IMPROVES PLANT STABILITY
When using DE in your soil, it can be especially beneficial as it frees up nutrients so that they are made available to the plants as needed. This works via the silica content of DE being absorbed into the plant tissue, which helps improve the plant’s ability to respond and receive more nutrients as DE activates. This in turn results in greater yields and better stability under small pH fluctuations!
https://divineseeds.net/
https://instagram.com/divine.seeds?igshid=osxe2v7en33v https://divineseeds.net/
Thanks Again to All my Friends, Family's, Teams, Sponsors, Followers and Subscribers!!! Your Genetics are Merry Magnificent, Mega Marvelous and Mighty Medical! Love um!!! I really Can't stress enough how Thankful and Grateful I am of All of you and what you've Shared with Us! Means the World!!! It's definitely a Pleasure being able to Grow with these Phenomenal Grow Lights! Please Enjoy! BudBrothers4-Life! Cheers Famz!!! Much Props and Much Topz!💯🔥 #Osree #GrowStarStore #Growatt #TNBNaturals #TNBTeam #GrowYourOwn #Bliss
https://instagram.com/as420.ca?igshid=1f116alw054wp
The Grow Bags: https://www.as420
