


Likes
Comments
Share

@squalino
Follow
Journal de Culture : Frost 1 (Semaine 5)
Génétique : Frostbanger (F2 Perso) | Système : Autopot 20L
📣 Remerciements
Un immense merci à toutes les personnes qui suivent ce journal depuis le début ! Un merci tout particulier à @MIA_BIOTABS et à Mrs_Larimar pour leurs précieux conseils et leur accompagnement. Merci à tous pour votre soutien !
🛠️ Configuration Technique (Rappel)
Éclairage : Lumatek ATS 300W Pro (réglé à 75%)
Distance lampe/canopée : 75 cm
Climat : Jour : 25°C / Nuit : 21°C
Humidité (HR) : 50%
Tente : 1m80 de hauteur
📅 Évolution & Entretien : Structure et Patience
plante 1:
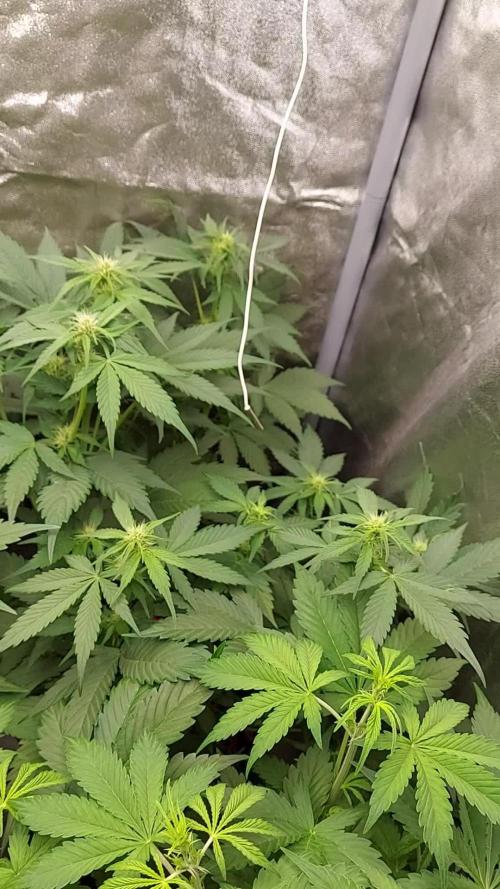
64 centimètres (+31 )
une croissance incroyable
les têtes se développent à toute vitesse
les photos et video parle d'elle même.
me manque de la hauteur dans la tente et de la place .
NUTRITION (12/05)
que de l'eau Ph 6,3 du réservoir Autopot.
le 14/05
apport de 50 cl de tea compost
preparation tea compost :
LE MELANGE :
15 grammes tea compost avec 5 ml d'orgatrex pour 1 litre d'eau ( 4 plantes donc ×2. 50cl par plante ) .
mélanger le tous dans un sceaux.
LA PREPARATION
materiel :
1 sceau
1 pompe à air pour aquarium. ( 15 euro ).
je vais utiliser pour 18h00 la pompe de mon aire dôme de l'autopots. j'ai acheté aussi 2 petit diffuseur d'air à 4 euros . ustensil utiles pour aérer le tea compost .
mettre les diffuseur dedans allumé la pompe et laisser pendant 18h00.
normalement le température idéal pour que les micro-organismes se développent est entre 18 degrés et 22 degrés.
pour ma part le mélange était dans ma salle de culture à enciron 24 , 25 degrés.
voir video et photos ajouter
18h00 après
filtrer le mélange pour éviter touts dépôts susceptible de moisir et ramener des champignons.
donner au plante 50 centilitres .
Le tea compost se garde mal donné dans l'heure qui suis le stop de l'aération.
encore 1 semaine et elles auront de la place et je pourrai mieux m'en occuper.
PS:
I NEED HELP
MES AMIS J'AI BESOIN DE VÔTRE AIDE ET DE VÔTRE SOUTIENT .
VENEZ LIKER LE POST DU CONCOUR 《《DRYROCKET 》》S'IL VOUS PLAÎT. J'EN AI BESOIN LES AMIS MERCI À TOUS

Likes
26
Share

@Growbody
Follow
Meine lieben Freunde und Freundinnen, Brüder und Schwestern im Geistigen und Tatkräftigen, herzlich Willkommen zum Greenhouse Summer Outdoor Grow 2026.
Der erste Strain des Outdoor Grows den ich Euch vorstellen werde ist die Purple Lemonade FF von 2Fast4Buds, eine 60% Sativa die laut FastBuds etwas nebulös als eine Kreuzung aus purple und citrus Cali Genetik beschrieben wird. Egal, sie soll sehr fruchtig und zitronig schmecken und könnte schöne Farben bekommen. Außerdem soll Sie eine kurze Blütezeit haben. Hier ist die URL:
https://2fast4buds.com/de/seeds/purple-lemonade-fast-flowering#description
Der zweite Strain der im Set mit dabei ist, ist die Mimosa x Orange Punch fem. von Barney's Farm, die ihre Genetik und den Taste bereits im Namen trägt, eine 65% Indica, die laut Barney's "ein wirklich sensationelles, zitrusähnliches und mandarinenartig-süßes Aroma" haben soll. Auch sie könnte interessante Farben bekommen. Hier die URL:
https://www.barneysfarm.de/mimosa-x-orange-punch-552
Last but not least, der dritte Strain ist die Chocolate Sherbet fem. von Grower's Choice, eine 70% Sativa, deren Eltern Chocolope x Sunset Sherbet sind. Auf den Geschmack bin ich schon jetzt gespannt, cremiges Haschisch. Mit bis zu 240cm könnte sie die größte im Greenhouse werden und würde dann bis zur Decke wachsen. Hier ist die URL:
https://www.growerschoice.nl/de/chocolate-sherbet.html#description
Auch dieses Jahr gibt es wieder etwas Neues:
Mir ist vor einigen Wochen im Baumarkt ein Foliengewächshäuschen begegnet. Die Aussicht, meine Schätzchen immer im Trockenen zu Wissen, lies mich sofort (also sofort nach einem Recall mit meiner Liebsten) zuschlagen. Danach war nur noch ein teilweiser Umbau unseres Gartens nötig, einen kleinen Weg anders verlegen, ein Fundament ausheben, Bordsteine zersägen, 2 Zentner Beton verbuddeln, Löcher bohren, verdübeln und verschrauben ohne das der Beton ausplatzt, einen haufen Astwerk vom Wein opfern und viel Rasen neu anlegen, das war's schon fast.
Neu:
Sind auch die zwei 90 Liter Maurerbottiche, in denen sich meine Pflanzen wohlfühlen dürfen, 4x soviel Platz wie im letzten Summer Outdoor Grow. Zur Drainage habe ich Rheinkiesel 9-18 verwendet. Da drauf kam mein altes Erdmischungsrezept mit frischem Kompost von Piluweris, Lehm, den die Wühlmäuse ständig in unserem Rasen aufwerfen und Sand aus'm Kieswerk mit gaaanz viel Staub drinne, praktisch Gesteinsmehl. Auch hier gab's was Neues: Hornmehl zusätzlich, hatich früher schon verwendet und ganz vergessen. Der erste Sack Sonnenerde Hanferde wurde mit der oberen Schicht meiner Mischung vermischt. Der zweite Sack kam dann blank obendrauf.
Neu:
Für mich ist auch die angewendete Keimmethode noch neu, die Samen zuerst in einem Marmeladenglas mit temperiertem Wasser mit Zusatz von Wasserstoffperoxyd keimen zu lassen. Das ist jetzt das dritte Mal, dass ich diese Methode anwende. Der Vorteil daran ist die superschnelle Keimung, der Keim schaut tatsächlich bereits am nächsten Tag aus der Schale und nach ein oder zwei weiteren Tagen haben sich die Keimlinge von der Samenschale befreit. Das weitere Vorgehen bereitet mir noch Probleme. Ich verwende immer noch die SmartStart Plugs von Zamnesia die ich praktisch halbiere, also von oben nach unten einmal Mittendurch. Dahinein lege ich jetzt den Keimling und klappe die zwei Hälften dann zusammen und pflanze den Plug in den Topf.
Neu:
In die Wannen kommen zusätzlich Gäste als da wären erprobte und neue sowie überwinterte Chilisorten, verschiedene Basiliken oder -kums, Weiße Melisse, Roter Klee, paar Blumen und so.
Tag 23: Die drei Jungen kommen nochmal für die letzten Tage der Eisheiligen rein. Hier im Süden kommt die Kalte Sophie einen Tag später an als im Norden. Übermorgen soll es wieder wärmer werden, dann können die kleinen wieder raus. 0,05 Liter Wasser.
Tag 24: Die Monstertomate hat sich selbst ausgesäät. Ich schau mal, ob ich noch ein Foto hab, als die ausgewachsen war. Die provisorische Heizung bleibt für die anderen Pflanzen über Nacht an.
Tag 25: Die provisorische Heizung bleibt für alle Pflanzen über Nacht an, bis die Nachttemperaturen mindestens 10°C betragen. Irgendwie scheinen die Kleinen nicht voran zu kommen, sie sehen jeden Tag gleich klein aus. Ich bin am Überlegen, ob ich Pflanzen zukaufe, für eine neue Aussaat ist es mir zu spät. Wäre auch ein Novum 🌱
Eins kann ich versprechen: It will take a very, very long time 😃 Schön das du es bist, der mich begleitet 👍😎


Likes
48
Share


@PapaNugs
Follow
This was a quiet week. The girls were recovering from their topping but were also flipping into flower. They have been getting water every two days and that seems to be an issue so I bought an auto watering drip system to install next week.
This girl has the biggest comeback outta all of them. Has continued to do well and has responded very well to the topping. Excited for this one
Dimmed to 60%
Here are the lights details:
Medic Grow Mini Sun-2 150W LED
Model: MN150-022
Spectrum mode: V1
Efficacy: 2.8 umol/J
Thanks for stopping by!
You can find the light on Grow Diaries:
https://growdiaries.com/grow-lights/medic-grow/mini-sun-2-150-watts
You can find the light on Medic Grow's website:
https://medicgrow.com/


Processing
Likes
4
Share


@Green_Thumb
Follow
My oldest girl had her flush this week and its about time for her to finish up. I will continue the journal for my 2nd oldest so stay tuned!


Likes
22
Share

@Suemchen
Follow
Sanlight EVO 3-60 at 80%
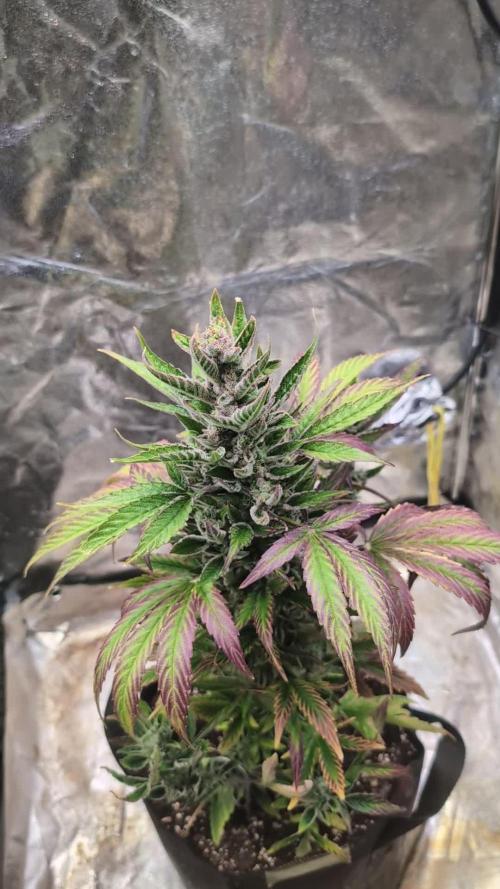
Day 64: Looks great watering still with rain water and 3 ml/l AlgaBloom, 1 ml/l CalMag, 2 ml/l Hesi Boost and 1 ml/l Green Sensation 👌🏻 pH at 6.4 👍🏻
Day 67: looking good 🤗 watered with rain water 👌🏻
Day 70: Looks great watered with rain water and 3 ml/l AlgaBloom, 1 ml/l CalMag, 2 ml/l Hesi Boost, 1 ml/l Pure Zym and 1 ml/l Green Sensation 👌🏻 pH at 6.4 👍🏻

Likes
2
Share

@GERGrowDesigns
Follow
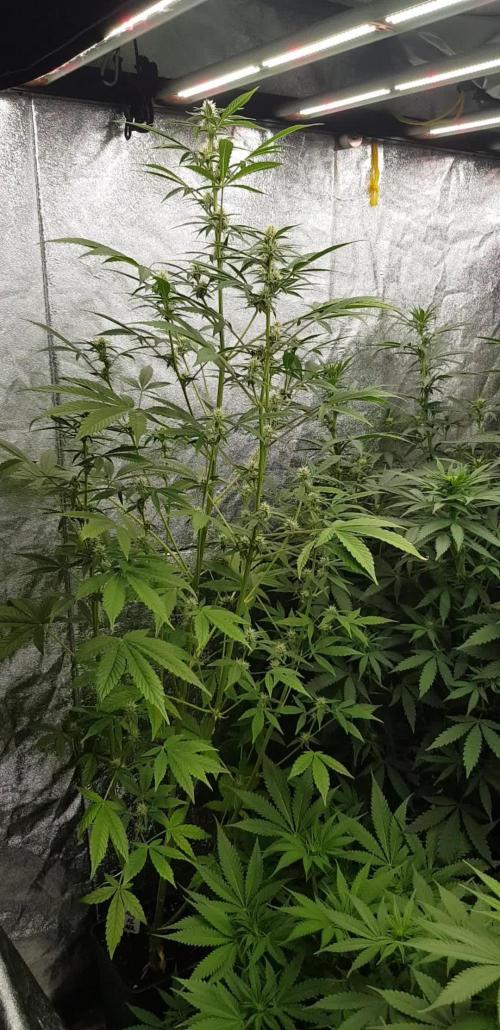
Welcome to Flower Week 1 of Divine Seeds Auto Ak 47 Xl
I'm excited to share my grow journey with you all as part of the Divine Seeds Autoflowering Competition 2025. It's going to be an incredible ride, full of learning, growing, and connecting with fellow growers from all around the world!
This Lady moved into the 12/12 light Photo tent because of the height
For this competition, I’ve chosen the Feminized Automatic strain: Auto Ak 47 Xl
Here’s what I’m working with:
• 🌱 Tent: 120x60x80
• 🧑🌾 Breeder Company: Divine Seeds
• 💧 Humidity Range: 60
• ⏳ Flowering Time: 59 Days
• Strain Info: 21-24%THC
• 🌡️ Temperature: 26
• 🍵 Pot Size: 0.5l
• Nutrient Brand: Narcos
• ⚡ Lights : 200W x 2
A huge thank you to Divine Seeds for allowing me to be a part of this amazing competition and Sponsoring the Strains. Big thanks for supporting the grower community worldwide! Your genetics and passion speak for themselves!
I would truly appreciate every bit of feedback, help, questions, or discussions – and of course, your likes and interactions mean the world to me as I try to stand out in this exciting competition!
Let’s grow together – and don’t forget to stop by again to see the latest updates!
Happy growing!
Stay lifted and stay curious!
Peace & Buds!

Likes
4
Share


@TS_Greens23
Follow
The orange 🍊 sherbet has finally made it to her own tent,,,and although she lost a couple branches in some early stage LST,,she’s looking healthy and showing signs of a good recovery,,she’s under the TS 1000 now,,after being under SF 1000 since she was popped,,,I’m interested to see if she might start making some ground on The Apricot Auto,,who she was bunking with ,,now that she has the Centre Stage,,😁🔥🥦👍💚💚💚💚💚
Likes
8
Share


@drbill
Follow
More mistakes made (I'm so worried I'm killing them), but trying to tone everything down to recover. I'm staying with 25% of nutes for now
Smell has increased. My whole basement has a very green "Plant" smell. It's less earthy now and more green.
First floor only smells on occasion... No carbon filter used yet...
Day 50 July 16 raised lights (saw a lot of light burn) and reduced power to 75%. fed 800ml water each (saw a bit of nutrient burn, slowing it down a bit)
Day 52 July 18 #2 1100ml to each 2.5ml calmag, 2.5ml micro, 1.25ml gro, 3.75ml
per gallon. pH meter issues 1L fed to each
Day 54 July 20 fed each 1l of water
Day 55 July 21 nut made 2.5ml calmag, 2.5ml micro, 1.25ml gro, 3.75ml bloom 6.36ph ppm 490 fed 1L each

Likes
12
Share

@DogDoctorOfficial
Follow
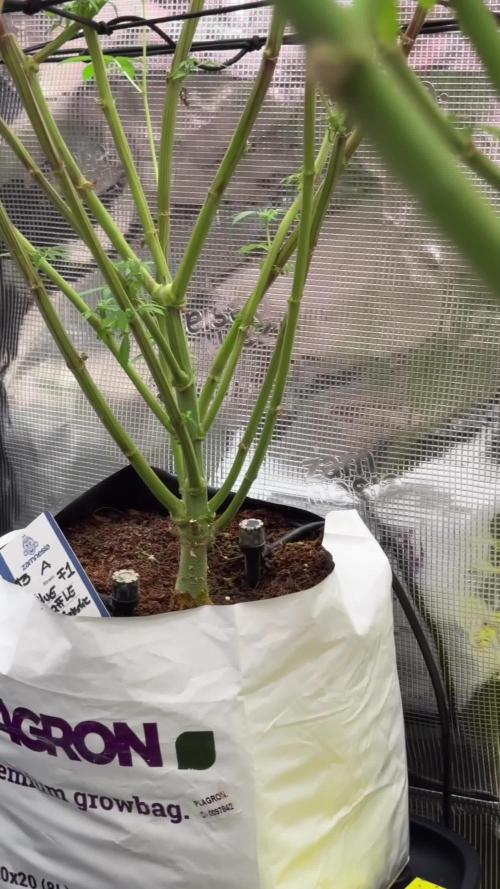
💙 Project Blue Tent – Week 11
💙 Blue Waffle F1 – Pheno A
🌸 The Frost Is Coming... And She's Looking Incredible
Hello everyone, and welcome back to another chapter inside Project Blue Tent! 💙🌱
And honestly...
I'm not even sure where to start this week.
Because...
LOOK AT HER. 😂💙🌸
After everything we've done over the previous weeks, we're finally reaching that beautiful stage where the plants don't need us to constantly interfere.
They just need us to watch.
And what we're watching right now?
Absolutely amazing.
The bud formation is developing beautifully.
The frost levels across the tent are going absolutely crazy.
The structure we built is doing exactly what we wanted.
The second SCROG is supporting the flowering branches.
The airflow is working beautifully.
The irrigation and drainage systems are running flawlessly.
And now we've introduced a second LumiFlora under-canopy light to help illuminate the lower portions of this enormous flowering structure.
So yes...
there was a little bit of tinkering this week.
😂
But mostly?
We stood there staring at the plants.
Because sometimes...
that's the best job in the grow room.
🌿 PHENO A – THE WORK IS NOW SPEAKING FOR ITSELF
Blue Waffle F1 Pheno A is still sitting at approximately 145 cm.
And at this point, her height almost isn't the interesting part anymore.
Because now we're watching what all that structure is turning into.
Weeks of vegetation.
Training.
SCROG.
Stretch management.
Defoliation.
Canopy organization.
A second SCROG.
Additional airflow.
Raised lighting.
And now...
flowers.
Lots of them.
And the development we're seeing is making me extremely happy.
The plant has moved from:
"How are we going to control all of this?"
to:
"Okay...
now let's see what all of this becomes."
😂💙
That's a very good transition.
🌸 BUD FORMATION – OUT OF THIS WORLD
This week, the thing that really catches my eye is the bud formation.
The flowering sites are developing beautifully throughout the plant.
And the amount of frost we're seeing now?
Oh my God.
😂
The whole tent is starting to look like somebody has been throwing powdered sugar around in there.
The flowers are getting increasingly covered in trichomes, and the close-up photographs are really starting to show what these girls are capable of.
This is the stage where all those weeks of structural work become incredibly rewarding.
We spent so much time talking about branches.
Canopy.
Spacing.
Stretch.
Support.
Light penetration.
Airflow.
And now?
The flowers are taking over the conversation.
Exactly as we hoped.
🌿 THE DEFOILATION – NOW WE SEE WHY WE DID IT
One of the things I really appreciate about this stage is being able to look back at the previous weeks.
When we performed the major defoliation, the plants looked dramatically different.
We removed a significant amount of foliage.
And at the time, the goal wasn't to make the plants look pretty.
It was to make the flowering structure more functional.
We wanted better visibility.
Better airflow.
Less unnecessary congestion.
More access to the flowering sites.
And a canopy that would be easier to manage as the flowers developed.
Now?
We're seeing the result.
The plant has recovered beautifully.
The remaining foliage is working.
The flowering sites are clearly visible.
The branches are supported.
And the flowers are developing exactly where we wanted them.
This is one of my favorite parts of cultivation.
You make a decision weeks earlier...
then you wait.
And eventually the plant gives you the answer.
And right now?
I'm very happy with the answer.
💡 TWO LUMIFLORA LIGHTS – LET'S LIGHT UP THE LOWER CANOPY
And this week we decided to take the under-canopy experiment one step further.
We brought a second LumiFlora into the game.
The first 150W full-spectrum LumiFlora was already helping us provide supplemental light underneath the canopy.
But looking at the size and density of these plants...
it simply felt like we could do more.
The lower portions of the plants are naturally receiving less direct light from the main fixtures above.
And with this much vertical structure, that becomes even more noticeable.
So instead of trying to solve everything by removing more foliage, we're exploring another option:
Give the lower canopy more light.
And now we have two LumiFlora fixtures working underneath the plants.
Both are 150W full-spectrum fixtures, with additional emphasis toward the red portion of the spectrum.
The idea is simple:
The main LEDs handle the upper canopy.
The LumiFlora fixtures supplement the lower canopy.
And the plant gets a more complete lighting environment from top to bottom.
We're not trying to replace the main lights.
We're complementing them.
And now...
we watch.
🌸
Because that's the whole point of the experiment.
We introduce something.
We observe.
We document.
And then we let the plants tell us what they think.
💡 THE UNDER-CANOPY LIGHTING DESIGN
And because we're apparently incapable of doing anything in a boring way...
😂
we decided not to simply place the two LED bars side by side.
The LumiFlora bars are quite long, approximately 1.20 metres each, with a central section of around one metre.
So instead of following the traditional side-by-side arrangement, we played around with the positioning.
We've arranged them diagonally across the lower portion of the tent, running from corner to corner.
And honestly?
I really like the way it looks.
It gives the lower canopy a much more interesting distribution of supplemental light rather than concentrating everything into one central area.
And visually...
it looks pretty damn cool too.
😂💡🌸
Sometimes the functional solution can also look beautiful.
🌿 LIGHT FROM ABOVE. LIGHT FROM BELOW.
This is becoming one of the most interesting parts of the Blue Tent experiment.
We're now looking at the plant as a three-dimensional structure.
The main fixtures are providing the primary lighting from above.
But the plant isn't flat.
It has height.
Branches.
Layers.
Lower flowering sites.
Interior flowering sites.
And all those areas don't necessarily receive the same amount of light from above.
So we're experimenting with supplemental lighting underneath.
The goal isn't to make some huge claim about what the lights will accomplish.
The goal is to see.
Will the lower flowering sites respond?
Will the additional light help us maintain development deeper into the canopy?
Will we see differences as flowering progresses?
That's what makes this fun.
We don't need to know the answer before we run the experiment.
We're here to find out.
🌸 FROST EVERYWHERE
And I have to say this again...
THE FROST.
😂💙
Oh my God.
The whole tent is getting ridiculously frosty.
The close-up photographs are becoming almost ridiculous.
The sugar is showing up everywhere.
The flowers.
The sugar leaves.
The surrounding structures.
Everything is starting to sparkle.
And this is one of those moments where you can finally see the genetics expressing themselves visually.
We're not talking about potential anymore.
We're looking at actual flowers developing in front of us.
And Blue Waffle F1 Pheno A is putting on quite a show.
🌿 THE SECOND SCROG IS DOING ITS JOB
The second SCROG continues to be one of those decisions I'm extremely happy we made.
When we installed it, the plants were already getting too tall.
The original SCROG had done its job beautifully during the vegetative phase.
But with all the stretch that followed, we needed another layer of support.
Now we're seeing why.
The flowering branches are developing more weight.
The structure is substantial.
And the second net is helping keep everything organized and supported.
We're not constantly moving branches anymore.
We're not trying to reshape the plant.
We're simply allowing the support structure to do its job.
And that's exactly how I want it.
The plant built the branches.
We built the support.
Now the flowers build the weight.
Everyone has a job.
😂💙
🌬️ AIRFLOW – STILL SPOTLESS
The airflow situation is also working beautifully.
The upper airflow continues circulating through the canopy.
The additional lower fan keeps air moving underneath.
The canopy was opened through the previous defoliation.
And now the lower portion of the tent also has the supplemental lighting system.
So we've got light and air working together throughout the structure.
That's important.
Adding more equipment underneath the canopy only makes sense if we're still maintaining good environmental movement down there.
And right now?
I'm extremely happy with how everything is working.
No stagnant feeling.
No obvious problem areas.
Just good continuous circulation through the room.
🌬️ THE EXTRACTION SYSTEM – STILL GIVING US SPACE
Moving the carbon filter and extractor outside the tent a few weeks ago was another one of those decisions that keeps paying dividends.
It gave us valuable vertical space.
That allowed us to raise the main LEDs.
That reduced the pressure we had on the tallest tops.
And now we're able to maintain this enormous flowering structure without constantly fighting the ceiling.
Sometimes the biggest improvements aren't made to the plant.
They're made to the room around the plant.
And this was definitely one of those changes.
💧 IRRIGATION – ABSOLUTELY SPOTLESS
And I have to give a little love to the irrigation system this week.
Because honestly...
I have absolutely nothing to complain about.
😂💙
It's working flawlessly.
The plants are receiving their water consistently.
The system is keeping up with their demand.
And the drainage system is performing just as well.
No drama.
No problems.
No complaints.
Just doing its job.
And when you have a flowering room this large and this thirsty, that consistency is incredibly important.
The plants can concentrate on growing.
We can concentrate on observing.
And the irrigation system can quietly do its job in the background.
That's exactly how I like it.
💧🌿
⚗️ THE EC MYSTERY
Now...
there is one little thing that caught my attention this week.
And I honestly don't have a definitive explanation for it.
😂
We didn't intentionally change the reservoir recipe.
The nutrient mix remained the same.
We're still using:
PLAGRON Hydro A — 2.2 ml/L
PLAGRON Hydro B — 2.2 ml/L
PLAGRON Hydro Roots — 1 ml/L
PLAGRON Power Buds — 1 ml/L
And yet...
the EC came out slightly lower this time.
Current recorded EC:
2.24 mS/cm.
Last week we were around 2.49 mS/cm.
Why?
Honestly...
I don't know.
😂
My first thought is that the rainwater may simply have been a little softer this time.
But that's only a possibility.
I don't want to invent an explanation when I don't actually know.
The important thing is that the plants are looking fantastic.
They're healthy.
They're developing beautifully.
The foliage looks good.
The flowers are progressing.
So for now?
We're simply recording the observation.
No panic.
No unnecessary correction.
Just:
"Interesting."
😂
And we continue watching.
🌱 SOMETIMES THE PLANTS MATTER MORE THAN THE NUMBER
This is another reason I like documenting all the environmental data.
Numbers are incredibly useful.
But they're only one part of the story.
You can have a number that looks slightly different from last week and still have plants that are absolutely thriving.
And that's exactly what we're seeing here.
The EC is a little lower.
The plants?
Beautiful.
The flowers?
Amazing.
The frost?
Absolutely insane.
The irrigation?
Perfect.
The drainage?
Perfect.
So we're not going to chase the number simply because it changed.
We're going to observe the entire system.
And right now...
the system looks fantastic.
🌸 CURRENT GROW CONDITIONS
🌸 Flowering: Week 11
📏 Height: approximately 145 cm
💡 Light schedule: 12/12
☀️ Day temperature: 28°C
🌙 Night temperature: 27°C
💧 Relative humidity: 63%
⚗️ pH: 6.01
⚡ EC: approximately 2.24 mS/cm
🌡️ Solution temperature: 24.9°C
🌱 Substrate temperature: 24°C
🌬️ CO₂: approximately 666 ppm
💦 Watering: approximately 1.6 L per plant / 24h
? Pot size: 8 L
CURRENT NUTRIENT RECIPE
PLAGRON Hydro A — 2.2 ml/L
PLAGRON Hydro B — 2.2 ml/L
PLAGRON Hydro Roots — 1 ml/L
PLAGRON Power Buds — 1 ml/L
PLAGRON pH Plus — 0.03 ml/L
PLAGRON pH Minus — 0.03 ml/L
💡 LumiFlora Under-Canopy Lighting:
2 × 150W Full Spectrum
🌸 THE FLOWERS ARE NOW THE MAIN STORY
This is probably the biggest change from where we were a few weeks ago.
Earlier, the main story was:
Stretch.
Height.
Canopy management.
Defoliation.
LED clearance.
Support.
Airflow.
Now?
The flowers are the story.
And they're telling a beautiful one.
The branches are loaded with developing flowers.
The structure is holding beautifully.
The frost is increasing.
And the whole room has that feeling of:
"Something special is happening here."
😂💙🌸
That's the feeling I love most.
Not knowing exactly how the final result will look.
But seeing enough clues to know that we're heading somewhere very interesting.
🔬 THE F1 UNIFORMITY CONTINUES TO AMAZE ME
And once again, I have to mention something that keeps catching my attention.
These F1 genetics are looking incredibly uniform.
The four girls are sharing the same room.
Same environmental conditions.
Same irrigation.
Same nutrition.
Same lighting philosophy.
Same structural work.
And they're responding with an almost uncanny similarity.
There are individual differences, of course.
That's exactly why we're keeping separate diaries.
But when I look across the room now...
it's almost like looking at different expressions of the same idea.
And honestly?
That's fascinating.
Maybe the biggest differences will reveal themselves later.
Maybe they'll become more obvious as the flowers mature.
Maybe the similarities will continue all the way to harvest.
That's what we're here to discover.
🌸 THE QUIET PART OF THE GROW IS GETTING LOUD
This is funny because technically...
we're doing less.
But visually?
The plants are becoming more impressive every week.
😂
We're not training.
We're not performing major defoliation.
We're not rearranging the room.
We're not fighting stretch.
We're not solving emergencies.
We're simply maintaining the environment.
And yet...
the flowers are getting bigger.
The frost is increasing.
The structure is becoming more impressive.
And every photograph seems to show more development than the previous one.
This is the reward for all the work that came before.
🌿 FROM BUILDING THE PLANT TO WATCHING THE PLANT FINISH
We spent weeks building this plant.
Now we're watching it finish.
The vegetative period created the framework.
The SCROG organized it.
The stretch tested it.
The defoliation opened it.
The second SCROG supported it.
The raised LEDs gave it room.
The additional airflow keeps it breathing.
The irrigation keeps it supplied.
The nutrition keeps it moving.
And now the LumiFlora lights are helping us explore the lower canopy.
At this point...
there's very little I want to change.
I want to let the plant show us what all of that work was worth.
🌸 WHAT I'M WATCHING NOW
The questions are becoming much more exciting.
How much larger will these flowers become?
How much more frost will develop?
How will the lower canopy respond to the two LumiFlora fixtures?
Will the additional supplemental light make a visible difference as flowering progresses?
How much weight will the second SCROG eventually need to support?
And perhaps the biggest question of all...
what are these beautiful F1 girls going to look like when they finally reach maturity?
I have absolutely no idea.
And I love that.
😂💙
🙏 FINAL THOUGHTS – THIS IS WHY WE GROW
If I had to describe this week in one sentence, it would probably be:
"We didn't do much... and everything looks amazing."
😂💙
And honestly?
I'll take that.
The plants are healthy.
The bud formation is incredible.
The frost levels are getting ridiculous.
The second SCROG is working beautifully.
The airflow is performing exactly as planned.
The irrigation is spotless.
The drainage is spotless.
The main lighting is doing its job.
And now we've added a second LumiFlora to complement the first and give the lower canopy even more supplemental light.
We even changed the positioning of those long LED bars into a more interesting corner-to-corner arrangement.
And I have to say...
I really like it.
It looks good.
It distributes the light in a way that makes sense for this huge lower canopy.
And it gives us another part of the experiment to watch.
As for the slightly lower EC?
We don't know exactly why.
Maybe the rainwater was softer.
Maybe there was another small variable.
Maybe it's simply one of those little differences that happen in a real system.
The important thing is that the plants are showing us no reason to panic.
So we're not going to chase numbers.
We're going to observe.
And right now...
what we're observing is absolutely beautiful.
Blue Waffle F1 Pheno A is standing there at approximately 145 cm, covered in flowers and increasingly covered in frost.
The structure is strong.
The canopy is organized.
The support is ready.
The lower lighting is installed.
The irrigation is flawless.
The drainage is flawless.
And the whole room is beginning to look like something very special.
💙🌸🌿
We've done the hard work.
Now we get to enjoy the show.
Let's see what the next few weeks bring.
Because if the frost continues at this rate...
Oh boy.
😂💙
We're going to have some very interesting photographs coming.
Until next week...
Keep watching.
Keep observing.
Keep the environment stable.
And let these beautiful girls do what they do best.
Grow.
Flower.
Frost up.
And shine.
💙🌸🌿
🙏 A HUGE THANK YOU
A huge thank you once again to Zamnesia for making Project Blue Tent possible and for giving us the opportunity to explore these beautiful Blue Waffle F1 genetics phenotype by phenotype.
Thank you to PLAGRON for the Hydro nutrient line supporting these girls through this incredible flowering journey.
A massive thank you to Mars Hydro for the automatic irrigation and drainage system that continues working absolutely flawlessly and keeping these thirsty girls supplied.
Thank you to Zamnesia for the Phytonaut LED lighting, the curved scissors and the clip fans that have all become such important parts of this project.
And a huge thank you to LumiFlora for providing the 150W full-spectrum under-canopy lighting that we're now using in pairs to explore supplemental lighting throughout the lower canopy.
I'm really excited to see what this experiment brings.
And of course...
thank you to GrowDiaries for giving us the platform to document all of this.
The successes.
The mistakes.
The unexpected moments.
The experiments.
The lessons.
And now...
the frost.
😂💙🌸
Most importantly, thank you to everyone following Project Blue Tent.
We're getting deeper into flowering now.
The plants are looking incredible.
The frost is everywhere.
The flowers are stacking beautifully.
The systems are working.
And we're finally at the stage where we can sit back a little and enjoy the work we've spent so many weeks building.
Four girls.
One room.
Same environment.
Incredible F1 uniformity.
Two LumiFlora under-canopy lights.
One very frosty future.
Let's see what comes next.
💙🌸🌿
Until next week...
More frost.
More flowers.
More observation.
And hopefully...
even more reasons to stand in front of the tent and say:
"Oh my God..." 😂💙
Growers Love, happy growing, and take care everyone! 🌱💙

Likes
4
Share


@Seabass
Follow
4.7.
DSD grew by far the biggest
Seems to take the heat and direct sun well.
Some bugs are eating the leaves. Will apply neem. Food every 10 days or so
Likes
2
Share


@PressurexGarden
Follow
Pretty easy grow so far. Yes I water a lot but I'm also in my garden a lot so it keeps me busy. Purple stems only panic I had. I switched to ro water
Likes
24
Share


@3lementa1
Follow
The colas keep filling out and getting longer and smell amazing. It's been warmer and more humid outside so RH in the tent has gone up. I added a mini air purifier I wasn't using (no ozone) as an extra precaution against mildew.
I woke up in the middle of the night on Monday and realized that the air purifier has a light on it so I got up and turned it off. I was worried that I'd messed with the dark cycle so I left them in darkness for an extra 2.5 hours.
My cool tube fan fell off the next day, onto my plants. They look undamaged. I taped it up again and set up a safety wire like the filter and fan have. I need a better solution for next cycle.
The buds are beautiful and having an even canopy is great. It's hard not thinking about the end result. The buds still look small compared to the big colas of a traditional grow shape but there's still a couple weeks left. There is some bud formation under the canopy but it's a little light. The tops of the colas are fat but short on the 7 gallon plants and taller and thinner on the 5 gallon plants.
I did leave a couple offshoots on that developed in late veg/early flower. By the time I caught them, I felt they were too mature to chop and I thought they helped fill out certain areas. But those ones have fewer bud sites and tend to be just a cola on a branch that shoots straight up which is still good. I do wonder if less crowding would have given me bigger buds, but I think it has more to do with pot size.
This is week 7 of flower. I switched to half strength nutes and started adding fancy molasses (18ml/gallon). I broke my pH tester and didn't replace my SCROG net until after I finally watered the next day so the canopy changed a bit. I took the opportunity to rearrange the plants a bit.
Crystal formation increased a crazy amount the day after I started adding molasses. I think I'll keep adding molasses even during flush.
The CBD Blue Shark has this really beautiful white glow. The pistils are very strong and white and the trichromes reflect back this silver light. The leaves are a nice semi-glossy dark green which gives great contrast. It's just a beautiful plant.
The Wedding Cake has a lot more colour with lots of red hairs and some yellow tones in the pistils. The fan leaves are more prone to yellowing and death than the leaves on the CBD BS. The buds seem more structurally dense and are really working on these pyramid shapes that look like delicious orange and green snacks. The buds on the CBD Blue Shark are more symmetrical and kind of otherworldly like some kind of sea creature.

Likes
2
Share


@aquaMan
Follow
The Tropicanas are forming some nice Buds.
This week the change to Plagron Nutrition and a higher EC was made. Plants are constantly beeing defoliated due to little space :D
Likes
52
Share


@Roberts
Follow
FBT2403 had a massive growth spurt over the last week. She is showing her first preflowering pistils. She is look healthy, and strong now. Everything is glong good. She will be ready for a solution change very soon to blooming nutrition. Thank you Agrogardens, Medic Grow, and Fast Buds. 🤜🏻🤛🏻🌱🌱🌱
Thank you grow diaries community for the 👇likes👇, follows, comments, and subscriptions on my YouTube channel👇. ❄️🌱🍻
Happy Growing 🌱🌱🌱
https://youtube.com/channel/UCAhN7yRzWLpcaRHhMIQ7X4g
If anyone needs to purchase fastbuds here is a link for my affiliate program
https://myfastbuds.com/?a_aid=60910eaff2419
Likes
11
Share


@Badassxwar
Follow
The plants all look healthy going thru this first budding phase we are almost done with week 2 of flower which will end on wednsday. I bought some pot elevators, and tied apart a few tops growing closer together. All plants tops look even except the first split plant which has a few stretchers, Not to bad tho. I feed 2 times a week and the rest straight distilled water which reads 6.5 ph. Assuming my coco's natural ph balance is wearing slime starting week 3, I'm going to ph to 6.2.


Likes
19
Share

@Chubbs
Follow
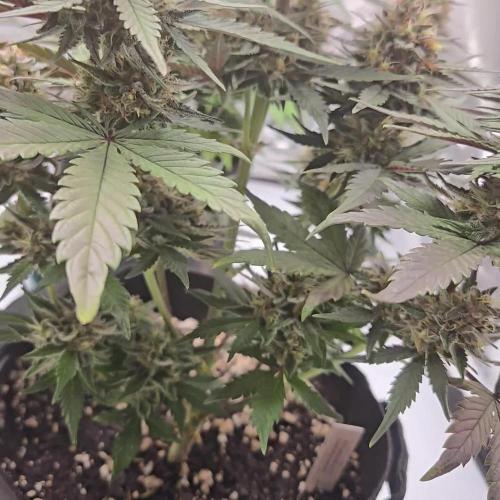
What up fam, weekly update on these ladies. They're progressing beautiful and starting to get close to being finished. I'm thinking of washing these as I think the fruity tropical terps would be amazing. All in all Happy Growing.


Likes
13
Share


@russrahl
Follow
1 month in now and all is still good. She finished stretching and I got the second net on now about a foot above the first screen. I tucked her a bit to level her off with the other 3 Obi-wan kush around her, shes still up a bit higher on the sides but I let those go cause there on the sides...lol still feeding nutrients on the lower side, just shy of half strength. Buds are developing good, not as big as the Obi-wan but that was to be expected. Cheers 💨
