


Likes
Comments
Share

@SkunkyDog420
Follow
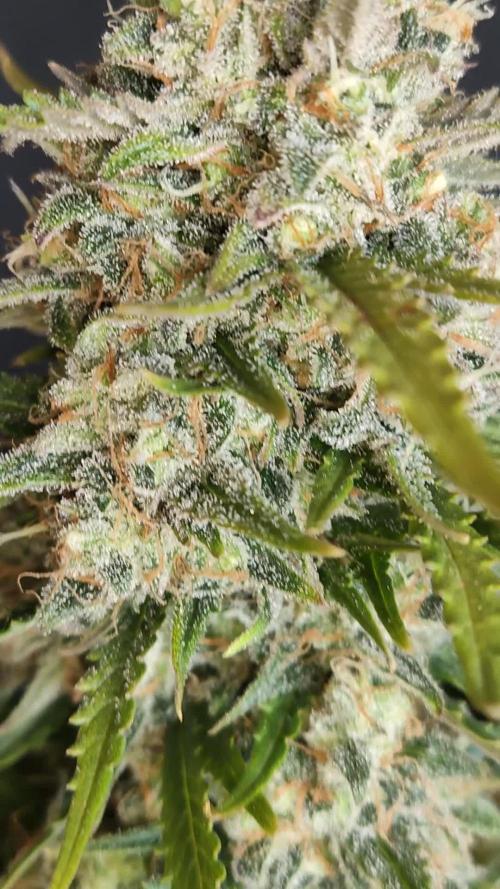
Hallo zusammen 🤙.
Habe sie heute geerntet.
Wir sehen uns in 3 Wochen mit dem Erntebericht.



Likes
2
Share


@Ninjabuds
Follow
I made this cross on my last grow I hope it turns out how I hope very weak seeds I wander if that has something todo with not drying them very
Likes
25
Share


@RastaGrow
Follow
GldaniGrowShop Thank you so much for bringing and giving me the strongest :)
Likes
5
Share


@diabolicalgrows
Follow
GG4 Clone day 151 10-30-24
- Gave 4 cups of regular water
GG4 Clone day 155 11-3-24
- Gave 4 cups of regular water
GG4 Clone day 156 11-4-24
- Gave 4 cups of regular water
GG4 Clone day 158 11-6-24
- Gave 4 cups of feed water
Likes
56
Share


@Master_weeda
Follow
Bonjour à tous les padawans et les maîtres jedis
Pour cette semaine 3 au jour 19 ma plante fais 21 centimètres et son septième noeud apparaît je décide donc de pratiquer un LST sur ma plante.
Pour ce j'utilise du fil de fer galvanisé que je plante directement dans le substrat en faisant attention de ne pas endommagé les racines car n'oublions pas que ce qui pousse dessus pousse aussi dessous.
Jour 17 je pulvérise du une solution composé d'une cuillère à café de savon noir mou (marque briochin) dilué dans un demi litre d'eau en prévention d'éventuels nuisibles.
Pourquoi le savon noir mou ?
Savon noir : quelle utilisation pour le jardin ?
Le savon noir est un produit naturel dont les propriétés nettoyantes sont connues depuis l'Antiquité. Utilisé pour l'entretien de la maison et pour les soins corporels, ses vertus antibactériennes et insecticides en font un allié précieux pour le jardinier bio.
Le savon noir est fabriqué à partir de potasse et d'un corps gras de type huils végétale comme l'huile d'olive, de lin ou de maïs.
Produit naturel et biodégradable (s'il ne contient pas d'additifs, comme cela peut-être parfois le cas), c'est un très bon produit nettoyant, pour les sols, la cuisine, la vaisselle, le linge, etc... Très polyvalent, il est également économique, comparé aux multiples détergents classiques du commerce.
Le savon noir se trouve sous forme de pâte molle et brune ou sous forme liquide, dilué avec de l'eau. C'est du savon noir liquide dont on se sert généralement au jardin, car son utilisation est plus simple. Il s'achète dans les magasins bio ainsi qu'en grandes surfaces ou jardineries.
Attention : la recette du savon noir de ménage et celle du savon noir utilisé en cosmétique ne sont pas forcément les mêmes ; les savons noir de ménage (multi-usages) peuvent contenir davantage de potasse afin d'améliorer le pouvoir dégraissant (irritant ou desséchant pour la peau), voire même certains additifs chimiques.
Au jardin, ce sont en priorité les propriétés antiseptiques et insecticides du savon noir qui sont utilisées.
Le savon noir liquide est utilisé pour lutter contre les pucerons, les cochenilles, les araignées rouges, les aleurodes, les psylles et autres thrips. C'est un insecticide de contact ; il tue les larves et nettoie le miellat qui englue les feuilles.
La recette de l'insecticide à base de savon noir (mou pour ma par marque briochin) est simple à réaliser : une ou deux cuillères à café de savon noir mou (briochin) diluées dans 1 demi litre d'eau tiède (dilution à 5 %) ; une fois la préparation refroidie, pulvérisez-la sur les plantes atteintes, en prenant soin de ne pas oublier l'envers des feuilles. À renouveler 1 à 2 fois si nécessaire, pour être totalement débarrassé des indésirables.
Comme il est de mise pour la plupart des traitements, ne pulvérisez pas la solution à base de savon noir en pleine journée, sous le soleil (ni sous la pluie !) ; procédez le matin de bonne heure ou patientez jusqu'à la fin de journée, lorsque les températures sont en dessous de 20°C.
Jour 18 Je corrige mon LST suivant la pousse de ma plante ...
Pour ma par c'est la manière dont je procède mais petit rappel de la technique du LST
Quand commencer à appliquer la technique LST ?
De nombreux cultivateurs commencent la manipulation dés que les plantes possèdent entre 3 et 6 nœuds ou une paire de feuilles. Durant cette première étape de la croissance, le tronc encore flexible est pliable sans risque qu’il ne se casse, même si au fur et à mesure du développement de la plante il sera de plus en plus difficile de le plier. Nous pouvons continuer à guider la croissance des branches durant toute la culture, même durant la floraison, ce qui pour cette étape représente un grand avantage face à la taille, qui n’est pas du tout recommandé une fois que la formation des têtes commence, cela stressera en effet la plante, ce qui aura pour effet de retarder la récolte.
Comment appliquer la technique de guidage LST
Si nous sommes prudents, la flexibilité naturelle des fibres du cannabis permet de plier leur tronc et branches avec une relative facilitée, même durant la floraison des plantes.
En utilisant une corde fine, nous pouvons accrocher la pointe de la plante à la base du pot par exemple ou à un tuteur que nous aurons planté dans le substrat. Nous plierons le tronc avec précaution et nous le fixerons avec la corde, à partir de là, nous pouvons augmenter progressivement la tension de la corde, chaque jour un peu plus, jusqu’à obtenir la position souhaitée. Soyez attentif à la réaction de la plante, essayez de ne pas appliquer trop de pression sur la corde et rappelez-vous que la flexibilité des branches peut varier d’une plante à l’autre.
Pour obtenir de meilleurs résultats, il suffit de suivre quelques règles simples. Pour commencer, nous devons choisir une corde fine mais pas trop pour ne pas blesser les troncs au fur et à mesure qu’ils grandissent et qu’ils deviennent plus gros.
Nous pouvons utiliser des crochets en plastique souple ou de n’importe quelle autre matière flexible pour éviter d’endommager les plantes. Spécialement en intérieur, utiliser des cordons en plastique de couleur (voir les diaries de @Silky) est très pratique pour voir facilement les accroches et faciliter le travail au milieu du réseau formés par les cordes, les tuteurs, les mailles ou les supports que nous aurons dans la culture. Bien entendu, en culture extérieure et surtout en guerilla nous ferons juste le contraire et nous utiliserons des matériaux de couleur qui n’attirent pas l’attention pour que notre jardin reste discret.
Pour stresser les plantes au minimum, la mieux est de réaliser ces manipulations le soir ou juste après que les lampes en intérieur s’éteignent, ce qui leur permettra de se remettre durant la nuit. Normalement, le jour suivant nous pourrons observer comme les pointes des branches que nous avons pliées se dressent de nouveau vers le haut à la recherche d’une source de lumière.
Que la force soit avec vous💪

Likes
15
Share


@Drtomb
Follow
Starting week 2 of flower. Slowly trimming branches that reach far from the main cola stem.


Likes
Comments
Share


@Budhunter
Follow
Week 1 flowering - Day 5 of flowering & Day 61 of life
Finally flowering here. It’s been 5 days on flowering, still pre flowering but finally the best is coming.
Apple blossom is coming from the smallest plant in the tent to the one of the biggest. It’s in a 18l pot too as the lemon tree, so it should be bigger than thw others. It has many bud sides and looks promising. Let’s go

Processing
Likes
18
Share


@Barcelona_Farmers710
Follow
Esta semana apesar de tener temp Máxima de 28... se va recuperando bien de las podas, el led de TodoGrowled funciona perfectamente para sus 55w farmers!🍁


Likes
7
Share


Likes
9
Share


@SuperSmoker
Follow
Exploded with growth from the topping
Added diatomaceous earth because i brought in 2 strains (banana cake and grape kush) which potentially brought in fungus gnats
Check out YouTube video
SuperSmoker for more!

Likes
18
Share


@TheGreenLeopard
Follow
nice week , coming along great. put back the ones that went to rehab. they can flower and see what happens among the elite tent. nutrients this week i have added bio boost for flower. getting th winter air in at night as i want to see color as we develop here. hope everyone good. thai choc is a lanky plant. dowes ok tied. will see how it flowers


Processing
Likes
3
Share


@DeeDeeKushner
Follow
End of week 8 and the beginning of week 9. 1-2 weeks left before I chop these girls down. All my girls are loving the new light and so am I! Highly recommend. Only things to report on is, I’m still flushing, my buds are getting denser, and also they’re starting to turn purple! This is my first plant to actually turn purple and I grew a plant just before these two that’s were supposed to be purple, but never did change colors. Fun fact: my favorite bud to smoke all time is purp diesel, so this is great for myself! Well, see you guys on the next update. Happy Growing! ✌️🏾
Likes
10
Share


@3lementa1
Follow
The colas keep filling out and getting longer and smell amazing. It's been warmer and more humid outside so RH in the tent has gone up. I added a mini air purifier I wasn't using (no ozone) as an extra precaution against mildew.
I woke up in the middle of the night on Monday and realized that the air purifier has a light on it so I got up and turned it off. I was worried that I'd messed with the dark cycle so I left them in darkness for an extra 2.5 hours.
My cool tube fan fell off the next day, onto my plants. They look undamaged. I taped it up again and set up a safety wire like the filter and fan have. I need a better solution for next cycle.
The buds are beautiful and having an even canopy is great. It's hard not thinking about the end result. The buds still look small compared to the big colas of a traditional grow shape but there's still a couple weeks left. There is some bud formation under the canopy but it's a little light. The tops of the colas are fat but short on the 7 gallon plants and taller and thinner on the 5 gallon plants.
I did leave a couple offshoots on that developed in late veg/early flower. By the time I caught them, I felt they were too mature to chop and I thought they helped fill out certain areas. But those ones have fewer bud sites and tend to be just a cola on a branch that shoots straight up which is still good. I do wonder if less crowding would have given me bigger buds, but I think it has more to do with pot size.
This is week 7 of flower. I switched to half strength nutes and started adding fancy molasses (18ml/gallon). I broke my pH tester and didn't replace my SCROG net until after I finally watered the next day so the canopy changed a bit. I took the opportunity to rearrange the plants a bit.
Crystal formation increased a crazy amount the day after I started adding molasses. I think I'll keep adding molasses even during flush.
The CBD Blue Shark has this really beautiful white glow. The pistils are very strong and white and the trichromes reflect back this silver light. The leaves are a nice semi-glossy dark green which gives great contrast. It's just a beautiful plant.
The Wedding Cake has a lot more colour with lots of red hairs and some yellow tones in the pistils. The fan leaves are more prone to yellowing and death than the leaves on the CBD BS. The buds seem more structurally dense and are really working on these pyramid shapes that look like delicious orange and green snacks. The buds on the CBD Blue Shark are more symmetrical and kind of otherworldly like some kind of sea creature.
Likes
16
Share


@DrLaggis
Follow
Day 72: The Finale 🌿🌟
It’s finally time. My very first grow is coming to an end—at least the cultivation phase. The plant is now ready for harvest, and I can’t believe how incredible this journey has been. I never expected to enjoy the whole process so much—from nurturing the plants to watching them grow and evolve. I’m absolutely hooked and can’t wait to dive into the next steps: harvesting, drying, curing, and of course, starting a new grow soon with fresh ideas and experiments!
While it may not be the largest yield, the quality of the buds speaks for itself. The time, love, and care I’ve put into this grow is visible, and I’m pretty proud of the results. I’ll admit, I was a bit impatient at times (which I think every first-timer can relate to 😅), but the experience was priceless.
Here are a few interesting highlights from my trimming and harvest process:
1️⃣ Dark Phase Before Harvest
Two days before harvest, I put the plant in complete darkness to encourage resin production. I'm not sure if it really made a difference, but it was worth trying!
2️⃣ Wet Trim vs. Dry Trim
I decided to go for a wet trim because the buds were really dense, and I wanted to avoid any risk of mold. I’ve read that wet trimming can speed up drying and may slightly impact the quality, but this is part of the learning experience. Next time, I’ll try a dry trim for comparison!
3️⃣ Yield Update
Wet, the total came in at 179 grams from my plant. Trimming took around three hours, and it was actually a lot of fun, despite the time commitment.
4️⃣ Curing Plan
The buds are now hanging in the tent for about 8 days. Once dried, they’ll go into jars with Boveda Packs (62% humidity) for another 3 weeks of curing. I'll update the smoke report once they’re fully cured, but I’ve already had a sample of the same strain from a friend, and I can say it’s pretty amazing.
Final Thoughts on My Grow 🌱✨
As mentioned earlier, this grow has been an absolutely incredible experience, and it has definitely set me on a path to jump right into my next grow. There were ups and downs along the way, such as over-pruning, which I believe stressed the plants a bit. Additionally, I think they could have benefited from an extra week to mature. We also faced many temperature fluctuations this summer, which impacted the plants due to external weather conditions.
I'm really pleased with the quality of the buds. The quantity is okay—I can’t fully gauge it yet—but I’m sure there’s more potential to unlock. I've gained valuable experience in what worked well and what didn’t. Overall, the countless lessons learned during this grow far outweigh the few mistakes made. I'm incredibly proud of my first results!
As this long journey comes to an end, I want to thank everyone who followed along. I hope you enjoyed all the content. In that spirit, happy growing, and see you next time! 🌟
Likes
11
Share

@Budhunter
Follow
Harvest on day 91 of cycle , day 54 of flowering.. I could leave it few days more for sure however my ladt harvest is nearly finishing so I need to dry this plant as soon as possible hehehe..
Purple punch has really frosty buds, it didn’t grow as much as I wish(I had to move the plant to the toilet with my burple light as there was no space for 3 plants in my 2x4 tent) but they are looking insanely good, with a strong flavor of grape, I am impressed with this smell/flavour, all covered in trichomes, I can’t wait to smoke it..
So my way to harvest it is I cut it down on the main branch and hang to dry out.. all the plant .. I prefer dry trim because it’s way easier to trim.. so now I am gonna hang it for 2/3 weeks and then start trimming.. I will update yield and tasty as soon as I finish trimming..
Overall I am happy with the results 🙌🏼.
Likes
11
Share


@OutForReal
Follow
Day 31 - What a healthy green plant like always , the petioles of the leaves are purplish but it is pretty commun for that strain so we are far from a magnesium deficiency here.
The smell is the typical deep citrus one from that strain.
The trichomes production is already huge and we are barely half the way now so imagine what it will be in 4 weeks 😍

Likes
5
Share


@Sativa763
Follow
Week 3
Plants Are Looking good, Not much to say this week 😇
Happy growing


