


Likes
Comments
Share

@LegacyGrow
Follow
English version below
Tag 91Grow:
Tag 36 Blüte:
Heute wurden erneut 25L gegossen mit weniger als 1L Drainage - Sie haben Durst! Wie immer waren nur ca 1,5ml Mag und Calc /L im 6,5PH Wasser. Ab ca Mitte der Blüte hebe ich den PH leicht an um die Nährstoffaufnahme von z.B. Mag zu fördern.
Der Geruch ist extrem Süßlich! Vor allem beim Entfernen größerer Blätter haut einen der Geruch förmlich um.
Sonst läuft der Grow recht Ereignislos weiter - es wird begonnen sich auf die Ernte vorzubereiten. Der Nachwuchs ist bereits im Anzuchtzelt.
Tag 93 Groow:
Tag 38 Blüte:
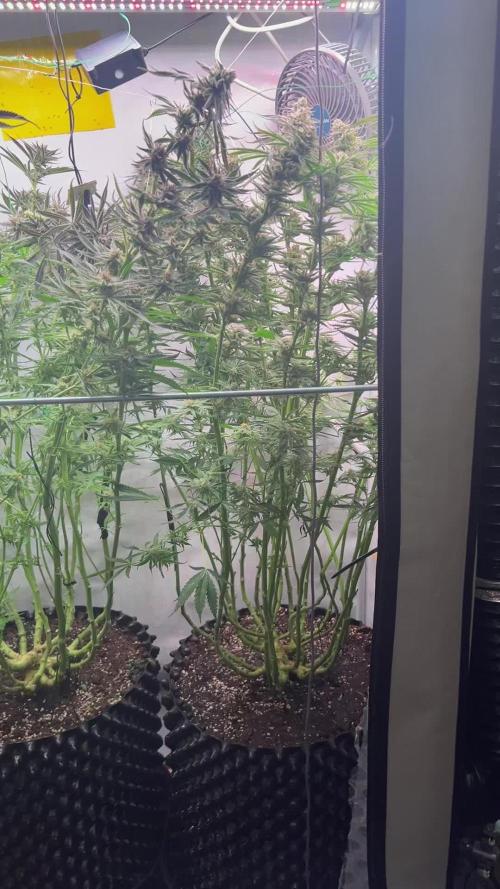
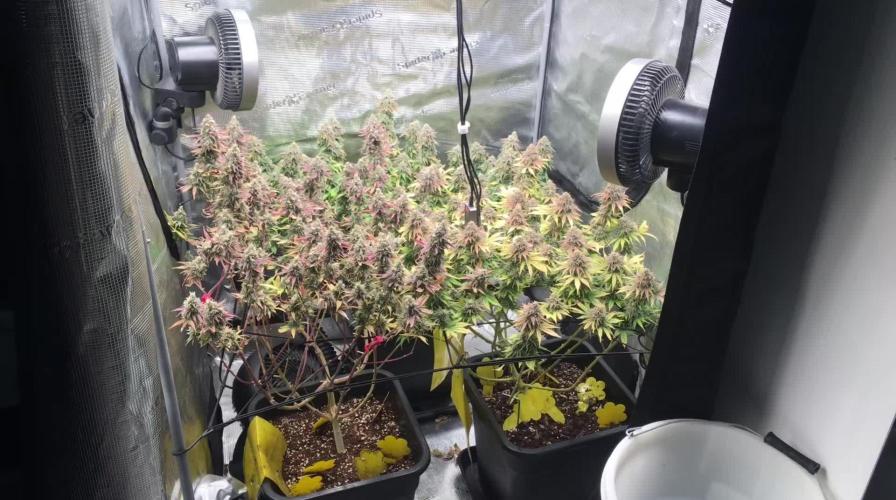
Heute gab es nochmal ein letztes HST in Form von Abschnitt vieler Laubblätter um mehr Licht an die Blüten in der Mitte zu bekommen. Der Unterschied ist deutlich zu sehen! Das soll auch diese Blüten bei der Reifung unterstützen.
Man kann erkennen, das der Herbst langsam einzieht - schöne pinke Verfärbungen sind jetzt sichtbar.
--------------------------------------------------------------------------------------------------------------------------------------------
Day 91 – Grow
Day 36 – Flowering Phase:
Today, another 25 liters were applied, with less than 1 liter of runoff — they are thirsty. As usual, the water contained only about 1.5 ml/L of Cal-Mag at a pH of 6.5. From around mid-flowering onward, the pH is slightly increased to support nutrient uptake, for example magnesium.
The smell is extremely sweet — especially when removing larger leaves, the aroma is very intense.
Otherwise, the grow is progressing without major events. Preparations for harvest have begun, and the next generation is already in the propagation tent.
Day 93 – Grow
Day 38 – Flowering Phase:
Today, a final HST was performed in the form of removing many fan leaves to allow more light to reach the buds in the middle. The difference is clearly visible. This should also support the maturation of these buds.
It is noticeable that “autumn” is slowly setting in — beautiful pink colorations are now becoming visible.

Likes
11
Share


@biggreens420
Follow
girl scout crack was a monster to grow she grew well and easily tripled in size during stretch the light issue could have had something to do with it did think she was going to turn out poor but she surprised us and filled in pretty well and buds formed well would recommend to anyone to try as iv also seen a few different phenos of this strain thanks for reading happy growing guys

Likes
10
Share


@BelgianBudtender
Follow
Heyo,
This is my Diary for the 2022 Dutch Passion Master Grower contest!
The first weed plant I ever grew was Auto Ultimate by Dutch Passion, So I am very excited to grow another Autoflower from this seedbank!
so far everything is smooth sailing, my germination took less than 2 days, and only 2 days later untill I had roots poking out, excited to see where she goes!


Likes
1
Share


@Happygrowing
Follow
Ciao a tutti...sono stato assente sulla piattaforma per un po...ma ora sono ritornato pii forte di prima...
Volevo dirvi che per questo ciclo userò un soil organico italiano al 100% come me 😜
Likes
17
Share


@HighZenBerg
Follow
Welcome back !
A lot of new branches developed and the tent gets fuller every day. The first flowers also developed, so I decided to start using Bio-Bloom and Top Max.
So far the plant did not stretch much, it’s more a horizontal bush. But I will wait, how she developed in her first weeks of flowering stage.
Keep in touch !
Cheers,
HighZenBerg

Likes
4
Share


@MonkeyGrower
Follow
Last week's plant showed an adorable life power, I hope this one will be the same or better ^_^
(14d) I'm not noticing that now, but it still grows excellent! update (17d): it grows perfectly fast and robust.
Box stayed outside and the morning sun heated it up to 40 degrees and humidity was 24%, so I moved the tent to my apartment.
I like what I have now.
(17d) Initially, I planned not to interfere grow process. No LST or any kind of topping, just defoliation, but now I started to think about LST and SCROG. MB I will start LST at the end of this week.
(19d) LST. It grows very fast, and I worry that it can cause problems in my short tent. How do I calculate:
1.6m total size - (0.3m pot + 0.2m between the led lamp and strain) = 1.1m - which is less than the max size of the plant.
I don't plan to bend strongly to the ground in a spiral, but I just wanna move the plant's living powers a bit ^_^
20d even after 1 day I can see a major speed up in side branches growing tempo. I hope that will take some living power and plant size will be lower without losing weight (^_^)
20d during changing the pot's stand I shook the plant too much and broke one branch (marked on the photo with a red line). I propped up it so can't even see the breakpoint.
Finally got my voodoo juice, and start using it instead of my GHE root booster.


Likes
5
Share

@dakineva1
Follow
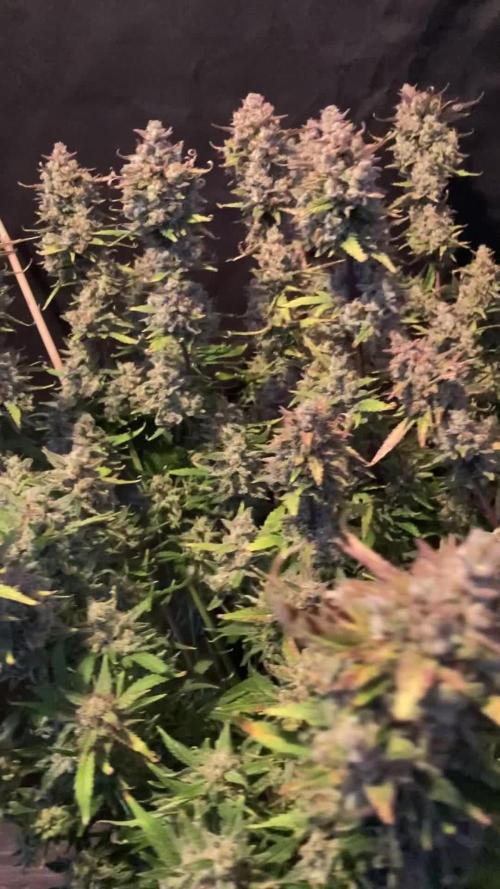
This gal finished up very nicely. I highly recommend this strain. easy to grow, great yield and tasty potent flowers!


Likes
48
Share


@Miss_Greenthumbs_Garden
Follow
will update on taste and effects when they have done curing 💚🧀
So I tried both cheeses last night and they were both slightly different in taste . plant 1 my short and bushy cheese had a pungent cheese taste and smell were as plant 2 had more of a citrus taste . both made me feel lovely and relaxed 💚👌🙏

Likes
4
Share

@Growfather2
Follow
Hello everyone,
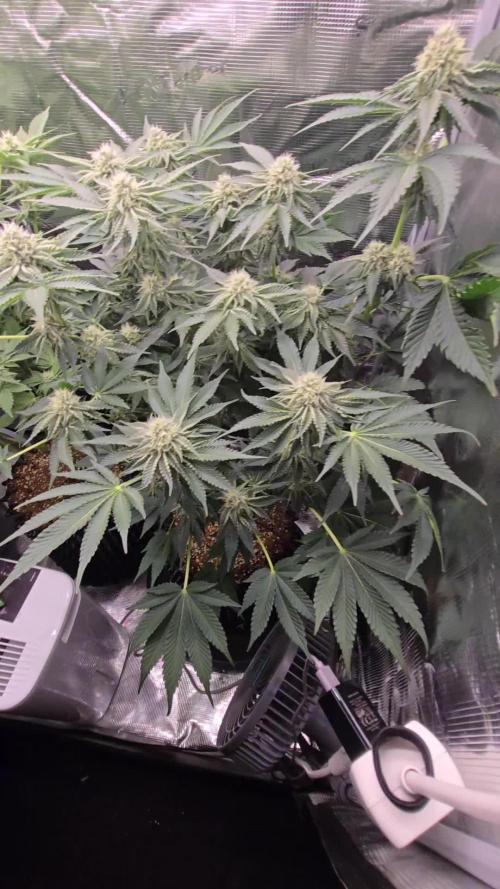
Everything is going according to plan, i added a dehumidifier to combat high humidity.
Let's see how they look next week, thanks for stopping by and have a nice week.
Growfather

Likes
2
Share


@TEAM_Piff_Paff
Follow
She is still showing some healthy growth as the weather is great these summer days.
Most notably she is getting more and more white pistils everywhere.

Likes
17
Share


@4chuk
Follow
Oct.16 - Week 2 begins.
I need to stop editing my diaries high.
Oct. 18 - Looks like a slight calcium deficiency on the oldest leaves, I'll watch the newer leaves for spots before I increase CaMg though.
Oct. 20 - I have been watering with 20ml twice a day, growth rate seems to have increased, but still developing spots so I will increase CaMg today.
Oct. 22 - It's growing pretty well considering how sick it seems. Time lapse uploaded.

Likes
4
Share


@Lilze
Follow
This week I changed the scrog net (2”holes) it’s about 7” above the pots
upped the nutes to 1.8-2 ec .
Watering every morning to about 10% run off
Sprayed with canna cure (350ml per ltr)
They have really started taking off
Lollipop and defoliation
There’s still not sign of sex but they are feminised seeds so I will be flipping to 12/12 by next week hopefully they show signs by then .
Likes
2
Share

@MR_S_theGardener
Follow
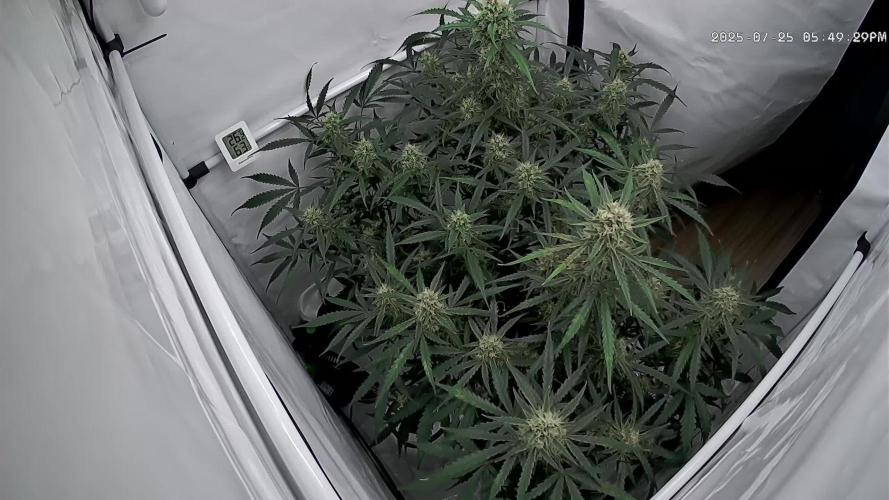
Beide Z-ups haben sich toll entwickelt, sowohl von der Reife als auch in der Masse. Das war die letzte Woche mit Dünger und nächste Woche gibt es gibt es dann nur noch flawless Finish, vielleicht auch noch zwei Wochen.

Likes
17
Share


@m0use
Follow
This was a fun project that was a few years in the making and a year later to see if they would last a season for this upload to happen. Before any of this I would bike aorund town grabbing up all the old Ikea solid pine bed slats that I could find and storing them in the basement. I have a lot of wood down there, any size worked as long as I have enough of them. The hot days to find them were the first and last of the months because that's when people where moving in/out. I also kept an eye on the free section on local online classifieds as well. The entire purpose of this was to recycle as much off the streets as I could before buying anything to finalize the project. In the end I only bought sealer, screws and some takeaway/beers. All the wood was 100% free and salvaged off the streets of Toronto saving it from the dumpster bin.
After collecting all the slats for about 2 years I was playing aorund with them on how I wanted to make this work. I had previously done a little project like this before but I messed it up and the boxes where crap. did not last longer then 2 seasons, they where thin and shallow as well could not grow much of anything in them. I Was talking to my friend who is renovating their house and we brainstormed some ideas on the boxes, I found some designs I liked online and said lets make something like this out of what I have here. We tossed out a few of the design features when looking at them as it would have been wasted wood and extra work not needed. If I had more wood them maybe it could have been an option but simple was the name of the game. They taught me what I needed to know like how the miter saw and sander worked, plus all the other tools I was using. They did help out with a table saw and creating the triangle support joints in the corners, They used some pine left overs they had while making a staircase indoors. I did not feel up to the task of using a table saw given all the relatives I know who have lost a finger to them.
In the end we decided the design would be three boards high and take an alternating pattern on corners. layer one short, layer 2 long, layer 3 short. Went with a galvanized and painted deck screw so it can take the weathering. Ran into some problems like making everything level as some of the boards were warped and other ones had undesired aspects like knots and tacky sticker goo I could not remove. So I used them for the base that will not been seen so much. Clamped everything down and called it a day.
Once it was all done and over with, I then brought them back home from my buddies work garage and started to seal them. I went with a boiled linseed oil as its a food safe option should the wood degrade into the soil I will plant in them. I will need to reapply it to the boxes year after year but the main coat is the most important one and I put it on 3 layers with a good dry in between coats. the inside of the boxes that where coated did not degrade at all as the sun did not hit them so it will not need a new coat just the outside. Overall the end result was very impressive for myself, I've never taken a woodworking class ever and It was a near perfect outcome for me. Heavy Duty Planter Boxes for all my gardening needs. I made a last min decision to add in a plastic liner to preserve the wood even longer and stapled that into the frame. it has held up quite well and may need replacing end of 2nd or 3rd year out in the sun. Used a thick moisture wrap plastic with UV protectors in its formula.
Lets see what I can grow in them this year!
m0use's haus of projects - garden box edition


Likes
7
Share

@Thedibber
Follow
16/11/25 - Prepped drying tent ready for the 3 plants to be chopped tomorrow 17th Nov 2025
Likes
23
Share


@420DeepGrow
Follow
Gracias al equipo de Kannabia, Marshydro, XpertNutrients y Trolmaster sin ellos esto no sería posible.
💐🍁 RS11:
Las variedades de marihuana son cada vez más grandes y mejores, y la Rainbow Sherbet #11 de Kannabia ha llegado para revolucionar tu mundo con su extraordinario contenido de THC del 30% y sus terpenos increíblemente deliciosos. Con una genética 70% índica, esta descendiente de la Pink Guava y la Sunset Sherbet ofrece muchas características interesantes, como su espectacular belleza. Sus cogollos a veces adquieren una tonalidad azul y brillan con una gruesa capa de tricomas, por lo que parecen piedras preciosas cannábicas.
Germina las semillas en exterior o interior, y prepárate para quedarte con la boca abierta. La Rainbow Sherbet #11 no necesita muchos cuidados para producir plantas robustas y vigorosas. Incluso los principiantes podrán conseguir un buen botín cuando llegue el momento de la cosecha, y los cultivadores que ya tienen experiencia no tendrán problemas para hacer que sus plantas rindan al máximo. Con un poco de LST podrás maximizar su producción, y tras 9 semanas de floración en interior conseguirás alrededor de 450-500g/m². Al aire libre, esta variedad puede generar hasta 500-600g por planta.
El nombre de esta variedad augura un montón de sabor, y la Rainbow Sherbet #11 cumple con creces. Sus cogollos tienen un aroma extremadamente complejo que convierte cada fumada en un viaje aromático. Las fragancias que más destacan son las afrutadas (principalmente a cerezas y bayas), así como las cítricas. Esta mezcla va acompañada de unos matices terrosos y especiados y de un toque de pino. Tras unas cuantas caladas, los efectos de la Rainbow Sherbet #11 aparecen con toda su fuerza, potenciando la alegría y la creatividad, calmando el cuerpo y la mente, y ayudándote a olvidar las penurias del día.
💡TS-3000 + TS-1000: se usaran dos de las lámparas de la serie TS de Marshydro, para cubrir todas las necesidades de las plantas durante el ciclo de cultivo, uso las dos lámparas en floracion para llegar a toda la carpa de 1.50 x 1.50 x 1.80.
https://marshydro.eu/products/mars-hydro-ts-3000-led-grow-light/
🏠 : Marshydro 1.50 x 1.50 x 1.80, carpa 100% estanca con ventanas laterales para llegar a todos los lugares durante el grow
https://marshydro.eu/products/diy-150x150x200cm-grow-tent-kit
🌬️💨 Marshydro 6inch + filtro carbon para evitar olores indeseables.
https://marshydro.eu/products/ifresh-smart-6inch-filter-kits/
💻 Trolmaster Tent-X TCS-1 como controlador de luz, optimiza tu cultivo con la última tecnología del mercado, desde donde puedes controlar todos los parametros.
https://www.trolmaster.com/Products/Details/TCS-1
📆 Semana 2:
Gran primera semana, ella ha dado un gran estiron estos días, si sigue así será una gran cosecha.
Esta semana se practica defoliacion, poda de ramas bajas y se le agrega Sticky Fingers .
La carpa está ocupada al 100%, sigue una floracion explosiva gracias a @Marshydro y @Xpertnutrients y @Trolmaster con esta gran genética 💪.
Potencia de la lámpara: 70%


