


Likes
Comments
Share

@Growfather1
Follow
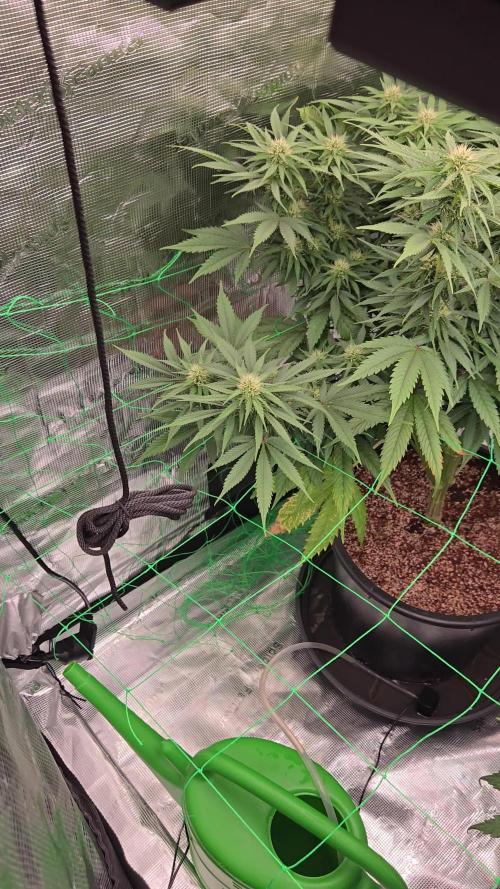
Hello everyone,
The plants are healthy and looking good.
This week i started to add pk 13/14 to the reservoir 12ml to 50 liter reversed osmose water and lowered canna coco a&b to 120ml per 50 liter.
The water runoff is 600 ppm so no salt buildup in the soil for now.
Thanks for stopping by and have a nice week.


Likes
89
Share


@nonick123
Follow
Día 54 (10/03) Riego 1,25 Litro H20 + Wholly Base 2,5 ml/l + Solid Green 2 ml/l + Early Flower 1,25 ml/l de Gen1:11
TDS 1033 PPMs - pH 6,51
Día 55 (11/03) Defoliation time!
Con la increíble ayuda de @miyaguiokpolilla, @dogdoctorofficial y @growwithflow420 hice la defoliación recomendada exactamente después de 21 días cambiada a 12/12
Consejos de defoliación
- Elimine menos del 20% de las hojas de abanico y solo las hojas de abanico
- Retirar el tercio inferior de la planta, incluidas las ramitas.
- Retirar las hojas en forma de abanico dirigidas hacia el interior de la planta.
- Retire las hojas de abanico que dan sombra a los futuros cogollos.
Día 56 (12/03) Esperando algo de estrés tras la defoliación... Han crecido 2 centímetros en 24 horas 😍🚀
Día 57 (13/03) Riego 1,25 Litro H20 + Wholly Base 2,5 ml/l + Solid Green 2 ml/l + Early Flower 1,25 ml/l de Gen1:11
TDS 1043 PPMs - pH 7,0
Las plantas muestras una ligera deficiencia de CalMag. Voy a subir el pH a 7.0 en este riego para mejorar la biodisponibilidad
Día 58 (14/03) Siguen con su crecimientos, los cogollos formándose y las hojas de azúcar empezando a llenarse de resina
Parece que la corrección de la deficiencia de CalMag ha sido muy efectiva! No hay más manchas y las plantas no paran!
Día 59 (15/03) Como mañana me voy a Spannabis 😍 voy a adelantar 1 día el riego reduciéndolo a 1 litro
Riego 1 Litro H20 + Wholly Base 2,5 ml/l + Solid Green 2 ml/l + Early Flower 1,25 ml/l de Gen1:11
TDS 1080 PPMs - pH 6,57
Día 60 (16/03) Spannabis time! 🚀
Día 61 (17/03) Spannabis time! 🚀
💦Nutrients by Gen1:11 - www.genoneeleven.com
🌱Substrate PRO-MIX HP BACILLUS + MYCORRHIZAE - www.pthorticulture.com/en/products/pro-mix-hp-biostimulant-plus-mycorrhizae
🎚️Controlled by TrolMaster TCS-1 Tent-X System Main Controller - https://www.trolmaster.com/Products/Details/TCS-1

Likes
52
Share


@DevilsBud
Follow
New week for the 2 purple berry Kush
I think the purple berry Kush needs couple days more then the rest but it's going great there at a size that adding extra nutrients is waste and only making flushing take longer so starting to lower all nutrients and preparing for last week exited times
Happy growings Growmies 🤜🏻 🤛🏻
visit www.marshydro.eu
for your best gear and use the PROMO CODE: DEVILSBUD
Some info about the Marshydro FC-4800
Superb Quality LED Chips: The whole light is composed of 1206 pcs Samsung lm301b and Osram 660nm chips. More than two times as many LEDs are used to drive the grow lights at low currents and to avoid overdrive. Quality is guaranteed and efficiency is up to 2.8 μmol/j.
Even PAR Distribution and High PPFD Output: The multi-light bar design and the densely distributed light chips enable the LED grow lights to achieve the optimum PPFD required for plant growth over the entire effective coverage area.
Specifically Designed Spectrum: To ensure even plant growth, blue and red light are enhanced on the basis of a full spectrum combination. Not only does this accelerate plant growth, but it also improves the yield and quality of the plants at the same time.
Dimming Daisy Chain Function: The dimming function saves on electricity costs and enables brightness from 10% to 100% for the different stages of plant growth. A single master light can connect up to 30 lights in a daisy-chain system.
Business LED Grow Light: The light's wavy heat sink dissipates heat quickly and the IP65 waterproof allows the light to operate in humid conditions. 180° collapsible feature for easier installation. All these features provide favorable assistance for commercial cultivation.
And some tent info
●【Lock All Light Insid】MARS HYDRO Grow Tent Interior is made of diamond mylar. Non-toxic to the environment, no harm to plants. High-quality 1680D canvas being double stitched, (ALL OTHERS BRAND grow tent is 601D canvas) which is tear-proof for perfect light locking, No light leaks or rips at all.
●【Durability Grow Tent】Stable Metal corner adapters and poles are the trustful supporters of the tent. No rusting nor paint-falling. Quick easy tool-free installation. Carries strong heavy-duty SBS zippers, double layer lining to create a light-proof seal.
●【Easy Observation of your Plants】Special peeks window made by double layers of cloths. Observe the growing conditions of your plants without opening the tent and avoid disturbing plants. The peek window also serves to dissipate heat and ventilate air.
●【Removable Tray Keep Clean】The package includes a removable waterproof floor tray to hold soil and fallen leaves. The tray can be taken out easily to wash. Removable and water-proof makes cleaning easy.
●【Good Ventilation&Fast Assembly】 Circular double-sleeved vent holes with adjustable nylon strap for air circulation by exhaust fan, ducting, carbon filter, or reflector. Better allows proper light, heat, and airflow. Quick tool-free installation. Reinforced by a sturdy metal frame to ensure security and stability, supports up to 140lb. Perfectly safeguard your plants to thrive even in winter


Likes
12
Share

@GERGrowDesigns
Follow
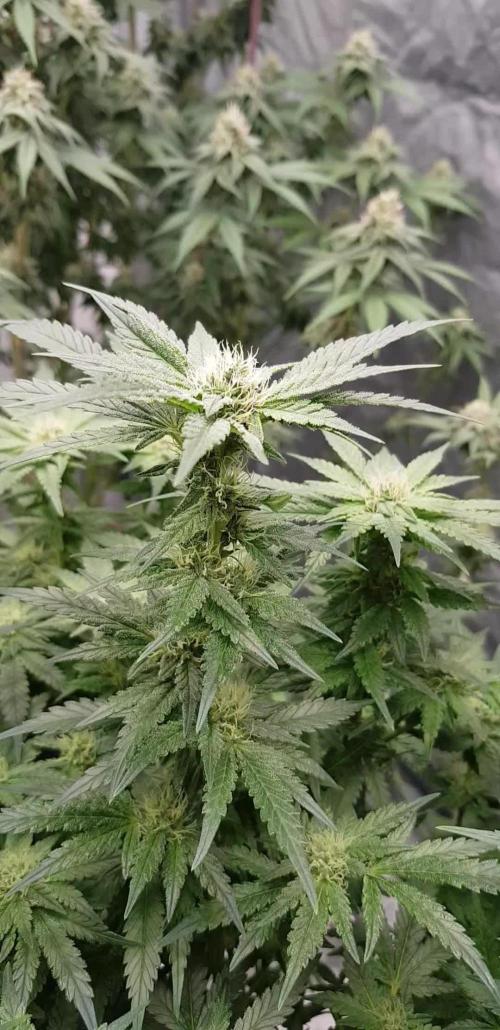
Welcome to Flower Week 5 of Sensi Seeds Mandarine Jam
I'm excited to share my grow journey with you from my
Sensi Seeds Project . It's going to be an incredible ride, full of learning, growing, and connecting with fellow growers from all around the world!
For this Project , I’ve chosen the Feminized Photo Strain Mandarine Jam:
Here’s what I’m working with:
• 🌱 Tent: 120x60x80
• 🧑🌾 Breeder Company: Sensi Seeds
• 💧Strain Info : 20-23%
• ⏳ Flowering Time: 7-8weeks

Likes
2
Share


@Lautimi
Follow
ya un poco mas grande, me empiezo a dar cuenta de que el moho volvio. entonces empece a cuestionarme si regaba mal. Efectivamente estaba regando demaciado para la planta

Likes
6
Share


@Muravushka
Follow
I started this grow in previously used coco, where you can see remnants of the plants. During a grow cycle


Likes
25
Share


@Ultraviolet
Follow
Replaced nitrogen with omina, omina has 14.0.0. Stretch almost over, growth almost switched to full flowering. Increasing phosphorous and potassium, beauty of nature is it only takes what it needs.
Started to remove some weights as stems starting to show solid reinforcement and are ready to hold fat cola. Fingers 🤞.
Decreased hours of light to 10.
Extended hours of cold @ night from 2 to 6 hours @59 Farenheight with 2 hours both sides @ 70&77 respectively.

Likes
74
Share


@MrHightimes
Follow
Paitence is a virture!
I got so far as to set up for the chop but decided to finish the week with a Ripen Flush.
Its already Wed, just a few more days to see what happens, then maybe 10 days on the 2nd.
The other 2 need maybe this week and next week then a flush week i'm thinking.
Theres no rush but i'm anxious to chop em soon!
___________________________________________________
Fuck it! I harvested the finished plant. The colas were epic! Its gonna be a nice yield, I'm pretty confident its close to 4oz. Will Chop other plant sooner than later I think.

Likes
Comments
Share


@Organic473
Follow
There’s a sweet grape 🍇 pungent smell that lingers after watering which is amazing she also has seeds …I await her ripening.


Likes
4
Share


@Naujas
Follow
77 days!!! wow she looks fantastic, the girl is maturing her flowers, they are growing very quickly :) I am going on a 5-day vacation now, so I think I will be very surprised to see her when I get back:) I am giving her advanced nutrients macro with 6.3 ph water, I think she has about 2-3 weeks left until harvest, good luck to everyone:)
Likes
67
Share

@Tower84
Follow
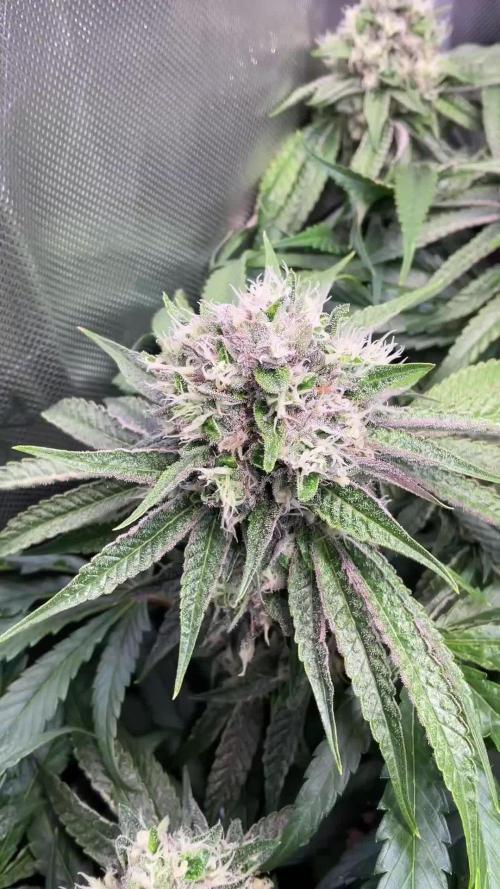
Cherry Limeade von Doja – Wochenupdate 🌱
Die Entwicklung der Buds schreitet weiterhin sehr gut voran 🌸. Sie legen sichtbar an Masse zu und insgesamt entwickelt sich die Cherry Limeade genau so, wie ich es mir zu diesem Zeitpunkt der Blüte wünsche.
Auch beim Geruch hat sich wieder einiges getan 👃. Das zuvor sehr spritzige Limettenaroma ist mittlerweile etwas schwächer geworden. Dafür entwickelt sich das Terpenprofil zunehmend in eine angenehme Zitrusrichtung mit etwas Süße und Cremigkeit 🍋🍦. Genau diese Entwicklung gefällt mir sehr gut. Das erhoffte Kirscharoma ist allerdings leider weiterhin überhaupt nicht wahrnehmbar 🍒. Ich hoffe zwar immer noch, dass sich hier gegen Ende der Blüte noch etwas tut, langsam habe ich aber Zweifel, ob die Cherry Limeade tatsächlich noch in diese Richtung geht.
Beim Tensiometer habe ich inzwischen einen weiteren Versuch nach den Angaben des Herstellers durchgeführt. Leider zeigt es auch diesmal nach einigen Tagen wieder deutlich trockenere Werte an, als ich aufgrund des tatsächlichen Zustands des Substrats erwarten würde 🤔.
Ich habe inzwischen allerdings einen Verdacht, woran es liegen könnte. Mein Substrat enthält einen gewissen Kokosanteil, der bei der Herstellung der Suspension stark aufquillt. Wenn ich diese Suspension wie vorgesehen in das Loch einfülle und anschließend die Keramiksonde einsetze, scheint sich das Substrat beim anschließenden Rücktrocknen wieder etwas zusammenzuziehen. Dadurch könnte der direkte Kontakt zwischen Keramiksonde und Substrat schlechter werden und das Tensiometer anschließend zu trockene Werte anzeigen.
Diese Woche werde ich deshalb noch einen letzten Versuch mit einer entsprechenden Anpassung durchführen 🔧. Danach werde ich das Thema für diesen Grow aber auch erst einmal abhaken. Ich kontrolliere den Wasserverbrauch der Pflanze ohnehin relativ regelmäßig und habe dadurch einen zusätzlichen praktischen Anhaltspunkt 💧. Aktuell liegt der Verbrauch bei etwa 1,8 Litern pro Tag, was für die Größe der Pflanze weiterhin sehr plausibel erscheint.
Ab heute erhöhe ich den Ziel-VPD noch einmal leicht von 1,3 auf 1,4 kPa 📈. Ansonsten läuft der Grow inzwischen praktisch vollständig auf Autopilot 🤖. Alle drei bis vier Tage fülle ich den Wassertank wieder auf – viel mehr gibt es momentan nicht zu tun.
Genau so soll es sein: Die Pflanze macht ihr Ding und ich versuche, möglichst wenig daran herumzuschrauben 😎🌱.
📊 Aktuelle Parameter:
💡 Licht: 900 PPFD / DLI 39 (12/12, Stufe 6, 40 cm Abstand)
🌡️ Temperatur: 28 °C
💧 Luftfeuchtigkeit: 61 %
📈 VPD: 1,3 kPa → 1,4 kPa
🌿 CO₂: Ø 740 ppm
💦 Wasserverbrauch: ca. 1,8 l/Tag
Cherry Limeade – Weekly Update 🌱
The buds are continuing to develop very well 🌸. They are visibly putting on more weight, and overall the Cherry Limeade is progressing exactly as I would hope at this stage of flower.
The aroma has also changed quite a bit 👃. The very zesty lime aroma that dominated before has become a little less pronounced. In return, the terpene profile is developing more towards a pleasant citrus aroma with some sweetness and creaminess 🍋🍦. I really like this direction. Unfortunately, there is still absolutely no sign of the cherry aroma I was hoping for 🍒. I’m still hoping it might show up towards the end of flower, but I’m slowly starting to doubt whether this Cherry Limeade will actually develop much cherry character.
I made another attempt with the tensiometer this week, once again following the manufacturer’s instructions. Unfortunately, after a few days it is again showing noticeably drier values than I would expect based on the actual condition of the substrate 🤔.
However, I now have a theory about what might be causing it. My substrate contains some coco, which expands quite strongly when making the suspension. When I fill the suspension into the hole as recommended and then insert the ceramic probe, the substrate seems to shrink slightly again as it dries back. This could result in the ceramic probe losing some of its direct contact with the surrounding substrate, causing the tensiometer to indicate conditions that are actually drier than they really are.
I’ll therefore make one final attempt this week, with a slight adjustment to the installation 🔧. After that, I’ll probably leave the issue alone for the rest of this grow. I regularly monitor the plant’s actual water consumption anyway, which gives me another useful practical reference point 💧. At the moment, the plant is using around 1.8 liters per day, which still seems very realistic for a plant of this size.
Starting today, I’m also increasing the target VPD slightly from 1.3 to 1.4 kPa 📈. Apart from that, the grow is basically running on autopilot 🤖. Every three to four days I refill the water reservoir, and that’s pretty much all there is to do at the moment.
And honestly, that’s exactly how I like it: the plant does its thing and I try not to mess with it too much 😎🌱.
📊 Current parameters:
💡 Light: 900 PPFD / DLI 39 (12/12, Level 6, 40 cm distance)
🌡️ Temperature: 28 °C
💧 Humidity: 61 %
📈 VPD: 1.3 kPa → 1.4 kPa
🌿 CO₂: Avg. 740 ppm
💦 Water consumption: approx. 1.8 L/day
Wenn du möchtest, kann ich den nächsten Wochenkommentar wieder im exakt gleichen Stil fortführen und dabei nur die Veränderungen zur Vorwoche herausarbeiten.

Likes
16
Share


@SirBudAlotts
Follow
You see her stretch? You see her reaching for sun? Damn she is already beautiful...All four of them. Not 1 is lacking in growth or showing signs of struggle.
Maybe I'm not doing it right. But this is the first time all seeds is looking this well in the 2nd week .
Thanks for the visit...keep your eyes peeled grommies...some awesome things are happening

Likes
16
Share


@SeshHouseCannabis
Follow
Been doing a lots of defoliation in this week(Especially on ETHOS-Lilac Diesel) and all the plant are looking great. Still waiting for the bloom fertilizer and then we will start flowering stage as soon as we received the fertilizers.


Likes
2
Share


@Saintvicious
Follow
Can't Lst this thing enough. Seems like every other day it needs readjusting. Autos are crazy when they start going.
Likes
5
Share


Likes
14
Share


@StickyFingah420
Follow
Semana 5 y ya en prefloracion, he usado una enmienda orgánica que contiene muchos minerales y también apliqué lactobacillos, los que ayudan a soludibilizar el fósforo en el sustrato.