Likes
Comments
Share
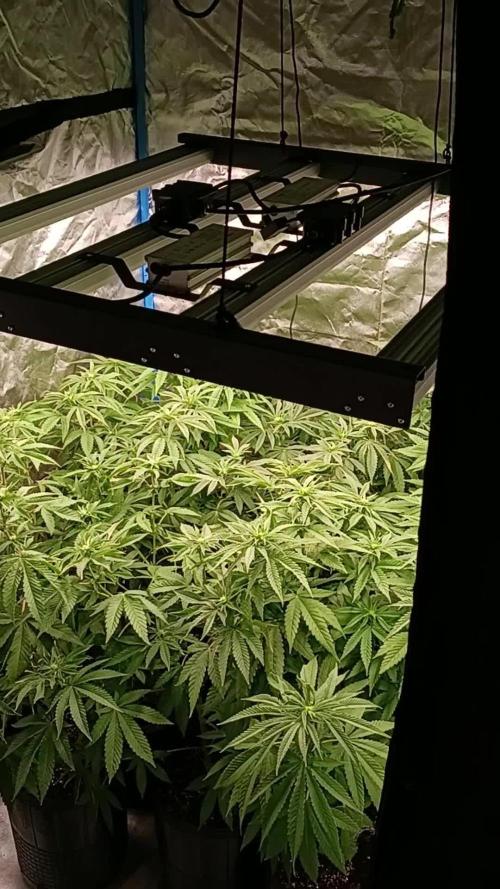
Schön das die Kleine noch ein wenig gestretcht hat. So passt Sie mit höher stellen genau ins Canopy. Enemy of the State wurde heute ausgedünnt und gelollipoppt. Das Netz habe ich ca. 5 cm höher gemacht.
Likes
8
Share
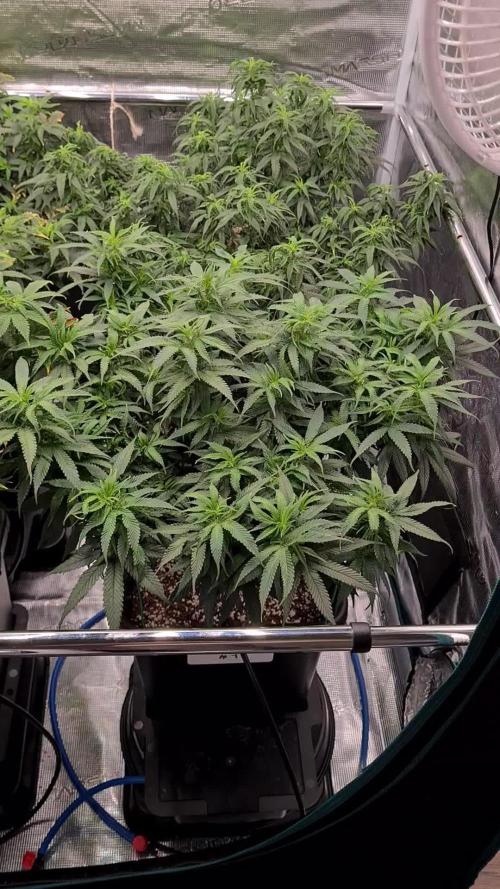
First time running an auto. This will be last plant of current perpetual grow, hence the lower than ideal soil level - I ran out and am shutting things down and going on vacation in April so will get more around that time. Looking forward to running early lemon berry (ethos) when I start back up. Will include plant and light height and distance details once I begin LST. Her sister, punch berry cookies, will be moving to flower tent tomorrow. The auto will finish alone and in this tent. Video/photos taken 7 days after breaking soil.
Likes
12
Share
WEEK #15 — FIRST SIGNS OF FROST Most „Standard“ Week so far, i guess. A Little grow, a little leaves removed (that shadowed other Branches), Water Water — same same all week. The only new thing: A Little smell. Slush Mint cake very fresh and fruity (had the Impression of a light menthol Impression in the air a few times). Skywalker like lemon-soapy Style. Looking forward to how it will develop individually. The Look: another clear difference is the appearance. SMC is very flat (like really flat), very dense, but mostly with distance between buds. Skywalker rather normal, but also dense. Both have „breakout“ Kolas, canopy rather uneven, so light Distribution not that great. Well, LED aint the sun, hu? BUT: The underdog, Mint Cake, has the most frostied leaves, covered in trichomes. From shaft to the tip, ALL of them, what makes them appear light green, although the leaves are rather dark. Hope this will develop Even further, very impressive so far. First few pistills turning brown already, However according to Dutch Passion, bloom is 8-9 weeks for SMC and 9-10 Weeks for Skywalker *Haze* on average. This should mean like half is already over. ☺️ Bonus: CUTE - SMC as well as Skywalker have slight purple tips (🍆) respectively tiny dark/ purple leaves. Fingers crossed i have a purple pheno! Temperatures are hot at the Moment, humidity dry. Both Translate to very good conditions in the tent. Guess thats it for this week, stay tuned. Edit: For nutrients, i still have some calmag and phosphor around from my beginnimgs. They dont seem necessary at the Moment, but — so i assume — will Not harm the plants either, at least in a very light concentration.
Likes
2
Share
Sticky Mango Auto — Week 4 Update Grower: Stoney Stark / Little Lilly Farms Stage: Late Veg → Early Flower Transition ⸻ Growth Overview By Week 4, a noticeable size difference has developed between the two plants. One plant is nearly double the size of the other, while the smaller plant has entered early flower first, showing visible white pistils. This staggered development is not uncommon in autoflowers and appears to be influenced by early root-zone moisture differences. The larger plant remains in late vegetative growth, while the smaller plant is clearly transitioning into flower. ⸻ Moisture Management & Wicking Adjustments 2/1 Signs of overwatering observed. Pots were placed on stands to remove them from the wicking rope and mat. The absorbent pad was removed from the pot showing more stress, while the healthier plant remained on the mat. After ~11 hours, both plants were returned to their wicking material. 2/2 Plants continued to show signs of excess moisture. Both were again placed on stands to fully disconnect from the wicking ropes. 2/3 Decided to extend dry-back by another 24 hours to allow the root zone to re-oxygenate. These adjustments helped slow water uptake and encouraged healthier root respiration before flower onset. ⸻ Flower Initiation 2/5 First signs of flower observed — white pistil hairs visible. 2/6 Smaller plant clearly showing pistils. Both plants were low-stress trained by tying down branches to open structure and manage height differences. ⸻ Feeding Log — 2/6 • Total volume: 1 gallon (split evenly) • Amount: ½ gallon per plant • PPM: 877 • pH: 5.9 Nutrients (per gallon): • Armor Si — 1 ml • Micro — 5 ml • Grow — 2 ml • Bloom — 4 ml • CaliMagic — 1.5 ml • Floralicious Plus — 1 ml ⸻ Nutrient Strategy & Purpose (Week 4 Transition) Armor Si (Silica) Used to strengthen cell walls and improve stress resistance. Especially important here due to recent moisture stress, training, and the upcoming stretch phase. Micro Provides essential micronutrients (iron, manganese, zinc, copper) that support chlorophyll production and enzyme activity. Keeps growth balanced as the plant shifts metabolic focus toward flowering. Grow (Reduced) Nitrogen is still needed, but at a lowered rate. This supports continued leaf function without pushing excess vegetative growth, which can be counterproductive once flowering begins—especially for the smaller plant already showing pistils. Bloom (Increased) Phosphorus and potassium are ramped up to support flower initiation, root signaling, and early bud site development. This helps both plants transition smoothly despite their size difference. CaliMagic Calcium supports cell division and structural growth, while magnesium is essential for chlorophyll production. Critical in coco, especially during stretch and early flower when demand increases. Floralicious Plus Provides organic acids and bioactive compounds that enhance nutrient uptake, improve root efficiency, and help buffer stress from training and environmental adjustments. ⸻ Notes Going Forward With one plant entering flower ahead of the other, feeding will remain balanced but conservative on nitrogen while continuing to support early bloom development. Moisture management will stay a priority to prevent further root stress and ensure a smooth transition into full flower.
Likes
24
Share
@m0use
Follow
***Sponsored Grow*** = Medic || https://medicgrow.com || Grow = ***Sponsored Grow*** Ok, so first week of introducing the trip tonic line of feed into the medium and getting rid of the lotus crap, all of the newer growth is looking much better and some of the older growth is greening up but I don't expect a full fix for that. Gave some extra grow B in this week as it is higher in P and K and will act as a small PK boost for the stretch that is to come. Flipped my plants to flower as well so they are now on a 12/12 setting. Been using the medic grows mini sun 2's internal timer in the lights and they appear to be working just fine. They have pre-programmed setting of 12/16/18/20/22 "on" cycles, I thought it might have been hold the dial till the number you want came up but its not that fancy. As of now my photoperiod is from 1:30pm-1:30am but I might move this up to 12pm-12am so when I need to look at my plants I'm not waiting till the afternoon. Its really only an issue on the days I'm working. over all happy with the progress, Plants are drinking lots so I'm happy with that. Lights still running at 80% with V1 spectrum, will increase to 100% after stretch, don't need to growing into them and burning up. Till next week. ***Sponsored Grow*** Official Website: https://medicgrow.com/ + https://www.emeraldtriangleseeds.co.uk/ Facebook: https://www.facebook.com/medicgrowled + https://www.facebook.com/OriginalETS/ Twitter: https://twitter.com/medicgrow + https://twitter.com/emeraldseeds Instagram: https://www.instagram.com/medicgrow420/ + https://www.instagram.com/emeraldtriangleseeds/ YouTube: https://www.youtube.com/channel/UCNmiY4F9z94u-8eGj7R1CSQ Growdiaries: https://growdiaries.com/grower/medicgrowled https://growdiaries.com/grow-lights/medic-grow + https://growdiaries.com/grower/emeraldtriangleseeds https://growdiaries.com/seedbank/emerald-triangle-seeds
Likes
8
Share
02/07 - Prepped for cloning - applied heavy defoliation - isolated clone cuttings - prepping 15 clones for 4x4 - running mother in veg for about 3 maybe 4 more weeks then flipping into flower (02/25).
Likes
3
Share
@PalmaGrow
Follow
No se cómo expresar mi felicidad después de casi 3 años sin poder cultivar consecutivamente he podido cosechar esta belleza gracias a @blacktunaco por la K.O una genética llena de resina con flores compactas. Cometiendo errores desde el principio se pudo obtener una excelente planta corrigiendo todo para así mejorar el aprendizaje continuo. Se dieron 12 días de lavado de raíz y 3 de estos estuvo expuesto a lluvia constante durante los 3 días por tal razón se decidió cosechar para evitar dañar las flores
Likes
44
Share
@I_and_I
Follow
About to go on holiday for two weeks, my mate looks after them like a boss, By now I know a lot more About light and realise I need another light especially for flowering, the plan is to order a 240w quantum board, 301b Samsung chips just as I go on holiday to take delivery on return, this takes a bit longer than expected to order light, I leave for holiday around end of week 5 veg
Likes
14
Share
@nonick123
Follow
Día 8 (20/01) Subo a DLI 20 Elimino la cúpula de humedad y oriento el ventilador para que les llegue una ligera brisa que fortalezca el tallo Hago un riego de unos 30 ml en la maceta de 1 Litro Día 9 (21/01) Se ve saludable y se empiezan a formar las primeras hojas reales! Día 10 (22/01) Desarrollo esperado para el día 10 Día 11 (23/01) Sigue desarrollándose bien. Las raíces se asoman la parte inferior de la maceta Riego con 100 ml H2O RO Día 12 (24/01) Buen aspecto y desarrollo Día 13 (25/01) Riego con 50 ml H2O RO Día 14 (26/01) Hoy procedemos a trasplantar a las chicas a su maceta definitiva de 6 litros con la siguiente mezcla: Substrato PRO-MIX HP BACILLUS + MYCORRHIZAE BIOTABS estrategia de cultivo de "Solo agregar agua", donde todos los nutrientes están premezclados en la tierra: SILICIUM FLASH 5 g/L de sustrato STARTREX 5 g/L de sustrato DOLOMITA 2 g/L de sustrato (ya que riego con H2O RO) MYCOTREX 5 g en el agujero del trasplante BIOTABS: 1 unidad a 10 cm de profundidad Se llena la maceta con las manos (limpias) y rompiendo los trozos de sustrato más gruesos, para que el sustrato esté aireado y esponjoso, sin presionar Se coloca una maceta vacía para que quede la forma perfecta de la maceta donde están las plántulas Se llena hasta arriba, y se hace un 1er riego muy lentamente con 0,75 Litros de H20 Osmosis RO Después de que el sustrato haya compactado y bajado de nivel (algo normal), se vuelve a rellenar con la mezcla de sustrato + nutrientes de BIOTABS hasta el borde Se saca la plántula de su maceta actual (bonitas raíces 😍) y se coloca en la maceta final Se vuelve a regar 0,5 L H2O Osmosis (RO) y se coloca en el armario ajustando la luz a DLI 25 El riego total es de 1,25 Litros H2O Osmosis (RO) A ver como reacciona al trasplante! Se aplica BoomBoom Spray 5 ml/L para ayudar con el estrés del trasplante! Khalifa Genetics - https://khalifagenetics.com/product/lemon-blanco-v3/ 💦 BioTabs 15% DISCOUNT code "GDBT420" biotabs.nl/en/shop/ @biotabs_official 🌱Substrate PRO-MIX HP BACILLUS + MYCORRHIZAE @promixmitch @promixgrowers_unfiltered 💡2 x Mars Hydro FC1500 EVO Led Grow Light (2024 NEW FC 1500-EVO Samsung LM301H 150W LED) - https://marshydro.eu/products/fc1500-evo-led-grow-lights/ - https://www.amazon.de/dp/B0CSSGN5D8?ref=myi_title_dp
Likes
1
Share
The tale of one strain but two different grows. Plant a is looking she she is ready to be harvested. I'm going to give her another week or two just to get the tricone a little more amber about less then 5% Plant b is looks healthy and is getting thick I am probably going to give it another 3 week cause alot of tricones are not cloudy about 50 to 60% is cloudy will wait till 90-100% is cloudy
Likes
7
Share
Die Pflänzchen sind aktuell immernoch am stretchen. Ich muss die Lampe nahezu jeden Tag weiter wegstellen. Alle sind absolut gesund, keine Anzeichen auf Spinnmilben, Nährstoffbrand oder ähnliches. Die Fächerblätter sind teilweise riesig. Gestern habe ich gegossen, die 30 Liter im Becken wurden innerhalb eines Tages aufgenommen. Ich hab aktuell (dem Sommer entsprechend) meine Lüftung auf dem Maximum plus Luftentfeuchter aber ich habe Probleme die Temperatur und Luftfeuchtigkeit in Griff zu kriegen. Im Zelt selbst sind 3 Ventilatoren aufgebaut, ein oszilierender richtiger Ventilator und 2 Schreibtisch Mini Ventilatoren. Damit ich wenigstens die Luftzirkulation im Griff habe. Alles in allem etwas chaotisch aber trotz der nicht optimalen bedingungen explodieren die Pflänzchen förmlich.
Likes
59
Share
Beginning of week... Out of the blue.. For no reason at all.. I went ahead and topped her. The branches are already beginning to form.. so I just wanted to speed them up a little 🤷 lol.. I also removed the bottom node (leaves and branches).. They usually just don't grow like the 2nd, 3rd, etc... and the branches were not symmetrical whatsoever lol.. That really grinds my gears (it really bothers the shit outta me lol).. She is left with 3 nodes at the moment.. I will decide which nodes I want to use and go from there.. So I will be going up a tad on the Armor Si.. Up on the CALiMAGic, adding in some FloraGro, amd going up just a tiny bit on the Floralicous Plus to bring it up to the normal dose.. Still using the Hydroguard and the MYCO Plus (powder) at the normal doses.. Other than that, just been watering/feeding when the top of the medium is dry, and when you can clearly feel the weight of the pot (bucket of butter lol) is pretty much weightless.. Basically, I feed on a Monday.. Then just plain pH'd water on Thursday or Friday.. Then back to feeding again on Monday.. This will obviously change once the roots fill the pot (bucket o' margarine) within the next couple weeks or so.. Btw.. Not sure if I mentioned this already.. Dont feel like going back and checking lol.. But I put about 2 - 3 inches of just perlite at the bottom.. Not sure if this helps or does anything lol.. But I've seen other people do it.. Had some extra on hand.. Sure! Why not? I never let this sit in runoff.. Infact, when I water/feed, I place the pot on top of a cup so that she won't be sitting in runoff and so I can collect the runoff as it drips out the bottom.. So far, the runoff pH comes out a little low still.. Going in at 6.2 and the runoff will be like 5.8 or 5.7.. But, I do believe that it has been slowly making its way up.. I should really start buffering and finding a way to remove roots when I harves, so I can keep reusing and avoid issues.. Anyways.. She is happy and healthy.. Topped her and remove the bottom node.. That's all there is to report on so far.. Will be updating mid week and end of week as I usually do.. So excited!!! 😁 Mid week.. So it looks like the bottom 2 branches are triploids! I could be wrong.. But that's what it looks like to me! Can't be mad about that! Lol.. I can tell she is going to be a short thing.. Perfect for this grow box! Not sure what these weird markings are.. But this literally popped up overnight.. Will be keeping an eye on it!.. Hopefully nothing.. But we shall seeee!... End of week... She's doing good.. I removed the very top node that I left.. Lol.. Yeah I can be very indecisive when it comes to that stuff.. Can always just remove one later if I need too.. But yeah.. I've kinda just been tucking the top 2 branches under the bottom 2 branches so that the bottom 2 can get some good lighting too.. So I try to switch once a day or sometimes twice a day.. Once the tops grow a bit more they should all be able to get their own light without the tucking and whatnot.. But still just been feeding toward the beginning of the week and just plain pH'd water toward mid/end of the week.. The runoff pH is a little acidic.. But it doesn't seem to be hurting anything so far.. The roots have made it to the bottom of the pot.. They did a long time ago, but have really filled the pot alot already.. But I've pushed plants alot longer in much smaller (veg for 6 weeks in a 9oz solo cup).. Her branches are so thick and sturdy! She is gonna be so strong!.. I really need to make sure I don't LST too late cuz it's gonna be hard to bend these tree trunk branches.. But I'm playing with her at least twice a day, so I doubt I will miss the opportunity lol.. But I can't wait to taste some Blue Berry!!! On to the next week!...
Likes
19
Share
@TylerBud
Follow
Welcome to the Jungle 😁😎 Girls are enormous , i literally lollipopped them 😅 , later in the flowering i will also make a great defoil of the tops to prevent very serious mold that already attacked my autos ,
Likes
14
Share
Week 1: Transition to Flowering Welcome to the fifth weekly update of our cannabis cultivation journey in Germany! As we transition from the vegetative stage to the flowering stage, our strains—Pulp Friction, Cookies Haze, Eleven Roses, Poddy Mouth, Critical Lemon Kush, and OG Kush—are ready for the next phase of their growth. Before entering the flowering stage, we took a few important steps to prepare the plants for optimal flowering. Key Developments: 1. Pre-Flowering Preparation: - The plants were defoliated to remove excess leaves and improve light penetration and airflow. - Each plant was repositioned to ensure they have ample space and light exposure. 2. Growing Medium and Setup: - The plants are grown in a mix of living soil, coco coir, perlite, and clay pebbles. - The soil mix includes mycorrhizal fungi cultures to support healthy root development. 3. Watering and Nutrient System: - The plants are watered from the bottom using an AutoPot system, which provides a consistent supply of nutrient solution. - The pots are equipped with air domes connected to an air pump, delivering oxygen directly to the roots to enhance growth. Steps Taken: 1. Defoliation and Positioning: - Carefully removed excess fan leaves to improve light distribution and airflow within the canopy. - Repositioned the plants to ensure each one has enough space to grow and receive adequate light. 2. Watering and Nutrient Management: - Set up the AutoPot system to supply a balanced nutrient solution to the plants. - Ensured the nutrient solution is appropriate for the flowering stage, with a focus on supporting bud development. 3. Air Domes and Oxygenation: - Connected the air domes to an air pump to deliver oxygen to the root zone. - Monitored the air pump to ensure consistent oxygen flow to the roots. Next Steps: - Monitor the plants closely for signs of flowering and adjust the light cycle to 12 hours on and 12 hours off to initiate and support flowering. - Continue to observe the plants for any signs of nutrient deficiencies or excesses and adjust the feeding regimen as needed. - Ensure the AutoPot system and air domes are functioning properly to maintain optimal hydration and oxygenation. Stay tuned for next week’s update, where we’ll discuss the progress of the first week of flowering and any adjustments made to the care routine. Feel free to ask any questions or share your own experiences in the comments below!
Likes
26
Share
@HinduGod
Follow
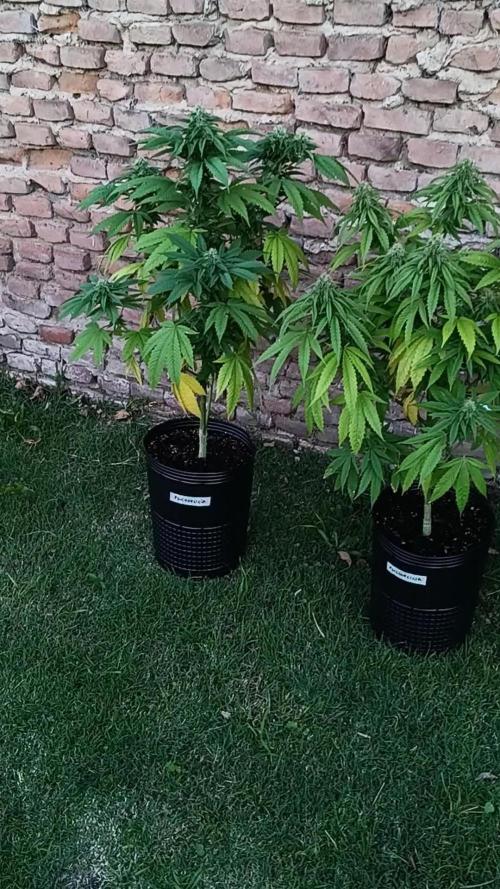
WOW LOOK AT DAT!!! DIS PLANT HAS HAD IT ALL!!! YOU CAN SEE DA FROSTBITE DAMAGE!!! DER IS NOTHING WRONG WIT DAT!!! DIS IS A LATE WINTER EARLY SPRING GROW!!!! IT PROVES DAT YOU CAN GROW AN AUTOFLOWER IN SUBOPTIMAL CONDITIONS OUTDOORS!!!! DIS IS NOT ABOUT YIELD IT IS ABOUT GETTING SOME GOOD SMOKE IN DA WINTER SEASON OUTDOORS DIS IS VERY VERY GOOD!!!! PLEASE COME AGAIN!!!!
Likes
28
Share
Fan leaves are not looking too great. Added abit of npk to supplent so no longer a full organic grow
Likes
57
Share
Hey everyone 😀. Another veggie week goes by and they are developing surprisingly well 😃. Both phenotypes look very nice and have a perfect leaf green. Both were topped again. I wish you lots of fun with the update, and stay healthy 🙏🏻🍀 You can buy this Strain at : https://sweetseeds.es/de/red-mandarine-f1-fast-version/ Type: Red Mandarine F1 Fast Version ☝️🏼 Genetics: Red Poison Auto®️ (SWS39) X Tangie (California Orange x Hybrid Skunk) 👍 Vega lamp: 2 x Todogrow Led Quantum Board 100 W 💡 Bloom Lamp : 2 x Todogrow Led Cxb 3590 COB 3500 K 205W 💡💡☝️🏼 Soil : Canna Coco Professional + ☝️🏼 Fertilizer: Green House Powder Feeding ☝️🏼🌱 Water: Osmosis water mixed with normal water (24 hours stale that the chlorine evaporates) to 0.2 EC. Add Cal / Mag to 0.4 Ec Ph with Organic Ph - to 5.5 - 5.8 .
Likes
12
Share
@Rko41
Follow
Likes
14
Share
ONLY 3 PLANTS LEFT IN THE 8X8. LESS THAN A WEEK EVERYTHING WILL BE DONE 🤞 ALL THE PHOTOPERIODS ARE IN THE 8X8 NOW. THE STRIVE NUTRIENTS IS INSANE.. BEST FERTILIZER PRODUCTS EVER MADE. I USED IT 4 TIMES IN 13 DAYS AT FULL STRENGTH AND THERE IS NO NUTRIENT BURN AT ALL AND THEY EXPLODED. AND I HAD A FEW THAT WERE TURNING YELLOW, I THOUGHT IT WAS ROOTBOUND OR CALMAG DEFICIENCY BUT THE STRIVE NUTRIENTS BROUGHT THEM BACK AND THEY ARE SUPER HEALTHY AGAIN.... ATTENTION GROWERS:::::: YOU MUST TRY STRIVE NUTRIENTS. BY FAR THE BEST FERTILIZER PRODUCTS EVER.. I PROMISE YOU THAT AND IF YOU USE IT YOU WILL NEVER USE ANYTHING ELSE FOR EVERYTHING MARS HYDRO VISIT: www.mars-hydro.com www.marshydroled.ca PROMO CODE: rocknroll VISIT THE ALIEXPRESS STORE: @marshydro_aliexpress Instagram: @marshydropenny https://youtube.com/channel/UChU5ZWwNi-DvnO3oWVU3ceA (NEW) STRIVE NUTRIENTS 💪 Thanks for taking the time to read and check out my diary🤜🤛 FC-E6500 LED GROW LIGHT: FC-E6500 grow light with 3978pcs OSRAM BridgeLux Diodes & Moso Driver, market-leading PPF 2.7 µmol/J, Max 2.5g yield/watt with 30% higher Average PPE, more cost-effective when compared to same style type lights. Only consumes 650W, perfectly cover 5x5ft (personal), 4x4ft (commercial) grow space. Innovative Precise Uniform Lighting-Built-in removable bars interval & dimmability enable the exact & dynamic PPFD control over each of the plant growing stages, FC-E6500 detachable bars deliverSuperior Heat Dissipation: Real Aluminum heatsink together with 6 slim profile passive cooled bars (THINNER & LARGER surface) and detachable Meanwell Driver, create less heat. save 50% hydro than other old grow lights! Driver can be mounted remotely on the side of a grow tent/rack or on an adjacent wall to remove heat from grow space. Full Spectrum UV IR LED: With Yield Max spectrum (660nm Osram enhanced Deep Red,2800k-5000k,730-740nm IR,380-410nm UV LEDs), Average PPFD the FC-E6500 LED grow lamp enables cultivators to produce BIG FAT Dense Buds, perfect for full-cycle hydroponic, soil, grow tent/grow room. Dimmable Commercial Grow Light: Cost-efficient, easy dimming & daisy chain With a max up to 20 lights, IP65 Waterproof, master light easily controls the rest. Perfect for commercial & home horticulture. FC4800 LED GROW LIGHT: GET THE MAX FROM MARS👍: Welcome one of  the newest members of the Mars Hydro family🤜🤛🤘. The Mars Hydro FC 4800 480W LED Grow Light can accommodate up to a 4' x 4' area for flowering. It has OVER 2000 LED chips consisting of the best selling Samsung LM301B diodes which has a Luminous Efficacy of: 220 lm/W 0.2 W, 3 V mid power, Osram 660nm Diodes, Infrared light and UV LIGHT👍. It boasts the incredible efficiency of 2.8 µmol/J, maximum 2.5gram yield per watt with 30% higher Average PPFD. This High-intensity spectrum is beneficial for plants at all stages - from veg to bloom, and creates Big dense Buds👍. achieve 50% higher yields & quality compared with the old lights! Only consumes 480W for 4x4ft personal grows, and 3x3ft for commerical grow. It comes with a dimmer and daisy chain function with a  maximum of up to 15 lights, the master light controls the rest👍. Wide 6-bar design offers even & wide canopy coverage and can maximizes your grow space. slim 180° FOLDABLE DESIGN... YES I SAID FOLDABLE🤘🤣 , making it compact and easy to install, it's IP65 WATERPROOF and will give you no worries while growing in a humid environment and makes it a flexible high performance commercial grow light for enormous  SUPER FROSTY yields.😛😛😛. MARS GETS EM FROSTY BOYS👍 AWESOME HEAT DISSIPATION: The Low energy consumption FC4800 growing light has 6 passive-cooled bars and an aluminum heat-sink a removable driver  you can upgrade later or have it outside your tent. with zero noise  you can save up to 50% in your electricity bill compared to HID's or HPS lights! It also has a removable driver so you can upgrade it in the future or have it outside your grow space for better heat control in your growroom👍 UPGRADED FULL SPECTRUM: Yield Max Spectrum with enhanced red (Top-Bin Samsung 3000k-5000knm, Osram 660nm Deep Red), speed up blooming & fruiting, perfectly suited for full-cycle growing. The FC4800 LED grow lamp was born for Big Buds, perfect for commercial, grow tent, grow room, hydroponics, and all soil grows.👍 THE BEST SAMSUNG DIODES: THE FC4800 has Top Bin genuine Samsung Osram Diodes, combined with remarkable 2.8 µmol/J Efficacy, 30% higher Average PPFD, 50% less energy consumption, to maximize your yields. They give you a TRUSTED 3 years warranty 100% Satisfactory guaranteed!!! TSW2000 LED GROW LIGHT: INCREASE YIELD AND CROP QUALITY WITH MARS HYDRO LED GROW LIGHTS: NEWEST SMD LED technology provides the highest PAR/LUMEN output (1122umol@18") and can make you get 30% higher yield compared to OLD blurple led lights.  Max 2.5g yield per wattage and achieve maximum quality and quantity, much better than traditional HPS grow systems LOW ENERGY CONSUMPTION LED GROW LIGHT: Consuming only 300W true output with 684 LEDS! It saves up to 50% energy than other led grow lights. Perfect for 3.5x3.5ft bloom stage, 4x4ft veg stage. Over 90% light energy can be absorbed by plants, it will have higher intensity in a MARS HYDRO grow tent with diamond design mylar, or by crossing over using multiple TSW2000 HIGH EFFICIENCY FULL SPECTRUM INDOOR GROW: 3000K 5000K and IR 660nm 760nm RED, makes it close to natural light, highly engineered to provide improved growing performance for plants at all stages of growing, rapid plant response from seed to flower; Uniform and wide-beam light distribution for your plant's optimal growth 8x8 1680D GROW TENT The MARS HYDRO 8x8 Grow Tent interior is made of a unique diamond design mylar which is highly reflective. (Other companies mylar and reflective rate is as low as 50%, and it won't provide efficient light. They use thick 1680D oxford canvas, and being double stitched, it is tear proof and perfect for locking in the light. Their grow tent keeps 100% of the light inside the tent and helps your plants absorb more light. EXTRA-THICK material means No light leaks or rips at all.👍 Strong Stable metal corner adapters and poles are the trustful supporters of the tent. It's very sturdy, neither rusting or paint flaking off. quick and easy tool-free setup. They use heavy-duty metal zippers, with double layer black lining, by far the best on the market which creates a light-proof seal. The Easy observation windows are made by double layers of cloth. Observe the growing conditions of your plants without opening the tent and avoid disturbing your plants. The observation windows also serves to dissipate heat and ventilate the air. The tent includes 2 removable waterproof floor trays to hold soil and water. The removable tray can be taken out to wash easily. They guarantee the grow tents are easy to install even if you've never done something like this before. Clear Instructions and no tools needed! They also offer 30-day unconditional refunds for quality problems. Just contact their friendly 24 hours customer service 👍
Likes
8
Share
@Hydronaut
Follow
First set of leaves were a bit light and what appears as some decent tip burn? Bucket was running hot on week two, but left it alone. She’s happy now that she’s starting to get the munchies. Most of the growth is looking decent. I’m going to top above the fourth node, and take the lower branches leaving 6 main branches to train. She’s topped but it looks like I will end up with 8 branches to play with. I may remove the bottom two?