


Likes
Comments
Share

@Sobreruedas
Follow
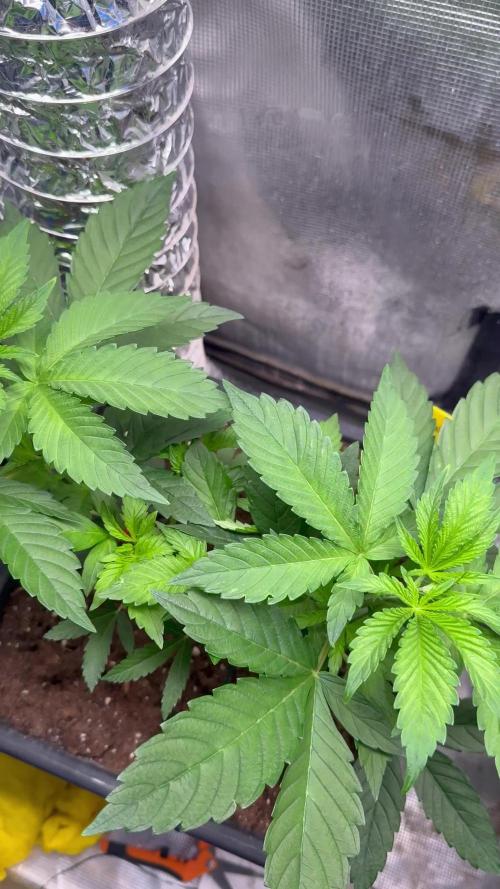
Le he hecho una apical en el tercer nudo, le he hecho una defoliación y a una de las ramas le he hecho supercropping

Likes
3
Share

@Grasshopper96
Follow
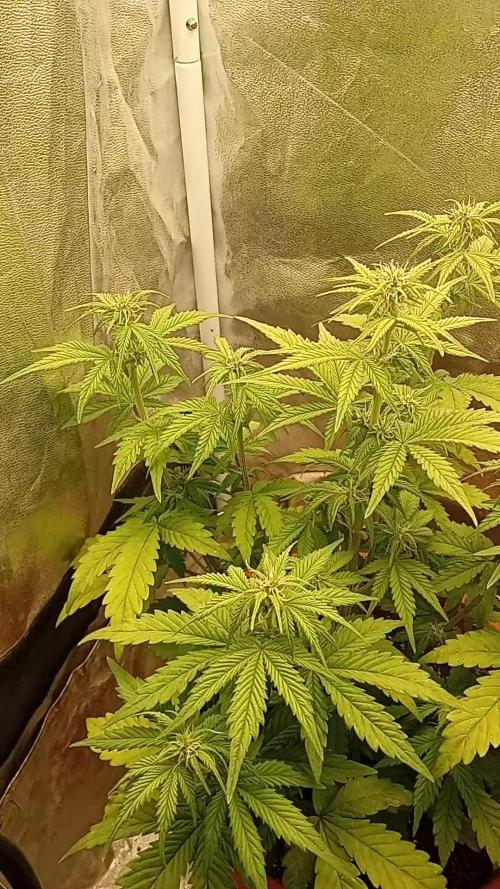
Thiss old school auto have a Life cycle of 10 weeks and today Is the frist day of 5th weeks, tomorrow i do a good words to this plant😍
Having reached the first week of flowering, we can finally pull in our oars (an Italian saying that means we've reached the end). After a good vegetative period, let's start with the regret: the first few weeks were at 12/12 to keep the plant in the flowering box. This negatively impacted the plant's growth, but for financial reasons I couldn't afford another grow box until I eliminated the electric heating. However, the result is satisfactory: 8 apical buds (there should have been 9, but a branch was accidentally topped in the third week). Now we need to see how the plant holds up in flowering. I hope all of you who follow the diary are finding it interesting.
See you later.

Likes
17
Share


Likes
29
Share


@NSABND
Follow
today was the day 🙏
time was running out and i have to harvest "Hilde" 😏
summary of "Hilde" 92 days in under 3 min. enjoy 😅🙏
I dry the plant in the boiler room because the climate there is very good. I also darkened the room so that no sunlight disturbs the drying process.😏
"Darkroom" Day 2 for "Hilde" 😏😄😜

Likes
10
Share


@Audi_grows98
Follow
Cherry cola is getting real close! As you can see in my tricomb pictures I got a new toy! You can see some ambers in there and we’re starting to go down on our nutrients with her. She’s gotten chunky and smelly and I’m super stoked to do a smoke review on this one🤤
Gorilla Cookies is starting to chunk up as well! She’s frosting,chunking up and starting to show what seems to be a slight fade. She’s smelling amazing and I’m super stoked to see her put on the weight 💪
Likes
51
Share


@nonick123
Follow
Día 43 (02/12) CBD Auto 20:1 #1 no para con el stretch! 🚀😍 Le elimino algunas hojas de abanico que tapan la luz a los cogollos inferiores
Está empezando a pedir más agua cada día, pero no me extraña con lo grande que es!
CBD Auto 20:1 #2 está empezando a engordar y engordar los cogollos 💥😁
OG Kush Auto tiene unos erizos preciosos!
Día 44 (03/12) CBD Auto 20:1 #1 sigue imparable. Elimino algunas hojas de abanico
OG Kush Auto se empieza a mostrar más sedienta en la formación de cogollos!
Día 45 (04/12) CBD Auto 20:1 #1 sigue imparable. Elimino algunas hojas de abanico más!
OG Kush Auto también le elimino algunas hojas de abanico
Día 46 (05/12) CBD Auto 20:1 #1 Schwazzing / defoliación intensiva
OG Kush Auto Defoliación!
Día 47 (06/12) CBD Auto 20:1 #1 repetimos Schwazzing / defoliación intensiva debido a que la planta no para!
Es increíble lo que crece esta planta!
Día 48 (07/12) OG Kush Auto ha empezado a aumentar el consumo de H2O, y se muestra sedienta en esta fase. Mañana aumentaré el volumen de riego de 750 ml a 1.000 ml
Debido a que se acerca una ola de frio, hago una mejora sustancial en la tienda
Coloco un radiador de aceite + un termostato digital Wifi (controlador de temperatura) para poder controlar el radiador
Me encanta porque desde la App puedo programar eventos en función de cualquier parámetro, de modo que puedo controlar la histéresis del radiador 😁
Tras un par de días de pruebas, consigo una temperatura estable de 22 - 24 ºC con luces ON! 😁
Día 49 (08/12) CBD Auto 20:1 #1 ha crecido increíblemente esta semana comparándola con la semana anterior! Un monster pheno!
CBD Auto 20:1 #2 hago riego con 750 ml H2O RO + BIO PK 5-8 10 ml/l. ¡Un empujón para la recta final de floración!
Tiene unos colores preciosos en los cogollos! Con tonos rosas y morados en los ápices! 😍
LSD-25 Auto hago riego con 750 ml H2O RO + BIO PK 5-8 10 ml/l. ¡Un empujón para la recta final de floración!
Está preciosa con ese morado casi negro que presenta en cogollos y hojas, unido a los pistilos de color naranja fuego conforme van madurando
OG Kush Auto tiene una formación de cogollos impresionante, y ha empezado a cubrir de tricomas todas las hojas que salen de los cogollos 😍
Lo único preocupante es que ha empezado a mostrar algunas manchas marrones en las hojas de los cogollos...
Riego con 1 litro de H2O RO + 1 g/L de BACTREX para ver si le ayuda con la gestión de este exceso / deficiencia
💦Nutrients by Bio Tabs - www.biotabs.nl/en/
🌱Substrate PRO-MIX HP BACILLUS + MYCORRHIZAE - www.pthorticulture.com/en-us/products/pro-mix-hp-biofungicide-plus-mycorrhizae
"GDBT420" 15% DISCOUNT code for the BIOTABS Webshop https://biotabs.nl/en/shop/
Likes
2
Share


@CanarianGrow92
Follow
We placed the clones in 7 liter pots, 1 of the clones looks worse than the other 2, but lets give her some days, she need some nutrients and im sure she will get better

Likes
16
Share


@ChewiesGrow420
Follow
Today on day 17 from date of birth Iam preparing a worm casting tea. In a cheese cloth bag ,Made up of 2 cups of worm castings 2 tablespoons of unsulfured molasses,2 tablespoons of mineralized phosphate (bat shit) ,2 tablespoons of soluble seaweed extract . 2 tablespoons of alfalfa meal 2 tablespoons of all purpose 4-4-4 all Gia green products other than. I also sprinkled in some great white premium mycorrhizae inton2 gallons of water. Tea will brew for 24 hours before applying.
Likes
61
Share


@Hou_Stone
Follow
🍊Bonjour les copains,
🍊Je vous l'ai peut être déjà dit mais je n'ai pas beaucoup le temps de m'occuper de cette culture, car je ne vis plus à coté. Je repasse la voir tout les 4-6 jours pour l'arroser, enlever les feuilles mortes et prendre quelques photos.
🍊Et jusqu'à présent j'ai l'impression qu'elles se sentent bien comme ça 😅
🍊Je suis si impatient des les gouter 😜
🍊--------------------------------------
🍊Intensité de la FC3000: 90%
🍊Ventilation : Extracteur mars hydro 6 pouces avec filtre à charbon puissance : 4/10 (24h/24h) + 3 ventilateurs à l'intérieur ( ON 8/24h). ils s'activent à un 🍊horaire différent.
🍊Arrosage : Environ tout les 4-6 jours avec 1.5L d'eau. (+ 1gr de bioenhancer/L eau un arrosage sur 2)
🍊Température & humidité : NUIT : 16°C & 70% / JOUR : 23°C & 50%
🍊My Instagram 🌱🧡
https://www.instagram.com/hou_stone420/
🍊🍊🍊🍊🍊🍊🍊🍊🍊🍊🍊🍊🍊🍊
Likes
51
Share


@cheetah844
Follow
She's been the bushiest plant so far. I'm excited for this girl.
I topped and defoliated every plant. I'm trying to form them into canna-bushes. Hopefully I'm doing the correct training procedures to make them all grow that way both indoors and out.

Likes
9
Share


@Sauce_XL
Follow
2.24.2024: Start of week 5 from seed. Started to flower last week. Nothing done today. Still no nutes given, still scared to defoliate. Plant is 15.5 inches tall and looks healthy. Light is 11 inches from the top and at 75% power, 112 watts. I'm clearly no expert and i'm sure there's something i should be doing(feeding) but she's chugging along.
2.25.2024: Day 37 from seed. Watered 64oz at 6.3ph. Bud development is slower then her tent mate. Perhaps thats due to her bushy stature and foliage. Still seeing solid upward growth each day. Hopefully she turns on the jets this week. Still no auxillary nutes given. Finally worked up the nerve to take off 8 fan leaves. Really opened the plant up. Hopefully i don't pay the price!
2.26.2024: Day 38. Small bit of upward growth. No negative affects from the defoliation yesterday. Will feed tomorrow for the first time at 1/4 strength nutes from the fox farm trio and maybe some calmag.
2.27.2024: Day 39 from seed. Finally fed the plant, albeit small amounts. Foxfam trio at 1/4 strength of the week 5 doses plus calmag. 64oz of the solution at 6.5ph.
2.28.2024: Day 40 from seed, 36 from sprout. Nothing doing today. Maybe a 1/4 inch of upward growth? Stuck around 19.5 inches in total height. Light at 75% power 11inches from the top.
2.29.2024: Day 41. 96oz of ph 6.5ph. Upward growth has stalled at 19.75 inches. Added a few handfuls of Ocean Forrest as i noticed the soil level has compacted a bit. Will add pics later today once she perks up a bit.
3.1.2024: End of week 6, day 42 from seed. Small bit of upward growth, now up to 21 inches. Besides some lite defoliation, i've let the plant do its thing. Since its my first time i figured the only goal is just to get to harvest. Lots of learnings thus far. FFOF probably isn't ideal but its working. Some burnt leaf tips, probably some nitrogen toxicity, but otherwise we're doing well. Will definately look to LST more and sooner next time around.
Likes
6
Share


@StarSkream
Follow
Week 1 24 hours ethos popped and began to stretch
Temp 76 humidity domes on top 5 of 5 out going directly into pots and 24 hour lighting on day 3! gonna run 24/7 for 30 then switch over hopefully. Nothing added but FishShit and rootdrench to pop


Likes
23
Share

@DutchFarmer
Follow
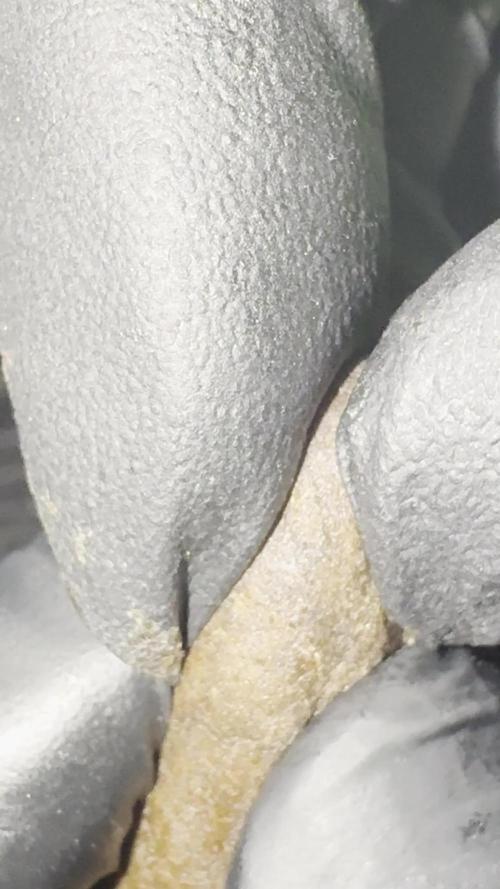
🚬 Test Run Verdict: Did a little taste test and ohhh boy… hittin’ like that 🇲🇦 Moroccan hash smooth, heavy, and straight knockout vibes 😮💨
Likes
6
Share

@DogDoctorOfficial
Follow
💙 Project Blue Tent – Week 11
💙 Blue Waffle F1 – Pheno B
🌸 Same Room. Same Conditions. Another Beautiful Expression.
Hello everyone, and welcome back to another chapter inside Project Blue Tent! 💙🌱
And once again...
I'm looking at these girls and thinking:
How can four plants look this similar?
😂💙
If you've been following Project Blue Tent, you'll know that we're documenting four individual plants from seed to harvest, each with her own dedicated diary.
All four share the same tent.
The same lighting.
The same irrigation.
The same reservoir.
The same nutrition.
The same environmental conditions.
The same cultivation philosophy.
And yet...
each one gets her own chapter.
Today it's time to give the spotlight to Blue Waffle F1 – Pheno B.
And honestly?
She's looking absolutely beautiful.
🌿 PHENO B – LET HER SHINE
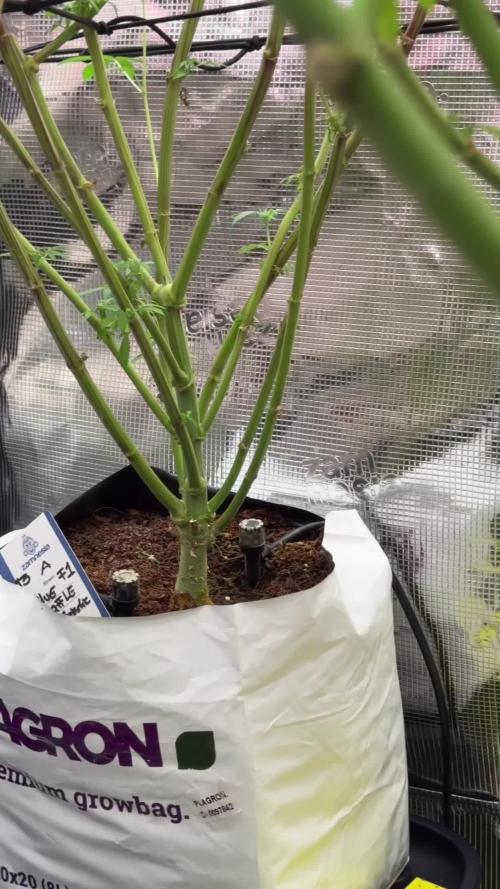
Pheno B has reached approximately 145 cm and has developed a fantastic flowering structure.
At this stage, there isn't really a lot I want to change.
And that's actually a good thing.
The big work has already been done.
The long vegetative period gave us the structure.
The topping and training shaped the plant.
The first SCROG organized the canopy.
The aggressive flowering stretch forced us to rethink the vertical space.
The major defoliation opened the plant.
The second SCROG gave the flowering branches additional support.
The ventilation system was moved outside the tent.
The LEDs were raised.
The airflow was improved.
And now...
we're watching all of those decisions come together.
The plant is doing exactly what we wanted her to do.
Grow.
Flower.
Develop.
And increasingly...
FROST.
😂💙🌸
🌸 THE FROST IS GETTING SERIOUS
I have to say this because the photographs really don't need much explanation.
The frost levels are beautiful.
The flowers are becoming increasingly covered in trichomes, and every week the close-up photographs seem to reveal more.
This is the part of the grow where you start looking at the plants differently.
Earlier, we were looking at structure.
Now we're looking at flowers.
And those flowers are beginning to tell us their own story.
The density.
The development.
The resin production.
The structure.
The way the flowers are forming along the branches.
Everything is becoming much more interesting.
And Pheno B is absolutely shining.
💙🌸
🌿 THE TOPPING AND STRUCTURE – LOOK AT THAT OPENING
Another thing I'm really happy with this week is the structure created by the topping and training.
When you look closely at Pheno B, you can really see how the plant opened up.
The main structure divided beautifully.
The branches spread through the available space.
And the flowering sites are now positioned throughout that structure rather than all trying to occupy the exact same vertical point.
This is one of those things that can be difficult to appreciate when you're doing the training weeks earlier.
At the time, you're making cuts.
Moving branches.
Supporting growth.
Trying to imagine what the plant will eventually become.
Then several weeks later...
you look at the flowering plant and suddenly understand why you did it.
And that's exactly what I'm seeing now.
The structure is there.
The opening is there.
The flowering sites are there.
And the plant is filling that framework beautifully.
🕸️ THE X-CROSS – KEEPING THE STRUCTURE WORKING
The support system is also doing exactly what we wanted.
The second SCROG remains in place, helping organize and support the upper flowering structure.
And with the way we've arranged the support through the canopy, we've created that X-cross structure that helps distribute and organize the flowering branches.
The idea isn't to keep forcing the plant into a new shape.
That stage is behind us.
Now the structure simply needs to support what the plant has already built.
And looking at Pheno B...
I'd say it's doing a damn good job.
😂💙
The branches are supported.
The flowers have room.
The canopy is organized.
And we can actually see through the plant.
That's exactly where I want to be at this stage.
💡 UNDER-CANOPY LIGHTING – NOW PART OF THE SYSTEM
The LumiFlora under-canopy lighting is also now fully integrated into the room.
We're using the 150W full-spectrum LumiFlora fixtures underneath the canopy to provide supplemental light to the lower flowering structure.
The main LEDs continue doing the primary work from above.
The LumiFlora units are simply giving the lower portions of these very tall plants another source of light.
And with plants reaching approximately 145 cm, this makes a lot of sense to me.
The canopy is no longer a flat surface.
It's a three-dimensional structure.
There are upper flowers.
Middle flowers.
Lower flowers.
Interior branches.
And naturally, not all of those areas receive the same amount of light from above.
So instead of constantly removing more foliage to chase light penetration...
we're experimenting with bringing light into the lower part of the plant.
And now?
We watch.
That's the fun part.
😂💡🌸
🌿 TWO LIGHT SOURCES. ONE VERY LARGE CANOPY.
The interesting thing about this setup is that we're effectively looking at the plant from both directions.
The main fixtures illuminate from above.
The LumiFlora fixtures supplement from below.
And the plant sits right between those two lighting environments.
I'm particularly interested in seeing how the lower flowering sites continue developing as we move deeper into flowering.
We're not making any promises about what the additional lighting will achieve.
We're documenting it.
We're watching.
We're comparing.
And we're letting the plants tell us what happens.
That's the whole point of Project Blue Tent.
🔬 SAME ROOM – SAME CONDITIONS – DIFFERENT DIARY
And this brings me to something I've been thinking about a lot during this project.
People often use the word "genetics" when talking about individual plants.
And obviously, genetics are involved in every plant.
But I personally like using the word:
"Cultivar."
Why?
Because we're looking at cultivated plant varieties.
We're not simply talking about an abstract collection of genes.
We're talking about plants that have been selected, developed and cultivated as a particular variety.
And here we're working with Blue Waffle F1 cultivars.
So throughout these diaries, when I talk about Pheno A, Pheno B and the other girls as individual cultivars, that's what I'm referring to.
And honestly...
the uniformity we're seeing makes this distinction particularly interesting.
Because look at them.
😂💙
Same environment.
Same reservoir.
Same feeding.
Same irrigation.
Same lighting.
Same training philosophy.
And yet we're getting remarkably similar expressions.
That's one of the things that makes these F1 plants so fascinating to observe.
And if you already know all of this...
beautiful.
You know.
😂
If you didn't...
hopefully you learned something today.
And that's never a bad thing.
I love learning.
So I don't think there's ever too much useful information.
🌸 F1 UNIFORMITY – THEY REALLY DO LOOK LIKE SISTERS
This is probably one of the most impressive things about this whole project.
The plants are beginning to look almost like copies of one another.
Different individual plants.
Different diaries.
But under the same conditions...
the similarities are incredible.
Similar height.
Similar flowering structure.
Similar development.
Similar response to the training.
Similar response to the defoliation.
And now...
similar frost.
😂💙🌸
Of course, we're still documenting them individually because the subtle differences are exactly what become interesting over time.
Maybe those differences will become more obvious as flowering progresses.
Maybe one will develop a slightly different structure.
Maybe one will finish earlier.
Maybe one will produce a different flower shape.
Maybe the differences will become much more obvious closer to harvest.
Or maybe...
they'll continue looking like sisters all the way to the end.
That's what we're here to discover.
🌬️ AIRFLOW – THE SYSTEM IS WORKING
The airflow arrangement remains unchanged.
We've got movement above and below the canopy, keeping the air circulating throughout this large flowering structure.
And that's particularly important now that the canopy is so developed.
The previous defoliation opened the plant.
The additional airflow helps take advantage of that space.
The lower portion of the plant isn't being ignored.
And the under-canopy lighting is working inside that same environment.
Everything has a role.
Light.
Air.
Structure.
Irrigation.
Nutrition.
And observation.
Nothing needs to be dramatic.
It simply needs to work.
💧 THEY'RE DRINKING BEAUTIFULLY
Another thing I'm very happy with is how these girls are drinking.
They're consuming well.
The irrigation is keeping up.
And the plants are showing us that they're comfortable with the current setup.
The reservoir remains shared.
The feeding remains shared.
The irrigation remains shared.
And yet Pheno B continues developing beautifully.
This is exactly why having a consistent system is so valuable for this experiment.
When all four plants receive the same inputs, we get a much more interesting opportunity to observe how the individual cultivars respond.
⚗️ SAME RESERVOIR – SAME NUTRITION
The nutrition remains unchanged.
We're continuing with:
PLAGRON Hydro A — 2.2 ml/L
PLAGRON Hydro B — 2.2 ml/L
PLAGRON Hydro Roots — 1 ml/L
PLAGRON Power Buds — 1 ml/L
pH adjustment as required
No need to start changing things simply because another week has arrived.
The plants are happy.
They're drinking.
They're flowering.
They're producing frost.
So we continue.
Consistency is part of the experiment too.
And honestly...
when the plants look this good, I'm not interested in fixing something that isn't broken.
😂💙
🌸 THE PREVIOUS DEFOILATION IS NOW A DISTANT MEMORY
It's also interesting to look at Pheno B now and remember what she looked like immediately after the major defoliation.
At the time, there was a dramatic difference.
A lot of foliage had been removed.
The structure became much more open.
And then we had to wait.
That's the difficult part.
You make the decision.
You do the work.
And then...
you leave the plant alone.
Now we're seeing the result.
The plant has continued growing.
The flowers have developed.
The structure has filled out.
And the flowering sites are clearly visible.
The plant didn't need us to keep interfering.
She simply needed time.
🌿 SOMETIMES DOING NOTHING IS DOING SOMETHING
This is probably one of the biggest lessons from this stage of Project Blue Tent.
There's a temptation in cultivation to constantly do something.
Adjust something.
Move something.
Change something.
Feed something.
Cut something.
Measure something.
😂
But sometimes...
the plants don't need another intervention.
They need stability.
They need time.
They need the environment to remain consistent.
And they need us to have enough discipline to leave them alone.
That's where we are now.
The structure is built.
The support is installed.
The lighting is established.
The airflow is working.
The irrigation is working.
The nutrition is stable.
So...
let her do her thing.
🌸 CURRENT GROW CONDITIONS
🌸 Flowering: Week 11
📏 Height: approximately 145 cm
💡 Light schedule: 12/12
☀️ Day temperature: 28°C
🌙 Night temperature: 27°C
💧 Relative humidity: 63%
⚗️ pH: 6.01
⚡ EC: approximately 2.24 mS/cm
🌡️ Solution temperature: 24.9°C
🌱 Substrate temperature: 24°C
🌬️ CO₂: approximately 666 ppm
💦 Watering: approximately 1.6 L per plant / 24h
? Pot size: 8 L
NUTRIENT RECIPE
PLAGRON Hydro A — 2.2 ml/L
PLAGRON Hydro B — 2.2 ml/L
PLAGRON Hydro Roots — 1 ml/L
PLAGRON Power Buds — 1 ml/L
PLAGRON pH Plus — 0.03 ml/L
PLAGRON pH Minus — 0.03 ml/L
💡 UNDER-CANOPY LIGHTING
2 × LumiFlora 150W Full Spectrum
🌸 THE FLOWERS ARE TAKING OVER
This is where the story becomes really exciting.
For weeks, we were talking about the plant.
Now we're talking about the flowers.
And Pheno B is giving us plenty to talk about.
The flowering sites are developing beautifully throughout the structure.
The branches are carrying them well.
The frost is becoming increasingly obvious.
And the entire plant has that unmistakable look of a flowering plant entering a very interesting stage.
The close-up photographs really show it.
The trichomes are becoming more visible.
The flowers are becoming more defined.
And the whole plant is starting to sparkle.
💙🌸
🔭 WHAT I'M WATCHING NOW
At this point, my list is actually pretty simple.
I'm watching the flowers.
I'm watching the frost.
I'm watching the lower canopy under the LumiFlora lighting.
I'm watching the structure.
I'm watching how the second SCROG continues supporting the branches.
I'm watching how much the plants continue to drink.
And I'm watching the four cultivars develop under exactly the same conditions.
That's it.
No major intervention.
No unnecessary changes.
Just observation.
Because right now...
the plants are doing exactly what we want.
🌿 WHAT WILL THE FUTURE BRING?
And this is the part where I honestly don't know.
We have a beautiful flowering structure.
We have impressive uniformity.
We have increasing frost.
We have healthy development.
We have stable environmental conditions.
And we have four incredibly interesting F1 cultivars sharing the same environment.
But what happens next?
That's the exciting part.
Will the flowers continue stacking at this rate?
Will the frost become even heavier?
Will the subtle differences between the cultivars become more obvious?
Will the lower flowering sites respond noticeably to the supplemental lighting?
And what will Pheno B look like when she reaches maturity?
I have no idea.
😂💙
And I absolutely love that.
Because if we already knew the ending...
what would be the fun of documenting the journey?
💙 FINAL THOUGHTS – SAME ROOM, BEAUTIFUL RESULT
So...
Week 11.
Same tent.
Same room.
Same reservoir.
Same irrigation.
Same nutrition.
Same lighting from above.
Same environmental conditions.
And yet...
another beautiful individual story.
Blue Waffle F1 Pheno B is looking fantastic.
She's approximately 145 cm tall.
Her structure is beautifully opened from the topping and training.
The flowering branches are supported by the second SCROG.
The canopy is receiving airflow from above and below.
The LumiFlora under-canopy lighting is now helping illuminate the lower flowering structure.
She's drinking beautifully.
She's flowering beautifully.
And the frost...
Oh my God.
😂💙🌸
The frost is becoming ridiculous.
And that's exactly the kind of problem I like having.
😂
The most interesting part for me, though, is seeing how similar these F1 cultivars are behaving.
Four individual plants.
One controlled environment.
And remarkably consistent results.
That doesn't mean every plant will finish identically.
It doesn't mean there aren't individual differences.
That's exactly why we're documenting them separately.
But right now...
they're giving us a fascinating look at just how uniform these plants can be under consistent conditions.
And that's something I want to keep watching.
We're not going to force the story.
We're not going to chase numbers.
We're not going to keep changing things just so we have something to write about.
We're going to let the plants write the next chapter.
And Pheno B?
She's writing a beautiful one.
💙🌸🌿
The structure is ready.
The support is ready.
The lighting is ready.
The airflow is ready.
The irrigation is ready.
The nutrition is ready.
Now...
we wait.
We watch.
We learn.
And we enjoy the show.
Let's see what the future has waiting for this beautiful girl.
Because if she keeps going like this...
I have a feeling we're going to have some very special flowers to photograph.
😂💙🌸
🙏 A HUGE THANK YOU
A huge thank you once again to Zamnesia for making Project Blue Tent possible and for giving us the opportunity to explore these beautiful Blue Waffle F1 cultivars individually.
Thank you to PLAGRON for the Hydro nutrient line supporting these girls throughout this vigorous flowering cycle.
A massive thank you to Mars Hydro for the irrigation and drainage system that continues keeping this entire ecosystem supplied and running beautifully.
Thank you to Zamnesia for the Phytonaut LED lighting, the curved scissors and the clip fans that have become such important parts of this project.
And a huge thank you to LumiFlora for the 150W full-spectrum under-canopy lighting that we're now using to explore supplemental lighting throughout this very large flowering structure.
And of course...
thank you to GrowDiaries for giving us the platform to document every part of this journey.
The good.
The unexpected.
The experiments.
The mistakes.
The lessons.
And now...
the frost.
😂💙🌸
Most importantly, thank you to everyone following Project Blue Tent.
Four individual cultivars.
One room.
One environment.
One reservoir.
One cultivation philosophy.
And four girls showing us just how beautifully consistent these F1 plants can be.
But we're not at the finish line yet.
There's still a lot of flower development ahead.
There's still a lot of frost to watch.
There's still a lot to learn.
And Pheno B has plenty more story left to tell.
Until next week...
Same room.
Same conditions.
Same beautiful girl.
More flowers.
More frost.
More observation.
And hopefully...
even more reasons to smile when we open that tent.
💙🌸🌿
Growers Love, happy growing, and take care everyone! 🌱💙


Likes
88
Share


@CBD_Sweden
Follow
Hi all the happy people here in GrowDiaries.
And hello to you who read my diary,
I just want to say that I am pleased that you have chosen to check in with me and in my diary.
I do this for myself and for a steady flow of my medicine.
Everything you read and see in my diary is 100% honest and I will never distort or beautify anything here.
I document my crops so that I can learn from my mistakes and also to look back at those different crops.
I try to update with pictures every day and with text if something special has happened in the garden.
This is my strainhunt for the best medicine and the beginning of my journey with cannabis and the cultivation of it.
This is my second feminised cultivation ever.
First, I'm just going to say something about my grow room.
The room is 2.14 meters by 1.7 meters and has a ceiling height of 2 meters.
It provides a floor area of 3.6 square meters.
I use a 54 Watt Lightwawe T5 for germination and 2 Pcs 400 Watt HPS lamps for bloom.
I have a channel fan that replaces the room air about 40 times an hour to get a comfortable environment in the room, the air enters a fresh air intake from the outside.
The air is purified through a carbon filter to then leave the room to the rest of the basement.
Then I use that heat to heat the rest of the basement.
I will use 15 liter Autopots to grow with and a 100 liter water tank that supplies the pots of water and nutrition.
I will grow completely organically in soil and will watercure my buds to get the best possible medicine for me.
Medical Mass is a new medical cannabis strain with a high CBD content and a low THC level that provides good medical properties without a strong psychoactive effect. This is a mostly indica plant that contains 40% sativa and 60% indica. Critical Mass and CBD rich strain were crossed to create this amazing valuable variety.
The plant suits both for indoors and outdoors, for beginner and experienced growers. The strain grows up to 60 - 100 cm tall and produces good yields for such height of about 500 - 550 gr/m2. The plant demonstrates great results even in small spaces. The flowering time takes only 7-8 weeks and the harvest comes in late September.
The smoke brings very strong, intense flavors with sweet notes of honey and skunk and an intense pleasant relaxation. Medical Mass is the great choice for each medical user due its small height, ease of growing, fast flowering and of course great medical potency.
2017-09-01. Started germinating.
------------------------------------------------------------------------------------------------------------
2017-09-03. 3 out of 3 seeds germinated today after 40 h, i planted them in soil and put them in my humidity dome under T5 lights. Added some pics.
KL 23.00. New video added, 2 of 3 girls is looking up from the soil.
----------------------------------------------------------------------------------------------------------------------------------------------------------------------------------
2017-09-05. New videos of the 3 girls. All is up from soil now and looking fine.
----------------------------------------------------------------------------------------------
2017-09-06. New pics.
-----------------------------------------------------------------------------------------------------------------------------------------------------------------------------------
2017-09-07. Kl 22.30. New pics.
-----------------------------------------
2017-09-09. Kl 21.00. New pics.
-----------------------------------------------
2017-09-12. Kl 12.00. New pics.
Likes
7
Share


@Madman2020
Follow
(39 day VEG)(56 day flower)(107 day clone to harvest)
Co2@800 Made a huge difference
70klux is to high lighting. 60-65 was best
87f+ leaf temp is to high in flower - 80did well
Hot temps made the leaves ugly
Auto irrigation went wrong because the water pressure was not even on all 11 spouts.
Two box fans were not enough. It seems more wind make denser buds
The plants closer to the fans were denser
The Liquid humic acid i think made a small difference.
That “Grow More Liquid kelp” exploded growths during veg stage
The southern AG microbes did well to keep my roots healthy(once a week)
I should have topped the clones at the 3rd node so itd be easier to harvest
I lollipopped plants day 1 flower, day 21 flower, and start of week5.
I defoliated before flower, day 14 flower, wk7 flower, and 2 days before harvest
I want to defoliate the week before harvest and flush 5days before harvest
————————
Harvest
Wet Trimmed
First 3 days 55%RH then 52-60% for 17 days. Ill split branches to speed drying next time
Temp 68F
Indirect Fans
After Drying:
Homemade tumbler/trimmer
Pvc pipe inserted into a barrel made from chicken wire and bucket lids tacked together. Sits inside of a tote bucket. The tote bucket holds the trimmings and kief that falls from buds
Put into mason jars
——-
Weight:
1: 71g
2: 48g
3: 78g
4:41g
5:56g

Processing
Likes
5
Share


@Reaper
Follow
the water coming out of the coco is anoying i have to build something to catch the water
6-9 formula

Likes
4
Share


@CannaIGrow
Follow
This plant plus one more started to wilt earlier on in the week, I figured it was probably time to transplant seeing as they had been in the solo cups for 2 weeks. After transplant plants seemed to be happy again. I introduced amino acids this week as well. They are getting the grease spray and drench program


