


Likes
Comments
Share

@LIPANJA
Follow
KKKK omg
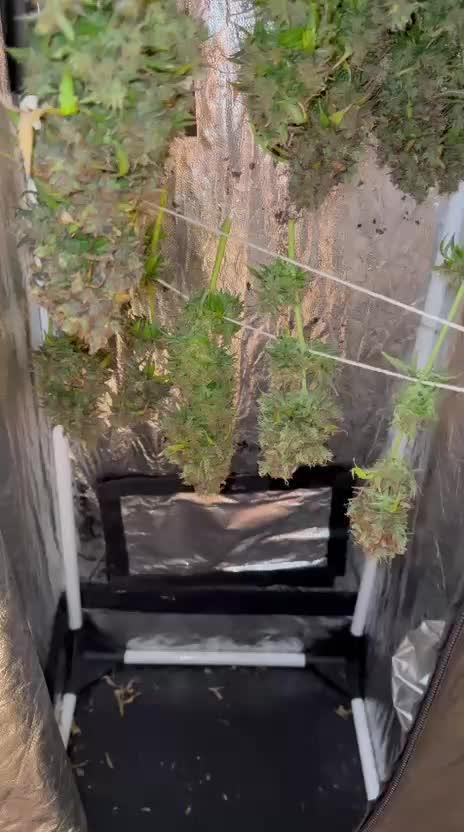
986 g wet with branches, and trimmed only the parts that were very dry. The smell is moderately strong, very sweet and pleasant. I believe that once dried, trimmed, and cured it will yield around 160-200 g.
For the flush I did the following:
I used 15 L of water with Flawless Finish and left it for 12 hours. After that, I rinsed with 5-liter increments until the runoff PPM was below 250, which took 100 L of water. I let it dry for 72 hours and harvested today.
________________________________________________________
15 days later....
170g weight dry
sweet+coffee smells
8/10 low high

Likes
18
Share


@birdmountain
Follow
Es wurde Zeit, das Wetter wurde ungemütlich, kalt und regnerisch. Die anderen Pflanzen hatten bereits Schimmel entwickelt und es war auch kein weiteres Blütenwachstum festzustellen. die Trichome sahen auch leicht angebräunt aus, Deshalb wurde geerntet und verarbeitet. Die Ernte der zweiten späten Pflanze war wesentlich geringer aber noch passabel.

Likes
23
Share


@Firepharmer
Follow
Tents all set up now with 2 futur vert flora max 660watts 1 futur vert uva led bar..


Processing
Likes
6
Share


Likes
11
Share


@Sawyer_grow
Follow
Hello guys,
Hope you are doing well. you will find into the video a review of plant before the flowering stage
That's it ! it was the last week of veg stage, i'm switching now into flowering !
The box is full at 40% and this is what we want before the flowering stretch.
she is very healthy and easy to grow.
Hope you enjoy
Take care guys and see you next week !

Likes
26
Share


@darb35
Follow
Day 14 - no water today, the girls seem to like their new pots (10 cm)
Day 15 - 300 ml water with Acti+Heaven+Grow (Ph 6.8)(11 cm)
Day 16 - litttle bit water (Ph 6.6)(13 cm)
Day 17 - 300 ml water with Acti+Heaven+Grow+Calmag (Ph 6.7)(14 cm)
Day 18 - 400 ml water + LST (Ph 6.6)(15 cm)
Day 19 - no water (16 cm)
Day 20 - 660 ml water with Acti+Heaven+Grow (Ph 6.5)(17 cm)
Day 21 - no water (starting to show preflower pistils)(20 cm)

Likes
29
Share


@Silverback_Guerilla
Follow
10/26 - 11/1:
I germinated 6 seeds with rapid rooters in net pots in my DWC cloner. The Original Bubble Gum didn't pop, so I started a Strawberry Pie in it's stead.
I planted them in 1/2 gallon biodegradable fabric pots and will plant those in some new 2 gallon pots (which actually hold closer to 3 gallons) once I harvest my current crop and have somewhere to put them.
I'll grow them in my tiny tent (36" x 18" x 60"), which is just 5 square feet, so it's gonna get pretty tight before it's over. Once they're mid-way into flowering, I'll turn on the 3rd QB and hammer them with 74w per square foot! Muah haaa haaaa haaaaa!😈


Likes
5
Share


@Mr_nugs_lover_David
Follow
I just moved this wonderful lady on her 4th week of life, I moved her into a 25l pot, and I'm starting to lst her. Let's see how she performs. Hope to be able to make a big nice bush
Likes
7
Share


@BushDoctor740
Follow
Did some more defoliation this week and gave some nutrients.They are looking happy and healthy still in vegetation stage but soon I’ll switch the light cycle.I added a scrog net and will clean up the bottoms tonight as I’m ready to switch to flower soon.I want to keep them smaller if possible in the short 3x3 60 inch high tent they are in atm with a spider farmer sf1000 light 100 percent power.Also have a Co2 bag hanging and hopefully adds a little more growth during the early flowering weeks.


Likes
15
Share

@GoodTimesOrganics
Follow
Welcome Back!💚
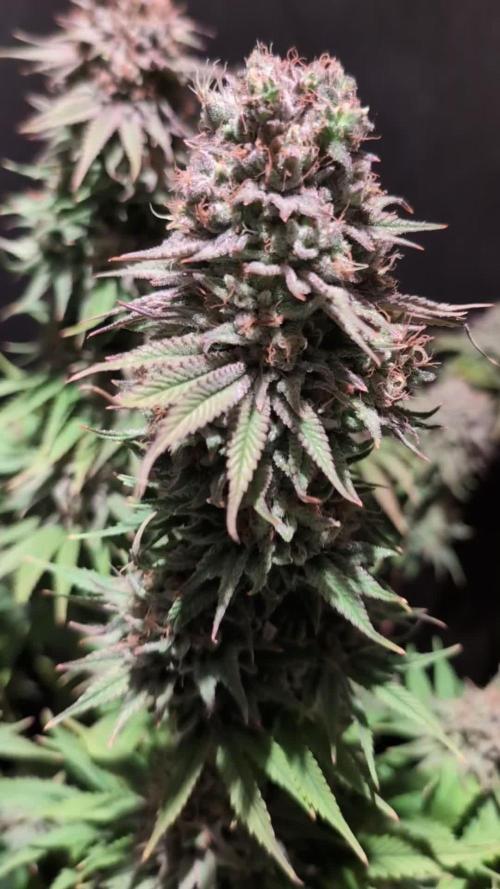
In der achten Blütewoche, genau nach Blütetag 56 ist Erntezeit!
Die Trichome sind durchgängig milchig und nun gibt es ein paar Bärensteinfarbene! Zeit für die Schere ✂️
Es zeichnet sich eine schöne, Dichte Blütenstruktur ab, mit immer weiter ansteigendem Trichom Anteil.
Das Aroma ist ziemlich fruchtig und süß.
———————
🌞 Temp: 24°C
🌚 Temp: 20 °C
💨 RH: 56%
VPD: 0,97kPa
😎PPFD: 830 mqm
———————
Stay Tuned! 💚

Likes
14
Share


@MrWigglyJiggly
Follow
Buds are densing up everyday and trichomes are coming along nicely. 3 more weeks to go. I feed her one last time after this there will be no nutrients given to her. Just water only.

Likes
6
Share

@Pompeyblue
Follow
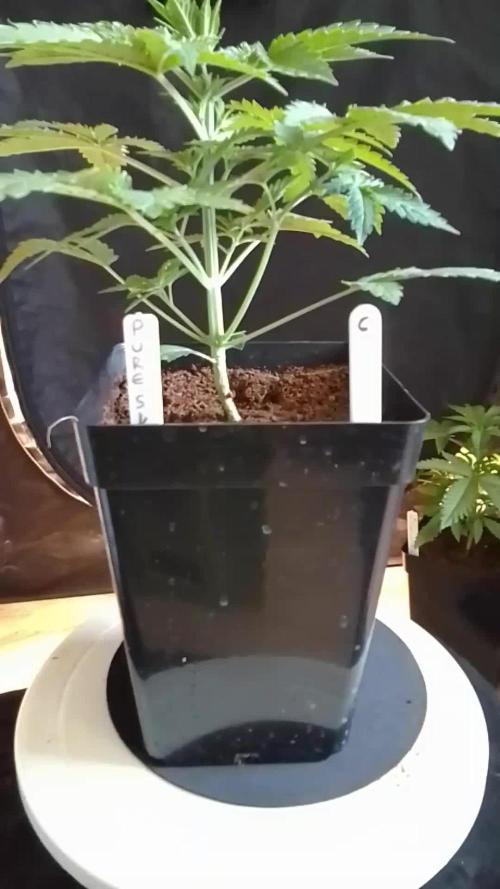
I've had to label these A B and C as they've got bit big with in the week lol
I'm going to leave A to do her own thing will be FIM to B and topping C today and a bit of pruning as well @Kannabia

Likes
10
Share


@BR1CK_SANCHEZ
Follow
Eventful week for the girls... threw in another 95w LED to finish out flower and to grow an extra plant or two next run. Checked the trics on the leftmost plant and they were almost all cloudy and even starting to turn amber in a couple spots, so I decided it was time to chop her. Probably gonna take the other smaller plant down soon as well. The tallest plant is still looking larfy as hell but I'm hoping she'll thicken up a little over the next week or two.
Likes
2
Share

@Organic_G
Follow
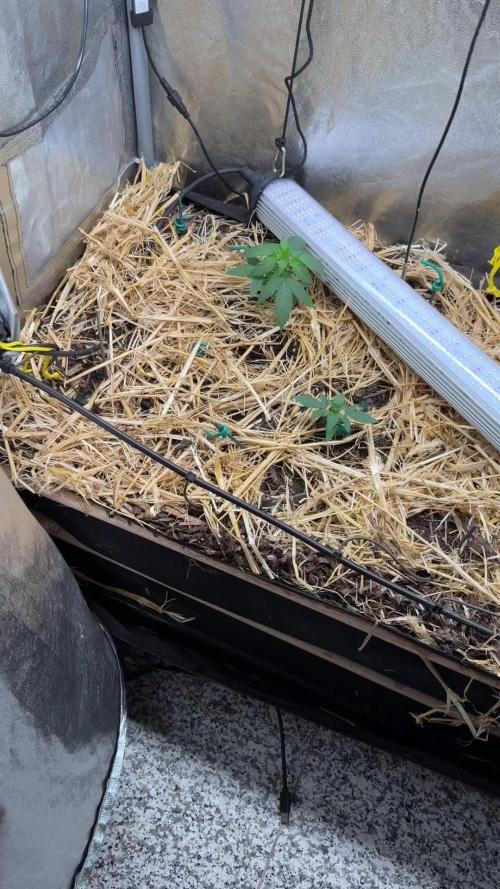
Einfach wachsen lassen bisher, haben wohl gut gewurzelt und jetzt mal schauen was wird. Bin einfach auf die blütenqualität gespannt ob DS was gutes ist.

Likes
17
Share

@ZhulenejJohny
Follow
A je to konec dámy a pánové. Byl to náročnej grow skrz vedra, ale s výsledkem jsem spoko. Tak zase u dalšího dobrodružství! Peace 👽


Likes
6
Share


@Magical_Surgeon
Follow
After you found some good sector and clone it you let the mycelium grow and fill almost all the petri dish like I did last week.
So now you're ready to move forward.
Making grain spawn!🍄🍄
For grain you can use Organic Rye Berries, but you can also get away with wheat berries, or brown rice or even corn kernels(which I used myself) !
And you'll need some mason jars or honestly I used some jars that I had home just clean them very well and sterilise before using
Making a grain spawn can be broken down into 6 easy steps.
🍄Hydrate Grain By Soaking
🍄Make Specialized Lids
🍄Simmer, Drain and Dry The Grain
🍄Sterilize
🍄Put your agar in the jar
🍄Colonize
🍄Soak the grain by placing it in a bucket, covering in water, and leaving it for 12 -24 hours. Easy.
🍄Drill 1 hole on top of the lid. Right in the center and cover with a small dab of high temperature silicone sealant, and leave it overnight to dry. And your jars are done. There other diff types for different methods like liquid culture etc. But I'm just going roughly through what Ive done.
🍄The next step is to simmer the grains on the stove. This will thoroughly hydrate the grains, and will soften them to make them easier for the mushroom mycelium to consume.
Cook soaked grain on the stove for about 15 minutes. You don’t want to cook it too long, because eventually all the grain will crack and you’ll get some mushy grain spawn. We don't want that. 🧐After the grains have simmered on a low boil, you’ll need to drain them off. What I did is I drop them in the sink with the drain cover on. The grains will drain over an hour or so, after which you can go ahead and fill your jars.
🍄Once your jars are filled, they need to be sterilised.This kills off all the other nasty contaminants in the grain cover the lids in tinfoil (to prevent water dripping into the lid) and then just pressure sterilise them for about 90 minutes at 15 psi.
🍄After that let them cool down. Get your SAB, wipe down the walls with some alcohol wipes and place the jars inside. And wait untill they will be warm to the touch... not hot and painful 😤patience is key. Bring in your plates that had been stored by you in a dark place. And what u have to do is sterilise your scalpel and just accurately and efficiently decide your mycelium into about 10 pieces and quickly place them in your jar. And complete for every jar u make. You have to be very quick. The more you keep you're jar and your agar plates lids open the more cans they will get contaminated. There certain technics you can see online..
🍄Ones you're done close all your jars lids tight and Jake your jar so the mycelium pieces will mix around the jar and place them in the dark place to colonize. And just keep waiting... 😅 Untill the mycelium will conquer your grain. Keep your eyes on the jars, any weird smells or colour during the waiting time.. because that would mean you got a contamination going on. Oh yeah and when about 55% of your jar is filled with mycilium shake the sh*t out of it so it will break the mycilium inside and make spread more faster.
Likes
12
Share


@Jesperado
Follow
Brought a friend to check out the grow this week.
Check out the video and remember to turn on the audio.

Likes
56
Share


@nonick123
Follow
Día 50 (09/12) Busy time
Solo riego!
Día 51 (10/12) CBD Auto 20:1 #1 no para de crecer! ¿Parará el stretch? 💥
OG Kush Auto avanzan las manchas en las hojas... ¿Será deficiencia o carencia?
Día 52 (11/12) CBD Auto 20:1 #1 está demandado más agua. Subo a 1500 ml / día de H2O RO
CBD Auto #2 está ralentizando el consumo de agua (el top se muestra húmedo). ¿Estará entrando en la fase final de floración?. Según FastBuds le quedan 11 a 18 días!
OG Kush Auto también demanda más agua! Subo a 1250 ml / día de H2O RO
Día 53 (12/12) CBD Auto 20:1 #1 es increíble como no para de estirarse y de formar nudos y hojas! Parece una Sativa pura que nunca para de crecer en floración!
CBD Auto #2 empieza a mostrar algunas hojas con senescencia. Se acerca la cosecha!
LSD-25 Auto está haciendo unos cogollos densos y duros como rocas 😍💥 No está tampoco lejos de la cosecha! 💥💨😁
OG Kush Auto produciendo una resina brutal en las hojas de azúcar! 😍
Día 54 (13/12) CBD Auto 20:1 #1 no para el stretch. Le hago una poda de bajos y ligera defoliación
OG Kush Auto está generando una cantidad de tricomas increíble. Además huele a Kush deliciosamente 😍😍😍
Día 55 (14/12) CBD Auto 20:1 #1 para un poco el consumo de agua en ¿Fin del stretch? Casi toca la lámpara de nuevo!
CBD Auto 20:1 #2 empieza a mostrar la senescencia.
Reviso los tricomas con muchos turbios y alguno transparente. ¿Estará en una semana más aproximadamente? 🤔
Día 56 (15/12) OG Kush Auto ha bajado un poco el consumo de agua
La cantidad de tricomas que está haciendo es insana e increíble. Y como huele! 😍
LSD-25 Auto muestra los tricomas trasparentes y algunos turbios. ¿Quizás dos semanas para la cosecha?
💦Nutrients by Bio Tabs - www.biotabs.nl/en/
🌱Substrate PRO-MIX HP BACILLUS + MYCORRHIZAE - www.pthorticulture.com/en-us/products/pro-mix-hp-biofungicide-plus-mycorrhizae
"GDBT420" 15% DISCOUNT code for the BIOTABS Webshop https://biotabs.nl/en/shop/