


Likes
Comments
Share

@BLAZED
Follow
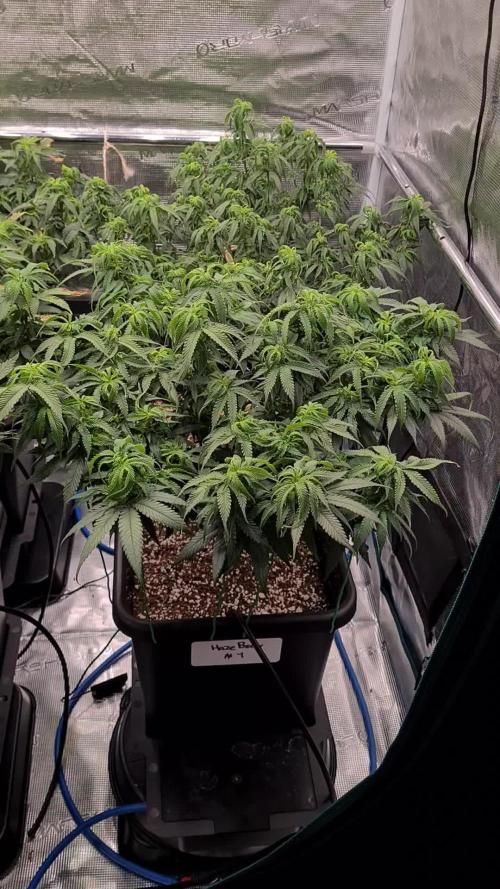
Week 13 (9-9 to 15-9)
9-9
Temps: 18.8 to 27.6 degrees
Humidity: 48% to 67%
Watering: Both 600 ml.
Decreased the light intensity from 50% to 40%
10-9
Temps: 19 to 24.2 degrees
Humidity: 51% to 58%
Watering: Both 500 ml.
Dry Weight #1 3.2 kg. #2 3.4 kg.
11-9
Temps: 16.5 to 22.5 degrees
Humidity: 50% to 62%
Watering: Both 500 ml.
Dry Weight #1 3.4 kg. #2 3.6 kg.
12-9
Temps: 18.5 to 23.6 degrees
Humidity: 50% to 55%
Watering: Both 500 ml.
Dry Weight #1 3.5 kg. #2 3.9 kg.
13-9
Temps: 19.9 to 23.1 degrees
Humidity: 49% to 59%
Watering #1: 1000 ml. #2: 500 ml.
Raised the light to 65 cm distance of the top canopy.
Dry Weight #1 3.5 kg. #2 3.9 kg.
14-9
Temps: 19.5 to 23.4 degrees
Humidity: 50% to 60%
Watering: Both 500 ml.
Dry Weight #1 4.0 kg. #2 4.2 kg.
15-9
Temps: 20.5 to 24.7 degrees
Humidity: 54% to 61%

Likes
11
Share


@Lahuertade_Bototo
Follow
🌱🌱🌱Comenzamos este primer cultivo, con esta hermosa cepa de FastBuds, Girl Scout Cookies Auto, germinación con ratio perfecto, 100%.🌱🌱🌱
Se utilizo método combinado de germinación, 24 horas la semilla en agua y luego se paso a un recipiente hermético plástico con toalla de papel absorbente por 32 horas a 22 grados Celsius app.
Se planta la semilla con una radícula de app 1,5 a 2 cm en el sustrato Light Mix de Biobizz, mas la adición de micorrizas en el mismo lugar donde se planta la semilla (app una falange del dedo índice de distancia entre la superficie del sustrato y la semilla)
Se humedece el sustrato con 150 ml app de agua declorada ph 6.2 app.
🚀Equipamiento🚀
Indoor de 60x60x159 cm y una iluminación BlackCob F320, pero en vegetación se activa solamente 1 modulo (160w) para luego a futuro en floración activar toda la potencia lumínica y aprovechar al máximo el espacio de cultivo.
👨🍳Nutrición👨🍳
Este cultivo será orgánico, con la linea Plagron completa (power roots, alga grow, alga bloom, green sensation, sugar royal y pure zym) + la adición de tricodermas liquidas de "Colectivo Científico" y utilizando la técnica de entrenamiento SCROG.
Acompáñenme para ver los resultados de este hermoso desafío, un saludo cultivadores 🔥🔥🔥

Likes
41
Share


@Ganjagrandaddy
Follow
Hi all. I hope to are all as interested as I am to see what this light can really do. I have been learning g to use l.e.d for the past 3 years and the majority of that has been using Mars Hydro lights. I originally grew for a few decades in HPS 600 watt bulbs and laughed at the new kid on the block ( l.e.d) and its fancy boxing and blurple colours and never saw a tine I could afford the kind of L.e.d that was being used by industrial and pharmaceutical grade growers worldwide. These were always way too expensive to make the conversion worth the benefits to my home growing. I started on the Mars Tsl2000 and soon had 2 , then added an sp250 followed by the very good sp3000 . Having the chance to try this new 300w beauty and its sexy framework too , was an opportunity too good to miss so here we are.It has been a lesson in training for a slight penetration difference mainly between the hps and l.e.d and keeping them in light as direct as I can. They are running at 50% for now as the ladies are just adjusting to the soil mix . The 2 Mexican airline are having a slight issue with the soils strength I think so have only just really started to settle down. I thought one was going to die of toxicity but it has kept going . The Strawberry Pie seem the most settled so far and are beginning to put their next leaf sets out but the six Shooter also has signs of disliking the initial soil mix. A few more days to settle in and a good watering cycle should sort them out better. So not much to really report this early on except we got 6 from 6 as a start lets hope it stays productive. Be well folks
Likes
10
Share


@Roscio99
Follow
hi guys, although the plant was born at the end of summer it is growing well and fast, the vegetative growth lasted about 4 weeks

Likes
2
Share


Likes
5
Share


@JohnnyBarrel
Follow
Week 17
Last week before harvest. Just let the plants ending the maturation process. Good synchronization between the different strains, selected with an approximate identical flowering period. I want harvesting all the plants at the same time.
Flowers are dense, hard and thick, pretty resinous. 4 strains = 4 different smells, 4 different colors….🤩
I flushed consciously and stopped watering 4 days before the harvest day. I turned off the light during 48h, with ventilation on.
All is ready for the cut. Date is programmed to the full moon period….why not…🤔
I will trim a little bit the plants before cutting and hanging them in the tent with the same ventilation cycle, no light of course…

Likes
17
Share


@Jahasus_Group
Follow
Growing report:
The growth through veg stage was amazing couldn’t fault the plant or the feed BUT then flower stage is where these genetics goes all wrong! So two weeks into flower I see one plant had Hermied, so gave this one the axe, and then spoke to acouple of other growers that have the same strain Had the same problem So it’s now named (hermie pie) then in week 5 all plants Hermied. I managed to keep the seeds at bay mostly and slow down the process of them seeding until harvest on week 7/8 I got signs of bud rot but dealt with that quick enough it didn’t damage the rest of the the harvest. Once harvested they got a light trimming then hung up for 5/6days at temperatures 20/28 and humidity 45/60.
Used Trimbag for the rest of the trimming process, got 6oz off 3plants 😬 curing for 2weeks in one ounce Jars 75% full.
Bud report:
Smell; is sweet and tangy
Taste; sweet spicy taste
Density of buds out of 10; 8.
Some seeds found in buds😞
Thank you all for watching another stressful but fun and learning harvest.


Likes
44
Share


@XperencdGmanXG
Follow
lots of work went into moving these girls outside. They are in a nice sunny and protected spot now. Can't wait to see these girls grow up. Gave them the best start I could. Season is a bit late here this year too.
Likes
44
Share


@SooSan
Follow
Mars Hydro m'a sponsorisé, je vais donc tourner à 100% en Mars Hydro !
J'ai donc une nouvelle tente, la 2in1 90x60x140 Mars Hydro !
Et le FC-E 4800 est arrivé ! 😍
J'ai divisée la 90x60x140 en 3 parties (et donc 3 Diaries) :
1️⃣
🏠 60x60x140
☀️ FC-E 4800
🍁
1x Black Bomb / Philosopher Seed
2x Amnesia Lemon / PEV Seeds
1x Blueberry / PEV Seeds
1x Blueberry / 00 Seeds
1x Wappa / Paradise Seed
1x Dark Phoenix / Green House Seed
1x Quick Sherbet / Exotic Seeds
1x Mango Cream / Exotic Seeds
1x Banana Frosting / Sensi Seed
1x Hindu Kush / Sensi Seed
1x Fast Mix / Sweet Seed
📎 https://growdiaries.com/diaries/122084-grow-journal-by-soosan
2️⃣
🏠 30x60x90
☀️ TS1000
🍁 4x Fast Mix - Sweet Seed
📎https://growdiaries.com/diaries/124052-grow-journal-by-soosan
3️⃣
🏠 30x60x50
☀️TS1000
🍁 4x Quick Sherbet
📎 https://growdiaries.com/diaries/122080-grow-journal-by-soosan


Likes
27
Share


@RDWCGrowing
Follow
1/20/2023- So much to do pre grow and over the next 16 days, absolute first order of business is that I have to take down my current Grow---TIMBER-- Then I have a list of things I have to get done in order to be ready to start this grow 1 Feb.
With that said
T - 2 days until start 48 hour Flush
T - 2 days until Start 48 hours of Light
T - 4 days until TIMBER!!!
Items that need to be done before 1 Feb 2023
1. I need to clean the tent out
2. I need to clean the equipment- Proper Sanitization between grows in Hydro is a must!!!
3. I need to get the hole in the ceiling above my tent repaired- For my last grow I had a deep sink installed in my grow room, to make Hydroponics a little bit easier and have a water source in the same room. The seals on the pipes they were installing broke and leaked through the ceiling causing some damage all the way across my grow room, I was already weeks into my grow and couldn't risk them working above my tent and it would have been very awkward positon for them to be working in as well, so have to get this done quickly between chop and germination.
4. I have to install my new light- I was using a Vivosun 4000 and for this grow I am switching up to a Spider-farmer SF 7000.
1/20/23- For this upcoming grow I am working with M/F photo seeds so I ordered 4 Sex determination kits. I recieved my my 4 Sex determination testing kits from Rimrock Analytics today. I will be using these to test my plants at week 2 of Veg so that when/if I take clones I know I am taking them off females. As well as I don't want to accidently pollinate my tent during this grow I am looking for big beautiful buds not seeded buds. :-)
1/24/2023- Harvest of current grow- Started at 2:00pm and finshed wet trim and firt batch into the freeze dryer.
1/25/2023- Next batch into the freeze dryer and cleaning all my equipment for this Grow.
T-1 Day until the workers are supposed to be here to fix the hole in the Grow Room.
T-3 days until I instll my new Gorilla Grow Tent and my New Light Spider Farmer SE-7000 for this grow.
T-7 Days until Start of Germination
1/26/2023- Harvest is done ran through the Freeze dryer and dry tim completed.
1/27/2023- Grow Room repairs completed. Hole is gone Letting the paint dry before I install the new tent.
T-2 days until Install the New Gorilla Grow tent and the new Light
T-3 days until I put the hydro equipment in the new tent
T-5 days until Germination
1/29/2023- Day 0- Final Pre Germination activities
Germination Start T-3 days
The paint on the ceiling was dry and it was time to finish prepping for Germination. I got the following items knocked off my list.
New 4X4 Gorilla Grow Tent is up and ready
New Spider Farmer SE-7000 Light is installed- Thanks Moony Grows for the suggestion and for the Code that got me some money off and free shipping (Moonygrows)!! I turned the lights all the way up to max and set the timer to 18/6 0600-0000. I will keep an eye on the temperature and humidity without my plants and see how hot it gets with the new light.
I put my Hydro system back together and put in 40 gallons of water into it, time to monitor for leaks the next few days.
I Setup my cloning machine for Germination Days 3-11
1/30/2023
let me break down the situation, ROOM in the TENT.. Enough said.. No really I tried putting my exhaust system up in the new tent with my new light, The light is so big corner to corner that it really didn't give me enough room for the lights be be raised, with the exahust hanging the buckets my plants are Starting in are 2 and 1/2 feet off the ground, great for plenty of room for roots but not so great for upwards space for the plant to grow. In a 6' 11 tent with the exauhst in side and hanging that only gave me a little over 4 feet of grow room to play with. My last grow if you saw my diary, anyone could tell I was struggling to keep the buds off the lights. No good, Since space was such an issue I was running my carbon filter inside on the ground but It really needed to be up sucking the heat out not shooting the cool out. With that setup I was sucking air through the filter and pushing it out the tent at a bottom exhaust hole cold out. Wasn't doing me any good for my heat. I was hitting temps of up to 85 degrees. I bought a portable AC unit and have been running it in the grow room to try and keep temps below 85 and I have had to lower the power on my lights during grow also not ideal.. With that said a friend of mine MoonyGrows (Check out his diary) took the time to look at my issue send me a picture of my grow tent setup with detailed instructions on how to suck the air out from the top but putting my filter and fan on top of my tent so no room issue and I am sucking the air out from the top where the heat is instead of pushing the air out from the bottom where the cool is... THANK YOU MoonyGrows For taking the time to help me get this straightened out.. Now I have room and I have the exhausts working right and now my temps with everything at 100% are topping out at 80 this dropped the temp by 5 + degrees at 100% max.
T-2 days until Start of Germination
Prepped my seed tray with humidity dome
Prepped my Rapid Rooter plugs. I Used RO water, and I added a few drops of Hydrogen peroxide to Oxygenate the water. I then PH balanced between 5.7-6.0 the same that they will be getting in the Cloning Machine and when they get to thier final grow pod. I perfere the 5.8x range and I hit 5.84 for these rapid rooters. If you want to see a complete video on the process HowWeedGrow has an amzing video that shows step by step how to do it and explains it better than I ever could including how to plant the seeds. Which I will cover when I get to that step on Wed. https://www.howweedgrow.com/how-germinate-weed-seeds-cannabis-rapid-rooters/
1/31/2023
T-1 day until Germination Start
All set and ready have my Rapid Rooter plugs ready to go have my seeds out.. Have my seed tray warming up tonight. Tomorrow morning right into the Rapid Rooter then strait into the tray. I will spray the dome to start the humidity in there.
2/1/2023
Germination Day!!
Let the games begin!
0600am Put the seeds into the Root Riots. And then put the seeded Root Riots into their first home the Seed tray. I have them under the light 24/7. Sprayed the dome
7:30pm Sprayed the Dome to keep humidity going on the dome.
2/2/2023
Day 1 of Germination
Sprayed the Dome in the morning
Sprayed the Dome in the evening
2/3/2023
Day 2 of Germination
Roots are starting to come out the bottom of the root riot plugs and the heads are slowly popping out of Number 4 just below the surface.
Afternoon- Number 4 has popped up
Evening- Number 3 has popped up as well. Happy Dance!!
2/4/2023
Day 3 - Germination
Surprise Surprise Surprise- all 4 have now poked their heads up.. Happy day!! 100% Germination succeeded.
Now major milestone to track is how many are female and how many are male.
I will take look at the roots this afternoon/evening and see if they have enough root to go into the cloning machine for the next 7 days before they go into their Hydro Pods.
Day 3 - Germination - Evening..
Roots looked good and they were tall enough to make it into the cloning machine.
Now that they are all in the cloning machine I have switched the lighting to veg state 18 on 6 off.
2/5/2023
Day 4 - Germination - Morning
All the Ladies (fingers crossed) looking great stretching nicely and look nice and green, Photo synthesis underway....
UPDATE!! After a very interesting POD cast on FSTS by Dr. Bruce Bugsbee from Utah University, I have shifted my lighting to 24 hours on through seedling and then I am going to shift to 20 hours on the rest of Veg.
2/6/2023
Day 5 - Germination
While Checking on my conditions inside the new tent last night, I found that the Humidity was down to 39 Percent. I added an AquaOasis Cool Mist Humidifier, the reason I selected this humidifier is that I needed one that could be turned on and off utilizing my Inkbird Humidity Controller IHC200 that I have my Pro Breeze Dehumidifier currently running with.
Root structures are starting to get there about 1/4 of an inch.
2/7/2023
Day 6 - Germination
Everything seems on track more roots poking out of each today. They are each getting a little taller as well.
Checked in the evening and number 3 was drooping the Root riot plug on the bottome was dry and the roots were not in the water yet. I raised the water just enough that the longest root that was sticking out is now hitting the water.
2/8/2023
Day 7 - Germination
Everything looked good while checking in on them this morning number 3 is now full up and no droop again.
2/9/2023
Day 8 - Germination
T-2 days until Plant into Forever Pods and we start week 1 of Veg .. :-)
Surprising thing to me is that number 1 and 2 were later in popping then 3 and 4 but the roots are growing longer in 1 and 2.
2/10/2023
Day 9 - Germination
Number 1 and Number 2 are definitely ready for transplant today.. Based on how they were yesterday and where they are today I am hoping by tomorrow 3 and 4 are ready. Today they look to me where 1 and 2 did yesterday.. I really hope 3 and 4 catch up by tomorrow since..
T-1 day until transplant to new/ final home for grow.
Need the roots long enough to have some clay down in the basket to keep the root riot out of the water and only roots in the water..
2/11/2023
Day 10 - Germination
Today they got placed in thier forever Home, 7 days from Sprout and 7 days until Week 1 Start.
PPM- 180 this is water out of the Tap
Temp Water: 70.7
Temp Tent: 77
Humidity: 40% I have a humidifier going 24/7 to try and bring this up.. I also have Humidity Domes on each plant.
2/12/2023
Day 11 - Germination
Sprayed the domes, all are looking good.. Nothing much to do at this phase but Keep monitoring the PH level in the system and making sure they have a comfortable home.
T-6 days until Week 1 start
2/13/2023
Day 12 - Germination
Sprayed the domes, They were looking a little yellow today so I moved the light down to assist. Nothing much to do at this phase but Keep monitoring the PH level in the system and making sure they have a comfortable home.
T-5 days until Week 1 start
2/14/2023
Day 13 - Germination
Sprayed the domes, They were looking a little Florissant yellow today, with what looks like slight burn on the tips, I talked with a fellow grower and we agreed that It was probably that I was drowning them, Yes you can drown you plants even in Hydro, but only early on.. :-) It usually happens with the water being too high, which soaks not only the roots but the medium (root Riot plug in this case). I lowered the water from touching the bottom of the pot to about 1" away. This will probably take 3-4 days to resolve. I will continue my daily monitoring.
T-4 days until Week 1 start
2/15/2023
Day 14 - Germination
Sprayed the domes, continue my daily monitoring they look a little darker green instead of lime green now that I lowered the water levels in the system, so I think that I might have resolved the issue but it will take a few days for recovery to happen.
T-3 days until Week 1 start
2/16/2023
Day 15 - Germination
I looked in on them this morning, 3 and 4 look like they are doing well and recovering nicely. Number 1 not so much it has brown spots on the leaves, this very well can still be a side effect of the overwatering but I decide to go ahead and add Nutes earlier than I was planning just incase. I was going to wait until Saturday but I think intervention is necessary now especially after drowning them early on.
I added 1/2 what I am planning on adding for week 1 start. I also think I am going to adjust my chart to add 1/2 2 days after plant from now on. I don't think it would hurt it to have some Nutes to pull from.
.25ml/Gal Calmag = 12.5ml
1ml/gal GH FloraMicro= 50ml
1ml/gal GH FloraGro = 50ml
1ml/gal GH FloraBloom = 50ml
T-2 days until Week 1 start = I will drain the system and start it over on Saturday with Week 1 Nutes.
2/17/2023
Day 16- Germination
I didn't even want to post today after looking in on them this morning, 3 of the 4 are now showing signs of dronwing.. Brown spots on the leaves, the water levels were still too high.. I drained about another inch out of the tanks.. Will see how quick they recover.. I start week 1 tomorrow and will have to ensure my water levels are at least 1" away from the basket on this round.


Likes
4
Share


@Dankgrowz786
Follow
Fire 🔥 she smoked nice. Smooth and got a sexy taste. Overall a easy grown and will try again

Likes
10
Share


@MarryJuan
Follow
Been trying to slow them down, defoliation and topped them tied down, doing well can’t defoliant fast enough. Guest room getting full

Likes
22
Share

@Brotanical
Follow
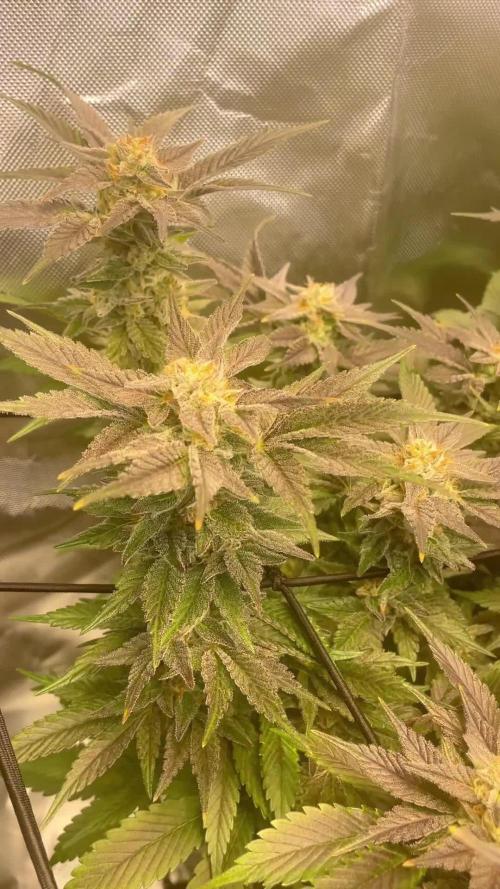
🌱(BT 40) 🌱Es sind verschiedene phenos zum Vorschein gekommen aber sie entwickeln sich bisher super 👍
Es gibt keine großen Veränderungen in den zusätzen☕ es geht weiter mit @Hesi_Official Dünger und die rlf Passt auch wieder wie gewünscht mit der ich zwischenzeitlich etwas zu kämpfen hatte aber das ließ sich gut gegensteuern mit der Infrarotmatte 👍
AKF von @VIVOSUN lässt Geruch durch ohne Ende auch bei 50% rlf 😄schon der zweite nagelneue 150mm akf ✅ bis vor zwei Wochen war noch alles top
Links die XS 1500 pro mit 36 cm Abstand und 85% Leistung derzeit✅
Rechts die M100 Pro von Wizard of Bloom mit 31cm Abstand und 100% Leistung ✅
Mir persönlich gefällt Spektrum und Vitalität sowie Performance unter der M100 etwas besser der Wuchs ist bedeutend kompakter und die Blüten gehen fast bis zur Erde das ist echt Wahnsinn 👍✅☣️
Die Research Reihe von @SensiSeeds läuft bisher ohne große Probleme und es ist eine Freude zuzusehen 😁
Likes
47
Share


@GWSD82
Follow
We have lift-off! She has stretched her little heart out this past week. This growth spurt inevitably came with a load of foliage, so I've been defoliating through the week - just a little each day - to keep the airflow nice.
She is loving the Bud Explosion. Bud sites are starting to swell up nicely, and the fragrant aroma is getting more and more every day, quite zesty, very citrus. More lemony than orange at the moment, but still early days. The first hint of frost is beginning to set in, and she is looking a very healthy plant, hopefully should get some nice trichome production.
This is my first photo-period plant, and in all honesty it's gone a lot smoother than some of the autos I've grown! No deficiencies, no pH or EC issues, no heat stress :) I deliberately gave it a long veg time so it didn't feel rushed, but moving forward I wouldn't want to have 1 plant taking up that much space for that long. SOG might be the way to go, but that's for another day.
Current feeding:
CalMag: 0.5ml / liter
Megacrop: 5.5 grams / gallon
Bud Explosion: 1.5 grams / gallon
Will be running PK 13/14 for a week, probably starting some point this week when I next need to change the res.
pH is currently 6 in the res, rising to 6.1 / 6.2 in the autopot tray.
Let's see what this week brings :) Happy growing.

Likes
199
Share


@PEAKYPLANTERS
Follow
WELL WELL WELL, FRIENDS!
NO PROBLEM WITH THE GERMINATION OF THIS BABY .... I CAN'T WAIT TO OBSERVE HER RED GEMS !!! ----------------------
-------------------
For those interested in buying this fantastic light
https://amzn.to/3ttb2j9
Likes
3
Share


@tontodedoverdee
Follow
15/2
So the plant it's growing much faster, i keep bend the top branch every 24H without any big sign of stress maybe also because she been trained since her first week, I've also start to bend on the side some sides branches trying to give a good canopy and space to the plant, from this week I've also start giving some green sensation from Plagron and i can already notice a good amount of pre flowers and sweet smelly tops
