
Likes
Comments
Share

@All_our_small_plants
Follow
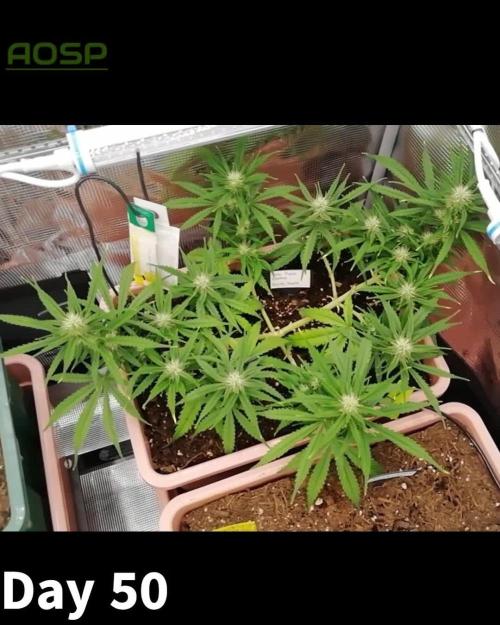
Bewässerung: 2000 ml jeden 2 Tag in der neunten Woche
pH-Wert: 6,4
EC-Wert: 2 mS/cm
Temperatur: 30ºC
Luftfeuchtigkeit: 65%
Schädlingsbekämpfung: im Moment haben wir keine Anzeichen das es was zu bekämpfen gibt, sobald die ersten Anzeichen da sind werden wir handeln :), aber zur Sicherheit haben wir wieder ein paar Raubmilben an die Pflanzen gehenkt.
PPFD: 600 µmol/m²/s
DLI: 38 mol/m²/Tag
Düngemittel: Sie bekommt CalMag von BioBizz zu Prävention. Ab Tag 44 haben wir angefangen sie mit einem Mineralischen NPK Dünger (NPK 3,5-6-6) zu Gießen, Plagron wurde auch hinzugefügt.
Besonderheiten: wir versuchen bei diesem Grow Effektive Mikroorganismen aus.
-Tag 50 sie mag das man sie Pablito nennt, Pablito entwickelt sich gut und hat heute wieder Wasser mit Dünger bekommen ;)
-Tag 52 Pablito hat heute Nematoden bekommen 😌
-Tag 54 Sie wurde heute mit mineralischen Dünger gegossen und jetzt ist Puck bei Pablito angesiedelt 😎
-Tag 56 wir haben ihr wieder etwas Dünger gegeben und den Runoff gemessen und er ist leicht erhöht 2.8 mS/cm 😱

Likes
50
Share


@DogDoctorOfficial
Follow
Week 6 Veg Report – Runtz We Meet Again!
Another week, another step forward in our Eternity Grow Cup 2025 journey, and oh boy, do we have a lot to unpack! These Runtz girls are showing their potential, and we’re dialing in every little detail to ensure they thrive. Let’s dive deep into everything that happened this week!
Cal-Mag Deficiency Adjustment – Pheno #5’s Special Needs
This week started with a close inspection of our phenos, and we noticed that Pheno #5 was showing early signs of a calcium/magnesium deficiency. Whether it was slightly off VPD levels or this particular plant being more demanding, we decided to correct it by increasing the dose of RO Water Conditioner. Now, while this isn’t a direct substitute for Cal-Mag, it does contain trace amounts that can help stabilize the situation.
🔬 Understanding Cal-Mag Deficiency:
Calcium and magnesium are essential secondary nutrients. Calcium strengthens cell walls, preventing issues like tip burn and weak stems, while magnesium plays a critical role in chlorophyll production, allowing plants to efficiently absorb light energy.
💡 Signs of Deficiency:
• Yellowing between veins (Magnesium)
• Rust spots on leaves (Calcium)
• Slow growth and weak stems
⚡ How We Address It:
• Slightly increasing RO Water Conditioner to see if trace minerals help
• Keeping an eye on overall nutrient uptake to ensure no lockout
• Monitoring VPD (Vapor Pressure Deficit) closely to optimize nutrient absorption
Let’s see how she reacts next week!
Branching Development – Pheno #2 Leading the Race
All five phenos are thriving, but Pheno #2 is showing the most aggressive branching, pushing outward faster than her sisters. However, overall, we’re seeing very uniform growth, which speaks volumes about the stability of these genetics.
🌱 What is Branching & Why It Matters?
Branching is the plant’s way of expanding its canopy, increasing surface area for photosynthesis, and maximizing potential bud sites. Well-structured branches allow better airflow, light penetration, and more even growth—key for a successful high-yield harvest.
⚖️ Topping vs. Leaf Bending – The Training Choice
Instead of topping, I’ve decided to go with leaf bending for now. This method allows for gentle manipulation of the plant’s growth without causing major stress. Once we introduce the SCROG (Screen of Green) net, this training will help maximize the canopy spread.
Moving to the TrolMaster Ecosystem – A Game Changer
Big move this week—our Runtz girls officially transitioned into the TrolMaster Ecosystem, and let me tell you, they are absolutely loving it! Under the ThinkGrow Model 1 LEDs, they’re thriving, leaves praying upward, soaking in that optimized spectrum.
💡 ThinkGrow Model 1 LEDs – Why They Work
• PPFD of ~400 µmol/m²/s at their level, running only on Channel One
• Full-spectrum lighting tailored for optimal vegetative growth
• Passive cooling design, keeping temps stable while saving energy
Environmental Conditions (Measured on the TrolMaster Tent-X and the AMP-3)
• Temp Max: 26.6°C | Min: 16.2°C
• RH Max: 77% | Min: 52%
• VPD Max: 1.65 kPa | Min: 0.43 kPa
• Solution pH: 5.8
• EC: 0.96
• Water Temp: 16.3°C
Why These Numbers Matter:
• Keeping VPD in check ensures efficient nutrient uptake
• pH and EC levels fine-tuned for maximum root absorption
• Water temp stable to avoid root shock and slow growth
Autopot System Prep – Getting Ready for the Next Phase
The week wraps up with us cleaning and preparing the Autopots for their next phase. These self-watering systems will allow the Runtz girls to access water and nutrients at their own pace, optimizing growth as we head into pre-flower soon!
A huge THANK YOU to Zamnesia, Plagron, and GrowDiaries for making this incredible Eternity Grow Cup 2025 possible! Also, a big shoutout to my main sponsors, thank you for keeping this journey running:
🔥 Aptus Holland – Precision nutrients for peak plant health
⚡ TrolMaster – Bringing automation and accuracy to the grow
🌱 Pro-Mix – The foundation of strong roots and healthy plants
💨 The CannaKan – Premium solutions for top-tier results
Grove Bags – Revolutionizing post-harvest storage & terpene preservation
📜 Ziggi Papers – The ultimate rolling experience
And of course, a massive thank you to the community—followers, supporters, lovers, and even the haters. You ALL fuel this journey, and I appreciate every single one of you!
🚀 Good luck to all fellow competitors—watching everyone’s grows is inspiring, and the competition is fierce!
📢 Join the journey on YouTube & Instagram for exclusive content, behind-the-scenes action, and more insights into this epic run!
👊 Let’s keep pushing, learning, and making history—see you all next week for another deep dive into the Runtz We Meet Again grow! 🌿🔥
💚 growers love to all 💚
Genetics - Runtz https://www.zamnesia.com/6000-zamnesia-seeds-runtz-feminized.html
Nutrients - Plagron https://plagron.com/en/hobby
- Aptus Holland https://aptus-holland.com/
Controls - Trol MAster https://www.trolmaster.eu/
LED - https://www.futureofgrow.com/en
LED - https://www.thinkgrowled.com
Soil - https://www.promixgardening.com/en
Germination - Cannakan https://cannakan.com/?srsltid=AfmBOopXr-inLXajXu3QFgKXCXXos4F1oEvScjMKIB5MR5dk8-GJ-F49
DOGDOCTOR 15% off
Smoking Papers - https://ziggioriginal.com/
Terpene saver - https://grovebags.com/
As always thank you all for stopping by, for the love and for it all , this journey of mine wold just not be the same without you guys, the love and support is very much appreciloved and i fell honored with you all in my life
With true love comes happiness Always believe in your self and always do things expecting nothing and with an open heart , be a giver and the universe will give back to you in ways you could not even imagine so
As always, this is shared for educational purposes, aiming to spread understanding and appreciation for this plant. The journey with nature is one of discovery, creativity, and respect. Let’s celebrate it responsibly and continue to learn and grow together!
Growers Love To you All 💚
#EternityGrowCup #RuntzHunt #GrowersLove #CannabisCommunity #AptusHolland #ProMixSoil #TrolMaster #Zamnesia #Plagron #ZiggiPapers #Grovebags


Processing
Likes
12
Share


@Therbalist
Follow
#3 has beautiful pink buds very happy with these girls, hopefully the other two show some colour as the Temperature comes down.
Have swapped the 250 red CFL for a 150 blue. May turn it off for the last week to get every last bit of pink possible! Pots have a nice wet dry cycle, have tried to hold back and not over water so I've been watering with a spray bottle. I use a 1L hand spray bottle and fill it up three to four times depending on the weather. Although it seems impossible to overeater with the breathable fabric pots. Which are awesome if I haven't said already. Perfectly fit 11 in my small cupboard which is lucky as I ordered ten as soon as he free one arrived without measuring them! Stoners eyes never lie! 👁️
Buds should be huge if they keep going at this speed! Haven't topped them for the natural look, been a few years since I've done it can't wait to see a big fat cola bud at the end!
Likes
79
Share


@DudeGrowsWeed
Follow
Mexican Airlines is just awesome!!! Tons of bud sites all developing nicely. My only concern is my Alien vs Triangle hermied on me and I just hope I yanked her before she dropped any pollen on my Mexican Airlines. I think I caught it early enough and should be fine, but I guess there's a chance of some seeds. If so, I'm calling them Mexican Aliens! 😃

Likes
17
Share


@Elpicor
Follow
6th day
@gottagrowsometime many thanks for your help, I've changed my setup with Mars Hydro FC 3000 , 25% dimming and 55 cm from the plants ☘️ This week couldn't get any better
7th day
I added a fan and put the FC 3000 power supply out of the tent, lamp lowered to 45cm from the plants.
Likes
58
Share


@Gisbert
Follow
An Größenwachstum ist kaum etwas dazu gekommen. Dafür entwickeln sich die Blüten prächtig und der Geruch ist ein Traum, superintensiv nach Limette.

Processing
Likes
Comments
Share


Likes
34
Share

@Kirsten
Follow
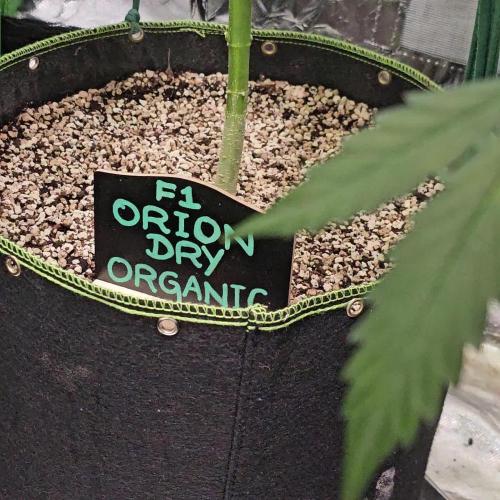
Orion Organic.
We are so close to being done. I was going to wait and see if the buds would bulk up in size a bit, but it doesn't look likely at this stage, so I am planning on harvesting this week. The trichomes are cloudy, with a small amount of amber.
9.8.25:
I watered with 3L of dechlorinated water PH'd to 6.5 with;
💜 1ml Trace
PH: 6.5
PPM: 381
12.8.25:
I watered with 2L of dechlorinated water PH'd to 6.3 with;
💜 1ml Trace
PH: 6.3
PPM: 349
13.8.25:
I watered with 2ltrs of dechlorinated water PH'd to 6.6 with;
💜 1ml Trace
💜 1 TSP Biosys
PH: 6.6
PPM: 351
17.8.25:
I watered with 3 ltrs of dechlorinated water PH'd to 6.5 with;
💜 2ml Trace
PH: 6.5
PPM: 364
Thanks for following on this one, it has been very interesting and helpful as the experiment. 😁💚✌️🍃🙏

Likes
116
Share


@AsNoriu
Follow
Day 50 since seed touched soil. From now on all is in stable position.
Twins always will be in center, looks sad a bit, was needing watering maybe yesterday before lights off, missed few hours for not making them droopy.
5 liters went in, want good run off and saturation.
Later today will install second level of scrog.
Reposition all shoots, some are lost, i almost regret instaling scrog, lost control of even height a bit, but canopy is very dense, branches went fatter during that week, i am happy .
Mars TSL2000 is on 80% will increase to 90% at the end of this week.
Day 53. Second level of scrog almost eaten, will have to make third, plus heavy clearing awaits next week ...
Day 54. Think tomorrow is watering day. Girls need good clearing, bottom canopy been canibalised heavily, lack off air shows a lot. Will do third level of scrog together with watering.
Day 55. Twins are thirsty !!! They are very sensitive , yesterday all good, pot still heavy for a day and today they look like this, pot light ;))) will recover in few hours.
Watered, did light cleaning before, only bottoms and shoots with 0 chance to make it ... Watering exposed new roots, plant occupies top up lair fast !
Happy Growing !!!

Likes
4
Share


@Ryno1990
Follow
All these beautiful girls are going thre flush now getting ready to harvest up they are all very resiny an covered in trichromes all the nugs are nice an dense an are smelling amazing can't wait to be able to dry an start curing them

Likes
16
Share


@GrowBeforeHoe
Follow
I think I'm lucky because I can't see any damage on the plant. Hopefully it's stay as easy as it's now.
You can comment if you see any mistakes which I made bc its my first grow :).
Keep Growing

Likes
11
Share


@drop_some_weed
Follow
Weeks with so many changes.
I've passed all this time finding best configuration nuts, adding and removing from every irrigation in little quantity, from infinite different bottles, but EVERY TIME some miss, some deficiency appear.
i mean that Plagron doesn't have ALL the necessaries traces for growth, Advance nutrients so difficult to calibrate, and every irrigation was a nightmare until now
now i'm using MEGACROP like base nuts with some booster (if girl tell me need it) and plants restart to growth and being beautiful
don't want to pay for water in my nuts, don't want to need every time calcs when i need to change rates anymore
now girls looks perfect and i'm feeling stupid 'cause it's so easy to don't have problems
Just use MEGACROP
------------------------
Purpp #2 and Gelato FB #1 went in flower during this week i think it will stretch next one
others (with same birth) have preflowers

Likes
20
Share


@TheGourmetWeed
Follow
Hey guys!
So, finally Saturday I chopped her down. She looked now ready and delicious, although I only notice yesterday how many seeds she has allover the place. She hermied in front of me without noticing, not good at all and need to start looking much better and in detail into the plants.
Feel like an idiot now.
Anyways, it was a full week!
Emptied the grinder collector and pressed it down a little, makes a very nice smoke, light but pleasant, the kind of stuff it keep you going all day without the dumb effect.
From all trimming made the bubble hash. Got a little too green as the 220micron bag's stitches slightly opened letting some contaminants in the final mix, hence the green color.
This was a hit. in opposition to the grinder stuff, this sent me straight to the moon, really heavy stone effect, even thinking was hard. Reminded me those afghan/ moroccan balls we used to get back in the early 2000's.
The weed itself it's still drying so the smoke report will be updated in there.
715g of fresh cut plant is good, let's see the potency and the seeds. Might turn it all into bubble hash, if I see it'll be an hassle to remove seeds.
On an earlier bud I've cut and dried, smoked it and you can see pure white ashes in the bong. Ain't that a beauty?


Likes
1
Share


@Mythological_Grower
Follow
27/05 - Day 1 of Veg(1L of Nutrients dissolved in water poured into the tray)
1/06 - Day 6 added toothpick to help give support
2/06 - Day 7 checked on their root development, so I can transplant (Tomorrow we transplant)


Likes
12
Share


@MadeInGermany
Follow
Harvest day 64
since time switch
to 12 / 12 h
Hey guys :-)
Finally it's time 💚
The lady is done the large leaves have been removed and hung upside down to dry in the dark drying room.
You can now stay there for 11-14 days at a temperature of 18 degrees and 55-60% humidity.
After 11-14 days it is neatly trimmed by hand and placed in jars with boveda packs 58.
After 4 weeks Boveda 58% come in and are ready for testing ;-).
Let's get to the plant 💚.
The smell is great I'm curious about the taste 💚 It is very fruity and has a touch of Tangie 😍
The taste remains on the palate even after a few minutes 👍
The look is very nice even if it looks very loose and not as nice and firm as other buds it is still a 10 out of 10 because of the taste 😀
Their growth behavior was perfect from start to finish 👌
I hope you liked the diary and wish you all a nice week.
If you have any questions, please contact us 💚
stay healthy 💚🙏🏻
👇🏼👇🏼👇🏼👇🏼👇🏼👇🏼👇🏼👇🏼👇🏼👇🏼👇🏼👇🏼
‘Powered by GreenHouse Feeding’
Copy the link for 10% off all Nutrients 👇🏼
http://shop.greenhousefeeding.com/
affiliate/madelngermany_passiongrower/
👇🏼👇🏼👇🏼👇🏼👇🏼👇🏼👇🏼👇🏼👇🏼👇🏼👇🏼👇🏼
Water
💧 💧💧
Osmosis water mixed with Cal/Mag (24 hours stale that the chlorine evaporates) to 290 ppm and Ph with Ph- to 5.8 - 6.4

Likes
55
Share


@Book_of_Thoth
Follow
So these girls are now 11 weeks old, and they are well through their flowering now. Buds are starting to swell and mature (for Red Devil and Pineapple Express more than Misty Mack), and their smells are pretty powerful. The end is approaching, and as a guideline my plan is to harvest
Pineapple Express @ 13 weeks
Red Devil @ 14 weeks
Misty Mack @ 15.5 weeks
So that means Pineapple Express' two week flush begins today.

Likes
5
Share


@noshoesguy
Follow
The pictures don't do these buds justice. They are a brilliant purple and orange color. I have definitely outdone myself for my first grow ever. These buds have that perfect subtle smell and taste of blue salt water taffy. It's brilliant. I couldn't get it to reveg which is a disappointment but it will live on in my memory


Likes
7
Share


@TegridyCal
Follow
The beautiful Purple Lemonade is growing really well, it is very large compared to the other little sisters, bushy has responded well to the topping and the first inflorescences are coming out, honestly we can't wait to see these beautiful purple fruits that promises.


