
Likes
Comments
Share

@Alex_mir_doch
Follow
anfang blütewoche acht. es wird die letzte sein. ab jetzt gibt's nur noch ph reguliertes wasser. ein wenig dicker sind die buds noch geworden und die trichome sind durchgehend milchig.

Likes
3
Share


@Mismatas
Follow
APROXIMADAMENTE CUARTA SEMANA EMPEZAMOS POR PRIMERA VEZ NUESTRO LST Y UNA LIGERA PODA DE BAJOS.
SEGUIMOS CON EL CABLE DE CALOR PUESTO Y TAMBIÉN AÑADIMOS UN CALEFACTOR PARA MINIMIZAR LAS BAJAS TEMPERATURAS

Likes
4
Share


@sensistar9
Follow
The plant is absorbing the last nutrients and coming to her end,beautiful strain if you love the dutch classics ❤️

Likes
61
Share


@Captensmokey
Follow
It was a hell of a job to get everything in my place but it's there. Follow this awesome guerilla grow


Processing
Likes
7
Share


@Chronnoisseur
Follow
Well she seemed to slow down and now her roommates have over taken her. But fingers crossed she still put out some nice buds
The cheese candy is starting to become more smelly this week stay tuned....
Likes
34
Share


@BOMbolenath
Follow
The plant is stretching very fast. It's very healthy. Smells amazing. Beautiful structure.

Likes
32
Share


@BB_UK
Follow
I’ll start by saying I wasn’t going to but ended up defoliating today because I had to, there is so much vigor I had to free up the space to allow air to pass for better air circulation and light penetration! It’s been 7 days since I flipped and the girls are raging into flower and stretching so well, no laggy branches, just thick sturdiness!

Likes
44
Share


@Chedderbob112
Follow
Rite early days so dunno exactly wot methods a fancy trying this time maybe transplant one of the clones maybe not tho mite make an attempt at main lining but a know am goin to struggle for space so it iz wot it iz got a scrog n al squeeze a sexy as fuk sea of greenery they can lock the locks 🔐 but cannot stop the clocks ⏰ if ye know ye know @chedderbob112@s2340420 🏴


Likes
2
Share


@BestBudsGrow
Follow
The only bottled nutrient I use is silica's 5ml per gal every other week. Other then that I use the EM-1 and ferments I make my self to water and spry the plant. I’m mainly relying on what’s already in the soil and what I’ll be top dressing the plants with as they grow and need more food.
Likes
45
Share


@PEAKYPLANTERS
Follow
Hi everyone, Weed's fantastic friends!
We still proceed in inflating the gems and to explode trichomas this week.
My God .... I'm already madly in love with this plant!
The gems of her are perfect


Likes
14
Share


@Smile_gan
Follow
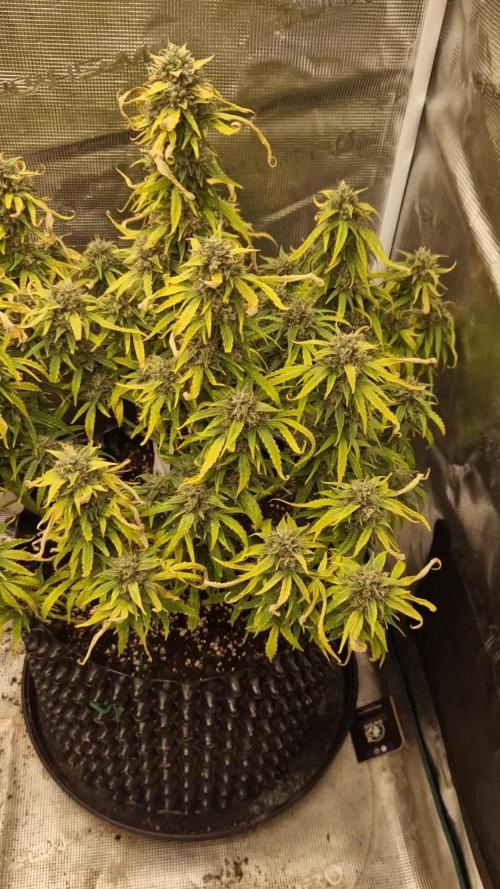
Start week 9
From the end of last week i feed Dolomite 9tbs per 1 gal of water to fix soil acidity(hope will help) and no fill any more nutrient. At this point seem to be all plant will ready for harvest in next 2 week. So additional nutrient should be not require on this period, just watering until harvest day.
Over all bud of BCN looking good and Pineapple looking better from last week but still smaller than expect.
I try to change light hrs. By 12/12(some local professional recommend i will try).

Likes
6
Share


@emeraldlabs
Follow
Nothing new. Typical spring weather in midwest; 80 one day, 35 the next. Keeps me active flipping between humidifier, dehumidifier, heat, and ac; fun!
Have started to monitor trichromes. Plants seem as they will all finish at different times; basing that on orange hairs at the moment.
Pics/vid taken 85/41F days after breaking the soil.

Likes
6
Share

@CheeRz
Follow
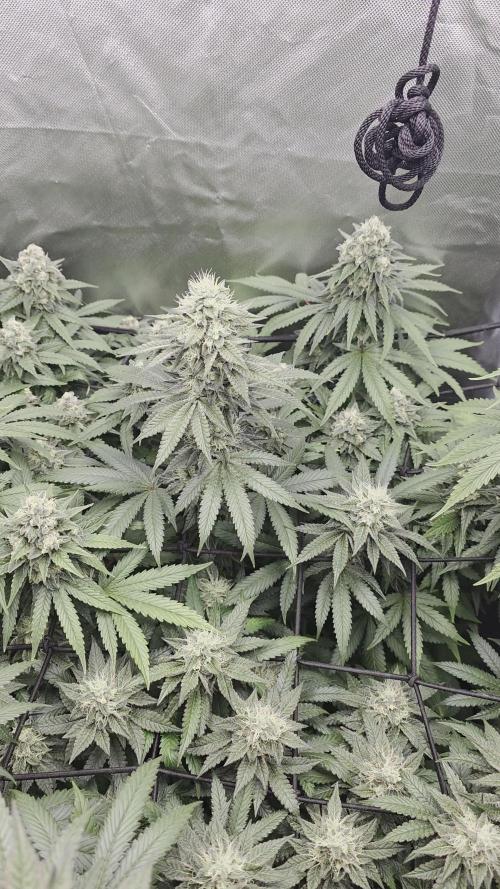
We are nearing the finish line! Both ladies look great, and the delicious aroma wafting from the tent brings a smile to my face every time. I think we should finish the run in about two weeks. 🍋🍋🍋
Likes
2
Share

@BudBeezy
Follow
Welcome to week 7 of my grow diary. The weather this week has been phenomenal! I hope it stays this way. The air is dry and the sun is shining brightly. Due to the weather I had to increase the watering again. Growth is slowing down. This week, there was only 5 cm of growth. The buds are forming and there is a light fruity scent in the air. The terpenes have a citrusy, creamy note. Reminds me a little of Gorilla Cookies, but with more fruitiness.
See you next week!
Likes
3
Share


@I_roll_my_own_420
Follow
Here we go, 4 days before harvest time. Last 2 days, light will be off. Cant wait to cut those ladies down :)

Likes
6
Share

@Bncgrower
Follow
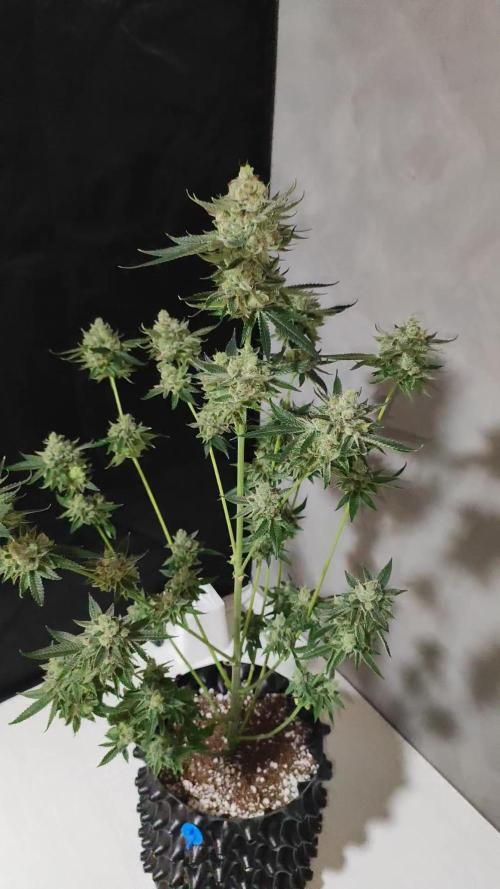
The aroma of Gelato #41 is simply exceptional, to the point that it fills the entire room with its intense and captivating fragrance. Each cultivation only strengthens my admiration for this strain, which will definitely remain one of my favorites, both for its quality and the sensory experience it provides.
*** Gelato 41 has a sweet and creamy aroma, with notes of vanilla, berries, and a citrus touch. The flavor is smooth and creamy like a dessert, with lemon and mint on the exhale.
Likes
43
Share


@MadeInGermany
Follow
Hey everyone 😊.
The last 2 weeks of flowering have come and I can't wait to harvest them 🤗.
The Ec is turned down a little every week, and next week the water is completely changed again to rinse 👍.
They have developed very well, are just getting their full load of resin, and smell exactly as they should smell .
Otherwise there is nothing to report this week.
I wish you a lot of fun with the update, stay healthy 🙏🏻 and let it grow 🍀
You can buy This Strain at :
www.Zamnesia.com
☝️🏼☝️🏼☝️🏼☝️🏼☝️🏼☝️🏼
Strain
Gelato clone from mother (Zamnesia )
☝️
Genetics: Wedding Cake x Gelato x Gelato 33
👍
Vega lamp: 2 x Todogrow LED CXB3590 COB 55 W
1 x Sanlight S2W 62 W
💡
Flower lamp : 2 x Todogrow LED CXB3590 COB 55 W
1 x Sanlight S2W 62 W
💡 ☝️
Grow Aero System : Growtool 0.8
☝️
Fertilizer:
Canna Aqua Vega A + B , Canna Aqua Flores A + B , Rizotonic, Cannazym, CANNA Boost, Pk 13/14, Canna Cal / Mag, Canna Ph - Grow, Canna Ph-Bloom
☝️🌱
Water:
Osmosis water mixed with normal water (24 hours stale that the chlorine evaporates) to 0.2 EG. Add Cal / Mag to 0.4 Ec Ph with ph- to 5.5 - 5.8
💦 💧