


Likes
Comments
Share


@Hempface86
Follow
Here we are today is the chop. The top is ripe while the popcorn buds at this bottom will be used for extractions... This grow has been a breeze. The training was amazing, and as you can see, the final result is absolutely stunning... Kannabia Seeds thank you so much for these fine genetics. The multitude of color hues it's very very eye pleasing ... i just hope I dry her and cure her in the way that she deserves so that I end up with this top notch product that it is right now... i hope everyone is doing well and so are there ladies... God bless everybody i'm happy growing ✌️



Likes
2
Share


@GrowerGaz
Follow
So the girls have been under 20 hours light , just been on water and LAB (Lacto Bacillus) made from rice wash and milk. They do seem to be coming on fast at day 13, one of the Tangie monkey took a day longer to germinate, so is a little behind the other is the fastest. The Bananangie look very similar in size and shape , one maybe has slightly fatter leaves than the other.
Likes
12
Share


@SpliffDoc
Follow
Week 7 is starting at day 48, things are rolling along nicely, she really is a hungry girl😂don't be shy with the nutrients as I've stated earlier, she takes everything she's given.
Room is smelling so good, I'm really liking the development of this Apple Strudel, she has been so easy to grow, a pleasure, just shows the good work that the fast buds team are doing behind the scenes, keep them coming Sebastian and Co👌🏻👌🏻👌🏻🏻
More Apple Strudel updates to come later this week.
Just noticed some mutations on a few of the leaves, got some crazy structure going on😁

Likes
16
Share

@AestheticGenetix
Follow
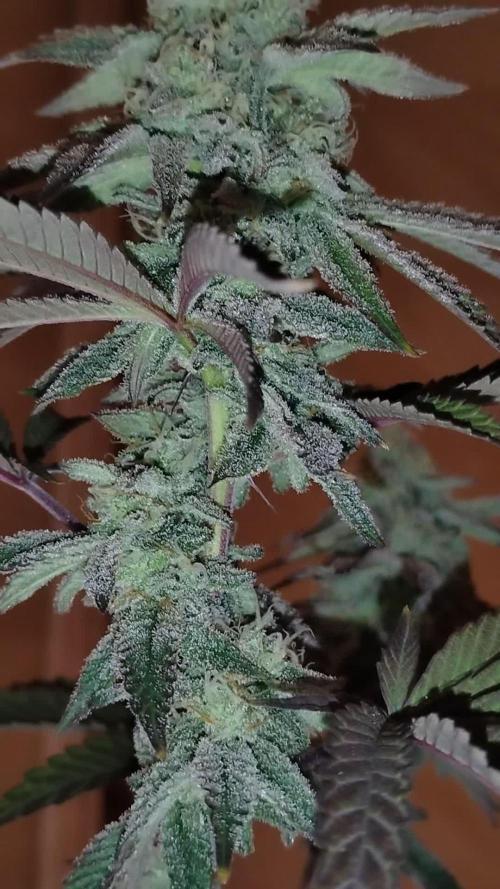
This strain may be as frosty as my RS11 s1 seed I ran earlier this year. The smell is almost berry like. It's very complex. It's like berrys with pepper and back end sour gas. Bud are pretty dense despite the small size.
Gave her a tea of bloom and bloom booster. Just mixed directly into water and poured on top of soil
She's losing leaves because I didn't feed enough nitrogen in early flower. But at this point there's not much I can do.
Check out my YouTube for more consistent updates with behind the scenes that I can't post on here. Such as cloning tutorials and how I feed and trim etc
YouTube.com @aestheticgenetix

Likes
4
Share

@UncleJono
Follow
Hey Growmies, here is my log for the past week: flower week 1!
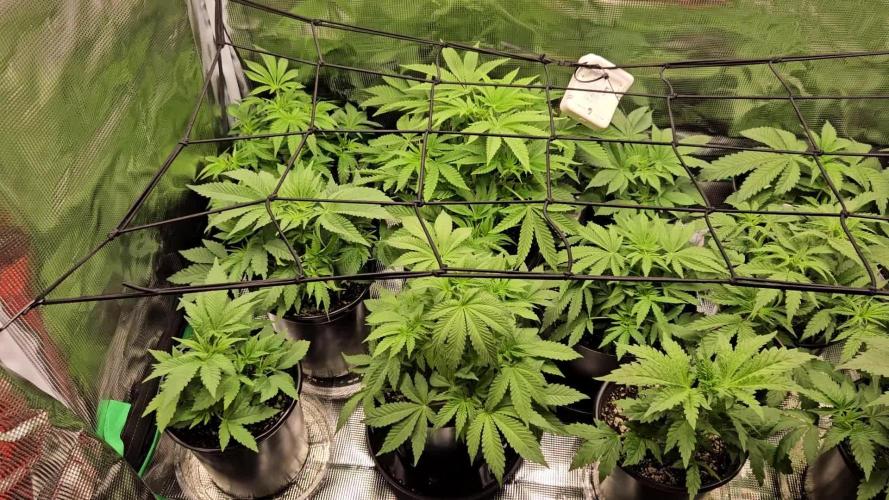
I have started feeding the plants 100% solution with a touch of cal mag and armor si during stretch. The ph does not need much adjusting now - falling within 5.8 to 6.0 easily. EC is in the high 1.8's but typically under 2.0
The plants had 4-6 inches of headroom beneath the scrog last monday - GDP and Bag Seed are now touching the screen today. The others are not far behind so I think the stretch is going week.
I did some defol the first two days of week 1 but am now resisting the urge until stretch is complete.
Plants were fed a light microbe mix with diluted jacks solution to close out week 1.
Upgrades to my setup this week include a new tent and t5 lights for seedlings and clones - I now have a two tent setup! There are currently some seedlings in the tent me and fiancé started
- if you guys want to see, I can start a new journal or include some updates on this one.
See you guys next week!

Likes
15
Share

@Kevs_Best
Follow
Week 2 – Early Pheno Differences & Lemon Meringue Terps
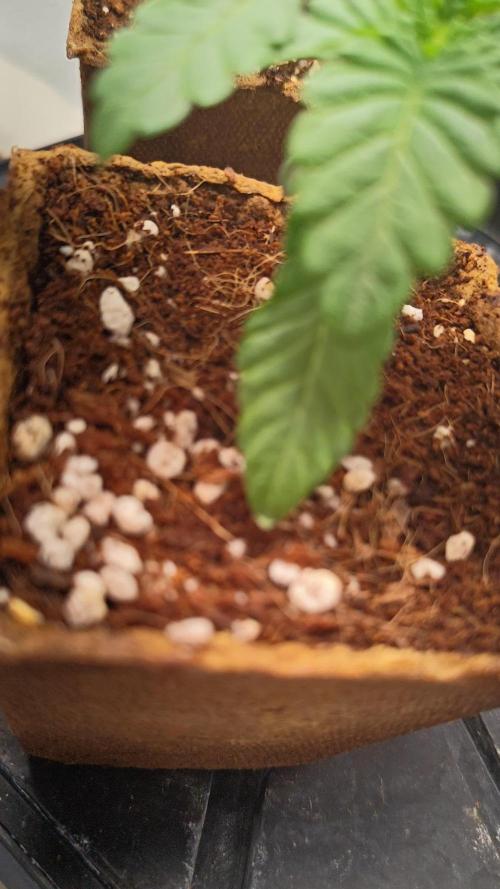
The second week with the two Black Light phenos is complete and both plants continued to develop very strongly. During the week, both plants were transplanted into larger containers and handled the transplant without any noticeable problems. Growth continued almost immediately, and by the end of Week 2 both plants had already developed a strong, compact and healthy vegetative structure.
The differences between the two phenos are becoming increasingly noticeable. Pheno #1 is developing slightly more compact and bushy, with broad fan leaves, short internodal spacing and very dense new growth. Pheno #2 shows a somewhat more open and upright structure with a slightly different leaf shape. Both plants remain very vigorous and healthy, but their individual morphology is already becoming clearly distinguishable.
The strong surface expression from Week 1 continues as well. The stems are becoming noticeably thicker and remain extremely fuzzy, with the same hairy texture extending across the petioles and even onto parts of the fan leaves. Tiny glandular and trichome-like heads are still clearly visible across the leaf surfaces and fresh growth. Combined with the very stable stems and compact development, both plants are showing some very promising early characteristics.
The biggest surprise this week was the first clearly noticeable terpene expression. After handling and transplanting the plants, one of the phenos already produced a surprisingly distinct aroma despite being only around two weeks old. The profile strongly reminds me of Lemon Meringue Pie or Lemon Soufflé, with fresh creamy lemon combined with sweet vanilla, candy-like notes and an almost lightly caramelized meringue character.
For such a young plant, the aroma is already remarkably clear and complex and goes far beyond the usual green or vegetal smell expected during early vegetation. Overall, I am very happy with the development so far. Both plants continue to show excellent early traits, and the combination of clearly different morphology, strong surface expression and an already recognizable terpene profile makes this Black Light pheno hunt especially interesting. 🌱✨
DE:
Woche 2 – Erste Phäno-Unterschiede & Lemon-Meringue-Terps
Die zweite Woche mit den zwei Black Light Phenos ist abgeschlossen und beide Pflanzen haben sich weiterhin sehr stark entwickelt. Im Verlauf der Woche wurden beide Pflanzen in größere Töpfe umgesetzt und haben das Umtopfen ohne erkennbare Probleme vertragen. Das Wachstum wurde nahezu direkt fortgesetzt und zum Ende von Woche 2 haben beide bereits eine kräftige, kompakte und gesunde Vegetationsstruktur aufgebaut.
Auch die Unterschiede zwischen den beiden Phenos werden zunehmend deutlicher. Phäno #1 entwickelt sich etwas kompakter und buschiger, mit breiten Fächerblättern, kurzen Internodien und einem sehr dichten Neuwuchs. Phäno #2 zeigt dagegen eine etwas offenere und aufrechtere Struktur sowie eine leicht andere Blattform. Beide Pflanzen wachsen weiterhin sehr vital und gesund, lassen sich morphologisch inzwischen aber bereits deutlich voneinander unterscheiden.
Auch die starke Oberflächen-Expression aus Woche 1 setzt sich weiter fort. Die Hauptstämme werden bereits deutlich dicker und bleiben gleichzeitig extrem pelzig. Diese haarige Struktur zieht sich über die Blattstiele bis teilweise auf die Fächerblätter weiter. Kleine Trichomköpfchen beziehungsweise drüsige Strukturen sind weiterhin deutlich auf den Blattoberflächen und im frischen Neuwuchs zu erkennen. Zusammen mit den sehr stabilen Stämmen und dem kompakten Wachstum zeigen beide Pflanzen bereits einige sehr vielversprechende frühe Eigenschaften.
Die größte Überraschung dieser Woche war allerdings die erste klar wahrnehmbare Terpen-Expression. Nach dem Anfassen und Umtopfen entwickelte einer der beiden Phenos trotz seines Alters von erst ungefähr zwei Wochen bereits einen überraschend deutlich erkennbaren Geruch. Das Profil erinnert sehr stark an Lemon Meringue Pie beziehungsweise Zitronensoufflé, mit frischer cremiger Zitrone, süßer Vanille und Candy-Noten kombiniert mit einem leicht karamellisierten Baiser-Charakter.
Für eine so junge Pflanze ist das Aroma bereits erstaunlich klar und komplex und geht deutlich über den typischen grünen beziehungsweise pflanzlichen Geruch der frühen Vegetationsphase hinaus. Insgesamt bin ich mit der Entwicklung bisher sehr zufrieden. Beide Pflanzen zeigen weiterhin sehr starke frühe Eigenschaften, und gerade die Kombination aus deutlich unterschiedlicher Morphologie, starker Oberflächen-Expression und einem bereits jetzt klar erkennbaren Terpenprofil macht diesen Black Light Pheno Hunt besonders spannend. 🌱✨

Likes
3
Share


@LonelyStonerz
Follow
Transplanted two more of these blueberry autos into 5gal buckets. Did some training on one and am going to leave the rest. I took that video yesterday check out the REBOUND one day later, clearly NO transplant stress whatsoever!

Likes
1
Share

@Aslanko
Follow
24. den květu 🌿🔥
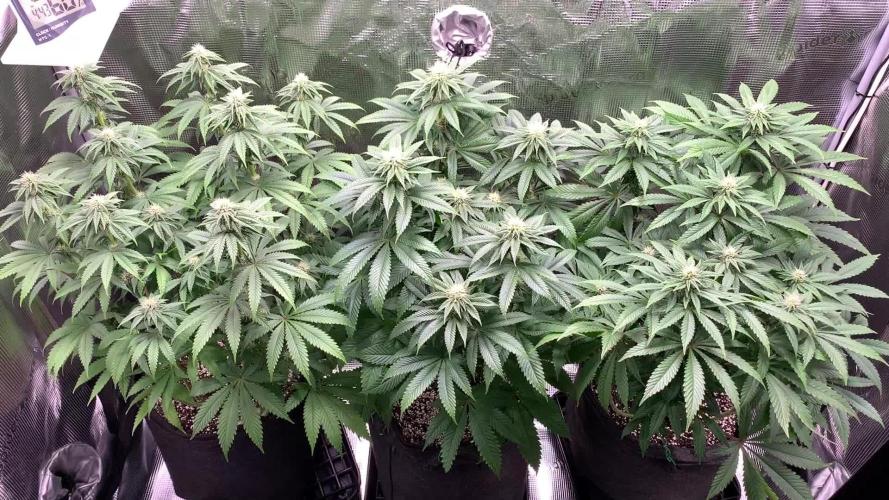
Tento týden vše probíhá dobře. Rostliny jsou aktuálně na 24. dni květu a stretch už je prakticky u konce. Díky předchozímu LST, defoliaci a lollipoppingu jsou canopy hezky rovnoměrně.
Květy se tvoří na všech vrcholcích a začínají postupně nabírat objem. Objevují se první trichomy, rostliny začínají být lehce lepkavé a objevuje se sladká vůně.
Proběhla lehká defoliace pro lepší průchod světla a proudění vzduchu. Teď už se snažím rostliny zbytečně nestresovat a jen udržovat jejich tvar.
Prostředí:
• Teplota den: ~26–27 °C
• Teplota noc: ~20 °C
• Vlhkost: ~45 % den / ~60–65 % noc
Noční vlhkost je trochu na hraně, takže pracuji na jejím snížení a lepším airflow, aby se předešlo plísním v pozdější fázi květu.
Hnojení:
• Advanced Nutrients Connoisseur Bloom A+B (2,5 ml/L)
• Big Bud ( 1 ml/L)
• Bud Candy (1 ml/L)
• CalMag (1ml/L)
Zálivka cca každých 6–7 dní podle váhy květináče.
Rostliny vypadají zdravě, listy se lehce zvedají, což bych řekl že je dobré znamení. Zatím bez větších problémů nebo přehnojení.
Další cíl je podpořit růst květů během následujících 1–2 týdnů a udržet stabilní podmínky.
Na základě nových zkušeností ze streamu plánuji v další fázi vysadit Big Bud a přejít na Overdrive, ideálně kolem 5.–6. týdne květu, kdy už jsou květy plně vytvořené a začínají nabírat na objemu.
Díky Hombremu za cenné rady! 🙏
A ať to roste 🍀
__________________________________________
Day 24 of Flower 🌿🔥
This week everything is going well. The plants are currently on day 24 of flowering, and the stretch is basically over. Thanks to previous LST, defoliation, and lollipopping, the canopy is nice and even.
Buds are forming on all tops and slowly starting to gain size. The first trichomes are appearing, the plants are becoming slightly sticky, and a sweet aroma is starting to develop.
I did a light defoliation to improve light penetration and airflow. From now on, I’m trying to avoid unnecessary stress and just maintain the structure.
Environment:
• Day temp: ~26–27 °C
• Night temp: ~20 °C
• Humidity: ~45% day / ~60–65% night
Night humidity is a bit on the edge, so I’m working on lowering it and improving airflow to prevent mold later in flower.
Feeding:
• Advanced Nutrients Connoisseur Bloom A+B (2.5 ml/L)
• Big Bud (1 ml/L)
• Bud Candy (1 ml/L)
• CalMag (1 ml/L)
Watering approximately every 6–7 days based on pot weight.
Plants look healthy, and the leaves are slightly “praying,” which I take as a good sign. So far no major issues or nutrient burn.
The next goal is to push bud growth over the next 1–2 weeks and keep conditions stable.
Based on new insights from the stream, I plan to stop using Big Bud and switch to Overdrive in the next phase, ideally around week 5–6 of flowering, when buds are fully formed and starting to bulk up.
Big thanks to Hombre for the valuable advice! 🙏
Let it grow 🍀


Likes
13
Share


@Danieledec
Follow
Hi Guys
the triple is doing well
and i think next week orthe next after i will change the light schedule and start the flowering
what you think??is that a good choice??
sorry for the bad quality of the pics
thx everybody
Daniele & Claudia
Italians from Greece
Likes
11
Share


@Bncgrower
Follow
Another week almost finished, we are on the final phase and tomorrow I will start watering it only with water, to harvest this little girl later.. See you next week.. 🌱🌱
Processing
Likes
7
Share


@420keef
Follow
So i had to take all my plants inside because i found bud rot on 2 of them & the weather wasn’t going to get any better, had to transform my bedroom into a grow room😂 & i have 2 more plants which i am going to finish next to a window.. The smaller plant to the right is a Northern light by zamnesiaseeds that has a seperate diary if you are interested! I really hope the bud rot doesn’t spread anymore & if anyone has any tips or tricks for that they are always welcome!
Likes
4
Share


@GeminiCQC
Follow
ABxRKO is about 42.5" tall, and has been top dressed with about 3tsp of grow dots to give it a phosphorus boost in flower
HBSS is about 26.5" tall and has been top dressed with about 2tsp grow dots as I believe it is fighting a phosphorus deficiency. She is giving all the smells, a bright red starburst like fruity smell with a stark citrus note.

Likes
60
Share


@BOMbolenath
Follow
Buds getting big. Very good sweet smell. Remembers a little bit the Radical Juice smell.


Likes
6
Share


@GemansGoGreen
Follow
WEEK 4:
The plants are now in the third week of the growth phase. I topped all three plants on the main stem and cut off the 4 largest top leaves so that the side shoots have more light available.
Plant #1 is clearly the smallest and is not as developed as the other two. Since I only want to take two plants into the flowering phase, I tend to sort them out.
Plant #2 looks the most vital and has already developed a noticeable smell.
Plant #3 still has a strange leaf shape, although I have the impression that this has improved slightly
The plants in 6L pots and added 5% FLO (Living Soil Fertilizer). I let the soil develop for 14 days beforehand. Clear mycelia have formed and the soil has a very pleasant forest floor smell.
- Light Power: 40%
- Soil: BioBizz Light Mix + 5% FLO (Living Soil Fertilizer)
- Additives: Dynomyco mycorrhiza granules

Likes
19
Share


@skeeter
Follow
Upgraded to "Kingbrite LED 320W QB288 Samsung lm301h 3000k LED grow light" direct from Alibaba!

Likes
49
Share


@masterofsmeagol
Follow
6/9 I can't believe it but I had faith. The transplant yesterday LOOKED like it was fucked. I cleaned it up though and left it outside. This morning it was standing straight up. Both transplants were! I put tarps up to block the wind tunnel between buildings. It's still overcast and rainy. Sun isn't supposed to come out for a couple poke days. Chance of thubder storms tomorrow but I'm going to try to get everyone in their forever homes today. Or at least most of them. I plan to light dep a few right in the 3 gallon. I'm sure I'll be updating this after I get some work done.
UPDATE: I WENT OVER AND GOT THREE MORE TRANSPLANTED. THAT MEANS FIVE ARE OUTSIDE IN THE CAGE. TWO 10TH PLANET, 2 BLUEBERRY CHEESE AND A LITTLE PURPLE PUNCH. THE 3 GALLON POTS WERE RELATIVELY HEAVY SO I PICKED THE LIGHTER ONES TO TRANSPLANT. I LEFT THE ORHER TWO 10TH'S IN THE GARAGE WITH THE DOOR OPEN WITH THE REMAINING PLANTS. I ALSO ADDED WIND BREAKS AND SUPPORTS TO EVERYTHING. I WANTED TO GET EVERUTHING DONE TODAY BUT THERE MAY BE A THUNDER STORM SO IF I DONT GET IT DONE ITS NOT A BIG DEAL AND ILL FINISH TOMORROW. TRANSPLANTS WENT SMOOTH. I THINK THEY'LL GO EVEN SMOOTHER IF THEY DRY OUT A BIT. STILL HAVE THE 50 AND 40'S TO FILL. Took a bunch of videos but the don't want to load. I'll have to try tomorrow or later tonight.
UPDATE: I TOOK TONS OF PICTURES AND VIDEOS BUT THEY DONT WANT TO SEEM TO UPLOAD. IVE GOT SIX IN THERE FINAL HOMES OUTDOORS 20s and 30 gallon smart pots. Still have massive plants but I'm going to out those in the 50 and the 40. I'll finish this shit up tomorrow and get all the girls in their forever homes and if I don't have room for some I was planning on doing a light dep anyway so that will work out good. I learned a lot and transplanting went a lot smoother todsy than before. I feel really proud of myself. The last Transplant I did break a few leaves off that I didn't notice but whatever. I used tomato cages for suppirt on two and bamboo poles and string on the others. I'll add the vertical trellis as they grow. I'm proud of myself.
6/10 I got a lot done yesterday. Six are outside already. Two are in 20s in the garage. I'm planning on transplanting the rest today or tomorrow. I'll update later. Accidently uploaded lots of stuff on the wrong week. UPDATE: I TRANSPLANTED THAT SUPER TALL PURPLE PUNCH THAT I DIDNT TOP OR HST AT ALL INTO A 40 GALLON TUB. ROOTS WERE DRY AND THIS TIME IT ACTUALLY LOOKED LIKE THEY FELL AWAY. THE PLANT HOWEVER STAYED STANDINGVUP FINE. I THINK THIS PHENO IS GOING TO BE A TOUGH ONE. LOOKS GOOD LIKE AN HOUR LATER. I HAD THE 50 READY TO TRANSPLANT THIS MONSTER BLUEBERRY CHEESE I FIMed BUT THE POTS WERE SUPER HEAVY AND I FIGURED I NEEDED TO SLOW DOWN AND THINK. WE HAVE THUNDER STORMS COMING TONIGHT. TOMORROW IS GOOD. I MAY TRY TO FINISH UP TONIGHT BUT WE SHALL SEE. THE GOOD THING WITH DOING IT A FEW AT A TIME IS THAT IF SOMETHING HAPPENS OUTSIDE IVE STILL GOT A CROP INSIDE LOL. WHAT IM PLANNING TO DO IS EITHER LIGHT DEP THAT BIG BLUEBERRY CHEESE OR PUT IT IN THE FIFTY BUT IM PLANNING TO LIGHT 3 RIGHT IN THEIR 3 GALLON CONTAINERS. HAVENT DECUDED FOR SURE BUT IM THINKING THATS WHATS GOING TO HAPPEN.......of course videos won't upload and the ones that do are old videos. Damn. I need to sharpen my computer skills....and my growing skills. Especially transplanting. I suck at transplanting. I decided not to out all my eggs in one basket and left the 10th planet amd Blue berry cheese in the 20s in the garage. I pulled them out for light further but I'm ousting them back a little tonight. That way I'll have a back up if something catastrophic happens. I doubt it but better safe than sorry. I'm proud of what I've accomplished thus far. I've successfully uploaded my 1 minute plus video several times but it won't appear. Oh well. I'll try to load the videos tomorrow I guess. Just started raining. Just a light rain. Probably what fresh transplants like.
6/11 BEAUTIFUL outside. Today is the day. Most is done and I'll add the supports as trellis as they grow. This new grow space gets about twice as much sun as my old spot. The tar stops the burrowing insects. I'm getting everything out today. I just need to decide if I'm going to light dep that MASSIVE blueberry cheese or bite the bullet and put it in the fifty. Maybe I'll try to get some help from my cousin. Plants withstood the thunderstorm like Champs. I'll update as the day goes on. I planned better this year so I SHOULDN'T have an unmanageable jungle. UPDATE: WATERED THE 3 PLANTS LEFT IN THE 3 GALLONS (1 10th PLANET WITH GREAT BRANCH STRUCTURE AND TWO PURPLE PUNCH THAT WERE THE SMALLER ONES. IM GOING TO LIGHT DEP THEM. EVERYTHING IS OUTSIDE NOW IN A MIX OF 1/3 FOX FARM OCEAN FOREST, HAPPY FROG AND ROOTS ORGANIC 707 IN EQUAL PARTS. TRANSPLANTED WITH MYKOS. EVERYTHING IS OUTSIDE NOW. FINALLY DECIDED TO GET The MONSTER BLUE CHEESE I FIMed INTO ITS FOREVER HOME A 50 FALLON POT. IT WAS TGE EASIEST BEST TRANSPLANT OF THEM ALL. JUST LIKE AETTING A POT IN THE WHOLE. I DONT EVEN THINK THE PLANT NOTICED. ONE OF THE PURPLE PUNCHES HAD ROOTS OB ONE OF ITS LEAVES WHEN I LOOKED BUTVIT WAS STILL STANDING UO STEAIGHT. I KNOW SOME OF THE PLANTS LOOK DROOPY BUT WEVE HAD SEVERAL DAYS OF RAIN AND A MASDIVE THUNDER STORM. I BROUGHT OUT THE EARLIER TRANSPLANTS AS WELL. THEY ARE OUT OF THE SHOCK. WIND IS PRETTY HIGH BUT I DONT WANT TO ADD MORE TARPS. I THINK THINGS ARE SECURED GOOD ENOUGH FOR NOW. IM SUPER STOKED THAT TRANSPLANT WENT SO GOOD! Went back at 7:30pm. Some plants have a little bit of transplant shock and a little bit of burn but it's negligible considering they've been through a thunderstorm with pouring rain and extremely high winds. That blueberry cheese in the 50 transplanted so easy and still looks like it didn't even know the difference. I'll start light dep once I get a plan. Plants are recovering nicely but should something happen to one I could replace it. I'm interested in the light dep though and I've got a pretty good idea how to start.
6/12 The plants that had a little transplant shock are coming out of it. We had a thunderstorm and pouring rain the day of some of the transplants. Wasn't forecasted. High winds moved the plants around a bunch bit they are tough as hell. Everything is out now. Suppisedcto have showers the next few days. I'm putting together a feeding schedule abd setting up a spit to start light dep on the three plants I decided to flower early. The cage now gets twice as much sun as before. This is going to be a good year.
Went back over and plants are perking up and doing even better everytime I see them. I took a video but it might not upload until tomorrow. I may start a new diary for the light dep. I have a few places I'm thinking to use for light dep. I need to make a solid plan before I start so maybe a day or two. Trying to upload again but I doubt it.
6/13 Had a rushed morning but I watered the plants in the 3 gallons as they were dry. I had added more soil to a couple of the bags. The top soil is startingvtj dry out but the plants look good and we are supposed to get rain so I don't really want to water if it's going to be raining. I think I've found my light dep spot and schedule. I'll update after I do something.
WENT BACK OVER AND SPRAYED A LITTLE BIT OF WATER ON THE EXTREMELY DRY TOPSOIL THAT I HAD TOPPED SOME OF THE PLANTS OFF WITH. SHITTY THING IS THAT WAS ADDED AFTER THE THUNDER STORM SO IT MAKES IT HARDER TO JUSTE THE PLANTS WATERING NEEDS. I CAN TELL THAT ONE OFCTHE FIRST TEANSPLANTS IS STILL HOLDING WATER. I MEAN WE GOT A DOWNPOUR AND I DONT WABT TO WATER IF WE'RE GOING TO BE GETTING RAIN ANYWAY. IM GOING TO LOOK BACK OVER THE DIARY. THATS ONE GREAT THING ABOUT THESE. YOU CAN GO BACK AND CHECK YOUR WORK.
6/14 Glad I held off watering. It's raining today. Just showers. We haven't gotten any of that extreme wind we usually do. I have the plants supported but I still worry. Definitely more than I should. Plants are still doing good and acclimating to there homes. I have not started the light dep with the 3 gallons but I think I've found my spot. Once I start it will just be staying consistent putt8ng them in and out. I need to train them anyway. I have some research to do and a joint to smoke so I'll update later.

Likes
11
Share


@Badassxwar
Follow
So this is the time where after week 3 my account required a password change and I couldnt open the email to change it for over a month. Luckily my brother took this and sent it to me. Ignore the crocks lol. But at this time I tried mainlining like before but had two plants tops break off. This was on NOVEMBER 5TH so 30 days from seed. At this time the stalks were so thick already it made it hard to work with. I think its cus the strains were different or the magnets lol not sure. Also I transplanted the one buy the door late. I had to buy more dirt. It was rough then came back. So it breaking and looking rough I slacked on the training. Just keeping it for hopefully an oz.