Likes
16
Share
Sorry, was doing some more expansion and re-arranging day 12 and 13 so no pics. We got some rain so all plants have been given a treat. I believe of the 5, I already see (2) I do not like the traits of and will go with the 3 that are most obviously bushier and stronger looking. Mom shot up fast and you can see the length and weaker, smaller looking leaf structure on the day 8 profile picture. Dad was stocky and bushy... so we are on our way. I have included a glimpse of the Aquaponic garden that the Indo plants get periodic feedings from. Once they are being fed... But for now just Neutral or rain water. Now these should be Photo plants as the dad was Photo and therefore the Auto gene from mom is Recessive and the Dominant Photo gene should kick out the Auto correct? If I understand that correctly I have to say I am amazed how these plants are coming up. They are acting more like an Auto (as far as speed of development) in my very Limited Opinion. It's very exciting. The pots they will be going into have BuildASoil cover crop that is coming along amazing and it should be an easy transition once they are ready. Thanks for looking and have fun growing all.
Likes
2
Share
Changed solution and they all look healthy.💉🌊 Even managed to get the runt into a bucket. 🌱 Gonna cut some lower growth into clones before the weeks end. ✂️😊
Likes
14
Share
~ FASTBUDS TESTER #2202 ~ Well friends, here we go on another 'canna-venture' together! The grow room has had a complete remodel and some upgrades done to it including brand spanking new 4x8 and 4x4 tents and a Trolmaster Hydro X controller along with a new Control Panel. This tester strain is one of six tester strains that FastBuds has graciously provided me with and I'm looking forward to seeing what this girl has to offer when she's grown to her full potential! One drawback of 'testers' is I have little to no information on it other than its number and that it's an autoflower... 🤪 But, it's ALWAYS a blast growing them for me because not knowing a lot allows me to just concentrate on the essentials: Light, Environment, Water, Nutrients and possibly a bit of LST... not complicated, just basics like keeping a constant temperature and RH in the tent at a level that gives a good VPD, watering when almost dry and maintaining proper light levels according to their stage of growth. ____________________________________________________________________________________________________________________________________________________________________________________________________________________________________________________________________________________________________________________________________________________________________________________________________________________________________________________ ~THE SETUP~ ~Initially seeds were lightly scuffed, then soaked for 3 hours in 78℉ distilled water after which they were transferred to moist paper towels laid out in a Jiffy Pellet plastic starter tray with lid. Underneath the tray was placed a Vivosun Heat Mat with Controller that was set to 78℉ where they stayed until their tap roots emerged. ~Planted into Jiffy Peat Pellets that were hydrated with distilled water warmed to 78℉ with a 7.0 ph. ~Once roots emerge from the Jiffy Pellet they're transferred to their fabric pots. ~Grown 100% organic in a 4g Gronest fabric pot and a 3g fabric pot by Wraxly filled with Mother Earth 70/30 Coco/Perlite medium and initially amended with Dr. Earth 4-4-4 / Earthworm Castings / Dr. Earth Flower Girl 3-9-4 and Coast of Maine Stonington Blend Organic Plant Food 5-2-4. ~19/5 light cycle for the entire run with supplemental UVA added during flower. Lights are controlled by a Trolmaster Hydro X controller set for a 15min Sunrise/Sunset simulation. ~Top dressing every 3-4 weeks with slow release dry amendments and Earthworm castings. ~Straight water ph'd @ 6.2-6.8 when needed and bi-weekly Compost Tea's. ____________________________________________________________________________________________________________________________________________________________________________________________________________________________________________________________________________________________________________________________________________________________________________________________________________________________________________________ Weekly Updates: 12/1- I soaked both seeds for 3 hours in 78℉ distilled water after which they were transferred to moist paper towels laid out in a Jiffy Pellet plastic starter tray with lid. Underneath the tray was placed a Vivosun Heat Mat with Controller that was set to 78℉ where they stayed until their tap roots emerged roughly 24 hours later. 12/3- Today their tap roots were about 1/2 to 3/4" so at 11 am I transferred them into Jiffy Peat Pellets that were hydrated with distilled water warmed to 78℉ with a 7.0 ph using a tine off of a plastic fork as a 'mini trowel' to make a hole in the pellet and to gently cover the tap root, leaving only the seed head slightly exposed. This method accomplishes most of the initial work the seed has to do by eliminating having to orientate itself, push it's root down and head up. By 10pm the #1 seed had her cotyledon leaves opened and the #2 isn't far behind! 12/5- Well this is the full Day One for the #2 FBT #2202 and the second day for her sister! I'll keep them in the covered/heated Jiffy tray until I see their roots beginning to emerge from the peat pellet, then I'll transfer them gently into their respective fabric pots. The #1 will be going into the 4g Gronest pot from FastBuds and the #2 will reside in a 3g pot by Wraxly, which I'm trying out for the first time. 12/7- Yesterday I checked the #1 tester and she had roots starting to emerge from her pellet so I transferred her into her 4g Gronest pot. After making a hole in the medium for the peat pellet, I coated the entire surface with Xtreme Gardening Mycos then placed the pellet in the hole and planted her in. Lastly, I watered her in with about 4oz of de-chlorinated water with 3ml/g of FishShit added which was then ph'd to 6.4 @ 75℉ after which I placed a humidome over her for 24hrs to ensure that the humidity stays constant. The #2 tester is doing great and I'm confident that she should be ready to transfer into her fabric pot in the next couple of days! 😎💚 Thank you for checking out my passion in life! Please visit as often as you wish and I hope you enjoy this journey as much as I know I will! Grow Strong! 💪😎🤙
Likes
181
Share
🍼Greenhouse Feeding BioGrow ☀️ by VIPARSPECTRA (models: P2000 & XS 2000) ⛺️MARSHYDRO The ⛺️ has a small door 🚪 on the sides which is useful for mid section groom room work. 🤩 🌱 by ‘GARDEN OF GREEN’
Likes
14
Share
@TOMI08
Follow
9.hét Rég voltam itt A lányok szépen fejlődnek Tegnap kaptak neem olajat Csak esővizet kapnak Lehet a tápanyagot növelnem kéne?mit gondolsz?
Likes
12
Share
@GrowGuy97
Follow
Day 35 - Ladies are way taller than I could have ever imagined & starting to get extremely dark pruple😍 make sure to check back for daily updates & happy growing friends✌️🏼🌱
Likes
48
Share
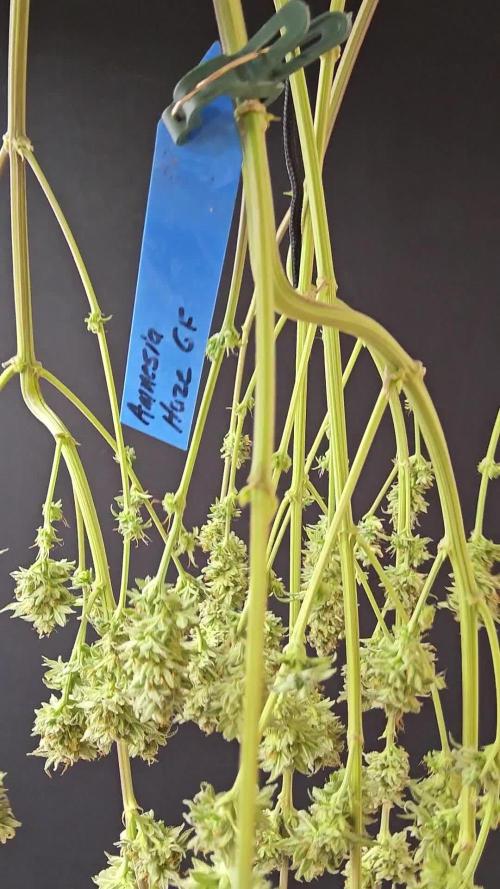
Harvest has went well. I will be hanging in a temt with a controlled environment at 50-55% rh to dry for 5-7 days. I hung the entire plant and didn't do any wet trimming. The cure went well, she maintained that sweet berry haze aroma. I would definitely recommend this high yielding strain.
Likes
14
Share
10/8 - going along steady. I'll take few more glam shots later. 2 MONTHS. It may not look like much but I'm proud of these 3. This is probably the healthiest tent I've had since I started growing inside. I just want them to fill out the net a little better before I flip. 10/10 - trellis training is underway. Between topping and this, I should have a nice, full canopy this time around. I've estimated about 72 squares in my net yet only about 35 or so colas forming. Wondering if I should really I push this one or quit while I'm ahead. One thing is for certain, Moby dick is responding much faster to being topped than GZ. Every stem of Moby I've topped has grown lower shoots aggressively and quickly. Gz has been far slower to respond. Noted. Can't wait to see these things bud. But patience is a virtue here. If the veg stage is any indicator, the buds going to be phenomenal.
Likes
2
Share
Looking very good. Healthy roots
Likes
114
Share
@Natrona
Follow
Week 10 6/9-15 Lemon ladies love the outside. Both are showing yellowing leaves so everyone is getting nutrients with feedings. 6/13 heavy defoliation and limb removal for lemon cake since she's now in flower. Repositioned the scrog after defoliation so the thicker limbs are in the mesh. Drizzle, got light defoliation mostly yellowing fans. Before and after pics and vids. I saw a Japanese beetle on my Lemon Cake and some small holes in the leaves so I added 1/2 tsp neem to the feed solution 6/12. Also started using fish & kelp. I'm still watering 1 gal per plant when I feed. With the heat and humidity, I water daily.
Likes
20
Share
Enormous deficiency of cuttings during placement, I thought they were going to die... Enorme deficiencia de los esquejes durante el ajuste, pensé que iban a morir...
Likes
15
Share
They are really starting to show off there growth the runt has flew past what I thought she would be by this post. The one I topped is the one that’s the furthest in she’s stretching already and the others are still in veg . They are coming out beautifully though. The grow ace system is doing what it’s suppose to with no problems. Can’t wait to see what these ladies produce for me.
Likes
4
Share
Grab this plant as a clone that had been set out for free at the side of the road in my neighbourhood. Hope it’s not hemp lol.
Likes
1
Share
Great news—my Banana Kush seed has popped and is standing tall! 🎉 Tiny cotyledons are already showing a healthy green, and I’m excited to watch this girl take off over the next few days. Here’s to a strong start! #BananaKush #Seedling #GrowDiaries **Day 5 – Seedling Update** Great news: all three Banana Kush seedlings are settling into veg! 🌱 The cotyledons look bright and healthy, and each plant has its first true leaf set. They did stretch a touch at the start, but the lowered light and steady airflow should help them thicken up fast. --- ### Environment * **Temp / RH:** 25 °C day – 21 °C night / **75 % RH** * **Light:** LED at 35 %, now **20 cm** above the canopy, 18/6 schedule * **Airflow:** Two fans have been running unfortunatley only since yesterday to keep fresh air moving and strengthen the stems * **Medium:** Light mix with extra perlite in 0.5 L peat pots on a seed-heat mat ### Watering & Feed * Still giving only **plain Gerolsteiner Naturell** (pH ≈ 6.2 out of the bottle) – no nutrients yet; runoff looks clean. ### Observations * Stems are a little lanky from the earlier light distance, but colour is good and the new growth looks happy. * Roots should start circling the peat pots soon; a gentle tug already shows light resistance. ### Next Moves 1. **Up-pot in 3–4 days** into 3 L Air-Pots and bury an extra couple of centimetres of stem to fix the stretch. 2. Keep RH around 70–75 % for another week, then start lowering to ~60 % as they bulk up. 3. Gradually ramp the light to 40–45 % once they’re settled in the new pots. So far, so sweet—here’s hoping for chunky Banana Kush colas down the road! 🍌✨
Likes
12
Share
@L_Choppa
Follow
the gorilla cookies came out really good i wish i couldve done more lol the buds were a little air but the potency is really strong im satisfied with this strain i do plain on doin this one again
Likes
28
Share
....Understanding Electrical Conductivity Electrical conductivity measures a material’s ability to transmit electric current, which in the context of gardening, relates to the soil or nutrient solution’s ion content. In simpler terms, EC indicates how salty the environment is around the roots of a plant. This “saltiness” is crucial because it affects the plant’s osmotic pressure, which in turn influences nutrient uptake and overall plant health. The Science Behind EC At its core, EC measures the presence of soluble ions like potassium, calcium, magnesium, and nitrates – all vital nutrients for plant growth. These ions carry electrical charges, and their movement creates an electrical current, detectable as conductivity. High EC levels typically mean a high concentration of dissolved ions, whereas low EC levels indicate fewer nutrients are available. The Impact of Electrical Conductivity on Plant Growth The relationship between EC and plant growth is a delicate balance. Just the right EC level can enhance nutrient uptake, bolster plant health, and increase yields. However, when EC levels stray too far from the optimal range, they can lead to nutrient imbalances, osmotic stress, and even plant death. Nutrient Uptake and EC Levels Plants absorb nutrients from the soil or water through their roots, a process influenced by the surrounding EC levels. Ideal EC levels help create an optimal environment for this exchange, ensuring plants receive the nutrients they need without exerting excessive energy. High EC Levels: A Double-Edged Sword While a certain level of dissolved ions is beneficial, excessively high EC levels can harm plants. High salinity can draw water out of plant cells, leading to dehydration and nutrient lockout – a condition where plants cannot absorb essential nutrients despite their presence. Low EC Levels: Undernourished Gardens Conversely, low EC levels can starve plants of necessary nutrients, stunt growth, and lead to underdeveloped or diseased plants. Maintaining an optimal EC range is crucial for healthy plant development. Measuring and Adjusting Electrical Conductivity Understanding the importance of EC is one thing, but applying this knowledge in the garden or greenhouse requires practical steps. Regular monitoring and adjustment can ensure that plants remain in a conducive growth environment. Tools for Measuring EC Gardeners can use various tools to measure EC, from simple handheld meters to more sophisticated systems integrated into hydroponic setups. Regular monitoring allows for timely adjustments to soil or nutrient solutions, ensuring optimal EC levels. Adjusting EC for Optimal Growth Adjusting EC involves changing the concentration of nutrients in the soil or solution. In hydroponics, this might mean diluting or concentrating the nutrient solution. In soil, amendments may be added or flushed with water to correct EC levels. Practical Applications: EC in Various Growing Environments The application of EC knowledge varies across different growing environments, from traditional soil-based gardens to modern hydroponic systems. Soil Gardening In soil, EC measurements can help diagnose nutrient imbalances and guide fertilization practices. Amending soil with organic matter or flushing with water can adjust EC levels to better support plant growth. Hydroponics and Aquaponics In hydroponic and aquaponic systems, where plants are grown in water-based solutions, maintaining optimal EC levels is crucial for nutrient availability. These systems allow for precise control of EC, directly influencing plant health and yield. Greenhouse Cultivation In greenhouses, EC monitoring can help manage the nutritional status of various plants, ensuring that each receives the right nutrient mix for optimal growth. Automated systems can provide real-time EC adjustments based on plant needs. Navigating Challenges: Overcoming EC-Related Issues While maintaining optimal EC levels can significantly enhance plant growth, gardeners may encounter challenges such as fluctuating conditions, equipment malfunctions, or environmental stresses. Regular monitoring, combined with a solid understanding of each plant’s specific needs, can mitigate these issues. Conclusion: The Conductive Path to Lush Gardens Electrical conductivity, though an invisible factor, is a cornerstone of successful gardening and farming. By understanding and managing EC levels, gardeners and farmers can profoundly influence the health and productivity of their plants. As we continue to explore the nuances of plant growth, the role of EC stands out as a testament to the marriage of science and nature in cultivating life. Whether in soil, water, or air, mastering the art of electrical conductivity can unlock the full potential of our green companions, leading to bountiful harvests and vibrant gardens.
Likes
3
Share
@DBanned
Follow
May 29, 2020 Week 5 Hi, Not much happened during this week. I found a Tom Ford Pink Kush seed in a weed bag a few weeks ago. I decided to germinate it and added to the out Outdoor Grow. it was doing great until squirrels got it. I tried saving it but it didn't work. I have not been able to find any TFPK seeds at all.