


Likes
Comments
Share


@BlaKX
Follow
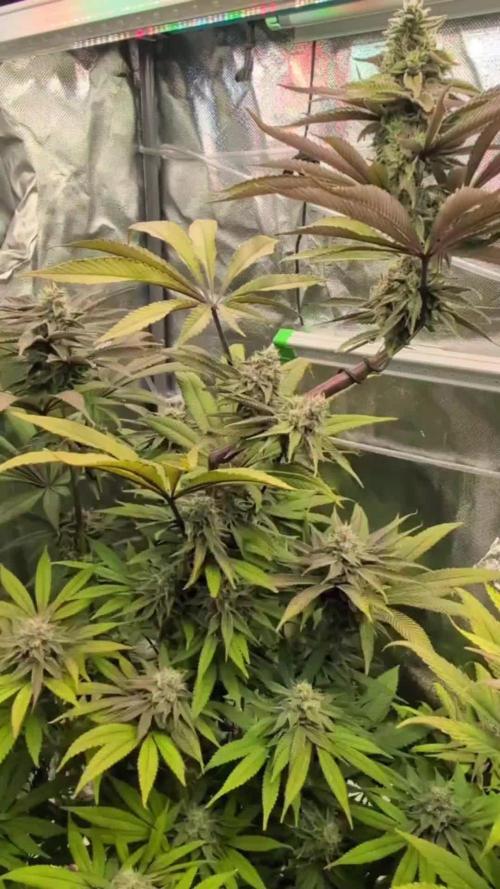
Ai Gude Growmies es wird langsam richtig frostig auf den Buds❄️🌌
Seit Blüte Tag 50 überschritten wurde sehe ich täglich wie die Buds Immer mehr Trichome produzieren und Gewicht!❄️❄️❄️
Mimosa die wie beim vorherigen Grow etwas länger brauchen wird nur dieser Klon entwickelt wahrscheinlich wegen Phosphor Mangel zu diesen bunten Spektakel. Aber die Mutter Pflanze wo jetzt davor in die Blüte kam war schon ziemlich groß und musste diesen Klon im aktuellen grow auch Reveggen und trotzdem hat er Größere und schönere Buds entwickelt! Im bekannten Kreis sagen sie auch man meint es wären 2 verschiedene Strains und keine Klone.
Habe die White Widow XXL ordentlich entlaubt da ich etwas nachlässig war haben sich an 3 stellen Mehltau niedergelassen.
Ich komme nie über 45% LF Nachts eher so 38-42% im Durchschnitt ,Tags über sogar 30-35% LF. Mehltau infiziert waren sie alle leider aber hatte ihn erfolgreich behandelt jetzt am Ende der Blüte entferne ich die Blätter und tupfe sie vorher mit bio Mehltau EX ab.
AK47 Hatte auch vorbeugend einen kahl schlag unten rum. Ein Klon aus Feminisierten Samen der sich zuerst absolutes Bastard Cannabis war entwickelte sich zu einem stämigen kompakten Indica zwerg mit schlechten Blüten/Blatt Verhältnis dafür extrem starken oldshool Skunk Duft mit Chemie,Erde und nassen Hund.
Die Super Lemon Haze sollte eigentlich eine neue Mutter Pflanze werden aber wurde zu spät geschnitten die hätte ich eher austauschen. Weil man erkennt wenn die Bilder vom Start sieht das die nur 1 bis 3 finger Blätter hatte bzw nur ganz wenige mit mit mal 5 und die Buds sind diesmal auch nicht so Groß und fluffig wie davor sondern sehr kompakt und erinnert mehr an Indica von der Blüten Struktur und Festigkeit. Der Geruch ist auch mehr in Richtung Chemie/Katzenpisse was ich sehr begrüße.
Nach ndl und 1 led grow und jetzt der 3 mit den selben Genetiken kann ich jetzt schon sagen dass ich Super Lemon Haze und Ak47 erstmal lange Zeit nicht mehr growen. Ich weiß nicht ob es Einbildung ist oder wirklich so das ich konstant zu jeden Durchgang bessere Ergebnisse bekam aber die Pflanzen von Serious Seeds und Green House Seeds nicht so darauf ansprach wie die Genetiken von Barney's Farm.
Grade die White Widow XXL hat mich wirklich überrascht ich war anfangs enttäuscht weil die Pflanze fast wie eine reine sativa wächst in der vegi Phase die ohne toppen safe über 150cm geworden. Wenn man die mit der SLH vergleichen will habe beide lange Internodien Abstände und kaum Blätter wuchs bzw Super Blüte/Blatt Verhältnis! Nur an den Blüten der WW die extrem Kompakt und Schwer werden zeigt sich der angebliche 75% Indica Anteil mit bis zu 26% THC. Das XXL am ende hat sich der strain verdient!!! Was in den 90er WW und AK47 waren und in den 2000er Die SLH als hype Strains hat es Barneys farm geschafft für mich die WW so zu updaten
Dass sie sich Aroma und Geschmack so wie Wirkung wie damals Riecht, schmeckt und kickt.
Konnte mehrfach bei Bekannten das Apotheken White Widow unterschiedlicher Preise und Herkunft probieren und je nach Qualität war es OK
für den Preis. Mr nice guy seeds Black Widow oder die ww Inbreed line von GHS ist auch absolut empfehlenswert wer den Hype von damals nachvollziehen möchte.
Die WW von Barney's Farm will ich mit GMO mal "ersetzen" oder aus Regulären Samen Mutter Pflanzen selektieren.
Die Mimosa Evo war was die Genetik angeht es neuste im Zelt und habe vorher lange recherchiert weil mir die ganzen neuen Candy Ice Dessert sweet tutti frutti breath nicht so zusagen aber ich eine Sorte wollte die bis zu30%THC erreichen kann und mit Farbe:D
Mich hat damals schon Tangerine Dream absolut positiv überrascht mit Süßen Mandarine am anfang und g13 und Nevilles A5 Haze im abgang und sehr stark war die zu der Zeit.
Mimosa Evo riecht hauptsächlich fruchtig nach Orange, Zitrone und Waldbeeren beim Rauchen kommt PP durch und Erde,Diesel gasig.
In diesem Grow verwende ich das erste mal CANNA Terra Professional Plus Erde und Hydrokugel im Topf Boden. So wie CANNAZYM und CANNA Calmag Agent. Man sieht und riecht den Unterschied schon zum vorherigen Grow mit BioBizz All Mix Erde und BB Calmag.
Ich möchte die Erde von Canna wiederverwen weshalb ich mir CANNAZYM holte. Bin vorsichtig bei Zusätze Dünger wie z.b Wurzel Stimmulator hatte bis her nie Probleme im wurzel Bereich. MONO Präparate sind absolut brauchbar wenn man gezielt Mangel Erscheinungen bekämpfen will. Habe vor 21 angefangen zu Growen mal größer mal kleiner aber konstant mit kleinen Pausen seitdem dünge ich Mineralisch mit CANNA und Guano. Organisch Düngen werde ich allein deswegen schon testen wegen Geschmack und Aroma.
Denke bis spätestens 22.5 sind alle rdy und Mein Grow report ist dann abgeschlossen 😍🌈🌌
*Update * muss die Leistung der Lampe drosseln sie wird einfach zu warm aber bei fast 26C° tagsüber kann ich schwer die heiße Luft austauschen obwohl die abluft in einen anderen Raum geleitet wird.


Likes
3
Share


@WeedMan2020
Follow
All the plants are in need of defoliation to increase the airflow and light penetration.
Fed both the Fritter Delight plants as they’re looking like they needed it.




Likes
69
Share


@nonick123
Follow
Día 129 (07/10) Riego con 750 / 1.000 ml H2O de osmosis
Empiezan a moderarse las temperaturas con 28 ºC de máxima
Día 130 (08/10) Riego con 500 / 1.000 ml H2O de ósmosis
Las temperaturas están sobre 25 °C
Día 131 (09/10) Riego con 500 / 750 ml H2O de ósmosis
Día 132 (10/10) Riego con 750 / 1,250 ml H2O de ósmosis
Día 133 (11/10) Riego con 750 / 1,250 ml H2O de ósmosis
Día 134 (12/10) Riego con 500 / 1.000 ml H2O de ósmosis
Reviso los tricomas y estos indican que estamos más o menos a una semana de la cosecha! 50% trasparentes / 50% nublados
Día 135 (13/10) Riego con 1 litro H2O pH 6,5 + Kelp Hidrolizado 0,3 g/L
💦Nutrients by Lurpe Solutions - www.lurpenaturalsolutions.com
🌱Substrate PRO-MIX HP BACILLUS + MYCORRHIZAE - www.pthorticulture.com/en/products/pro-mix-hp-biostimulant-plus-mycorrhizae


Likes
8
Share

@TyRun
Follow
Fungus gnats blew up, so I had to surround the whole place with traps. Looks like I’ve thinned the population out for now, but I’ll be picking those little bastards out of the buds later — they stick like they’re welded on )
Runoff pH is way too high, so I decided to bring it down by feeding with a lower pH solution. Temporarily running 5.2 instead of 5.8.
What can I say… this grow keeps throwing more and more experience at me, barely keeping up with processing it all. The more you learn, the more opens up)) Hope this won’t go on forever and the perfect grow is somewhere around the corner )
The smell has started to shift — moving more and more into gas and chem territory. I’m getting more convinced that all these berry/fruity strains should be chopped around the end of week 6, day 42–45, but this time I’m gonna hold her for about 9 weeks and see what’s left.
The color has really started turning purple now, with the top buds darkening first. From next week I’ll start bringing her into autumn mode — I think by harvest she’ll be almost fully purple.


Likes
184
Share


@Still_Smoq
Follow
#seedsman420growoff and #SeedsmanSeeds
📆 Week 5, 25-31 May 2024
25-27 May - Observed and let the plant grow.
28 May - Defoliated plant.
29 May - Placed scrog ring on trellis system, bent top of plant over 90 degrees, adjusted and spread branches (see pictures).
30-31 May - Observed and let the plant grow.
📑 I’m very pleased with the way this plant has responded to the nutrient schedule so far. Now it is time to see how she will do with training. I like using a version of the scrog method most because it gives me the greatest space for bud growth overall. My experiences have taught me that under these lights there is about 15-18” worth of quality vertical bud potential. Anything below that line is only draining on the plant, and not receiving adeqate DLI. So I dont need to focus on a tall plant - rather a wide one. Now that she is under a scrog the DLI has a significant canopy increase.
What I’ve done with this plant is cut all side shoots off the main branches up to the scrog. She will grow for another week to allow all for growth to develop just above that and then be flipped to flower. I’ve never grown this plant before, but assumeing she can double her size during pre-flower, I’ll have plenty of room in my grow tent.
The Trellis System: is made with 1/2” (12.7mm) white, SharkBite PEX, 1/2” pex clamps, small screws/nuts #6-32 x 3/8 in (to hold clamps opposite each other, this is what holds the structure together, side bars, rings, scrog), 1/2” pex straight coupling connectors (to connect rings, and extensions), nylon tape and nylon cord. The frame design is independant from the bucket and can be put on anytime before or after the start of the grow. It simply snaps together (nothing needs to be crimpted), the rings stay in tact with coupling and tape, the netting is strung once for the most part, I prefere 2” squares, and held in place by clamps. The size of the rings depends on the size of your pot, the bottom and top ring are measured seperately. The scrog ring is determined by the size of the tent or desired spread. It takes 5 side bars evenly spaced apart and snapped on the bottom ring 1st to hold the frame sturdy in place, their length should start flat from the bottom to about 8” above the top of the bucket. Place the pot into the bottom ring with 5 side bars already attached, lift up the bars, then put on and attach the top ring, this prevents it from moving. Both are then placed on a 12” Bonsai turn table for easy access and observation of the plant. The final scrog is placed on when the desired height is close to being achieved, then maneuvered down over the plant. A simple design that allows you to easily adjust the netting (place extenders on side bars faceing in opposite direction for additional height) and opens many other possabilities for training. See pictures for an example.
🍶 25 May nutrient solution changed
🍽️ 25 May feeding schedule updated
💧 Using reverse osmosis water with EC/TDS at 0
🐉 Nutrient Solution EC 2.3 at 73 degree F
🔆 Light power at 60%, DLI 30-35 canopy coverage at 18hrs
😤 Using General Hydroponics, HGC728040, Dual Diaphragm Air Pump, 320 GPH
That is it for this week. Thanks for the look, read and stopping by.


Likes
1
Share


@Generix
Follow
So at the start of the week I did what everyone says not to with autos; top/fim em!! As I said this is 💯 an experiment so, why not?? The last pic and vid are 3 days after topping
Likes
17
Share
@squalino
Follow
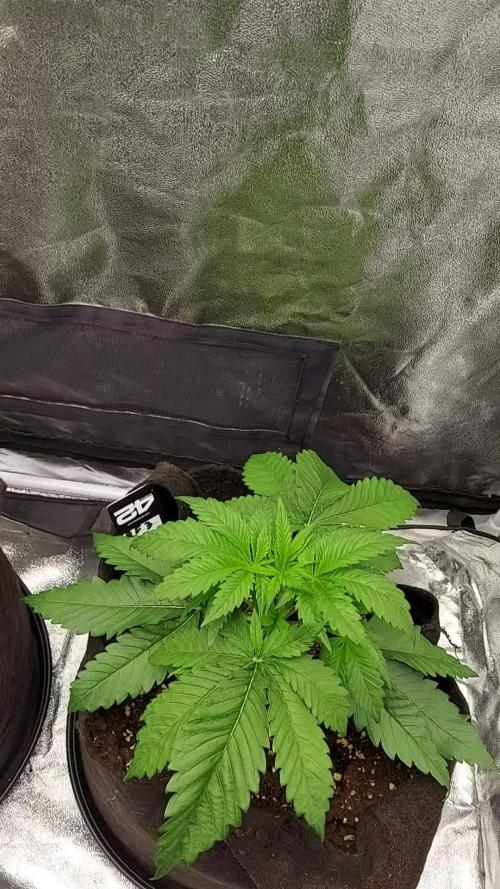
12/02 plante 1
3 semaine 2 jours
lumière descendu à 50% power
taille :21 centimètres
pas de signe de carence
terre encore humide pas besoin d'arrosage
se porte bien
plante 2
2 semaine 6 jours
taille12 cm
lumière réduite à 50% power
quelques jours de moins que sa petite soeur donc un peux plus petite et sûrement que le stretch de la première qui était plus important que la deuxième à jouer un rôle.
avait reçu un léger stress lumineux trop intense.
les feuilles s'enroulant sur elle même.
pas de signe de carence
pour le moment mes deux petites se portent bien.
13/02
plante 1
pratiquer une coupe de 2 grosses feuilles située un peu avant le sommet. elle cachait les autres branche de dessous .
pratiquer un lst léger pour écarté un peux les autres petites branches pour plus de lumière
ett aussi a la branches principale pour baisser sa hauteur pour que les autres branches atteignent la même hauteur que la branche principale ( cela permet que la hauteur de la lumière ne soit pas éloigné des autres tête. pour que la lumière sois homogène partout.
plante 2
pratiquer une coupe de 1 feuilles qui cachait les branches en dessous.
15/02
donner 50 centilitres d'eau avec 5 ml orgatrex. solution PH 6,3
donner 1 pastilles tabs fertilizer
généralement je donne 1 litres d'eau mais vue que le pot est encore assez humide je n'en ai donner que 1/2 litres d'eau chacune
18/02
plante 1
taille 23 centimètres après nouveau LST
j'ai refait denouveau un LST pour bien repartir la lumière sur les nouvelles branches et l'espace de développement.
j'ai coupé les premières feuilles du bas les simple et les premières feuilles à 3 feuilles et une dessus qui me cachait la lumière sur des branches.
plantes 2
taille 13 cm après son premier LST
je lui est fait son premier LST pour bien écartéles branches.. vue qu'elle pousse comme un buisson et non vraiment en hauteur j'ai attendu pour le faire .
j'ai remarqué pleine de petites branches en dessous des feuilles .
j'ai fait légère defoliation. les feuilles a ras le sol .pour éviter les champignons et moisissures. et les premières feuilles simples ainsi que les feuilles a 3 feuilles .
Likes
21
Share


@Brown832
Follow
Swapped tents mars hydro 600w led
And mars hydro tent now, so the black sugar are in the bigger tent now. Topped 3 of them, gona let the new start catch up.
Seem to be growing at a decent rate, possible over water on the younger one but hopefully over comes.
Likes
80
Share


@Greenwolvesfarmer
Follow
Es una variedad super estable en su cultivo , las primeras semanas le fascina la luz blanca , en mi caso usé un panel led #qkwin el cual tiene un mix ideal para crecimiento y floración : chip samsung 3000k
5000k
uv
660nm
iR . Agradezco a mi amigo mkled que gracias a su ayuda logramos probar ese panel led ! Aguante master ! ...
En los primeros días de su crecimiento estuvimos con 20 horas de luz y 4 de oscuridad , en mi zona de cultivo , es un lugar húmedo y frío , estas horas de luz me ayudan bastante al crecimiento...ya casi en su 3 o 5ta semana de crecimiento , bajamos a 18/6 ...
Se realizó corte apical en la 3era semana de crecimiento y reaccionó al 100%...
A medida que crece le aplico defoliacion y poda lolypop para una aireación ideal en toda la planta y además evitamos esfuerzo adicional de la planta en querer buscar luz con los brotes de más abajo ...
Ideal para realizar podas y lst ! Super fácil y cómoda, se recupera fácilmente después de defoliar . Por su estructura final tambien es ideal para técnicas de cultivo como SOG y SCROG por su facilidad al adaptarse ...
En floración , le gusta el ambiente bien seco y aireado , 22°C / 40% humedad / extracción 45mins on / 15mins off / intraccion pasiva ..
A los primeros dias de floración ya hace notar su riquísimo aroma a limon maduro y skunk , se confunde con un olor a orina de gato en algunas ocasiones ...un verdadero zorrillo...
Le hice defoliacion 1 día antes de pasar a floración , reaccionó super bien , esto me ayudo a que todos los brotes pequeños recibieran mayor luz y se definieran ...
En esta ocasión su alimentación sube "por las nubes" logrados medir hasta una alimentación de 2.2 EC una verdadera bestia ! Robusta !
Ya en su 4ta a 5ta semana de floración comenzamos con riegos de sólo agua , sin fertilizantes ....
Su corte fue en su 8va semana de floración y era un corte sin fin ! El resultado ideal ...
Esta nena nos rindió unos 90g como mínimo ! Bastante conforme..


Likes
43
Share


@TheCannaProphet
Follow
~Entry for the 'Best Rarest & Smallest Pot by Seedsman' contest~
Starring 🤩....
~ Seedsman Zkittlez Auto ~
Zkittlez (Grape x Grape Apple) Auto x Auto Fruit (Auto Fruit Cheese x Auto Blueberry)
Zkittlez Auto is one of the very sweetest-tasting auto strains available anywhere. It is a sativa-dominant (60%) strain that was bred from Zkittlez (Grape x Grape Apple) Auto crossed with a male Fruit Kush Auto, the latter a remarkable fruity strain bred from Fruit Cheese Auto and Blueberry Auto. Growers can expect to harvest some good yields of high-THC buds.
Zkittlez Auto remains a fairly short plant, rarely exceeding 120 cm. in height wherever it is grown. This is a vigorous plant which is able to metabolize a high level of nutrients and she's a thirsty girl too! If growing indoors close to neighbors it is strongly advised to ensure good and effective carbon air-filtration in order to neutralize powerful odors. This strain's life-cycle is approximately 90 days from seed to harvest.
The leaves on this plant are big and wide serving to convert every lumen available into Zkittlez goodness. Indoor growers should obtain between 400 - 500 gr/m2 while plants cultivated outdoors will produce slightly more at 500 - 600 gr/m2. Lateral branching is very good and it is recommended to use supports/ties to prevent snapping and keep buds close to the light source.
This strain's scent is sweet and fruity with candy and berry notes. Its high-THC has been measured at between 21 - 24% with less than 1% CBD. The effect is well-balanced, cerebral and euphoric, and is very good for social situations as well as for relaxing in front of the TV either alone or with company. It also has the added effect of helping to relieve chronic pain, helping with nausea, insomnia and depression as well as stimulating the appetite.**
**Credit to Seedsman.com
______________________________________________________________________________________________________________________________________________________________________________________________________________________________________________________________________________________________________________________________________________________________________________________________________________________
~ The Setup ~
~ Grown in a 2qt plastic popcorn pot filled with Mother Earth Grow 70/30 Coco/Perlite with Xtreme Gardening Mykos added.
~ Seed was germinated directly in the medium without any 'pre-soak'
~ Feeding will be by Dutch Pro Nutrients
~ 24hr light cycle while germinating
~ 20/4 light cycle after first leaves appear.
~ 4x8 Gorilla Tent
~ HLG 650R w/ 30w Supplemental UVA Bar controlled by a Trolmaster Hydro X controller set for a 15min Sunrise/Sunset simulation. (also a HLG Blackbird for additional side lighting if necessary)
~ Supplemental co2 controlled by an AutoPilot APC 8200 co2 controller
~ AC Infinity Cloudline T6 with Controller 67 using a Terrabloom 6x24" carbon filter
~ De-Humidifier and Humidifier when needed.
~ 14k BTU IdealAir portable A/C unit plumbed into tent for temperature control.
~ BlueLab testing instruments
~ Two Hurricane 18" oscillating fans
~ Two 6" Clip-on fans
~ Two 10" floor mounted fans
______________________________________________________________________________________________________________________________________________________________________________________________________________________________________________________________________________________________________________________________________________________________________________________________________________________
The Harvest:
After checking her trichomes which were at 90% milky, I placed the Zkittlez Auto into complete darkness for 72 hours. While in the dark I maintained a temperature of 65-68℉ and a RH of 40%. After three days in the dark I removed the Zkittlez Auto and all I can say is WOW! All of the flowers on the Zkittlez were just covered in trichomes and it had a super strong sweet/fruity aroma that hit me right in the face!😍
I cut the Zkittlez and hung her in two sections as the flowers were huge, and I wanted to make sure that there wasn't going to be any issues with air circulation around them possibly causing issues.
It's wintertime here now so I took advantage of the low temp's and RH hanging the Zkittlez Auto in my attic. I sealed off a section of the attic from any light leaks and installed a de-humidifier, fan and humidifier along with a hygrometer which I suspended at the same level as the plant was hanging which give the most accurate reading of temp/RH.
After hanging the Zkittles, I adjusted the fan direction so that it was not blowing directly on the hanging plant, but kept the air slightly moving in the room. I set the de-humidifier for 50% which I run for the first 24hrs to knock down some moisture in the plant, then set it to 60-65% for the remainder of the drying time.
The Zkittles Auto hung for a full 12 days, during which I checked on it daily to empty the de-humidifier and make sure that the environment stayed on point. After hanging, it was time to trim this beauty up and get her flowers into glass jars to begin the curing process which I prefer to take at least one month, preferably 2-3 months to really get a good cure and allow all the starches to convert to sugars, the remaining chlorophyll to metabolize and the terpenes to form their bouquet!
Trimming the Zkittlez Auto by Seedsman was a breeze and resulted in some tightly stacked and absolutely gorgeous flowers that are loaded with shiny trichomes that sparkle, and a sweet and fruity aroma that will make your mouth water!😍 I was super stoked to harvest almost 100g from this beautiful autoflower that was grown in a little .5g plastic popcorn pot that I had saved from a trip to see 'Top Gun Maverick' at the theater and I can attest from cultivating Seedsman's Zkittlez Auto in the past, that with a bigger pot, it is capable of some incredible yields!
All in all, this grow was super fun and easy! I highly recommend Seedsman's Zkittlez Auto to everyone from novice's to master growers as it NEVER disappoints to produce some mind blowing fruity buds! ❤️❤️❤️


Likes
25
Share

@nonick123
Follow
Día 22 (03/02) Se está desarrollando estupendamente!
El sustrato sigue húmedo, así que el suelo vivo siga haciendo su trabajo!
Día 23 (04/02) Riego con 500 ml H2O RO
Se muestra sedienta!
Día 24 (05/02) Un desarrollo espectacular en estos 24 días de vida! 😍
Día 25 (06/02) Riego con 500 ml H2O RO
Se ve radiante!
Día 26 (07/02) Riego con 150 ml
Día 27 (08/02) Riego con 350 ml
Día 28 (09/02) Flip to 12/12! 💥💨😁
💦 BioTabs 15% DISCOUNT code "GDBT420" biotabs.nl/en/shop/ @biotabs_official
🌱Substrate PRO-MIX HP BACILLUS + MYCORRHIZAE @promixmitch @promixgrowers_unfiltered
💡2 x Mars Hydro FC1500 EVO Led Grow Light (2024 NEW FC 1500-EVO Samsung LM301H 150W LED) - https://marshydro.eu/products/fc1500-evo-led-grow-lights/ - https://www.amazon.de/dp/B0CSSGN5D8?ref=myi_title_dp


Likes
44
Share


@rudiak
Follow
Well another epic this week. The girls are looking very tasty indeed now! I have now harvested one plant on day 57. It was a tad early for her but she started looking pretty bad for some reason. Potentially started the flush on her a little early or could have been root rot. Either way the plant was chopped to ensure buds were saved. She weighed a cracking 550g wet, and dry was about 100g. This was the girl that was completely untouched, no defoliation etc complete virgin ;).
Unfortunately the RH was high I ordered a dehumidifier but they sent me a faulty one and by time had a new one was too late some mould was starting to occur on the girls in a few places. I was over cautious and slung around 25g of buds that were near the mould just to ensure it didn’t spread to the rest of the plant. I also sped the drying up and placed in brown paper bags for last 2 days to suck the remaining moisture off after a full trim and inspection. The girls took a total of 5 days to dry and are now curing. They were a bit “hay” like in smell and taste but this was probably because of all the problems listed above. She is starting to smell much better after a couple of days of curing though so my faith is restored that the remainder of the buds may be quite good still!
The last 3 girls have been going lovely, and starting to bring in some purple colours to the sugar leaves which are quite nice, all the trichomes are nice and cloudy and just starting to go amber. I will be harvesting on day 66 as this will allow me a good period of time to trim them fully into reasonable size buds and dry in my hanging net in the tent to ensure no mould problems again.
For the last 3 days I have been flushing with 30L of water to ensure they are completely free of nutrients as again think this maybe another factor on the not so nice smelling/tasting buds from the first girl. I will give 2 days to fully dry the soil out bone dry before I cut them down. Happy I took her down early as it’s allowed me to ensure I have 3 good plants left and the remainder of the grow/dry/cure should go smoothly as know what I am doing now.