


Likes
Comments
Share


@kauilmayel1996
Follow
Está increíble
Fascinado con esta planta
Está enorme no cabe en el armario
Tiene un olor dulce como a chicle
Increíble planta para el hidro
Toma agua como loca...

Likes
6
Share


Processing
Likes
16
Share


@TheHighNews
Follow
I just dropped it in water and rootjuice for 2hrs and then direct in peat pellet and after about 50hrs she was saying hello ✋
I'm very exited to start this experience whit exotic seed can't wait to grow this strains 😵

Likes
4
Share


@Cannibalgardens
Follow
From the get go the smell these ladies gives off is very nice and sweet , the plant had grown very well from a while until I had made some mistakes but she always tried to fight threw it . This girl will begin her flush now and that will take about two weeks .. here's to hoping for healthy strong plants at harvest ..

Likes
3
Share

@Ekoms
Follow
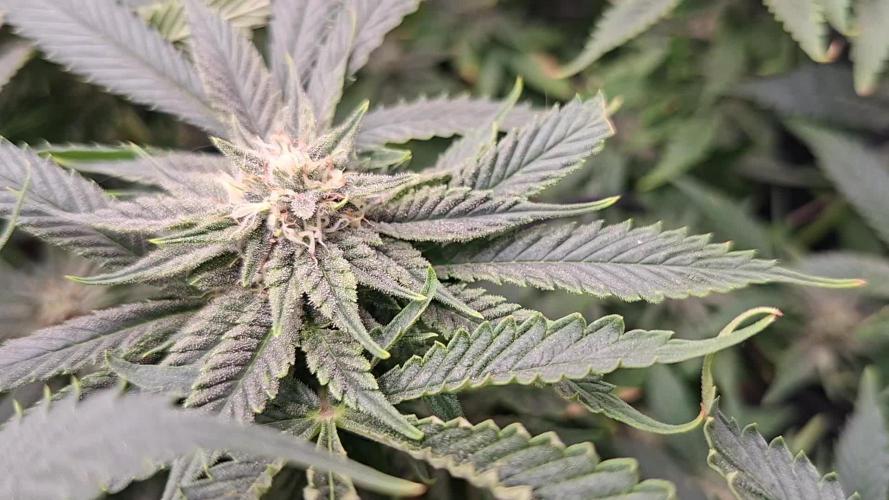
All good .. watering every 3-4 days ..light on 100 % power when i see a problem a raise up on 55 cm ..now is 40 cm from plants


Likes
8
Share


@Inceptionist
Follow
Milky Dreams got harvested 16/11 and I'm planning to let her dry for 14-21 days before trimming and put them in glass+boveda (58%) and grove bags for final cure.
Drying conditions are as follows:
16-18°C
55-60% RH


Likes
14
Share


@Dispo_Bud_Is_Mid
Follow
This has been such an incredible learning experience, back in December a friend and I got bored and decided to build a tent with some scraps in my garage and a single CFL in a reptile heat lamp 🤦♂️and try and grow the seeds I had been sitting on for a few years. The cfl broke almost immediately and poor little lato spent the first few days of her life in the dark waiting for a cheap led from Amazon. At the beginning of this grow we had no idea what we were doing and honestly no faith we could grow anything but mid bud but it was just abt the experience. Both of us spent most of our days researching and learning about cannabis and organic growing. We ended up deciding on a small company called Dragonfly earth medicine and used their full line of bacteria based nutes/supplements (radiant green, fat flowers, brilliant black, lush roots and natural Mystik) to make teas with worm castings and molasses. I wet trimmed a couple nugs just to see what I prefer seeing as I’ve never done this before. Got everything hung up in her tent with the exhaust fan on the lowest setting. Hopefully everything goes well. I know I started this diary late but thank you guys for all the support if you have any questions or feel like I’m missing anything feel free to reach out.

Likes
517
Share


@Legendaryseedthumb
Follow
Hello guys I’m sorry that I missed one week, the last week when she turned pink!
Day 101 - harvest day, I had to wet trim my plant because i have problems with the humidity, it’s 98% rh outside and raining like hell.
I haven’t invested in a dehumidifier yet didn’t think I had to use one🤦♂️🏽
Day 103 - day 3 drying
Day 104: today I hade to cut the buds from the branches because my rh is to high hahaha!
😃
Day 105: I put my buds to jars today. I had a total of 124g trimmed buds!
Day 106: had to put my buds outside the jars for 12hr for now to start with, had them over night and rh was 70% in the jars… having them now for drying again in 55%-60% rh

Processing
Likes
21
Share


@Siriuz
Follow
Starting week #3
Day 15
We are so happy, she's looking great we can't wait to taste it, they say it's 9 weeks but I think she's going to be ready at 13weeks plus cure and dry process
So like 16/17 weeks maybe
I don't know we will see at the end of the road, right now she's looking good
We plan on to increase nutrients to 7.5ml
For her meal we are going to split it
Wednesday 3.25 and Sunday 3.25ml
Flora nova grow
We will keep you posted, any advise please let me know I appreciate it
Good vibes
Day 16
Gave them. 3.25ml floranova grow mix in 1gallon of water (690ppm)
Lets see how they handle it
Plan on to give them 3.25ml more on Sunday if they do good :)
Day 17
As you can see we take them daily to get sunbaths, daylight, sunlight, since it's the best source of light
Day 18
She's getting big and big everyday, soon we gonna have to replace the pot to a bigger one
Day 19
We built up a circle fence for better netting and also continue to give them sunbaths early morning
Day 20
She's taking all nutrients very well
She's growing gorgeous she's so awesome
Day 21
Fed them as always do on Sunday but this time 3.25ml or 940ppm.
Starting on week #4
We only gonna feed them once a week
Readjusting feeding schedule to 8ML (4/4ml grow and bloom)
Day 22
Started LST and preparing for transition to bloom, week #4
Likes
1
Share


Likes
4
Share


@Kronen
Follow
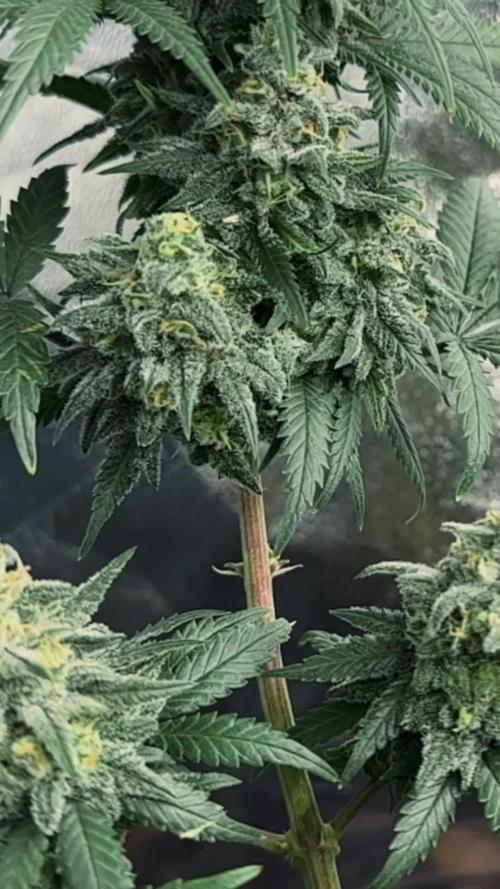
Mohawk Meds: Banana Flambe (BF): Day 21. 4 BF plants green and growing. Cut off a piece of leaf for gender testing. Should hear within 10 days results. Roots have reached bottom and looking healthy. I've been bottom watering them 6.0ph mineral water to get those roots to stretch along with a spritzx2. Environment: 76F, 55%RH, 650ppm CO2, 510-620ppfd all week. Increasing the lighting really helped them grow. Giving them another week in the cups before up potting to 1 Gal.


Likes
12
Share


@ELPIRATA
Follow
13/05/2020 Ha comenzado una nueva semana; día a día aprendiendo del proceso, analizando las condiciones del clima.
+Se sigue apreciando el desarrollo lento de la #3AutoLemonKix, una diferencia notoria con sus hermanas, pero se seguira insistiendo 💪
*El día de hoy 18/05/2020 se han regado 3 plantas en macetas de 11 litros:
X2 Semillas Auto Lemon Kix= 500 ml[2mlKnactive+2mlDeeperUnderground+1ml/L ATAGrowth-C] PH 6.0 / EC=1.15 Tº=22 + Riego foliar [2mlxlitroKnactive+0.5MlDeeperUnderground]
X1 Semilla Auto Tutankhamon= 500 ml[2ml/LKnactive+2ml/LDeeperUnderground+1ml/L ATAGrowth-C] PH 6.0 / EC=1.15 Tº=22 + Riego foliar [2mlxlitroKnactive+0.5MlDeeperUnderground]
*El día de hoy se han regado 1 planta en macetas de 7 litros:
X1 Semillas Auto Lemon Kix = 250ml [2mlKnactive+2mlDeeperUnderground+1ml/L ATAGrowth-C] PH 6.0 / EC=1.15 Tº=22+ Riego foliar [2mlxlitroKnactive+0.5MlDeeperUnderground]
(Hasta el momento se esta ocupando Intraccion Pasiva + ventilador Pinza (Temperatura Controlada)
QUE LES PARECE ?

Likes
49
Share


@Reyden
Follow
E siamo veramente bene qui! Stiamo decollando verso un aspetto gelido e pungente, i tricomi iniziano a formarsi sui calici e la pianta prende la sua forma finale! La super hash come le altre 2, non sono state allenate in nessun modo, andiamo avanti così e aspettando che si gonfiano le cime 😁🚼💯🕷️🌀🌱🙌🌲

Likes
6
Share


@Magical_Surgeon
Follow
After you found some good sector and clone it you let the mycelium grow and fill almost all the petri dish like I did last week.
So now you're ready to move forward.
Making grain spawn!🍄🍄
For grain you can use Organic Rye Berries, but you can also get away with wheat berries, or brown rice or even corn kernels(which I used myself) !
And you'll need some mason jars or honestly I used some jars that I had home just clean them very well and sterilise before using
Making a grain spawn can be broken down into 6 easy steps.
🍄Hydrate Grain By Soaking
🍄Make Specialized Lids
🍄Simmer, Drain and Dry The Grain
🍄Sterilize
🍄Put your agar in the jar
🍄Colonize
🍄Soak the grain by placing it in a bucket, covering in water, and leaving it for 12 -24 hours. Easy.
🍄Drill 1 hole on top of the lid. Right in the center and cover with a small dab of high temperature silicone sealant, and leave it overnight to dry. And your jars are done. There other diff types for different methods like liquid culture etc. But I'm just going roughly through what Ive done.
🍄The next step is to simmer the grains on the stove. This will thoroughly hydrate the grains, and will soften them to make them easier for the mushroom mycelium to consume.
Cook soaked grain on the stove for about 15 minutes. You don’t want to cook it too long, because eventually all the grain will crack and you’ll get some mushy grain spawn. We don't want that. 🧐After the grains have simmered on a low boil, you’ll need to drain them off. What I did is I drop them in the sink with the drain cover on. The grains will drain over an hour or so, after which you can go ahead and fill your jars.
🍄Once your jars are filled, they need to be sterilised.This kills off all the other nasty contaminants in the grain cover the lids in tinfoil (to prevent water dripping into the lid) and then just pressure sterilise them for about 90 minutes at 15 psi.
🍄After that let them cool down. Get your SAB, wipe down the walls with some alcohol wipes and place the jars inside. And wait untill they will be warm to the touch... not hot and painful 😤patience is key. Bring in your plates that had been stored by you in a dark place. And what u have to do is sterilise your scalpel and just accurately and efficiently decide your mycelium into about 10 pieces and quickly place them in your jar. And complete for every jar u make. You have to be very quick. The more you keep you're jar and your agar plates lids open the more cans they will get contaminated. There certain technics you can see online..
🍄Ones you're done close all your jars lids tight and Jake your jar so the mycelium pieces will mix around the jar and place them in the dark place to colonize. And just keep waiting... 😅 Untill the mycelium will conquer your grain. Keep your eyes on the jars, any weird smells or colour during the waiting time.. because that would mean you got a contamination going on. Oh yeah and when about 55% of your jar is filled with mycilium shake the sh*t out of it so it will break the mycilium inside and make spread more faster.
Processing
Likes
4
Share


@CzechEbola
Follow
First week of flowering-finally🤔.
This strain is so strong. I used LST first day of flowering after 24hours I repeated it...After 24h again... 3 day of flowering- defoliation...
Likes
9
Share


@Krautbauern
Follow
Those colours are so beautiful, the forbidden nectar is turning totally purple in the moment. Her orange smell is incredible.
Kush Pop Clone is producing insane dense buds in these days, thed are also turning a little bit purple. dehumidifier is a must have.
The Rainbow Triangle seems to be the latest plant. She also produces very nice buds


Likes
6
Share

@420DeepGrow
Follow
📆 Semana 6
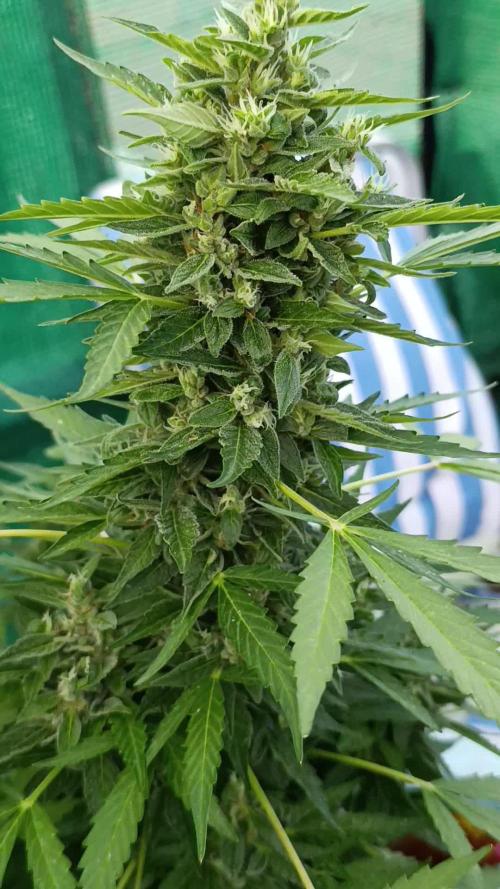
Esta sexta semana la planta empieza a marcar claramente su personalidad. Aunque se mantiene pequeña en tamaño, ha conseguido concentrar prácticamente toda su estructura floral en un cogollo principal compacto, muy apretado y cargado de resina.
El desarrollo sigue siendo equilibrado y la flor continúa ganando consistencia, destacando especialmente la cantidad de resina que está acumulando. Mantengo una nutrición moderada, dejando que la planta siga centrando su energía en terminar de formar y madurar esta flor.
⚡ EC: 0.95
💧 pH: 6.2
🌡️ Agua: 21°C
🌫️ Humedad: 45–55%
💡 Intensidad: Luz directa del sol
🔥 Nota de cultivo: Es una planta pequeña, pero está demostrando que el tamaño no lo es todo. Un único cogollo, compacto y completamente cubierto de resina, que cada semana tiene más pinta de poder dar una buena sorpresa.
¡Seguimos creciendo fuerte! 💪
