







Likes
10
Share

@eldruida_lamota
Follow
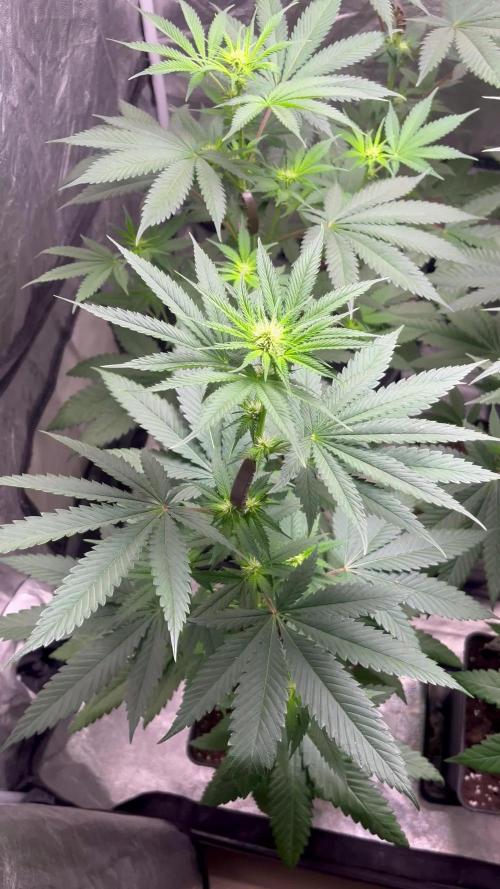
Vamos familia, actualizamos la segunda semana de floración de estas Lemon Cherry Runtz de FastBuds.
La temperatura que estuvo entre los 24-26 grados y humedad dentro de los rangos correctos.
En cuanto a las plantas las veo verde sano, estiraron bien y ensancharon bastante también.
Se nota que los nutrientes de la marca Agrobeta cubre todas las necesidades de cada ejemplar.
Las flores empezaron a formarse, por el momento todo correcto, os dejé también alguna novedad y un cambio en la sala, agradecer al equipo de Mars hydro por el nuevo TSW2000. (los últimos 5 años cultive solo con los leds de esta marca)los cuales probé, TS600, TS1000, TS3000, TSL2000.
Llevaba 10 años trabajando en sodio y fue un salto de gigantes cambiar a los Leds, jamás me arrepentiré de ese cambio.
- os dejo por aquí un CÓDIGO: Eldruida
Descuento para la tienda de MARS HYDRO.
https://www.mars-hydro.com
Hasta aquí todo, Buenos humos 💨💨💨

Likes
9
Share


@Unnamed
Follow
This is the start of my second grow and also second Northern Light Auto from RQS, the goal is to hit #1 in g/plant for that Strain.
I didn't take as many notes as in the last grow but there are timelapses, some photos and metrics from probes.
Started with 3 Seeds and then picked the 2 strongest.
The System is a NFT System but due to the size of the tube and root growths the solution with submerge the roots ~70% later on.
To combat that I use 3 small 1.5w air pumps, these are super silent, if one dies I got 2 more running and to be honest air pumps used in DWC systems are often oversized and rely on Broscience.
In my Salad/Herb NFT Systems I don't use any air pumps and the plants are just fine and grow great.
This time I added sprinklers to humidify the air inside the tube, slightly moisturize the Rockwool and speed up root growths.
Spoiler: Was a great success :)
The ratios for the fertilizers are not accurate in the following weeks, I have a 120l Reservoir that is filled 90-110l I top it up once or twice a week to sustain PH and EC, if you want to copy it just go by the EC and use the B (Calcinit) and A (Kristalon Blue/Orange) 50/50.
I mix the solution myself with dry salts that I bought in bulk 25kg bags.
4l Water(distilled/RO preferably, tap water is OK) + 1kg salts mixes just fine, keep the solution dark and cool and it will stay stable for months.
Dry salts don't expire if kept cool and dry so only mix what you need and keep the rest stored as dry salts.
40ml A + 40ml B is about 2EC and 6PH with my tap water, very similar to Canna, Plagron etc. isn't it? just with the twist that I pay ~20% of the known brands.
P2O5, K2O, MgO etc. are always the same as long as they are produced by a good manufacturer, Yara is a world leader in fertilizer production just not to be found in you general hydroponics or hardware store.
Any other known manufacturer is fine as well, pick the cheapest.
Check Hoocho on Youtube to see a guide on how to mix your own solutions, it ain't that difficult trust me.
From week 5 onwards I also use Oxygen granulate (KMPS, CAS-70693-62-8, 2KHSO₅ * KHSO₄ * K₂SO₄) if you want to use this check pool supply stores and buy the cheapest.
Keep this one dry, cool and dark.
I used a old pill bottle to keep some ready to go because it came in a 1kg container and I only need 2-4g per serving + the bottle has a silica pack in the cap.
From week 6 onwards I used Haifa Grow Clean for Details check week 6, I use this one as dry salts and add it directly to the tank, it does not interact in a bad way with the solution.
For meassurements I use a generic 8in1 Meter "PH-W218" branded by many companies, as usual, check stores and buy the cheapest. (Check week 1 for an image of it)
I got mine from Aliexpress for ~70€ it uses the Tuya app so you can always check your metrics and export them aswell.
The PH and EC probe are accurate and are giving me stable results for almost 1 year now, I re calibrate the PH probe once in a while and it is tops 0.15 off after a month, always double check your results with PH drops/paper.
Bluelab is... A LOT more expensive for less value.
For the timelapses I use 2 Tappo C210 2k Cameras, these have the ability to make the stream available trough RTSP so that you can access it trough a link in a browser and that way I snap a Screenshot with a raspberry pi :) after that I just render it with blender to a timelapse.
Sadly they seem to have trouble with the bright lights and I get image trouble over the course of the day, if you have a recommendation hit me up :)
The script I use to take the Images:
#!/bin/bash
##########################################################################################################################################
##### A script to save images from a rtsp capeable IP cam, Tapo C210 (2k image quality) for example in my case.
##### Images are saved in a directory named "2024_01_01" for example, it uses the "date" command within the system it is running on.
##### You can then render the images to a timelapse, I use blender for that.
##########################################################################################################################################
RTSP_URL_LEFT="rtsp://:@:/stream1" #sets the variable for cam LEFT access
RTSP_URL_RIGHT="rtsp://:@:/stream1" #sets the variable for cam RIGHT access
while true; do
TIMESTAMP=$(date +"%Y_%m_%d_%H_%M_%S") #sets the timestamp variable
DIRECTORYLEFT=/$(date +"%Y_%m_%d") #sets the directory variable with current day for LEFT
DIRECTORYRIGHT=/$(date +"%Y_%m_%d") #sets the directory variable with current day for RIGHT
mkdir -p "${DIRECTORYLEFT}" #makes a directory for each day if it doesn't exist for LEFT
mkdir -p "${DIRECTORYRIGHT}" #makes a directory for each day if it doesn't exist for RIGHT
ffmpeg -y -i "${RTSP_URL_LEFT}" -frames:v 1 -vf "format=yuvj420p" "${DIRECTORYLEFT}/${TIMESTAMP}.jpg" #captures a frame from the RTSP stream and save it as a JPEG image for LEFT
ffmpeg -y -i "${RTSP_URL_RIGHT}" -frames:v 1 -vf "format=yuvj420p" "${DIRECTORYRIGHT}/${TIMESTAMP}.jpg" #captures a frame from the RTSP stream and save it as a JPEG image for RIGHT
################################################################################################################################
##### Waits for 180 seconds, change that depending on how precise you want the timelapse to be, less waiting = more images
################################################################################################################################
sleep 180
done
Hope you like my diary, leave a comment and a like if you like it :)
Likes
9
Share


@Chronicbastard
Follow
These girls are done.im just doing the final flush then I will have a smoke report in 3 weeks.im overall pretty satisfied with this grow.my plants would have been better but I had some unseen circumstances.
Likes
14
Share


@LokalGrenz
Follow
Still just water and some fish shit
Jan. 1 Happy New Year welp to start new year off drop my very cheap PH meter in the bucket water and now the readings are off and I probably watered them today with wrong pH water Sour diesel looks cool didn’t water today soil was still moist but the amnesia haze be


Likes
Comments
Share


@Big-Daddy
Follow
Die ersten Stempel färben sich, die Blätter wollen langsam Lila werden. Der Geruch ist stark. Beim berühren, riecht sie noch undefiniert. 3 Wochen circa noch und am Montag das letzte Mal Nahrung.
Likes
13
Share


@DaddyPrime
Follow
7/26 sorry bout the flash in the pictures
7/27 idk if its because shes smaller than my other plants but she seems to love this heat wave we are having, atleast alot more than my bigger plants, she looked hungry for nitrogen with those leaves so I fed her
7/29 gave her some nutes again. She's on add plant in the way she grows, she's short and takes her time but she's thick too. Not in the vine type way like a sativa but idk I cant wait to see how she produces
7/30 shes so top heavy its kinda sexy
Likes
17
Share


@MasterKush714
Follow
So this is the starting phase of the light schedule 3 days in so far after they sproutd from the soil in the 3" cups the light schedule is on 16hrs on 8 hrs off. Also there is strictly water being sprayed lightly on and off through the day no heaving water added at all. Will keep it posted, Also if someone could help me better arrange this grow diary that will be greatly appreciated lol sorry thanks!

Likes
12
Share


@2Stones1Bird
Follow
Checkout my Instagram @smallbudz to see the Small budget grow setup for indoor use, low watt, low heat, low noise, step by step.
30/11/2019 - Struggling with high humidity, change led strip color from red,green,blue to red and green.
1/12/2019 - Checked and adjusted the light distance.
2/12/2019 - Pot feels light and dry, gave her 1,5l PH 6.3 with a 1/4 of recommended Biobizz nuts, notice almost no run off.
3/12/2019 - Finally her first pistil appeared on the main stem I was starting to get worried.

Likes
40
Share


@Targona
Follow
24/05/2023 - 78 days since my little girl sprouted from a seed🌱
Tenth week of my Jack Herer 🌿🌾🌲
Nutrients:
Advanced Nutrients Flawless Finish - 2ml - I rinse the plants two weeks before harvesting so that they have a clean taste and smell 😋👃🌴
-------------------------------------------------- -----------------------------------
Lights: I use a Mars Hydro TS1000 - 150w full spectrum, great light for vegetation and flowering use 💡💡
Training:
No training is needed this week
In general:
As I already wrote, Jack did not go well for me this round. I still don't know what caused the burnt leaves. Whether it was a small watering and high heat, or a bad reaction to nutrients. The pH of the soil was fine. Its buds are very weathered and have many leaves in them 😒
In a week I will gradually harvest the girls 🌿🌾
Thanks for the likes and you can follow me on Twitter 🐦: @ Targona666
See you soon 😍

Likes
5
Share


@BlackandGreen
Follow
The plants have gotten pretty dense they also have sweet gassy dmell

Likes
3
Share
@Chrisandweed
Follow
Engorde weenooo engoorde real jajajajaja
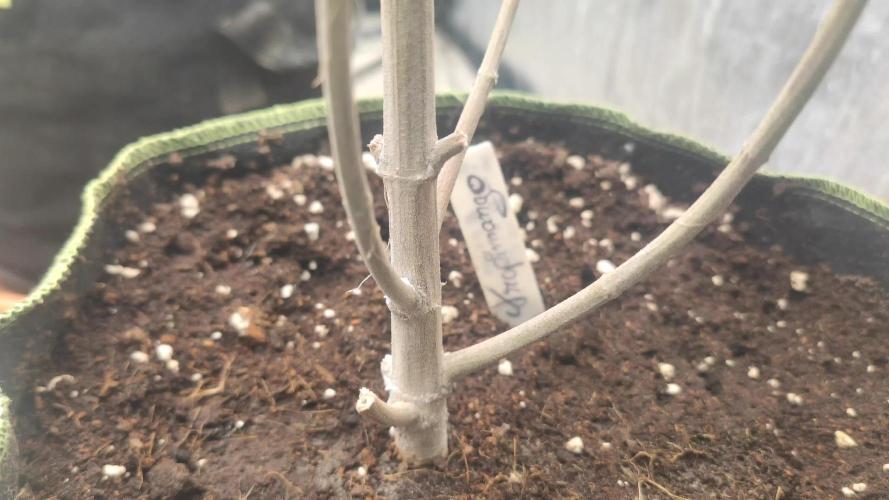
Bueno, pues buenas noticias dado que la población tan bestia de araña roja ha descendido a minimos! Por lo general ni veo ya, pero se que aún queda alguna, por ello, les meteré una limpieza mas con aceite de neem y jabón potásico, pero una sola mas, quizá esta noche o ya mañana. A partir de esta aplicación ya se acabo el uso de estos productos, y el siguiente lavado foliar que le haré será un té de canela, haré un concentrado hirviendo agua y con canela en polvo, filtrándolo para wue no quede residuo. Esto lo haré con intenciones antifungicas y de controlar un poco mas la humedad para mantener los bichos controlados.

Likes
27
Share


@RDWCGrowing
Follow
5/23/2023
Week 7- Day 1 of Flower (Day 110 overall) (Day 49 of Flower)
There was a couple of small super small sucker buds on the lower stocks that needed to be cleaned off but that was it. Just watching them Flower!!
5/24/2023
Week 7- Day 2 of Flower (Day 111 overall)
Tucked a few fan leaves below lower buds but didn't see any blatant offenders that needed to be removed. I typically do start my checks in Week 8 but since this is a new strain I decided to go ahead and do a Trichome check just to see what was what.. Just as I thought nothing but clear glassy Trichomes. I will check again in one week....
5/25/2023
Week 7- Day 3 of Flower (Day 112 overall)
Just letting them grow today!! Smell is getting stronger I would say it is a hint of Pine and a heavier fruity smell.
5/26/2023
Week 7- Day 4 of Flower (Day 113 overall)
I did Nothing but took some pics and I enjoyed it!!!! It is nice to be able to just sit back and watch them on auto pilot.. :-) Tomorrow Water Change Day!!
5/27/2023
Week 7- Day 5 of Flower (Day 114 overall)
I admit it.. I had to defoliate a little bit.. I looked in while changing the water today and there were just a couple blatant offenders blocking the light from lower bud sites and those leaves they just had to go. Other than that I changed the water and this week is where I drop everything and start preparing them for this last phase of the grow. Loving a few of these buds they are starting to beef out very nicely.
I added 36 gallons
Mammoth Silica = .5Mil/Gal= 18Mil
Root DRIP = 1Mil/Gal= 36Mil
CalMag= .5Mil/Gal= 18Mil
FloraMicro = 3.8Mil/Gal= 137Mil
FloraGro= 2.8Mil/Gal= 100Mil
FLoraBloom= 4.6Mil/Gal= 166Mil
LiquidKoolBloom= 2.5Mil/Gal= 90Mil
TPS SIGNAL= 4.0Mil/Gal= 144Mil
ORCA = .5Mil/Gal= 18Mil
Water Temp= 70.1
Tent Temp= 76
Humidity =64 ** I have two dehumidifiers running on Ink bird controllers to try and keep the humidity down, In late in flower I like to keep the humidity above 45 but below 60.
5/28/2023
Week 7- Day 6 of Flower (Day 115 overall)
Opened the back of the tent today and boy did she need some defoliation love in the back. Other than that I took off a few little sucker buds trying to form. I did start to setup my Dry space as well as did a Trichome Check today and the brown tips are coming in nicely.
5/29/2023
Week 7- Day 7 of Flower (Day 116 overall)
Found a few baby sucker buds trying to form so I removed them. Other than that I am enjoying watching her mature.
I also started my Reverse of the Clone I took 6 weeks ago in Apr from #3. I am uploading footage of the reversing process for your viewing pleasure.

Likes
7
Share


@Stifler
Follow
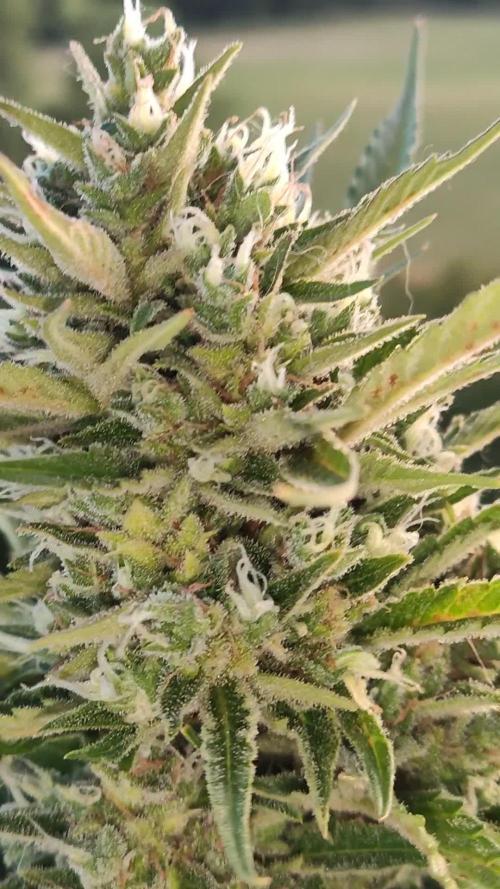
No big changes this week, some pistils have started to mature, I believe that starting today she will get fat! 😀
The smell started to get stronger this week too, the aroma resembles coffee with pine! 😋


Likes
2
Share


@Trinidad
Follow
Week 8 day 56. Trichomes are turning milky, most still clear. I should of defoliated before but this being my 1st auto flower and me being a newbie I didn't want to take the chance. Lessons learnt for next time.
Day 61. Approaching 9 week mark. Buds are getting frosty. Not sure if I should give more nutrient or just continue topping up with water. No sign of amber. Pistils on top buds are changing to brown.

Likes
6
Share


@valiotoro
Follow
Super easy trim✂️
The buds are super dense & sticky🤩
For the smell it’s cherry & blackcurrant with a gassy touch the Cherry Cola Diesel ⛽️🍒
Likes
16
Share

@eldruida_lamota
Follow
Vamos familia, actualizo la novena semana de floración de estas Royal Gorilla de RoyalQueenSeeds.
Se estropean un poco por el calor aunque se les ve sanas, están formándose las flores bastante bien. Y desprenden ya un aroma increíble.
Hasta aquí todo bien el único suplicio que sufro son altas temperaturas por estar en pleno verano. Acabaré este proyecto y daremos parón unas semanas. Que avance algo más el verano.
Máximas de 30 y mínimas de 27 ahora viene el calor y ando jodido en humedad ronda el 40%.
Hasta aquí nada nuevo no sé si las dejaré más o que haré podría cortarlas ya o darles 5 - 7 días más, todavía no e decidido.
Agrobeta:
https://www.agrobeta.com/agrobetatiendaonline/36-abonos-canamo
Mars hydro:
Code discount: EL420
https://www.mars-hydro.com/
Hasta aquí es todo , espero que lo disfrutéis, buenos humos 💨💨
Likes
49
Share


@DogDoctorOfficial
Follow
🌿 Mentha de Croco – Harvest Report | Week 19 from Seed (End of Week 8 Flower) 🌿
By Terpyz Mutant Genetics
And just like that, we close this incredible chapter in our mutant journey. 💚
After 19 weeks from seed, including a long, loving veg phase and a wild 8 weeks of flower, our girls have reached the final moment: Harvest.
Each one was chopped with gratitude and admiration, then gently hung to dry, where they will now rest for about two weeks under carefully controlled conditions:
🌡️ 18–20°C
💧 60% RH
…A slow, respectful cure to allow all those unique expressions to settle and shine.
These plants were peculiar from the start, true mutants, each with her own story, her own twist of leaf, her own rhythm. What they lacked in size or symmetry, they made up for with character, energy, and intense presence.
Let’s talk terps:
The dominant aroma is deeply chemical, like nail polish, with a gas note that grabs the senses. It’s bold, loud, unapologetically strange, and that’s what makes it so special. This isn’t your everyday garden — this is an experience.
No two flowers are alike. The phenotypes are as if sculpted by nature’s abstract brush, perfect in their imperfection, from the shape of the colas to the twist of every leaf.
📸 We’ve shared photos of their final moment standing — each one captured in her full glory before the shears came in. May they live on through memory, resin, and smoke.
⸻
Dry & Cure Notes:
They’re hanging now in a dark, clean space, and we’ll aim to maintain the 60/60 rule (60% RH / 18–20°C) for the next 10–14 days before trimming and jarring for cure.
Expectations are high. We’re hoping for smooth smoke, complex flavors, and some deep mutant magic in the effects.
⸻
🌱 Shout-outs to the dream team:
@terpyz_mutant_genetics – creators of this beautiful madness
💧 @aptus_holland – for the cleanest mineral recipe in the game
💡 @futureofgrow – lighting the path forward
📊 @trolmaster.agro – keeping every condition dialed in
💚 And always, the Grow Diaries community – friends, followers, lurkers, lovers & haters alike. You’re part of this journey.
📲 Follow us on IG & YouTube for more madness, inspiration, and behind-the-scenes freak shows.
⸻
This isn’t just a harvest… it’s a celebration of weirdness, patience, and beauty.
Until the next round — thank you for growing with us.
Growers love. Always
DD 💚
Genetics - Mentha De Croco
Nutrition - @aptusholland
https://aptus-holland.com/
Led Power @ F.O.G. Future Of Grow
https://www.thefuturofgrow.com/en/online-store/BLACK-SERIES-600-p489093171
Controls @ TrolMaster
https://www.trolmaster.eu/tent-x
Let’s see what next week brings! 🚀
As always thank you all for stopping by, for the love and for it all , this journey of mine wold just not be the same without you guys, the love and support is very much appreciloved and i fell honored with you all in my life
With true love comes happiness Always believe in your self and always do things expecting nothing and with an open heart , be a giver and the universe will give back to you in ways you could not even imagine so
As always, this is shared for educational purposes, aiming to spread understanding and appreciation for this plant. The journey with nature is one of discovery, creativity, and respect. Let’s celebrate it responsibly and continue to learn and grow together!
Growers Love To you All 💚
