


Likes
Comments
Share


@xTaps
Follow
Just checking the trichome heads daily to harvest them at the for me perfect moment.

Likes
6
Share


@gabigarcia
Follow
It is already the fifth week of vegetation and they are incredible, the autoflowering ones above all are beautiful and it is also noticing how the critical x are growing little by little. ! (Any questions, or any advice you can give me leave it in the comments, I also speak Spanish)

Likes
11
Share

@GreenEldritchGardens
Follow
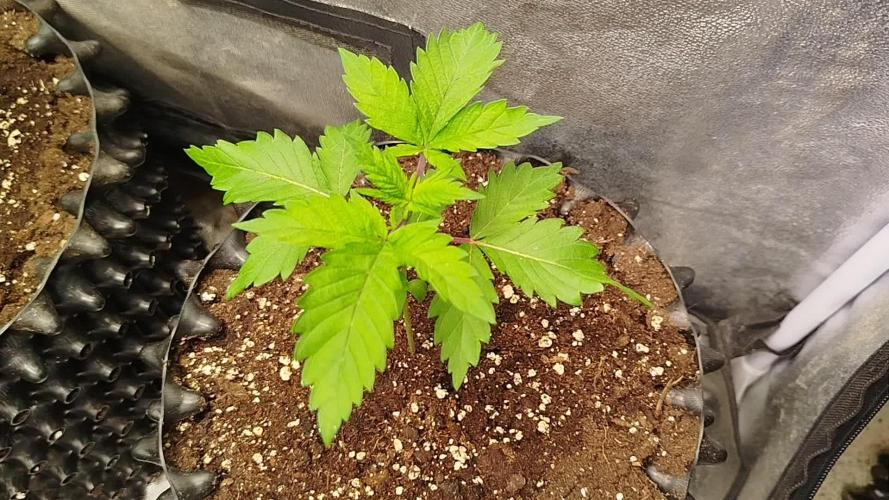
The roots had begun to demand more.
No longer content within their smaller vessels, the chosen plants of Eldritch Gardens were transferred into greater chambers, black containers vast enough to house the expanding hunger beneath the soil.
Plant #1 — The Fat One — emerged as the largest presence within the garden. Broad, vigorous, and deeply rooted in its new domain, it stood like some ancient green monolith beneath the false sun.
Plant #2 — The Battered One — continued its unnatural ascent through the ranks of growth. Node after node unfolded with terrifying efficiency, each new layer arriving before the others.
The crimson coloration remained. The pale markings upon certain leaves lingered like cryptic symbols written in chlorophyll and flesh. Perhaps the LEDs demanded a price.
Plant #5 — The Red One — Though still alive and developing, Yellow hues now crept softly through parts of the foliage, subtle as old parchment aging beneath candlelight. The red stems deepened further, veins illuminated beneath the cold LED glow like blood beneath translucent skin.
Likes
42
Share


@Ganjagrandaddy
Follow
Hi Grow room buddies. Here we have another generous sponsors run of Zamnesia Autos. Ordering was a simple process with a great delivery and after sales welcome to the brand. A nice touch indeed. Rhe pack I recieved was well wrapped and secure with no signs of being tampered with in any way. A really nice package of goodies was found inside from plant labels to grinders and plenty of nice stickers to decorate too.
I chose the 3 strains as 1 I love as a strain in the amnesia haze and the Gsc is one i have fancied growing for a while. The sticky beast looks like a great new strain to sample too.
I used the cup of water soak for 24 hours to soften the seed casing and dissolve any protective coatings they may have . After 24 hours they were still all sealed but had at least sunk so I left them a further 12 hours. I then put them allnjnto a light mix to hopefully germinate under my lights but at a good distance away and in a heated propagator . Within a few days I saw a few heads popping up and signs of most being awake by disturbed soil. Sadly leaving them for a few more days resulted in 6 making the surface but the only Sticky beast that got through , opened a second set of leaves and keeled over with a stragulated looking stem halfway up ??. I recovered her in her fallen state in the hope she may still fight on but it isn't looking good. ( see pics !) With only 5 making it to this point , I have had to fill the gaps with other seeds. A little disappointed to get 4 failures but hopefully Zamnesia will ensure this is looked at ?.
I now have 3 very healthy looking Amnesia Haze and 2 sprightly looking Girls scout cookies to play with. I have now got them into their 30L pots and have done on them to encourage a little moisture while they settle in. Fingers crossed........
Likes
8
Share

@bkickstand
Follow
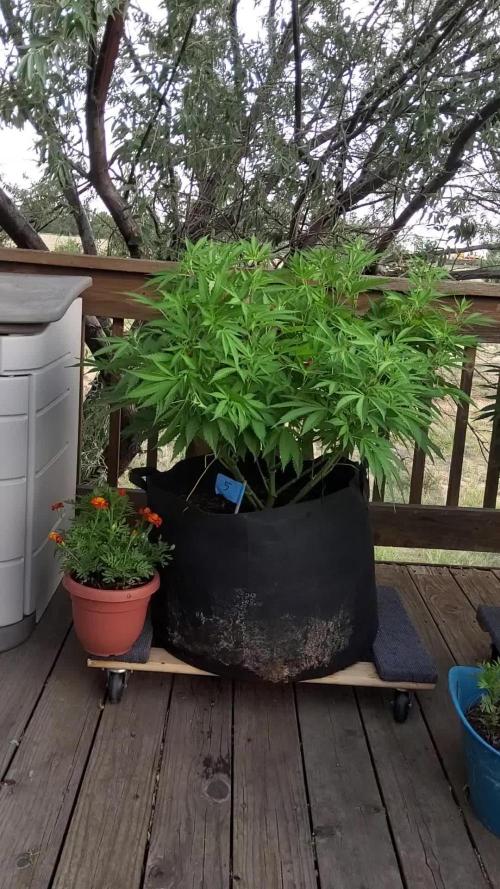
Week seventeen of The Oasis Project brings the Durban Poison quartet to a point of impressive maturity and structure. The plants continue to thrive under the intense Colorado high-plains sun, responding beautifully to the ongoing commitment to Low Stress Training (LST) rather than traditional netting.
* Canopy Development: Each plant in the quartet is displaying a robust, open canopy that allows for excellent airflow and light penetration.
* Maintenance: Manual watering remains the primary method for these plants, which has proven essential for the mobility required to position them strategically on the deck throughout the day.
* Integrated Pest Management: The "security team" of African marigolds continues to accompany the quartet, providing a vital organic defense as we move closer to the flowering stages.
The quartet is looking exceptionally healthy and balanced, preparing for their final stretch before the anticipated harvest window in early to mid-October.
Update 7.9.26: recieved the ScroG netting for the big girls! Getting it setup so the buds can be supported from day 1 of flowering.

Likes
9
Share

@Grow_Outside
Follow
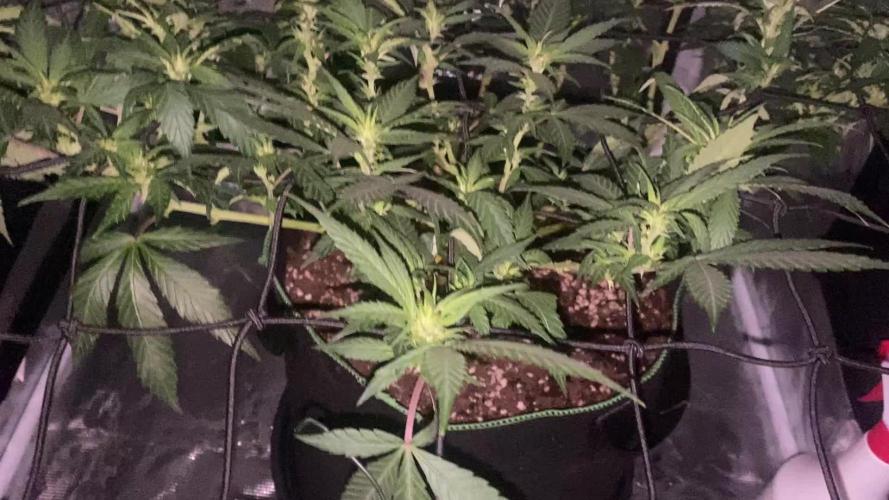
Die "kleine“ Dame macht sich hervorragend, sie bildet überall Knospen aus und steht sehr vital und fit da. Ich bin mal gespannt wie es weiter geht
Aktuell bekommt sie 12 Stunden lang 650-700 PPFD am Tag (über der pflanze verteilt)
Sie bekommt den Green Power 5in 1 Dünger der eigentlich super ihr bekommt 💚 bald geht’s richtig zur Sache
Infos:
Gießwasser: 1L in 24 Stunden
PH-Wert: 6.2
Nährstoffe/Dünger: S&R Organics 5in1 4ml/1L
Luftfeuchtigkeit: 55-60%
Temperatur im Zelt: 20-23Grad
Lichtdauer: 12 Stunden
PPFD: 650-700
EQUIPMENT:
Licht🌞: Marshydro TSW2000 300watt ✅️
Rohrventilator💨: S&P TD 350 silent.✅️
Aktivkohlefilter💢: Can-lite 300
Zelt⛺️: Marshydro 80x80x160 ✅
Luftbefeuchter: Spider Farmer 6L. ✅️

Likes
13
Share


@EasyGoing420
Follow
Plants are finishing the third week of flower, everything seems to be on path . 5 more weeks to go more or less ! Happy growing everybody !

Likes
30
Share


@GanjaGecko
Follow
Das war die letzte Woche der GorillaAuto. An sich sehr vollgepackt mit Blüten. Leider etwas viele kleine Blätter die zwischen den Blüten gewachsen sind. Die musste man regelmäßig entfernen damit es nach Regentagen das Wasser besser wegtrocknet und man dem Schimmel etwas vorbeugt. Es waren echt viele von diesen kleinen Blättern...
Hier und da waren ein paar Stellen die vom Schimmel betroffen waren. Ich denke das lässt sich outdoor nicht komplett vermeiden. Besonders nicht bei dem verregneten Sommer den wir hier dieses Jahr haben.
Für die letzten Tage wurde die GorillaAuto an Regentagen reingeholt damit die buds nicht unnötig nass werden auf die letzten Tage und vielleichtnoch hier und da schimmel entsteht. Für die Zeit drinnen hat ein 5Watt Ventilator für Umluft gesorgt und eine 20W Anzuchtlampe die für etwas Tageslicht sorgt. Das Substrat wurde nur noch so minimal feucht gehalten das das Substrat nicht austrocknet.
Likes
3
Share

@Ninjabuds
Follow
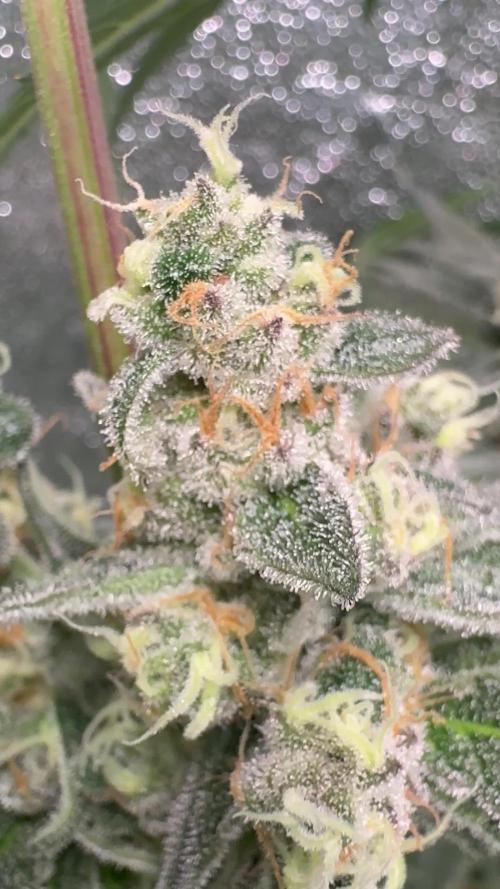
My new Gro pros solutions under canopy lights are really making the colors pop
Likes
144
Share


@TOTEM
Follow
Getting ready for flowering!
On day 45 I placed a metal grid (90x90cm) on the bottom of the pot and a same one on the top as a scrog grid. Then I did a huge defoliation removing as much as I could under the net, exposing many small colas that were covered by upper leaves.
On day 46 I didn’t switch off the lights in the night, so the princess has been awake for more than a day. I switched off the lights in the morning. After about 30 hours of darkness, on day 47 I switched lights back on and set up the timer for the switch to 12/12.
In this first week I’m waiting for the plant to empty the reservoir, then 2 days of flush, and will start kicking bloom nutes (with fungi, bacteria and sugars) at half dosage next week.

Likes
12
Share


@GarciasGarden
Follow
WEEK 2 DAY 14
Since last week the babies have taken off! They didn’t have much light until yesterday when I added another 100w led and since then I’ve seen a huge difference ! They are looking super healthy the roots said fuck the pot and grew right through it I’m actually super interested in seeing how these grow up..
The 3 clones that were separate last week are now moved into one single pot to further develop the experiment.
They are on the same feed as the mother with flora grow/micro/bloom and cal-mag .
And In the last picture you can see my ghettos man way of cloning .. going to see which 2 out of 4 are better rooted and I will move those to a pot in about a week or so.
If you guys have any questions or want to know where I got these exotic seeds message me!! Or comment below !

Likes
6
Share


@rvabudman
Follow
Topping appears to be working well. Began some LST via tie down to encourage growth to other branches.
Likes
18
Share


@Bread_n_Buds
Follow
Now we've reached day 25.
We are in the transition phase, pre-flowering if you want, when the seedlings reveal their sex by showing the white fluff or the boyish balls. Here and in all F1 Hybrids you can be SURE, SURE as death that you will never see any balls.
If you have underestimated this aspect of the F1 Hybrid, go back and think about how many times you found the balls on the paint, full of pollen that fertilized your ladies.
Do you like having young ladies impregnate you? Absolutely not for me and this is a very valid reason why you can choose the F1 Hybrid. Really guys the seeds suck and the genetics of the various breeders if they don't do a job like this it means that they are super hybrid poles with genetic traces scattered here and there. Inglourious bastards.
Here we don't want to be Aryan but to cultivate healthy plants with safe results.
Our Watermalon Candy F1 per mea culpa mea culèa mea grandissima culpa shows some signs of overfeeding, the famous yellow tips of the leaves. Let's be clear, this is minor and is due to the fact that these genetics are so good that they need very little or no fertilizer in the vegetative phase. Then if you already have fertilized soil, forget about growing guys, another pro!
I gave the recommended doses even a little less to tell the truth of both Aptus and Plagron and the plants more or less all have these small signs of over. LITTLE guys, wait until the end to save if you feel like it, or at least I recommend it.
To fix this little thing we go to flush with pH 6.2 and only give Aptus Regulator which should rebalance the plant and soil before delicately moving on to fertilizers for flowering.
Site Description
ZAMNESIA SEEDS - WATERMELON CANDY F1 HYBRID AUTOMATIC: BUDS BURSTING WITH FLAVOR
If you've been looking for a flavorful strain with superb genetics that's effortless to cultivate, the hunt is over. Thanks to reliable F1 hybrid genetics, Watermelon Candy F1 Automatic showcases the highest degree of productivity and efficiency. This strain takes everything you know and love about the original, and packages it in a plant with even greater potential.
GROWING WATERMELON CANDY F1 HYBRID AUTOMATIC
Derived from Watermelon, Candy Kush, and ruderalis, Watermelon Candy F1 Automatic is a finely tuned medley of genetics. This cultivar is fast to flourish and reliable to grow, no matter where you choose to grow. Taking just 9–10 weeks from germination to harvest, she provides a uniform growing experience culminating in a huge haul of buds for her size.
Reaching heights of 65–80cm, Watermelon Candy F1 Automatic stays pretty grounded, making her perfect for smaller growing areas where space is a commodity. It also means you can fit more plants in if you have the room! Once ready to yield, growers will see a return of 400–450g/m² indoors and up to 100g/plant outdoors. Moreover, Watermelon Candy F1 Automatic is highly resistant to pests and disease, making it an ideal strain for newcomers and fans of low-maintenance cultivation.
AROMAS, FLAVORS, AND EFFECTS OF WATERMELON CANDY F1 HYBRID AUTOMATIC
If we haven't already sold you on the power of F1 hybrid genetics, the proof is in the pudding. Watermelon Candy F1 Automatic is teaming with terpenes and cannabinoids, making for a lively high coupled with huge flavors. Just one hit is all it takes to sample rich fruitiness mixed with sweet candies and a slight earthiness to back it up. And with an average THC content of 23%, the effects are euphoric at the start but settle into deep relaxation soon after. Whether you're chilling alone or with friends, Watermelon Candy F1 Automatic will see you right.
As for fertilizers, I'm doing a small comparison experiment to finish off the fertilizers I had at home, it's not 100% indicative, it's only on two specimens but given the stable genetics I decided to try to compare the results of Plagron Vs Aptus , both excellent brands which they will certainly produce beautiful plants which are already of excellent stable genetics. In the next few weeks the comparison will be more evident now the seedlings are still very small and just potted.
So seeds of all brands, in addition to these great F1 Hybrids and the entire Zamnesia line, fertilizers and everything related to the world of cannabis, you should buy them from the best online store in the sector
www.zamnesia.io
Likes
5
Share


@The710Garden
Follow
Definetly an awesome Strain easy to grow with a phenomenal trichome production even the stamps are covered in trichomes 🤷🏻♂️💚🤙🏻🤙🏻❄️💯
Likes
5
Share


@Blakoby
Follow
Going slow i believe because I chocked the seed with peat moss. I needed to put vermiculite, rookie mistake. I’ll do better next round though!


Likes
19
Share


@Alice_in_Wonderland
Follow
Day 8 - First official day of veg and both ladies are right on time for a small adjustment in lighting, PH and nutrients. 10ml of Hydro A & Hydro B were added to both buckets (10L of water in each bucket) and the Milwaukee PH controller was set to work. Starting at a PH of around 7.8, it slowly worked down to a perfect 6.0 over about 50minutes. The lights were readjusted to be 60cm from the seedlings who are all between 8-10cm tall and the intensity of the lights increased to about 70% brightness.
Day 9 - Cheech is taking nicely to the adjustment in light and nutrients, but CG 1 is looking a little bit too perky. Going to give her 24 hours to adjust.
Day 10 - We have finally renamed CG 1. Fellow enthusiasts, meet Venezia.
Day 12 - The root systems are clearly visible in the ladies today
Day 13 - The ladies are looking well today. Venezia seems to be showing some light signs of heat stress with slight curling of the leaves. The lights are due to be adjusted tomorrow to account for the seedlings growth over the last week.
Likes
2
Share

@Lvnsource
Follow
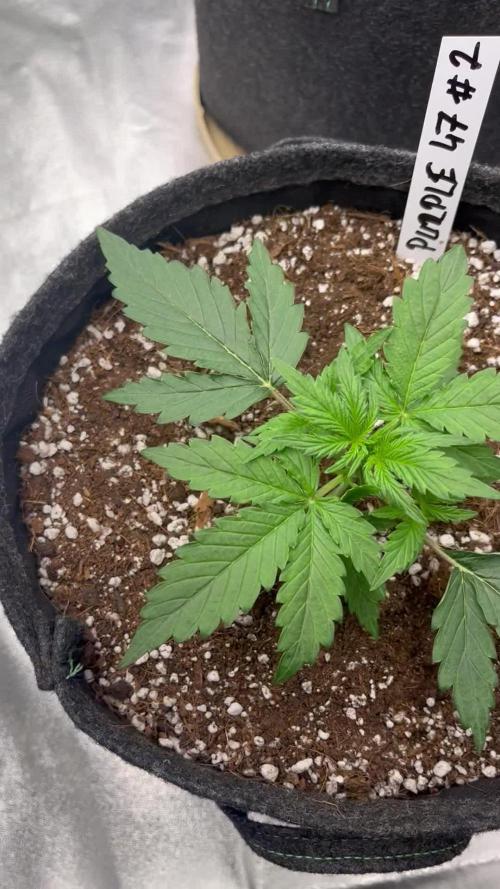
Start of week 3; increased PAR from 250 to 280 for the autos, 300 is still too much for them to handle as they’re clocking out early with that amount lol!
Likes
6
Share


@RzDreams
Follow
22/11/2022 Se nota gran cantidad de pistilos en la planta un poco de estiramiento final
23/11/2022 Formación final de pistilos. Los cogollos comienzan a crecer considerablemente
25/11/2022 😰 Continua el crecimiento de cogollos.
26/11/2022 Cogollos comienzan a engordar
Likes
16
Share


@JohnnyBlaz3
Follow
Now that was a great week indeed. she has really spread out nicely being held down with some yoyos. will be transplanting the ladies in the next day or 2 here and then flower in about 10-14 days is my guess. They are a little smaller then usualy for this time, maybe a week behind but i think i messed up on the calibration schedule again damnit. I swear you can not calibreate you ph tester too much, do it every 3-4 weeks is my reccomendation. I think the ph maybe a little low, i'm not postive 100% on the issue but dont really matter, she is very healthy
Likes
29
Share


@pHilosophy420
Follow
Purple Kush CBD Auto - Seed 1 is growing very well now in the flowering stage. Seed 2 has recovered fully and now growing well but it will not be the same as seed 1 😀
