




Likes
17
Share


@olli0420
Follow
Super happy with this grow! I'll update harvest pics with pics of jarred buds💚 dosidos is a warranty as well as barneys farm 😍 I'll do it again for sure

Likes
7
Share


@Sunstonedgrows
Follow
Well the pas week has been a lot! We had some dehydration issues, did some defolitation, and additional LST to prep for flower. Starting today, this plant has been kicked into the flower tent and will be starting its journey!
Before we went to flower, I gave this guy 1tbsp of Dr. Earth tomato blend. Over the next week or so we'll be switching to Dr. Earth flower girl.
Cheers til next time!
-Dj Sunstone

Likes
1
Share

@Tropical_Grow
Follow
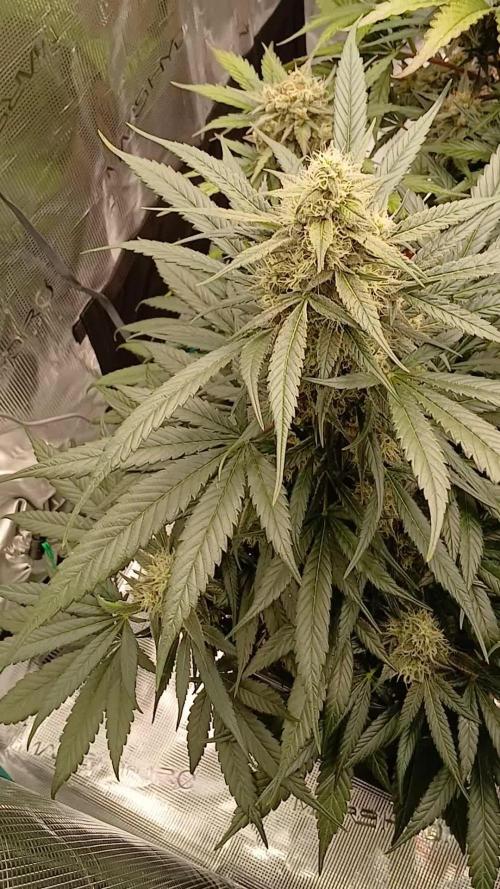
The plants are developing well. You can tell we're nearing the end. They don't smell too strong.
The first two plants from left to right are kiwi x papaya, followed by Super Larry OG, which has a structural problem. The rest of the plants are grown from given seeds that have shown good visual results.


Likes
44
Share


@SooSan
Follow
12/12 + 40 jours
Vu qu’il y a 16 plantes mais que sur growdiaries on ne peut mettre que 8 variétés j'ai divisé en 2 diaries pour le bas de la tente
1️⃣
🏠 90x60x90
☀️ FC-E 4800 => puissance a 20%
🍁
1x Black Bomb / Philosopher Seed
2x Amnesia Lemon / PEV Seeds
1x Blueberry / PEV Seeds
1x Blueberry / 00 Seeds
1x Wappa / Paradise Seed
1x Dark Phoenix / Green House Seed
1x Quick Sherbet / Exotic Seeds
1x Mango Cream / Exotic Seeds
1x Banana Frosting / Sensi Seed
1x Hindu Kush / Sensi Seed
3x Fast Mix / Sweet Seed
📎 https://growdiaries.com/diaries/122084-grow-journal-by-soosan
📎https://growdiaries.com/diaries/124052-grow-journal-by-soosan
2️⃣
🏠 30x60x50
☀️TS1000 => puissance a 50%
🍁 4x Quick Sherbet - Exotic Seed
📎 https://growdiaries.com/diaries/122080-grow-journal-by-soosan


Likes
136
Share


@Kitties_and_Colas
Follow
~_~_~_~_~_~_~_~_~_~_~_~_~_~_~_~_~_~_~_~_~_~_~_~_~_~_~_~_~_~_~_~_~_~_~_~_~_~_~_~_~_~_~_~_~_~_~_~_~_~_~_~_~_~_~_~_~_~_~_~_~_~_~_~_~_~_~_~_~_~_~_~_~_~_~_~_~_~_~_~_~_~_~_
💡🌱🤘🐱 Week 10 of flower! Amber trichomes are starting to form, we're cloudy in most sections but there's still a bunch of clear a little deeper in. This is probably their last full week..we cut all nutrients nearly a month ago and have been watering heavy (as we typically do during flush) but they have only lightened slightly, we use a soilless media which should be completely flushed out by now but most the leaflets are still super dark, after seeing several other grows of this strain we assume it must be characteristic of B.B..we have 4 grow areas in our grow room and the Bangers can be smelled over everything else.. It smells like Fruit Loops with notes of gasoline 🍓⛽...The SP-3000 by MarsHydro is an absolute beast in a 4x2, this is our 2nd grow under The SP-3000 and we completely filled the 4x2 on both occasions. Each run resulted in massive, compact Buds just covered in resin..its without a doubt the best LED of its size we have in house or have ever been privileged to use honestly...
Full disclosure: we got a little impatient starring at these girls, so we (well I did lol) pulled down a bud 2 days ago (approx. 10grams) and immediately threw it in the oven for decarb..we made a 5oz batch of tincture and this is easily the "speediest" Seedsman strain I've tried to date, its a surprisingly clear headed high, definitely a daytime smoke..however, may have a different opinion after a proper dry and cure..we'll update our smoke report after drying...thanks as always for dropping by and happy harvests everyone!! ❤️💡🌱
⚡Mars Hydro/SP-3000⚡ Specifications ⚙️:
Diodes: Samsung LM301B / Osram 660nm (960 total!)
Driver: Meanwell 300watt 🔌 (300W±5% @AC120V-277V)
PPF: 824umol/S ☢️
PPE: 2.8 µmol/j 〰️〰️
Lifespan: 50k+ hrs ⌛
Weight: 10.1 lbs (4.6kg)
Veg Coverage: 3 x 5 ft 🌱
Flowering Coverage: 2 x 4 ft 🌼
-The SP-3000 uses an aluminum heatsink (no fan) and the driver can be placed outside the tent 🌡️⬇️
-IP65 waterproof ratings, tolerant to high humidity grow environments 💦 ..
-Up to 15 can be daisy-chained together and all controlled from a single light! 💡~💡~💡~💡~💡
~_~_~_~_~_~_~_~_~_~_~_~_~_~_~_~_~_~_~_~_~_~_~_~_~_~_~_~_~_~_~_~_~_~_~_~_~_~_~_~_~_~_~_~_~_~_~_~_~_~_~_~_~_~_~_~_~_~_~_~_~_~_~_~_~_~_~_~_~_~_~_~_~_~_~_~_~_~_~_~_~_~_~_

Likes
28
Share


@basementgrown
Follow
Had a lot of fun growing these girls. They went through a lot off the bat due to my inexperience. Learned a lot during this run and it was extremely rewarding to nurse them back to health. I am very pleased with this grow for it being my first run. I had no expectations as I am just starting to learn and want nothing more than to acquire knowledge. The quality and yields will come once I get more dialed in. Once these girls got healthy they had no problems for the whole grow. I am already planning improvements for future systems and am extremely excited to continue on my grow journey. Thanks to all who helped me out.

Likes
10
Share


@Lazuli
Follow
The smell was new for me its amazing that Fastbuds strains always smell exactly like the name they give them

Likes
29
Share


@JeyGanesha
Follow
Inizio 4 settimana di fioritura 💪...gente è incredibile ma vero! Ho messo in terra un pezzo di piantina che mi s'è rotta(talea) ,senza radicante ne niente. Solo messa in terra...sono passati quasi 10 giorni ed è ancora viva e sta crescendo...vuol dire che ha attaccato con le radici.......non ci credevo nemmeno io, ma quando mi dicono che ho il pollice verde inizio a crederci😂🤣😉😂🤣💪✌️🕉️. W la ganja sempre.....la pianta sacra che salverà il mondo

Likes
23
Share


@Vincent11
Follow
Hi Everybody hope you got a great week. And that you will have even a better one this week.
Little disappointed this week. All been great after defoliation cleared all leaves in way off buds. Responded well.
Been away for 2 nights and because off that that it's a cupboard Grow I needed to close the door at nigh to keep 22/24degrees at night.
But like you understand I was away so night temperature dropped to below 20 degrees in 2 nights and I got a cold Burn on my Gorilla Glue Autoflower.
By the looks off things all I can do is give her another week maximum Two.
And get her down. Next week will be week 8 that's what the Royal Queen seeds site says for finishing it. 8/10 weeks
Sorry to disappoint everyone with that grow.
Have a great week.
Likes
15
Share


@Dillon1550
Follow
Hey guys and gals
Lots of growing!!! Lots of training.
Looks like the northern lights might be a go, witch is exciting.
Another week of bending and probably some more topping. Until next week!!
Happy growing


Processing
Likes
49
Share


@CBD_Sweden
Follow
2018-04-03 Week 14 Day 1
Not much to say, there isn't much drama going on in growroom 2, the only things I do is giving them water and nutes 2 - 3 times/week and making sure that the lamp don't burn the girls.
I gave them 4 liters today, and since they live in smartpots I can see when the pot gets wet when watering the girls, but you could hardly notice that. They are getting thirsty 😛
The flowers are developing very good, they look really healthy and their colors are fine.
Zombie Kush nr 1 is 66 cm
Zombie Kush nr 2 is 87 cm
2018-04-04
Raised the lamp to it’s highest level and turned all girls 1/4 turn, it’s really hard to get in to the ladies in the back, I need to push the girls up against the walls on each side and crawl on the floor to be able to turn them and give them water/nutes.
Damn these plants, why do they have to grow and become so BIG?! 😆💪
Added a new video, enjoy my SoG 😄
-----------------------------------------------------------------------------------------------------------------------------------------
Strain information
From the selection of one of Ripper seeds first genetic search works, an old Lavender Kush clone was pollinated by brilliant Amnesia.
From there a clone that we named “Sideral” was selected and decided to pollinate it again later with Bubba Kush.
Its vegetative cycle should be generous if we want to develop the full potential of its Indica demeanor. With a low EC both in the vegetative and the flowering cycles we will get spectacular results.
Its purplish colour scheme and the great quantity of trichomes that cover its large flowers would make this strain a key one for Kush flavor lovers.
Vegetative: From 2 to 4 weeks
Genotipe: 20% Sativa / 80% Índica
Indoor flowering: 55/60 days.
Production: Medium / High
Effect: Powerful / Durable
------------------------------------------------------------------------------------------------
https://www.youtube.com/watch?v=G8sSHdfbu1g
https://www.youtube.com/watch?v=-Twzz8lBfEQ
https://www.youtube.com/watch?v=PnE5ixD9iTE
https://www.youtube.com/watch?v=bDyJXP4vEG8&t=906s
----------------------------------------------------------------------------------------------

Likes
13
Share


@XanHalen
Follow
Mar 24:
Watering till runoff now...
runoff ppm was 2500+...
Will be using very mild nutes to flush over 1 - 3 feeds... or until I am near my input.
Mar 26:
Continuing to use 650ppm feed with bloom focus, 2L per plant gives 15% runoff...
Runoff ppm is still very high...
I wanted to check pH of runoff but the color is so vibrant i cant use the pH drops to view color, need to get a pH probe.
Plants are thriving, no issues at all. the extra fan fixed the post-water droop.
One plant is bushy and has the most bud sites,
One is the smallest but has the most uniform structure, this one has the biggest buds and thickest stalk,
One is about in the middle of the 2.
Mar 29:
one of these girls gets droopy early when its time for water, thought the canopy was too high so i tied down some more, no cigar...
gonna try increasing calmag, if that doesent work im going to reposition in the grow box to a side instead of middle, may not need the upper end ppfd...


Likes
35
Share


@MrSpooky882
Follow
Ich bin eigentlich sehr zufrieden bisher, nächste Woche kommen sie in das Zelt, wie man sieht wurzeln sie sehr schön außer der genetische "Krüppel" mal sehen was daraus wird, ich habe leider keinen Ersatz gepflanzt 😒😏😅 bis dahin schönen Sonntag noch 😘👌
I am actually very satisfied so far, next week they come into the tent, as you can see roots very nice besides the genetic "crippled" let's see what will become of it, unfortunately I have not planted a replacement 😒😏 until then nice Sunday still 😘👌

Processing
Likes
2
Share


@FolloMiSensi
Follow
Nice growth this week, lst from last week resulted in more cola growth. Readjusted lst for even canopy.
Both showing sex, treating as pre flower and starting to transition into bloom nutes with a light feed.

Likes
Comments
Share

@BasedBuds_89
Follow
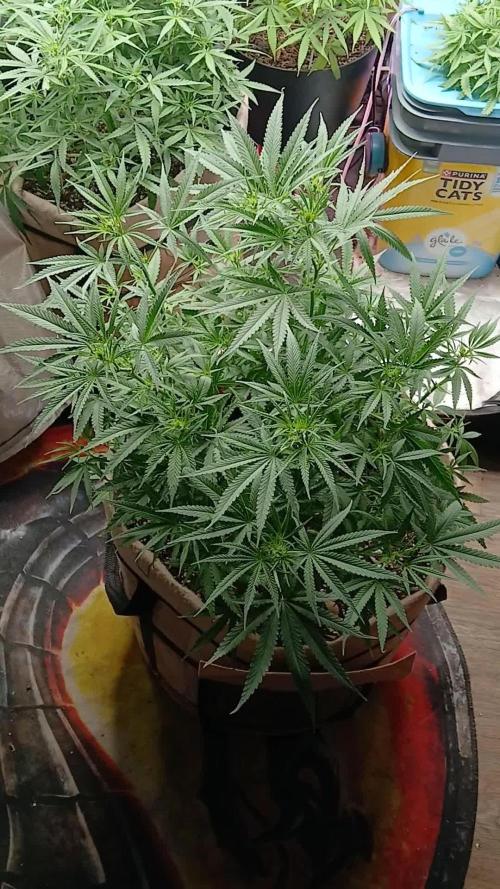
This baby started stretching, getting ready to start stacking up nugs. It has a very skunks smell already. Looking very healthy, going to cut back on nutes and make sure my tent is dry with no humidity.

Processing
Likes
142
Share


@MadeInGermany
Follow
Hi people 🤗
A lot has happened this week 😄
The 3 Blue Cheese and 2 Kosher Tangie Kush which have been in the flowering tent for 1 week have become very bushy 👍
Unfortunately I just noticed that I completely forgot to take pictures of the Blue Cheese Phenotype # 3 🤦♂️🏻
The picture will be given later.
The rest of the Vegi tent is also progressing very well.
They are repotted in 11 liter pots this week, and then come to the flowering chamber die the following week
The next week there will be new pictures, until then I wish everyone a nice start into the new week 🙏🏻💪🏻
Let it grow 🍀🌱


Likes
4
Share


@SamDo
Follow
Vegetative Week 7 – Pineapple Upside Down (Round 2)
This week confirms a very good recovery following last week’s defoliation and pruning.
As shown in the photos, the plant bounced back quickly and shows strong vegetative vigor.
Leaf mass has rebuilt nicely, and overall growth looks healthy and well-balanced.
There are no signs of stress or slowdown at this stage.
After the structural work, light intensity was temporarily reduced to avoid additional stress.
Now that the plant is clearly responding well, light power has been increased again to around 50%, corresponding to roughly 150 watts in full-spectrum.
For now, the plan is to let the plant continue growing and building strength.
The four main branches that were previously selected need a bit more growth before starting any low-stress training.
Once they elongate further, light LST will be applied to begin shaping the plant’s final structure.
A move to a larger grow space is planned later, but there is no urgency at this stage.
Overall, everything is stable and progressing well.
See you next week. Take care.

Likes
13
Share


@MrPott
Follow
Now that I got the environment stable, it's nice to see her bud sites popping up. Did a bit more LST on her and hopefully when Nicky (the photoperiod) is done, I can boost the lights to 18 hours a day.